
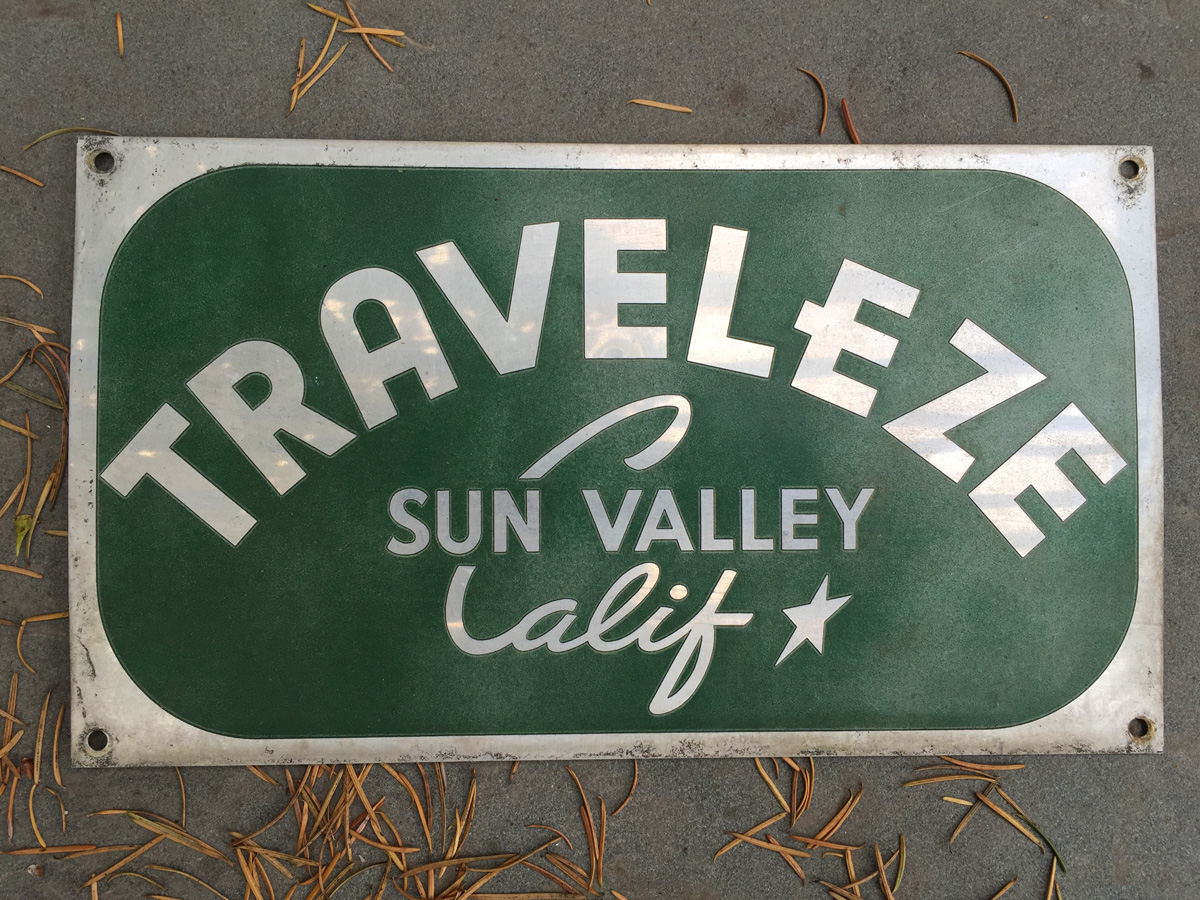
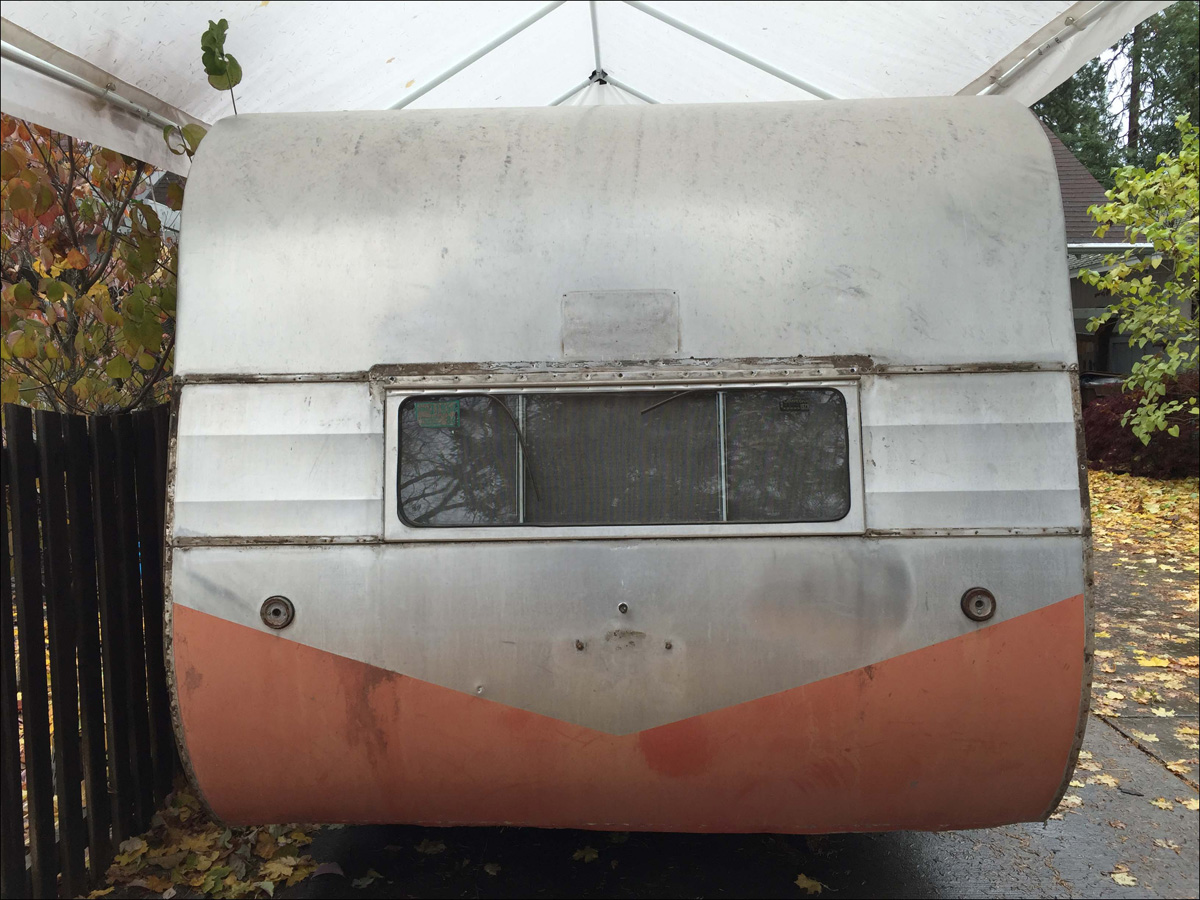
- About the 55
- It begins... Sept 15
- Oct - Reveal
- Nov - The back
- Winter - More...
- Mar - May
- June - July
- Aug - Nov
- Dec - Jun
- Jul - Mar
- The End?
Step 1 - Find the labor of love...
 |
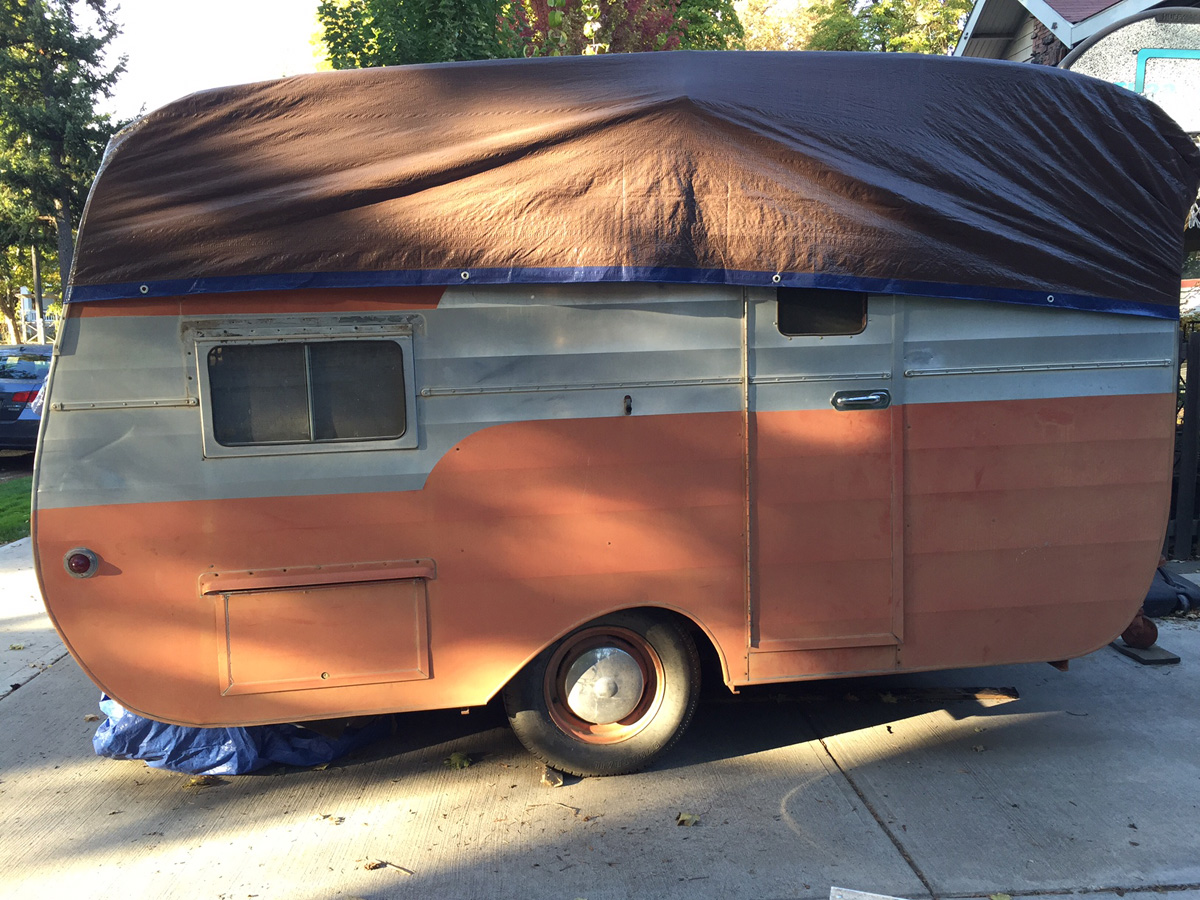
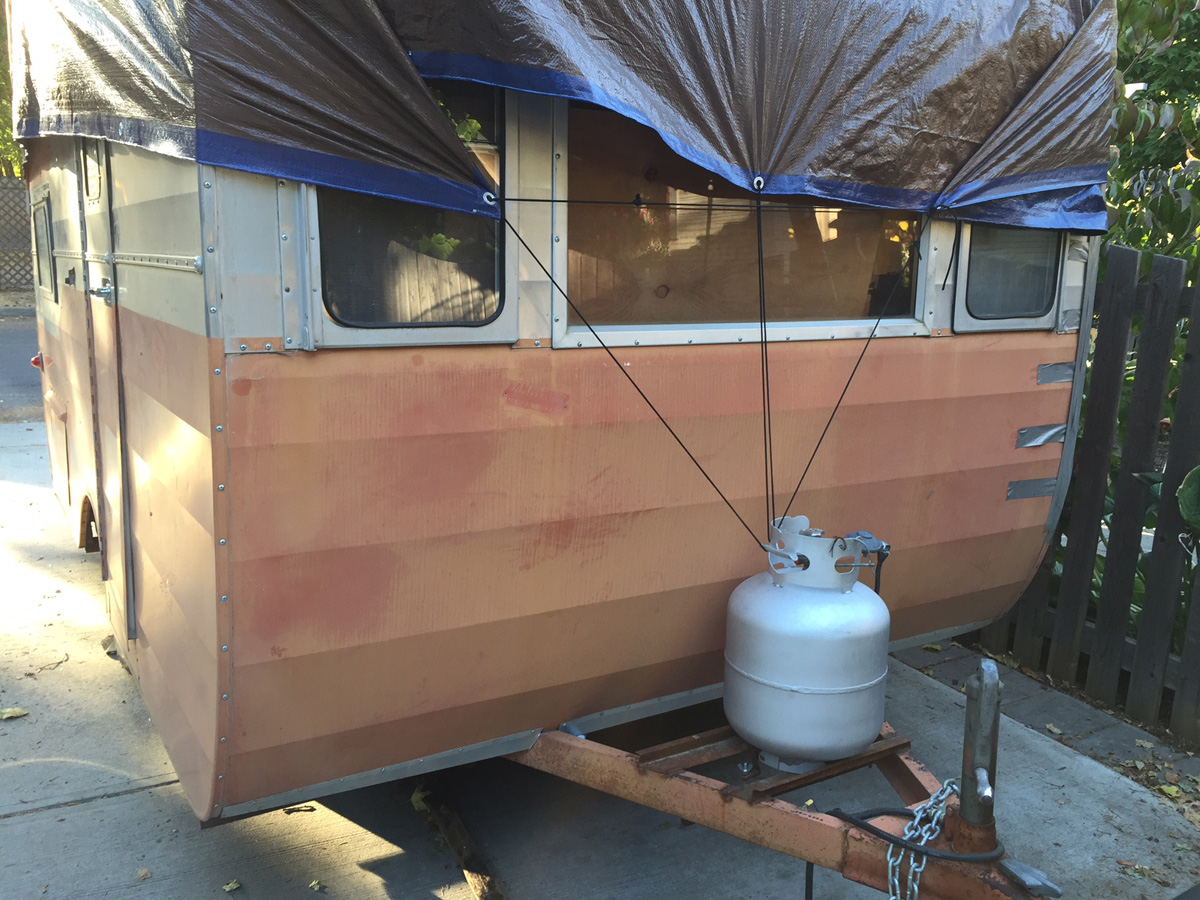
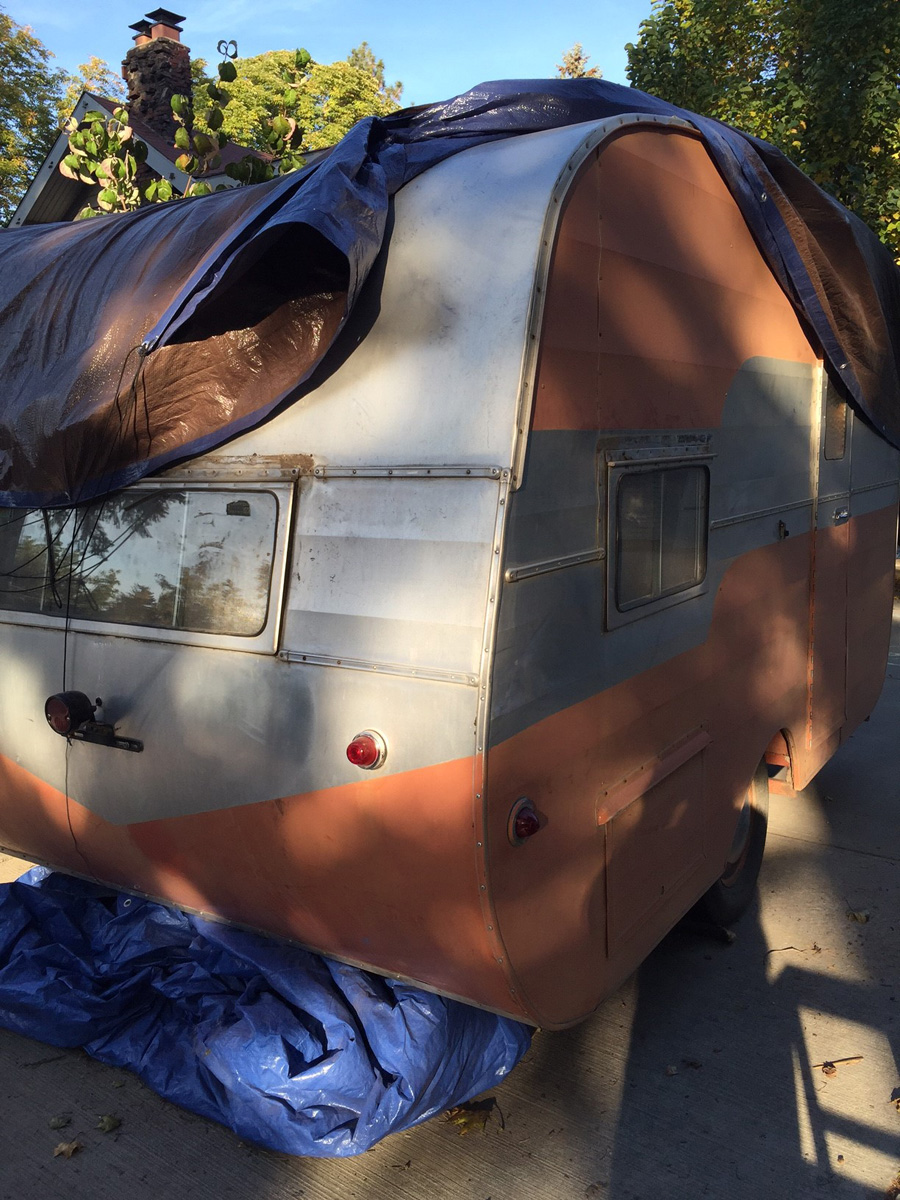
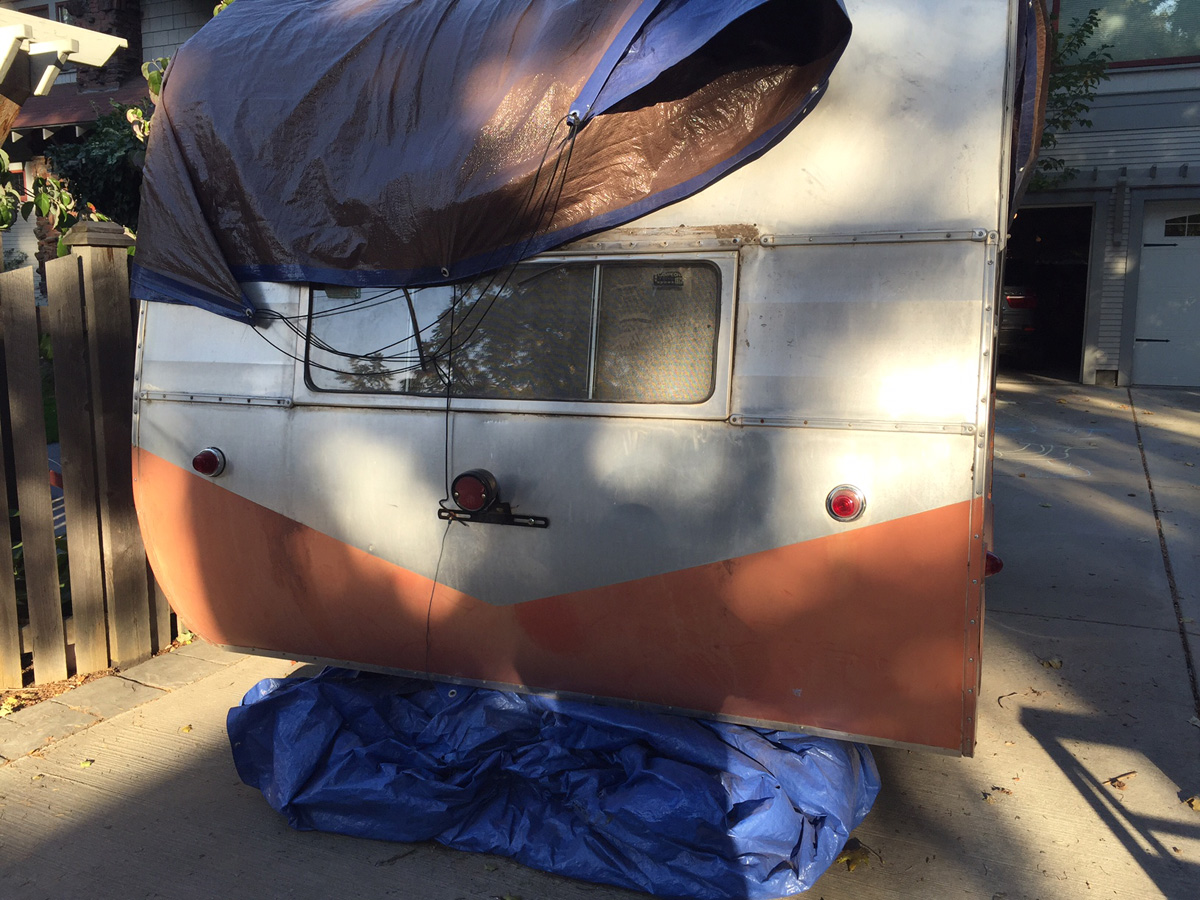
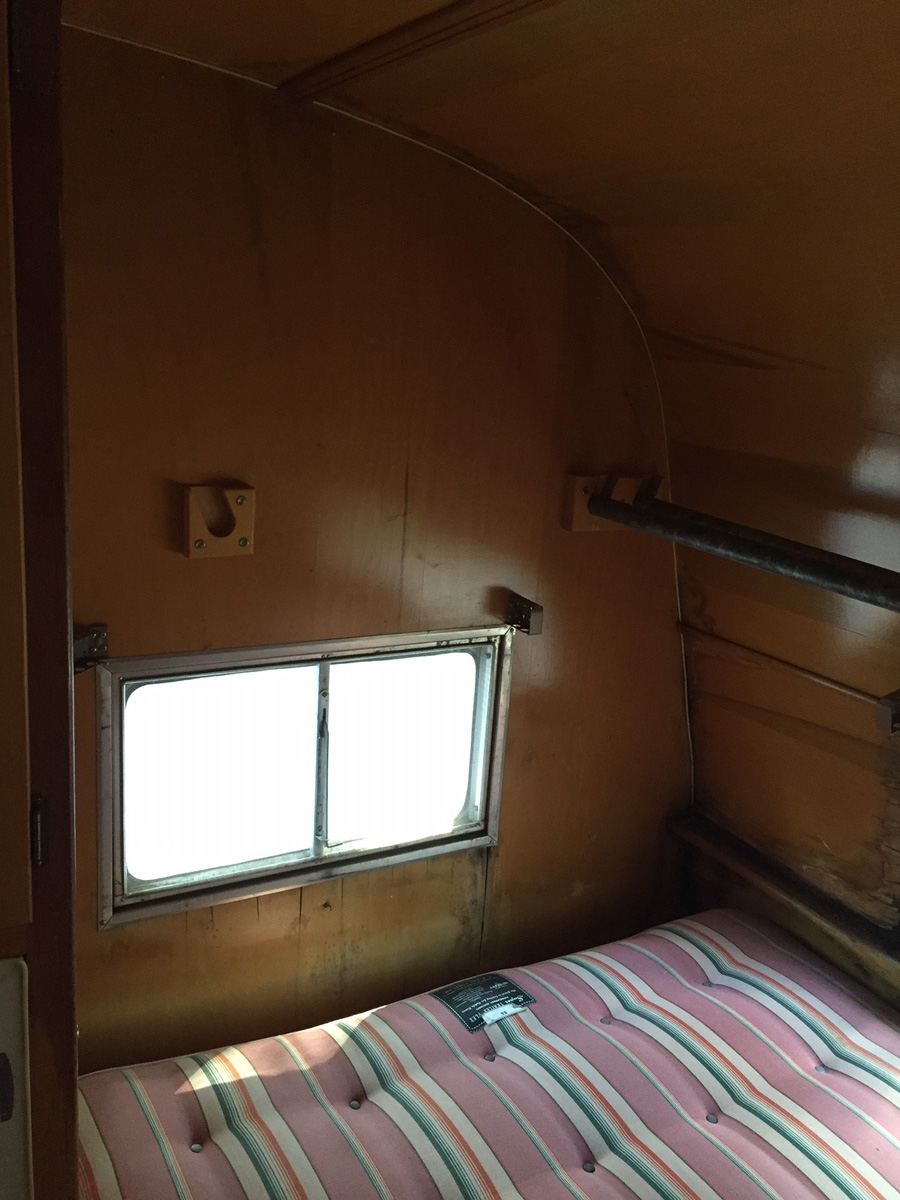
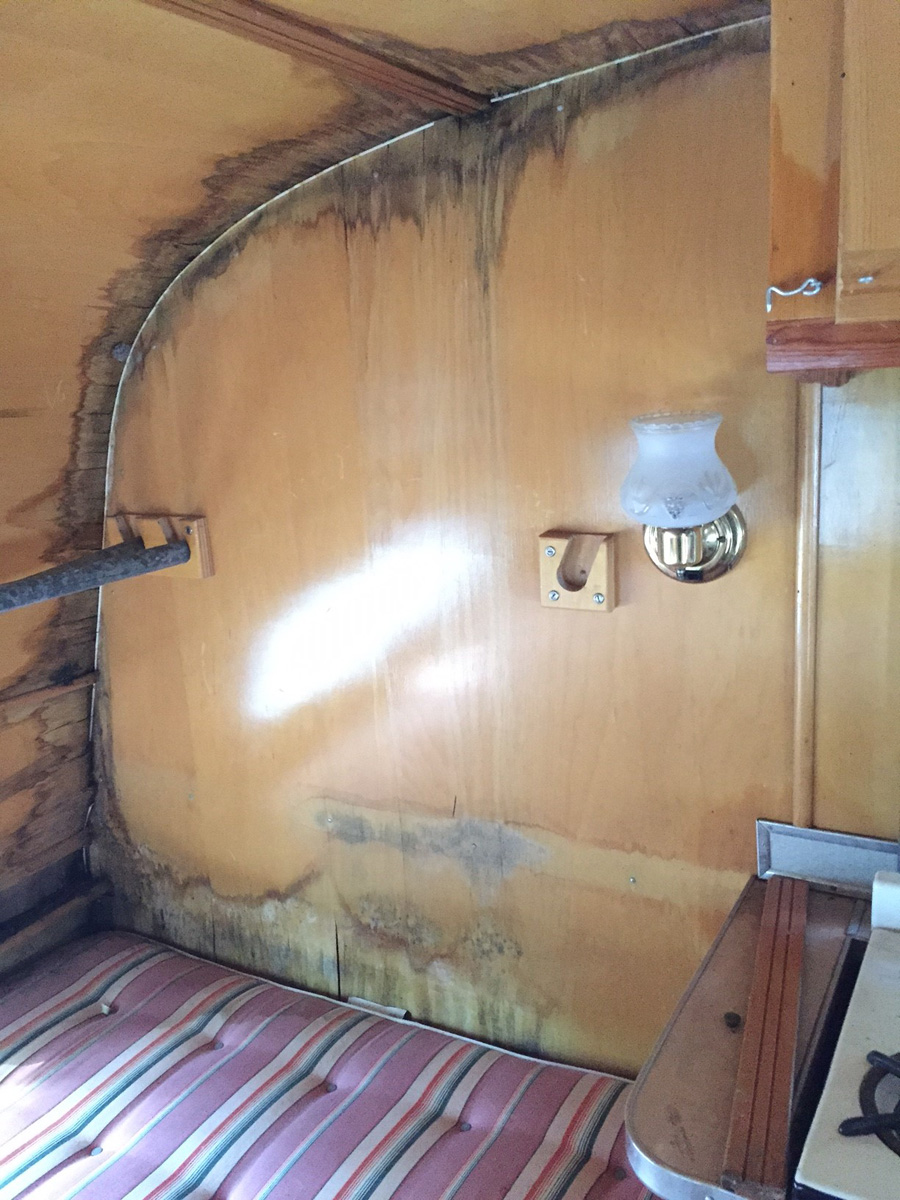
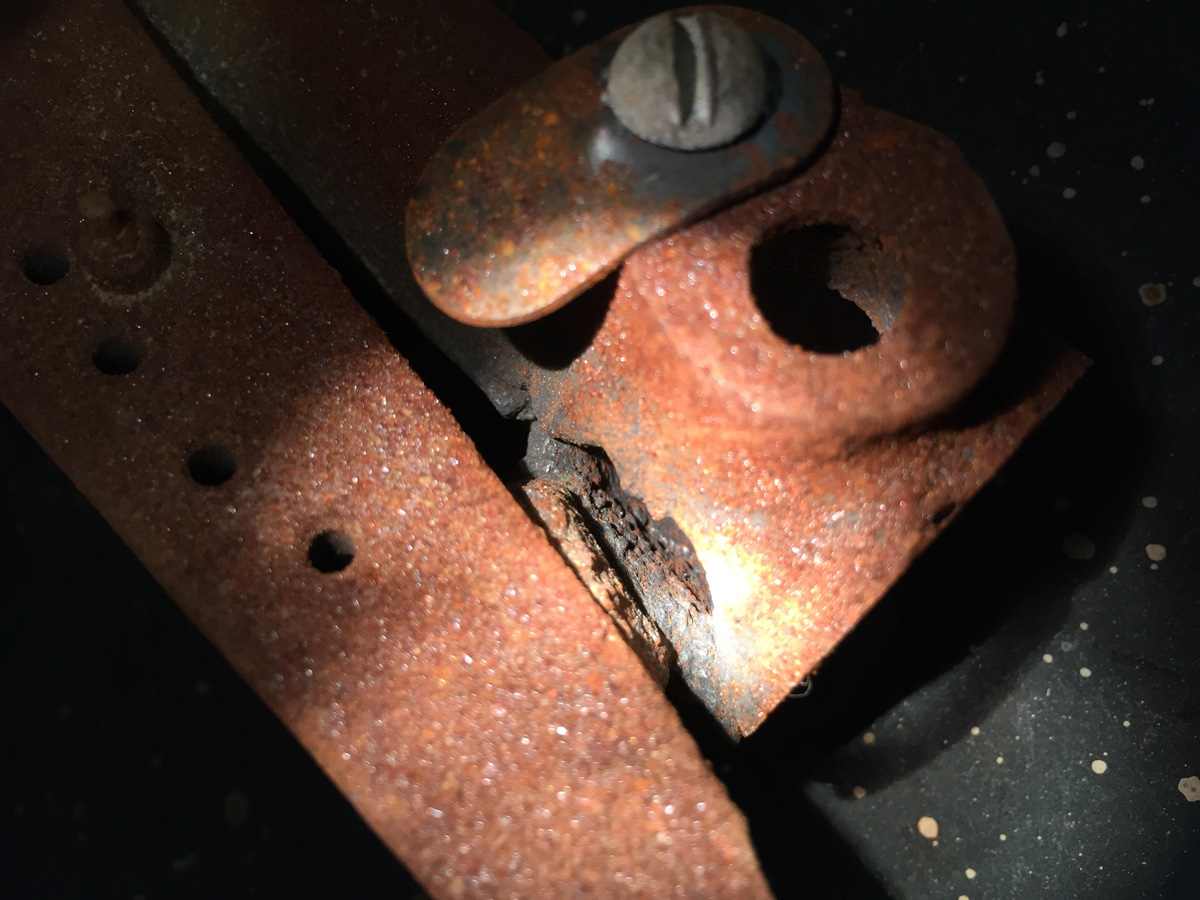
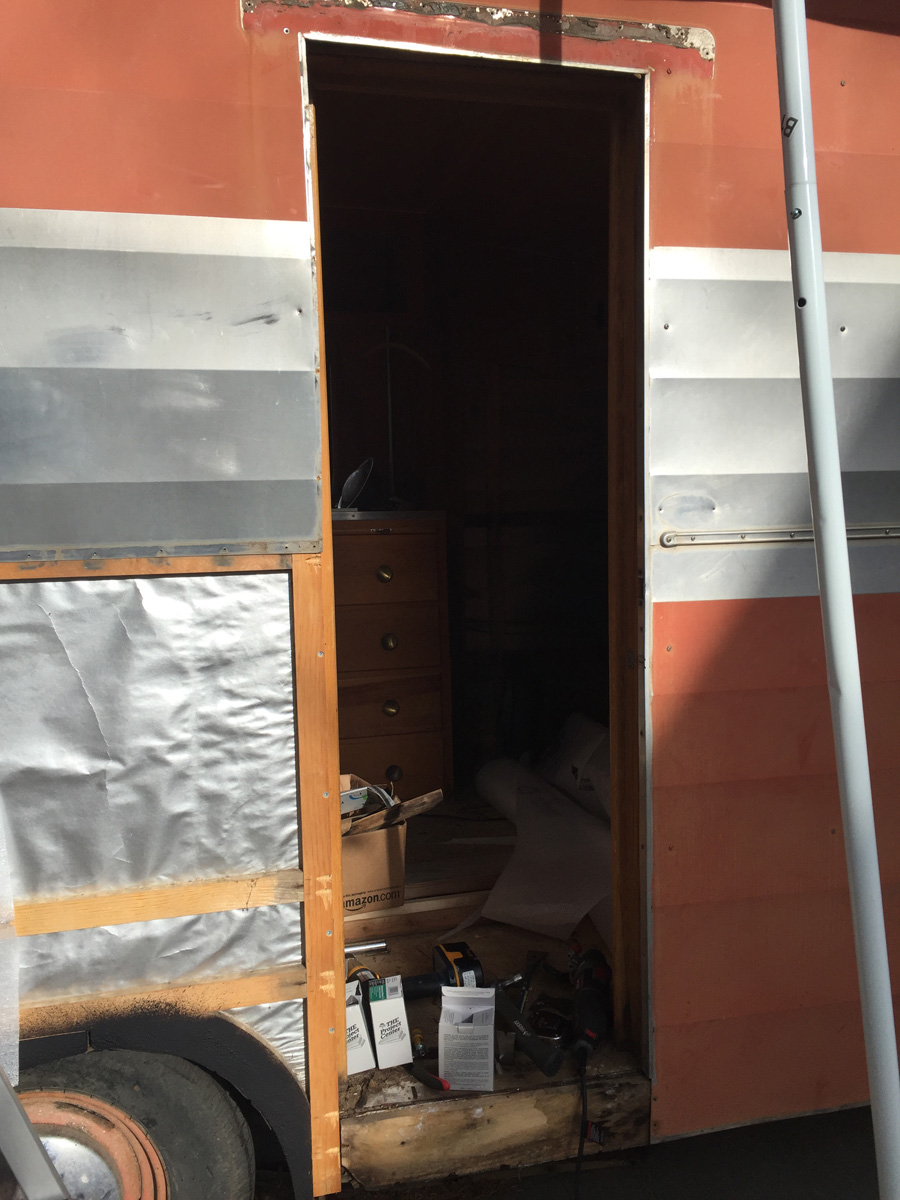
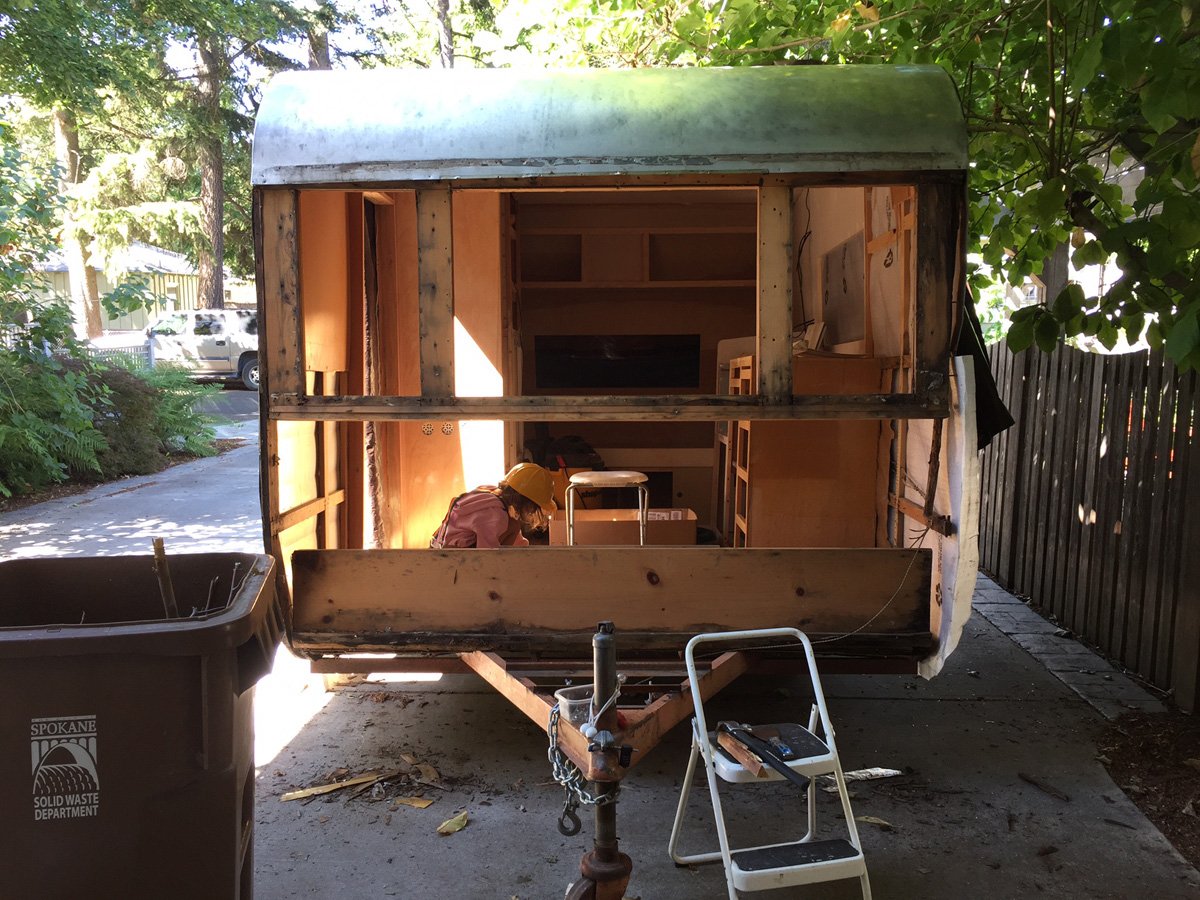
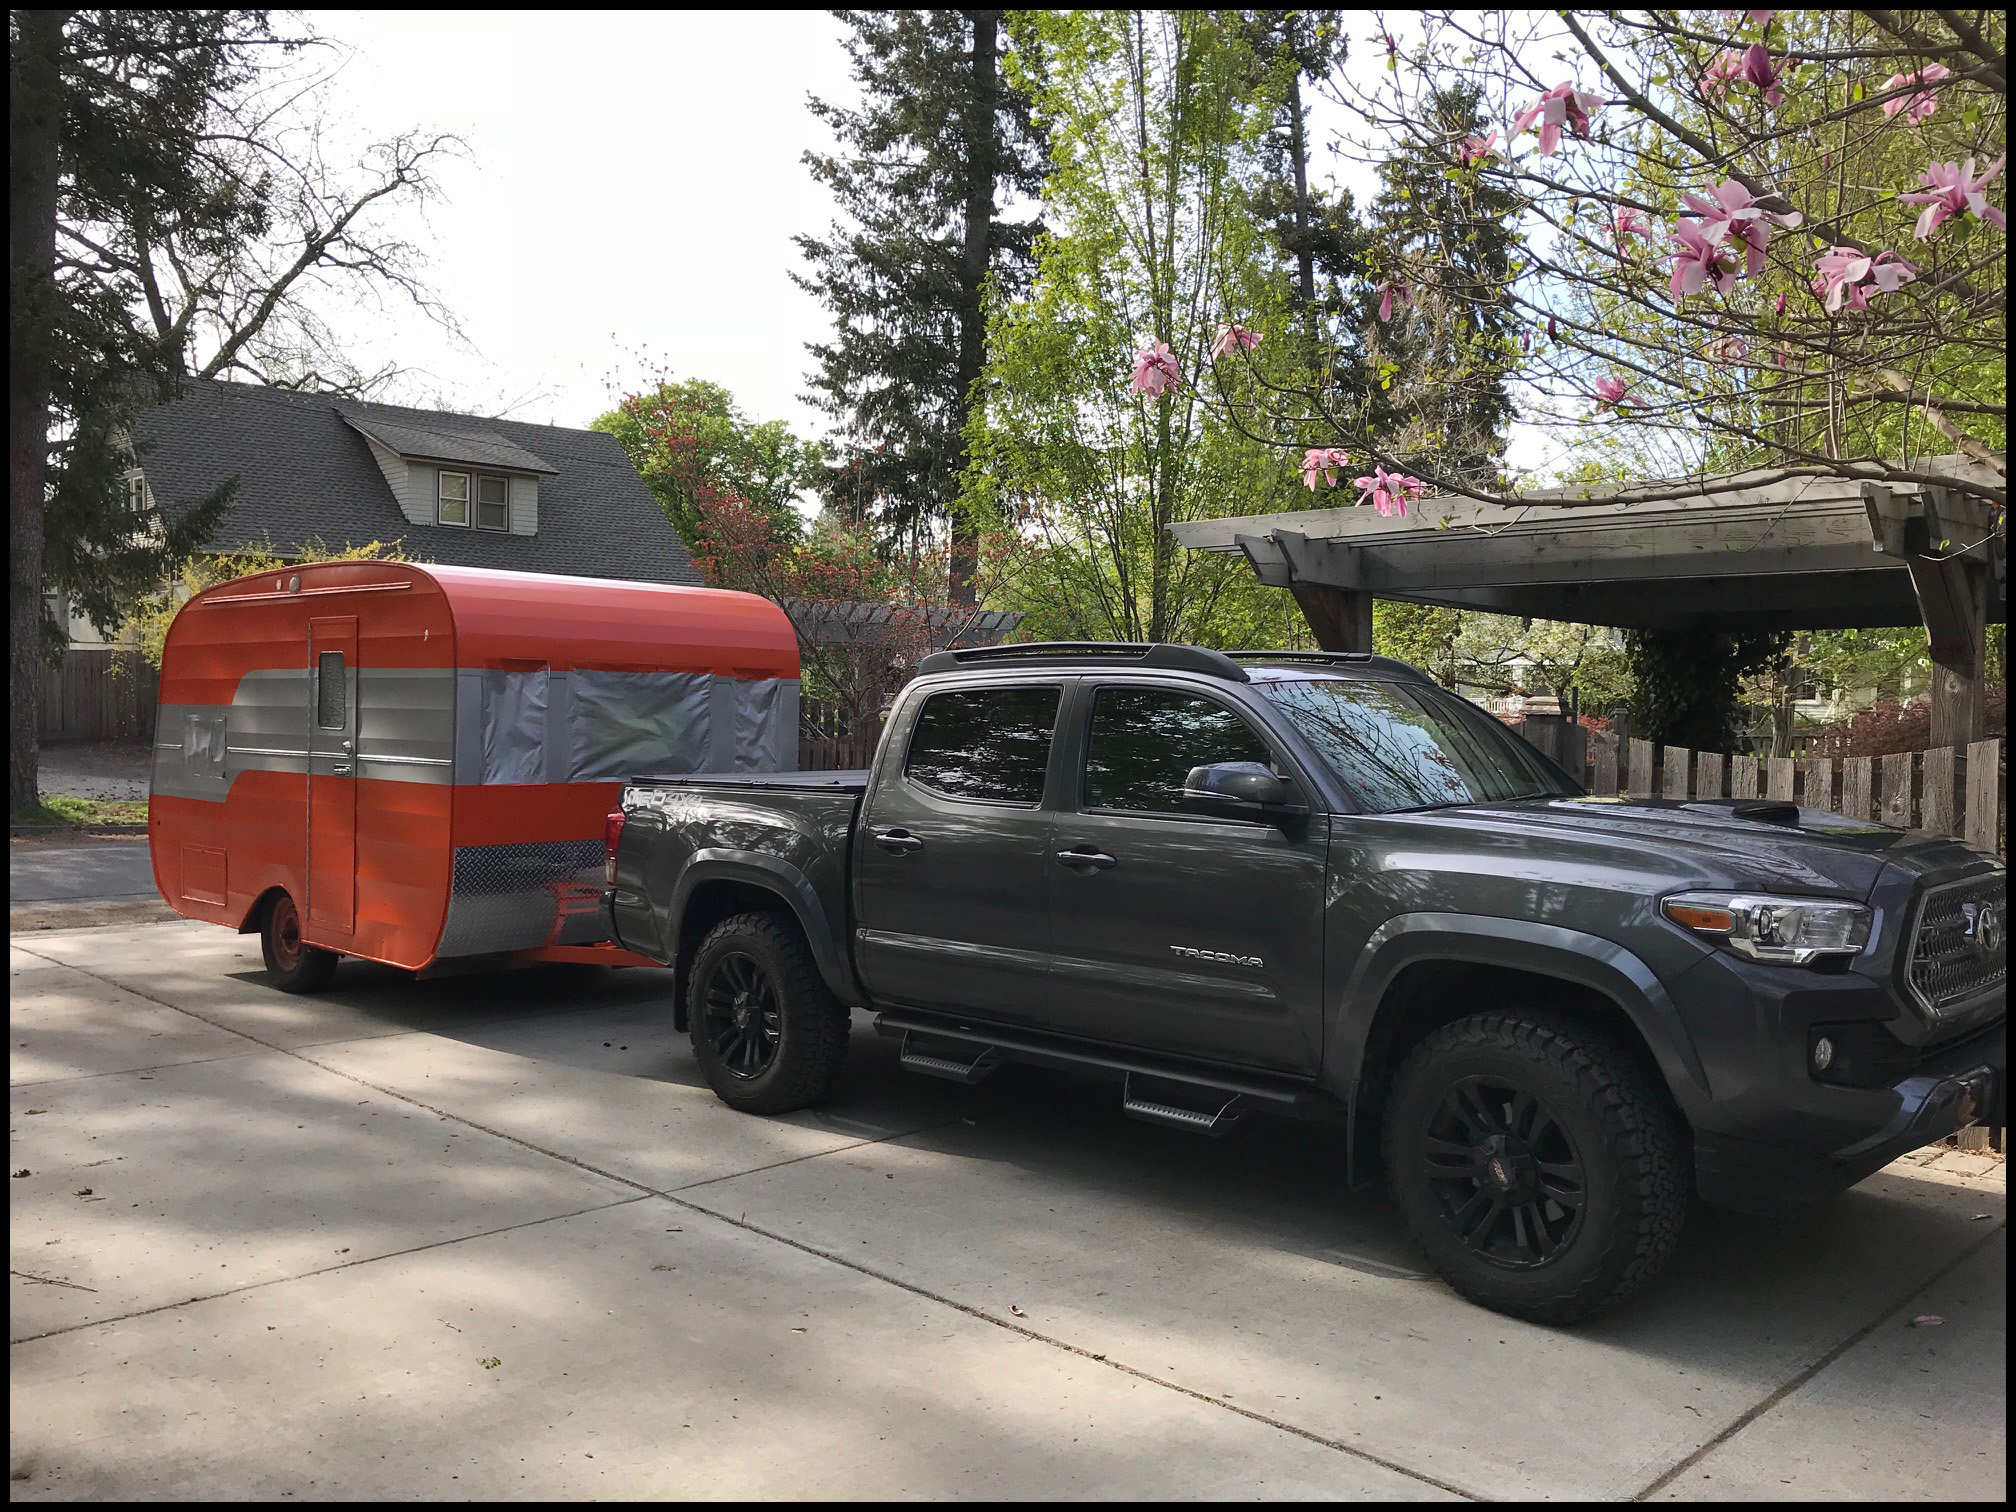
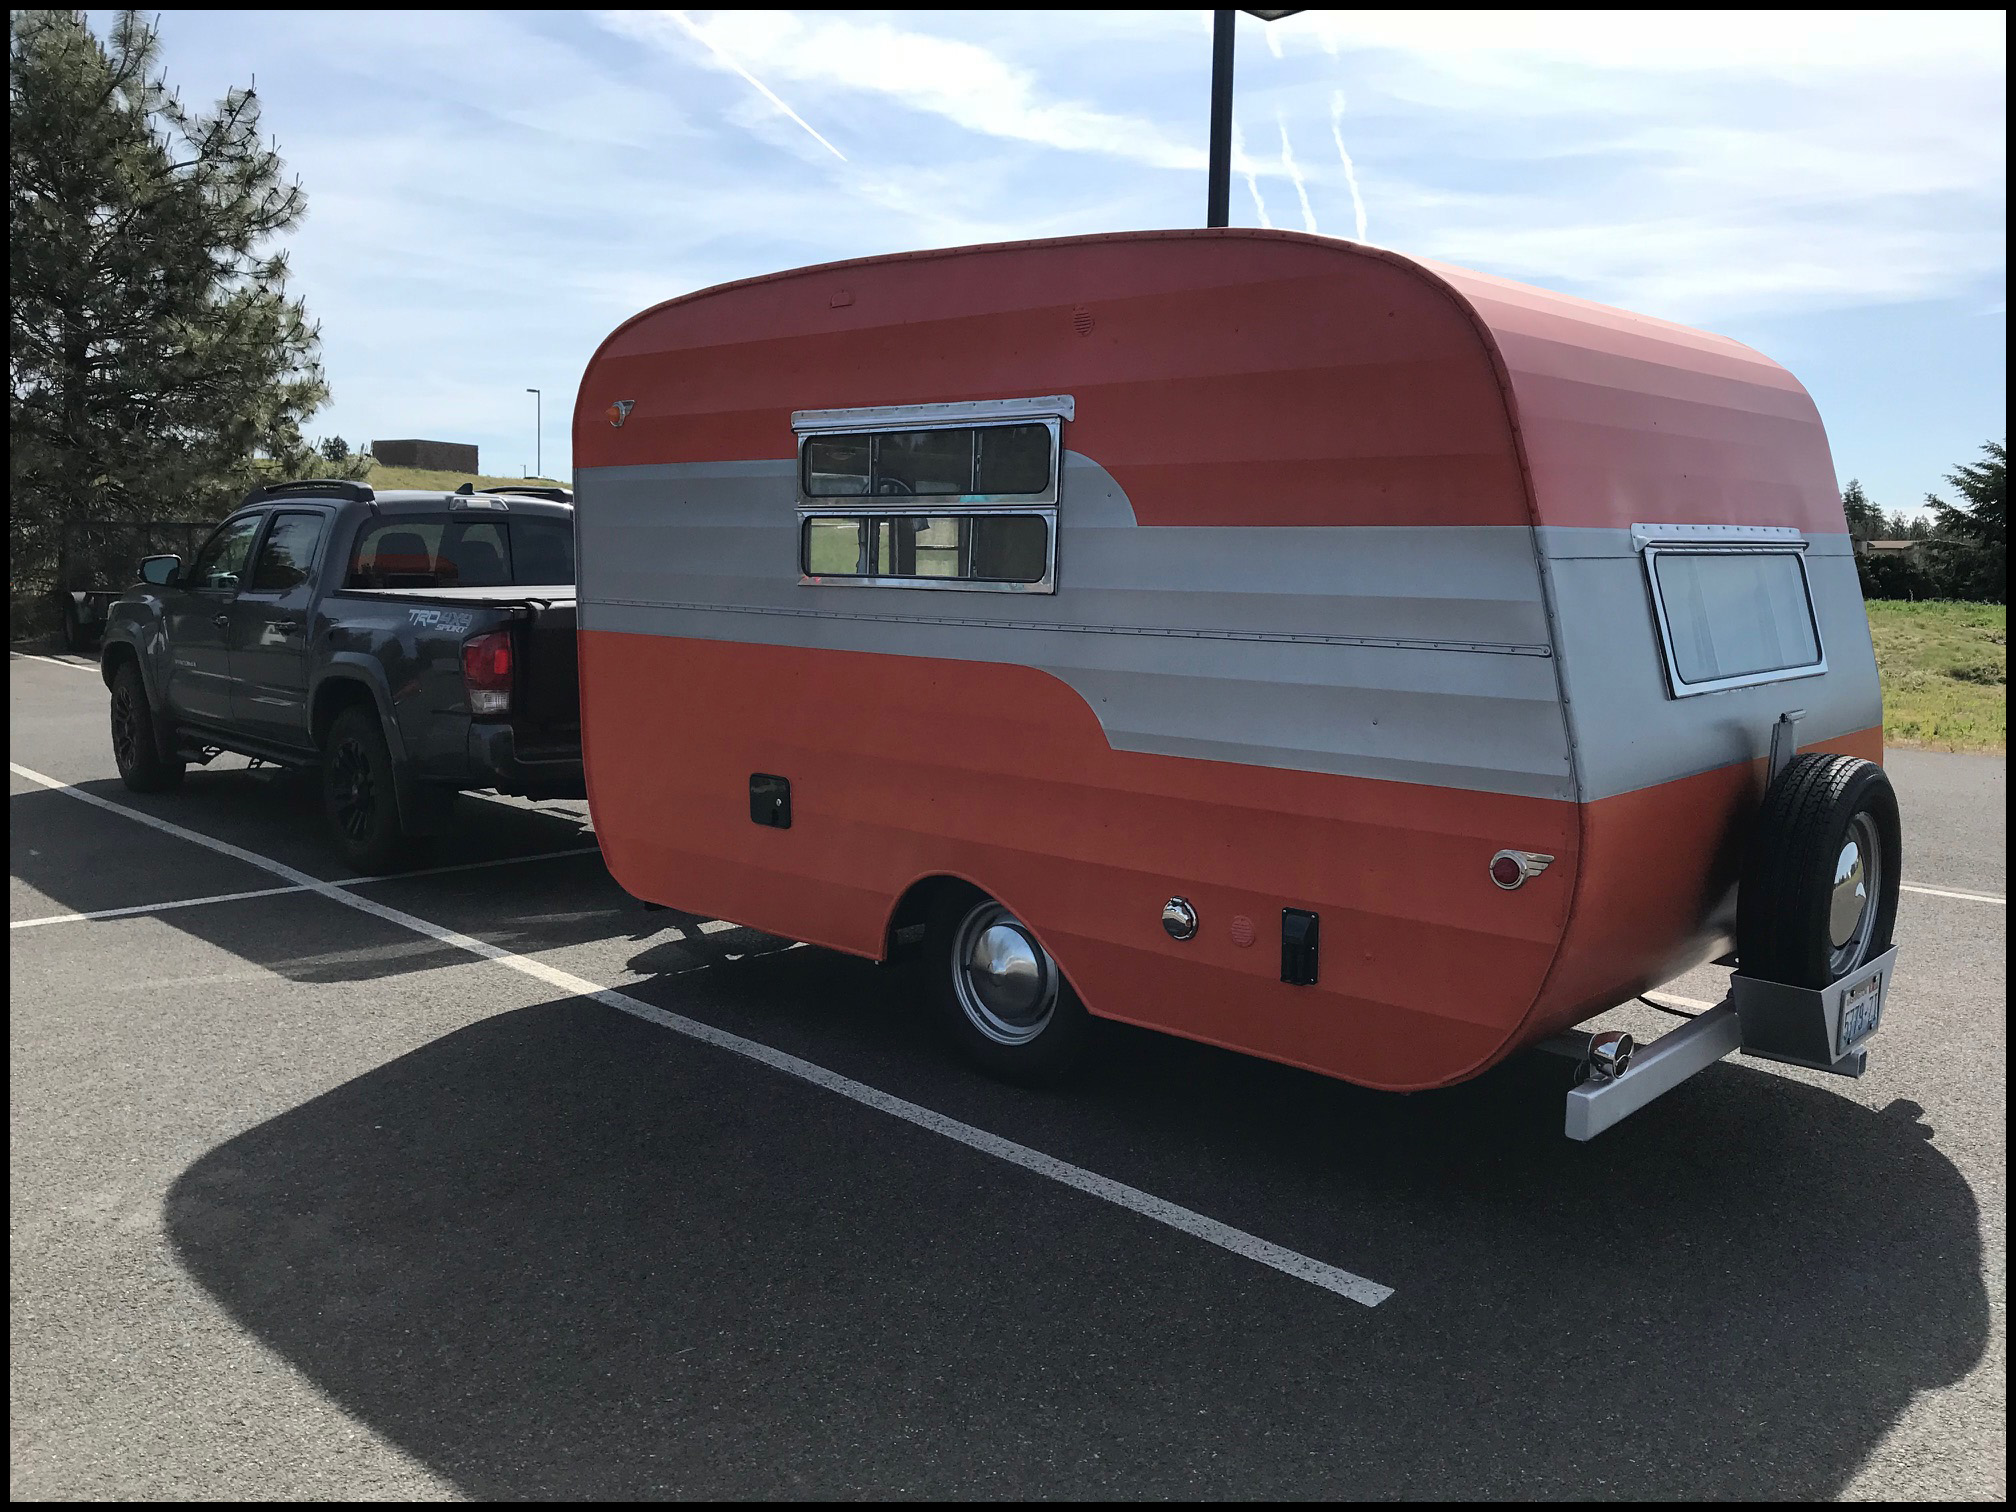
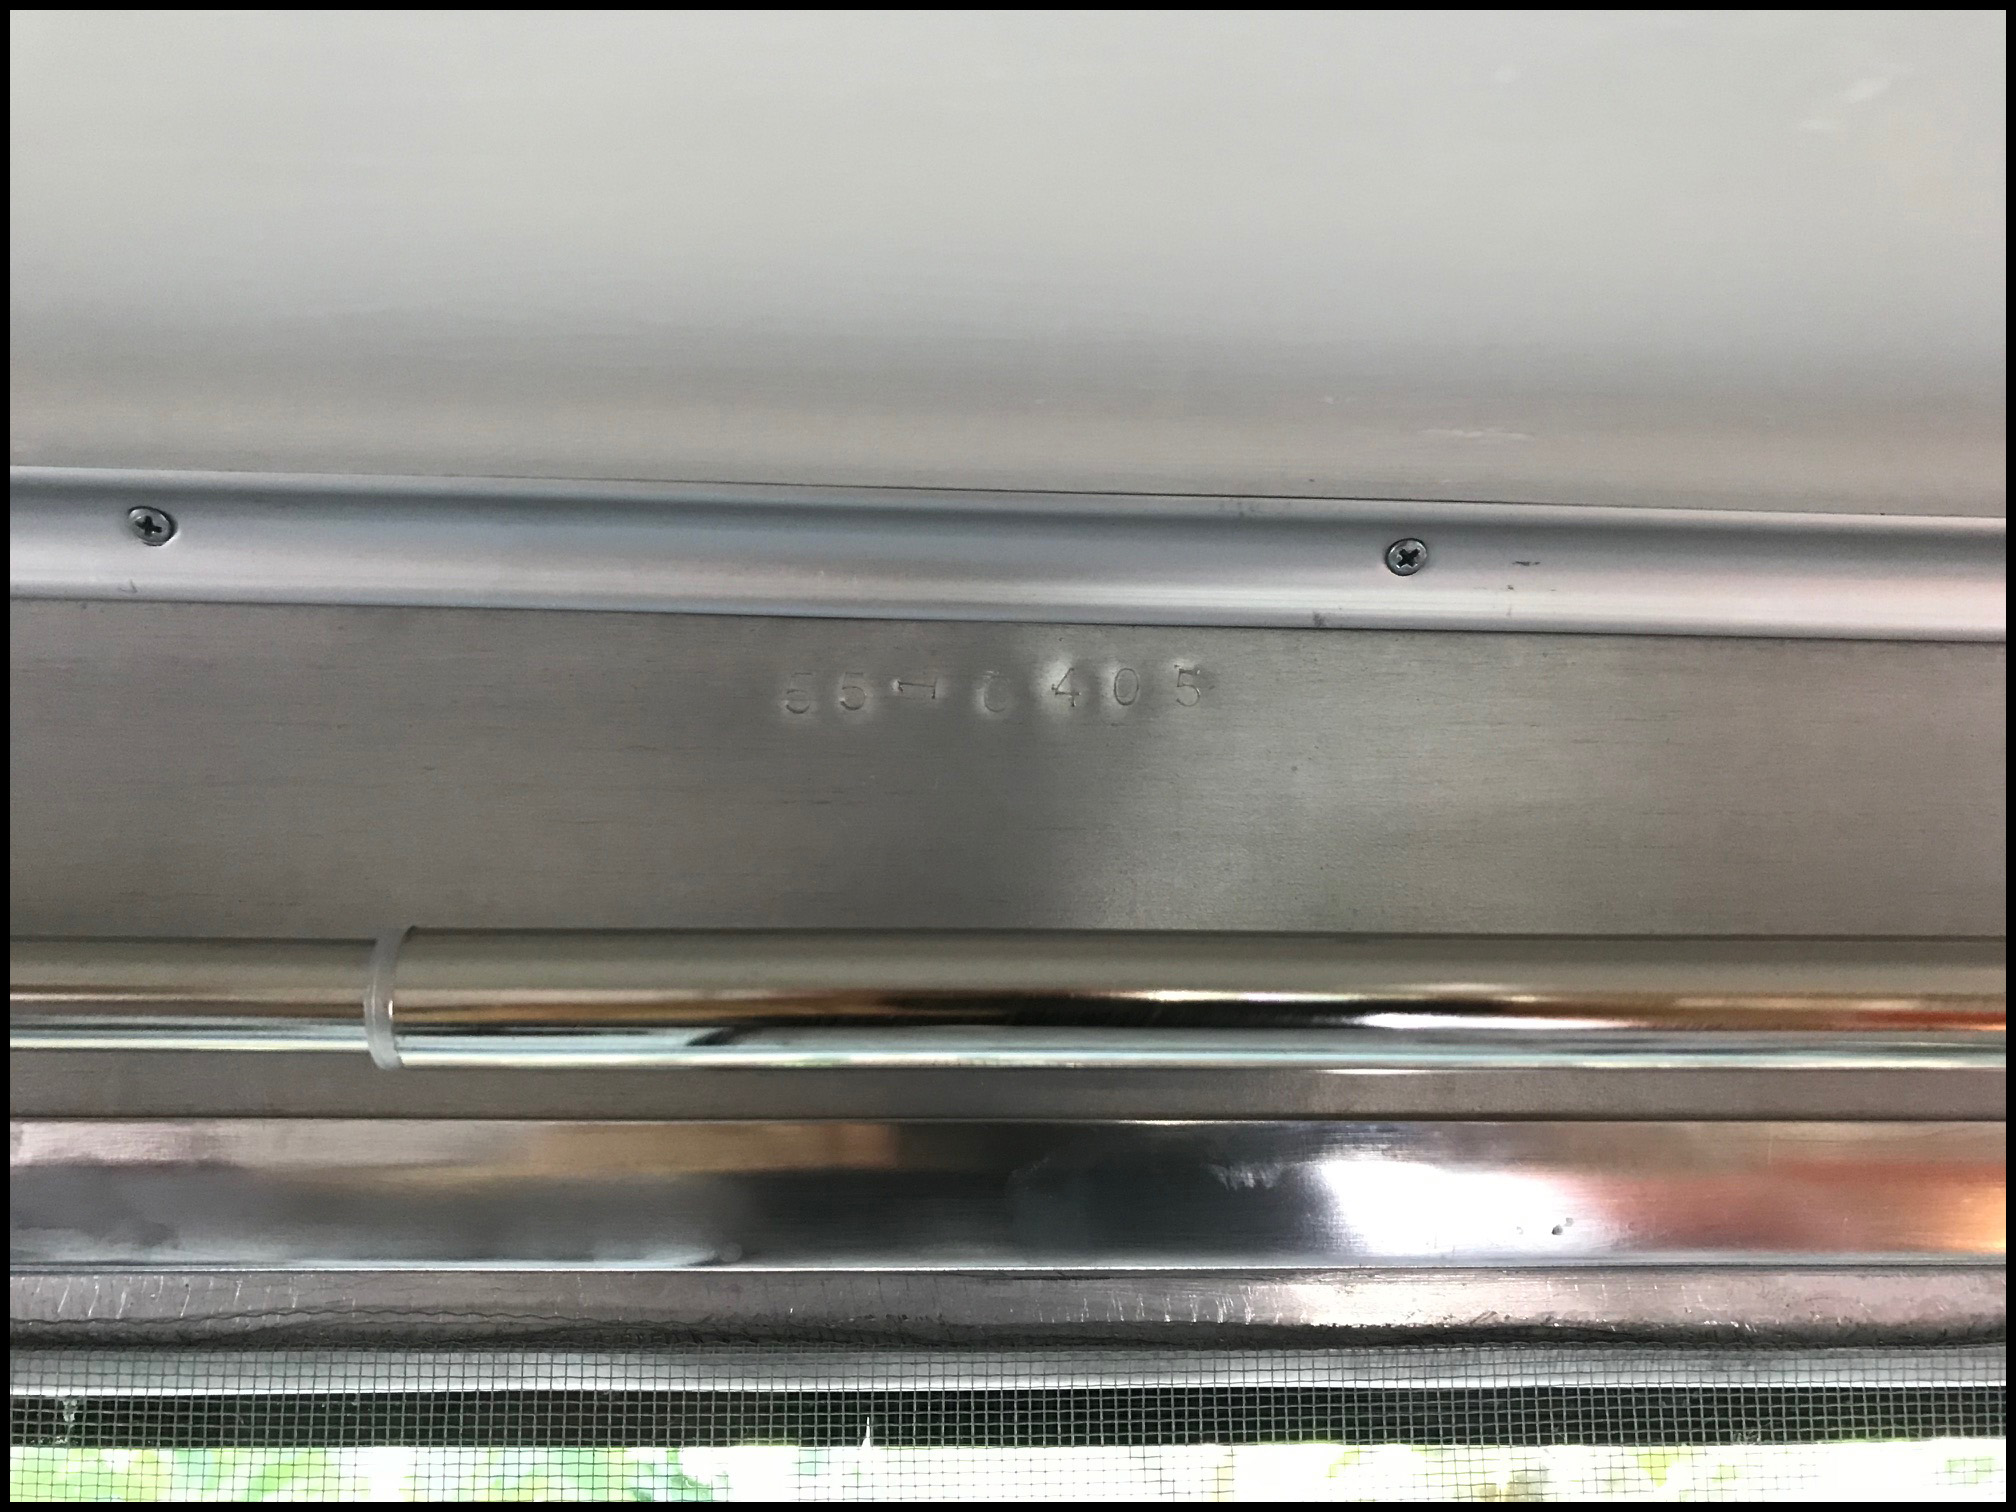
After a lengthy search and looking at many trailers... we found this Traveleze listed on Craigslist and located in Lewiston Idaho, or so I thought, it was more like the outskirts of Weippe Idaho... About 2 more hours East of Lewiston. Advertised as a Santa Fe we didn’t realize it was actually a Traveleze until we began to unpack it, and found the Traveleze placard and paperwork inside. Documented as the 3rd owner, this trailer was purchased new in Nampa Idaho in 1956. The first owners basically just put it in the garage and left it for 50 years, and upon their death it was sold to a family friend during the estate sale. That is where the water damage occurred… |
What was a vintage perfect inside and out, all original… was left in the rain and snow in Weippe Idaho for 10 years with dried up butyl putty. Purchased for just about $1500 from Jack, he is in the ATV in the picture. We got it home and began our own custom vintage journey. And this blog… is that journey. The story of Nampa Jack. After towing it home and a closer inspection, I am pretty confident that, that trip home was the farthest that Traveleze had ever been pulled since its shipment up to Nampa when it was new. There is not a sign of any road rash on the front, the frame has not a dent… and the sides? In great shape for 60 years old… What a find. |
 |
First, Larry at Canned Hams Trailers (cannedhamtrailers.com)… He is awesome. And his information and how-to videos have been instrumental in the decision making process. His videos and website have cleared up a ton of “what ifs?” and “unknowns” before we even pulled one twisty nail to see what we needed to do. Do yourself a favor, watch all of his restore videos series’ before you start… and make sure to donate to his site to keep the advice flowing!
Step 2 - Inventory...
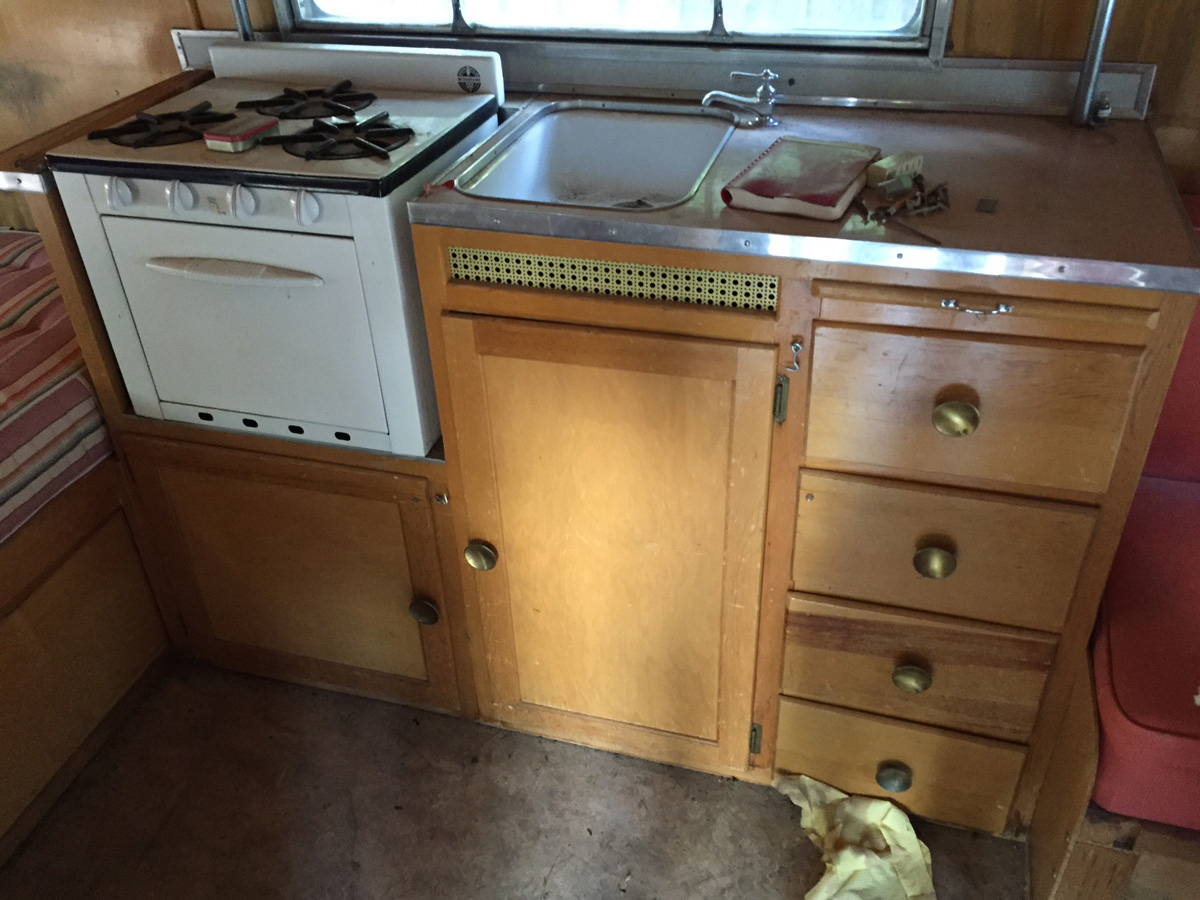
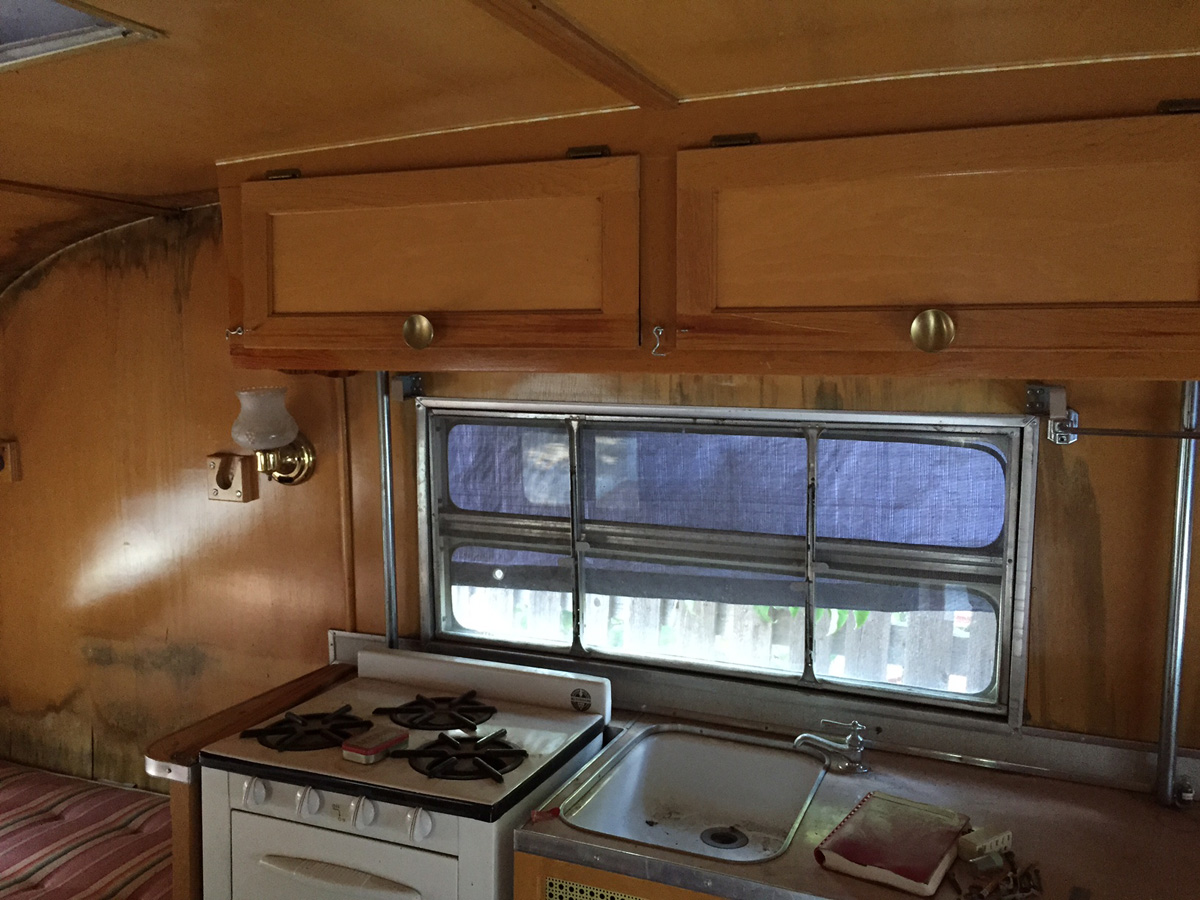
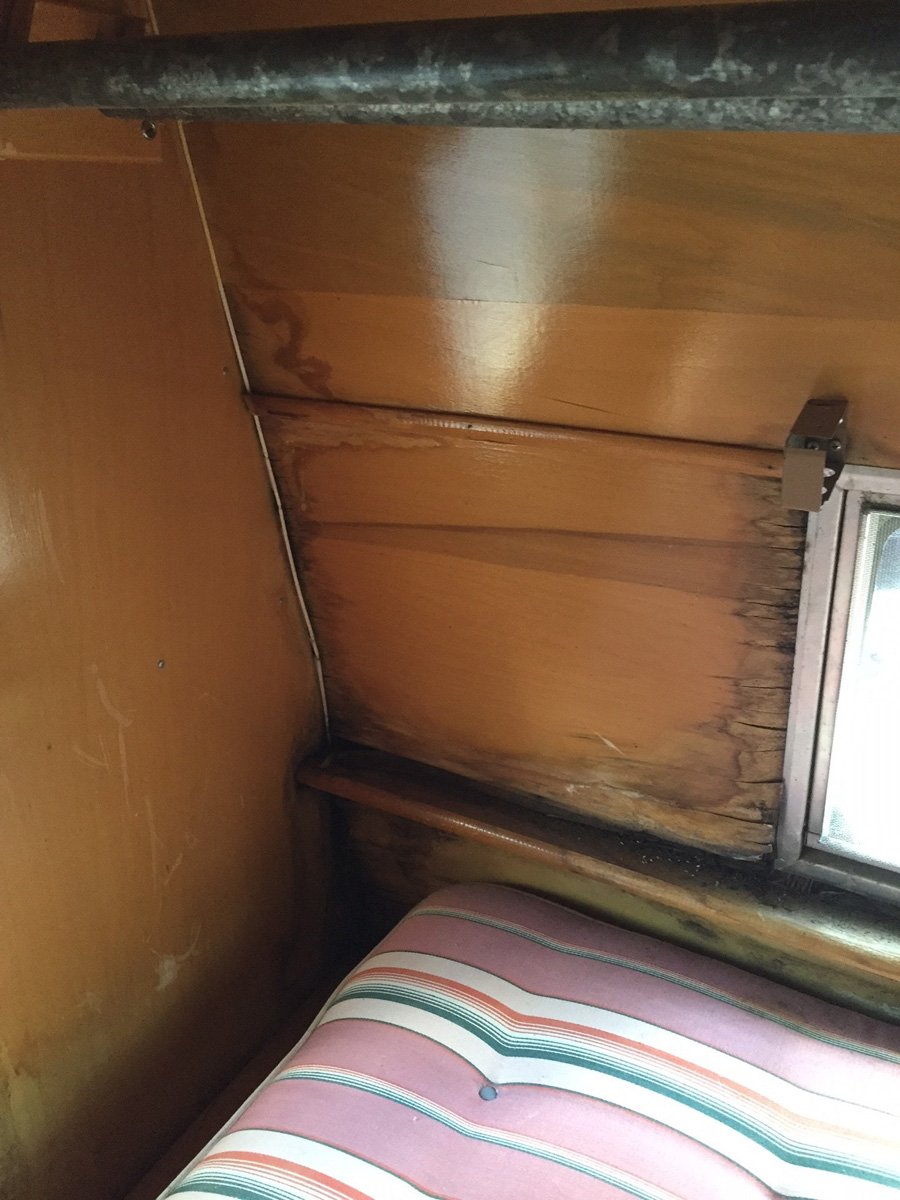
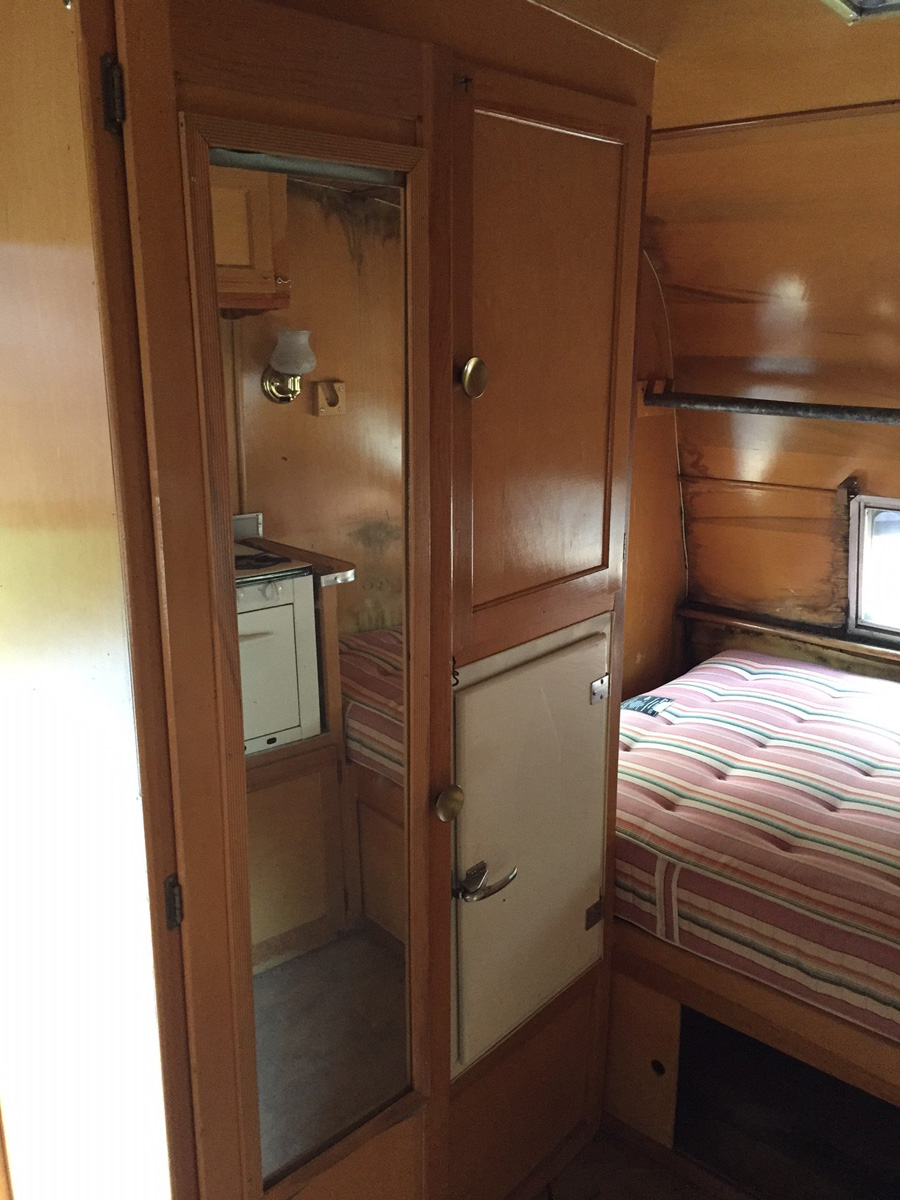
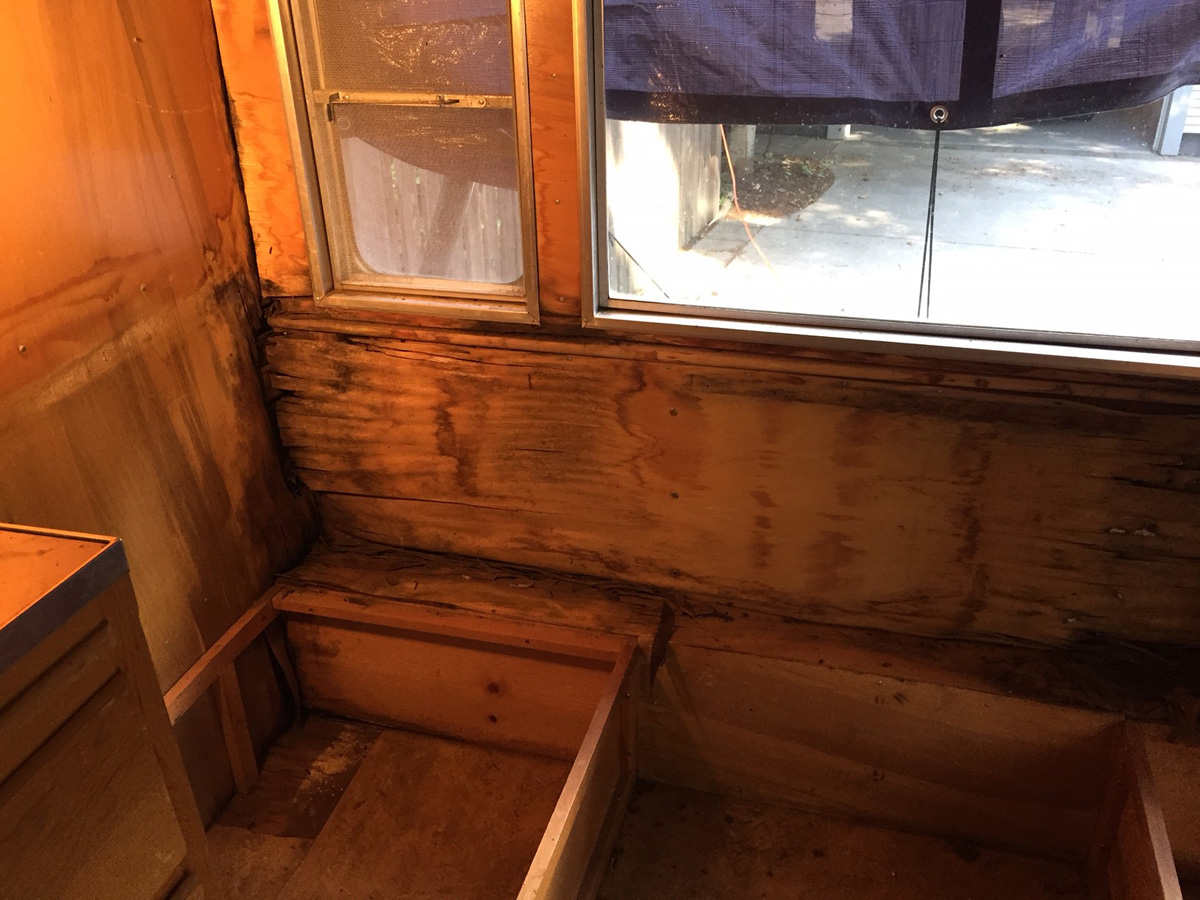
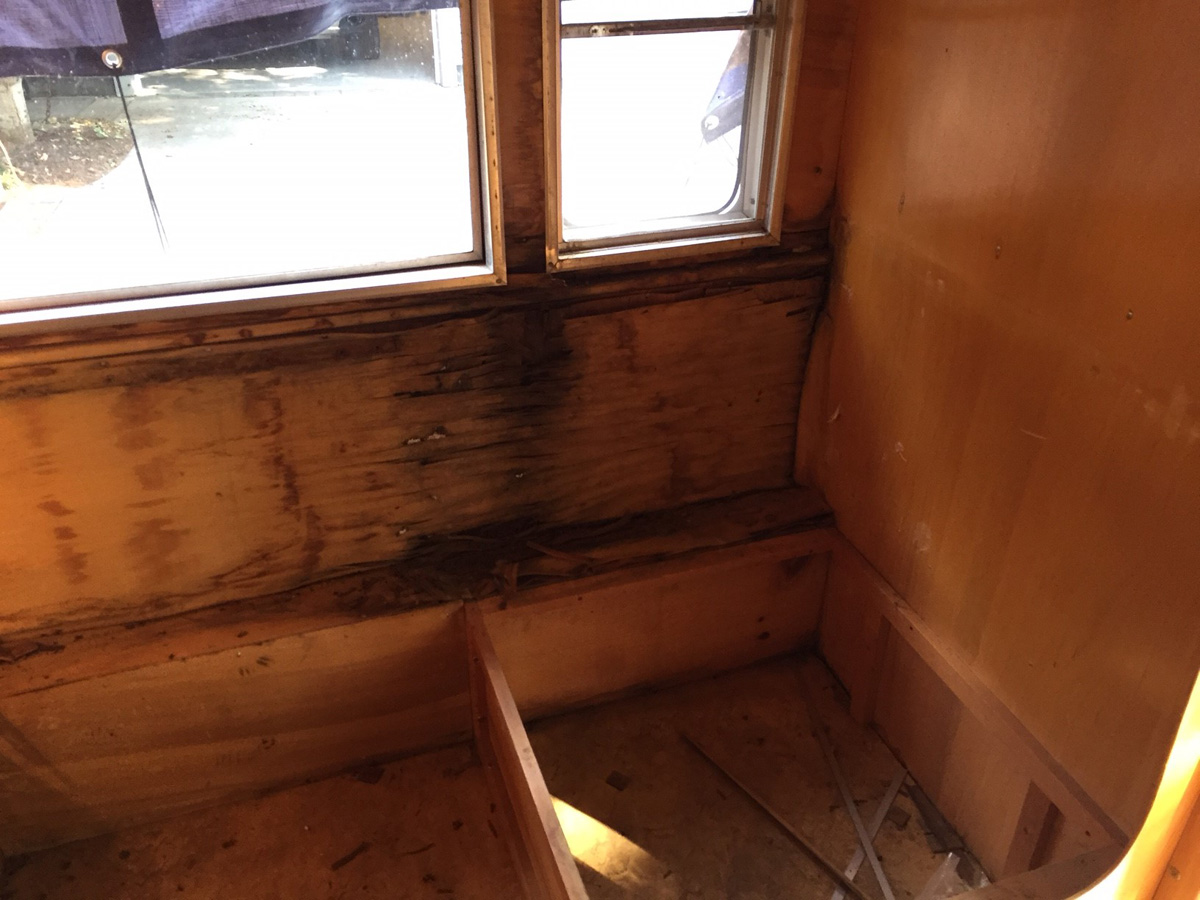
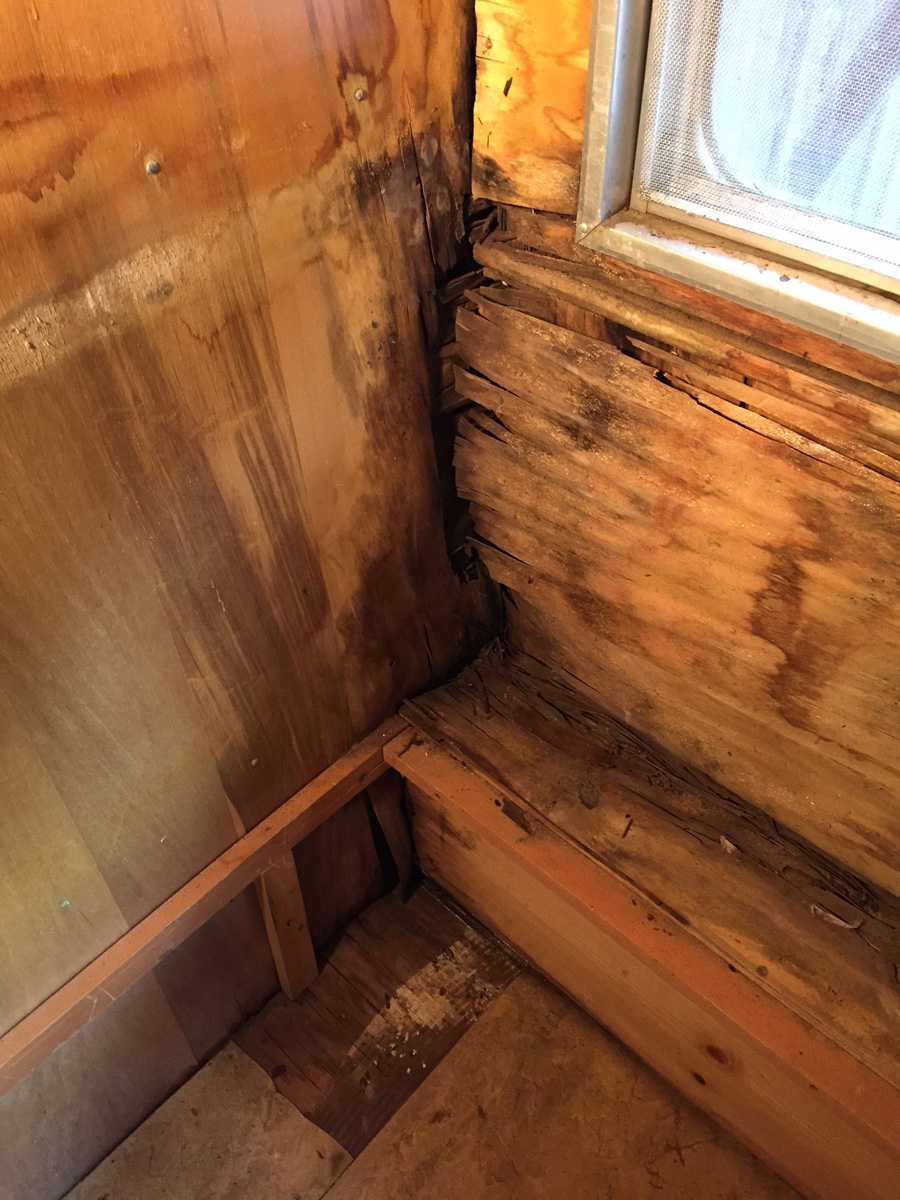
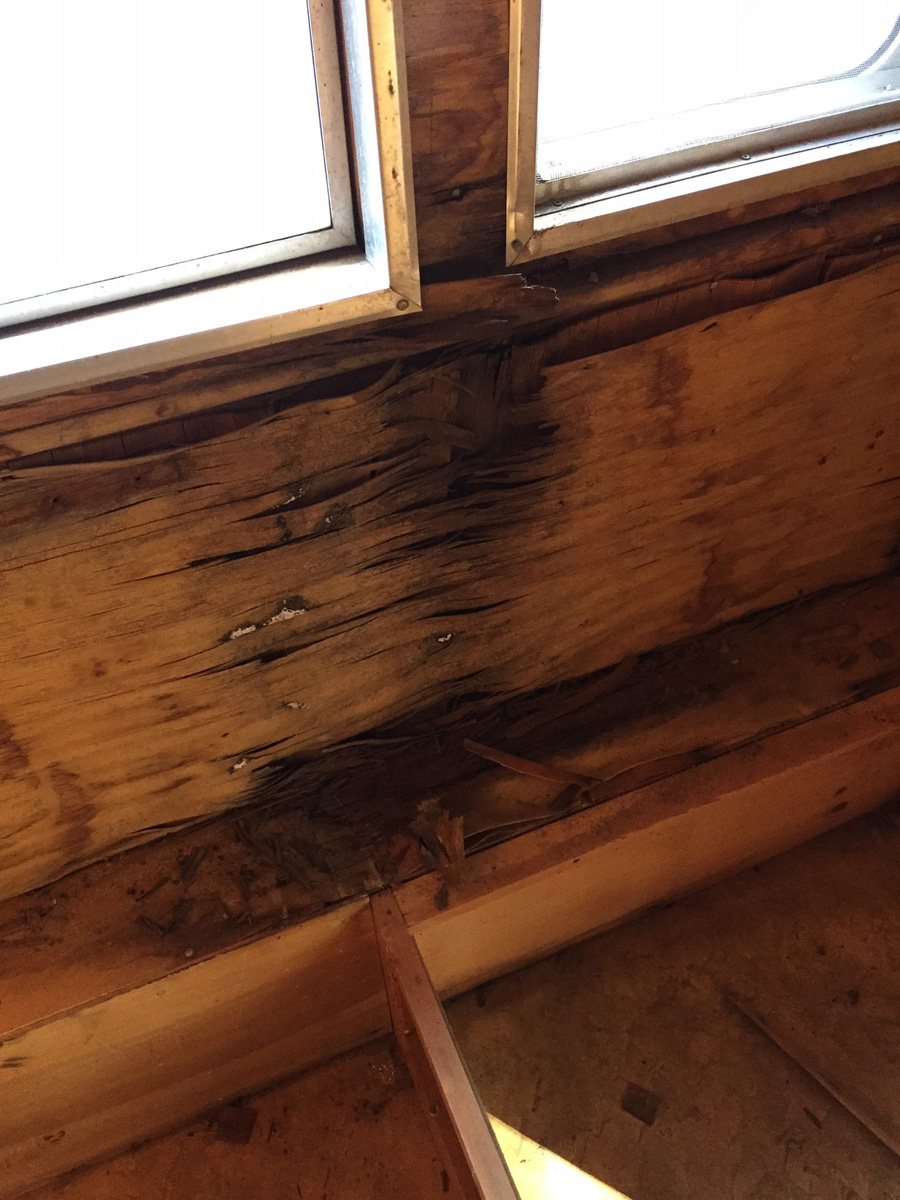
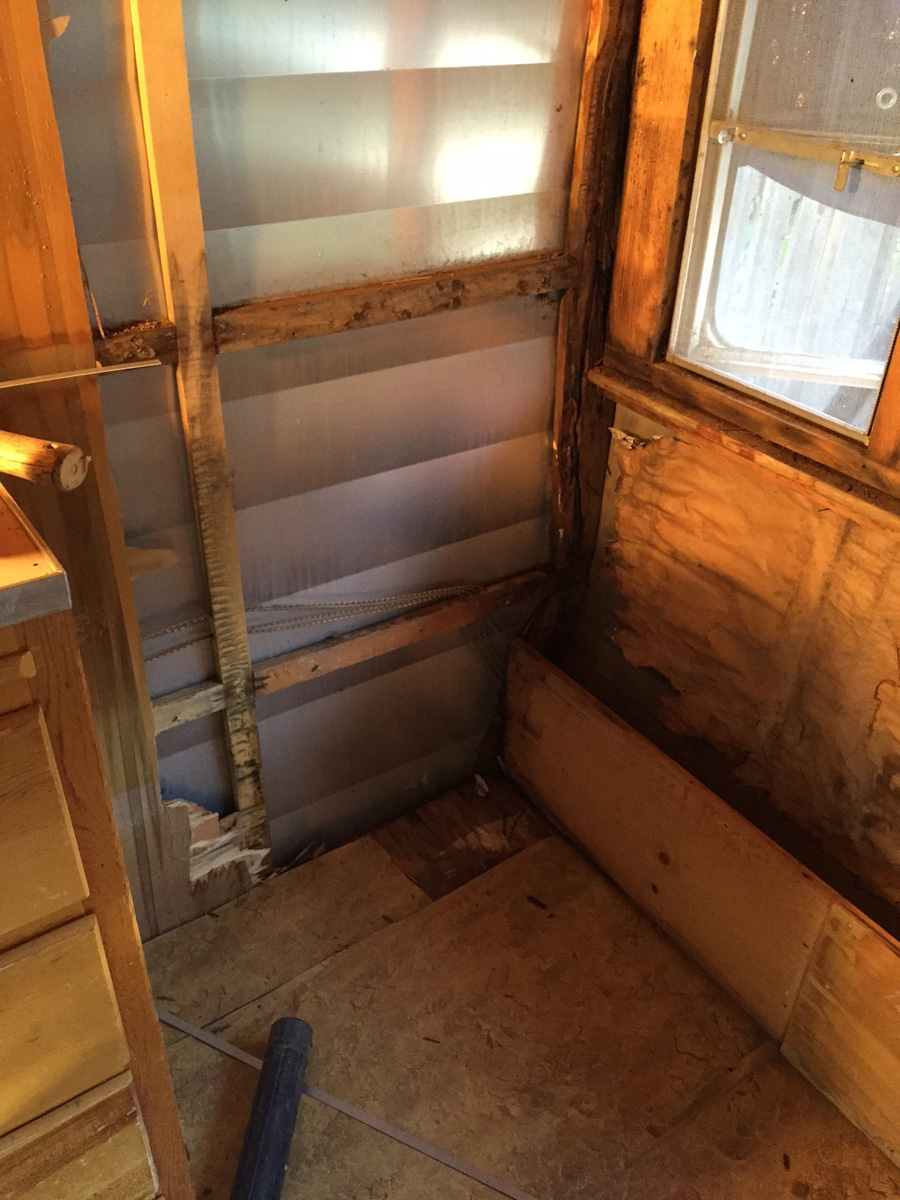
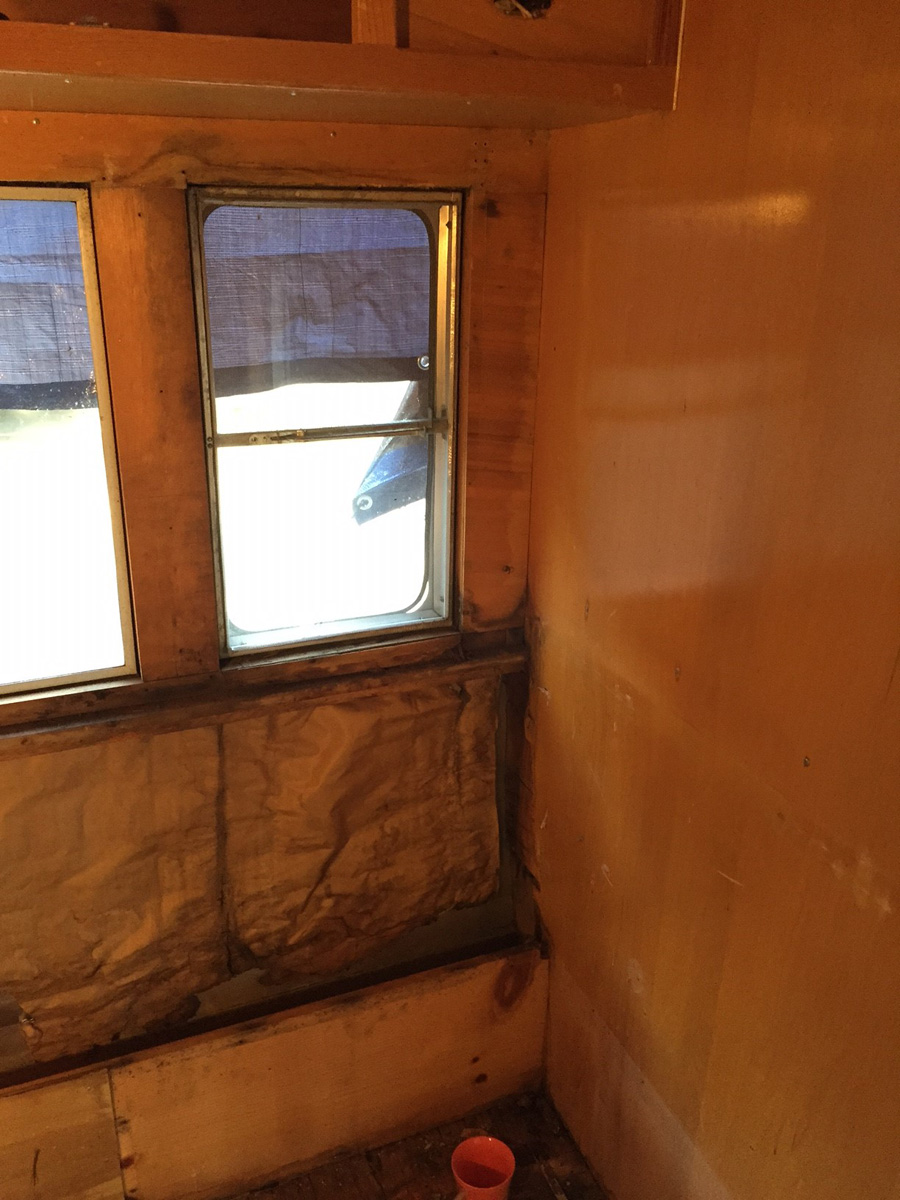
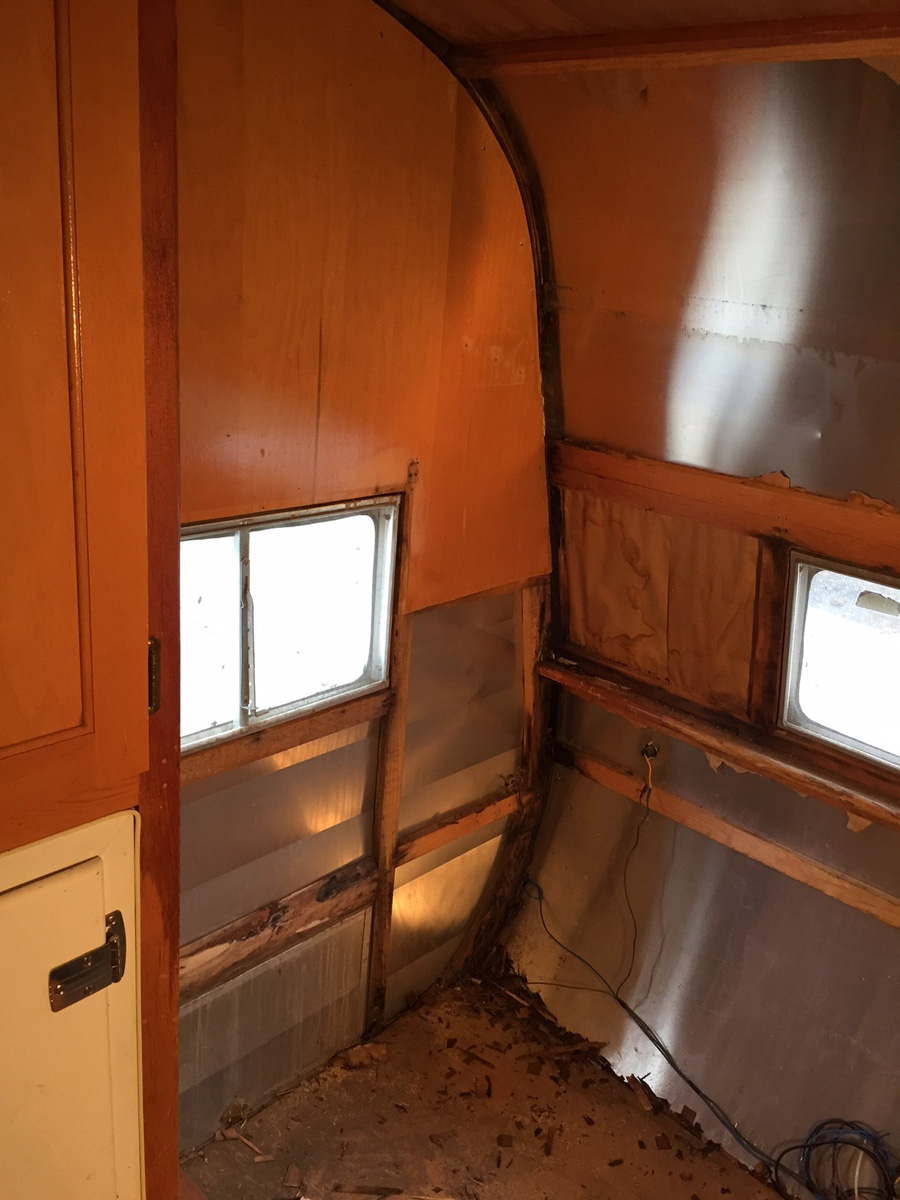
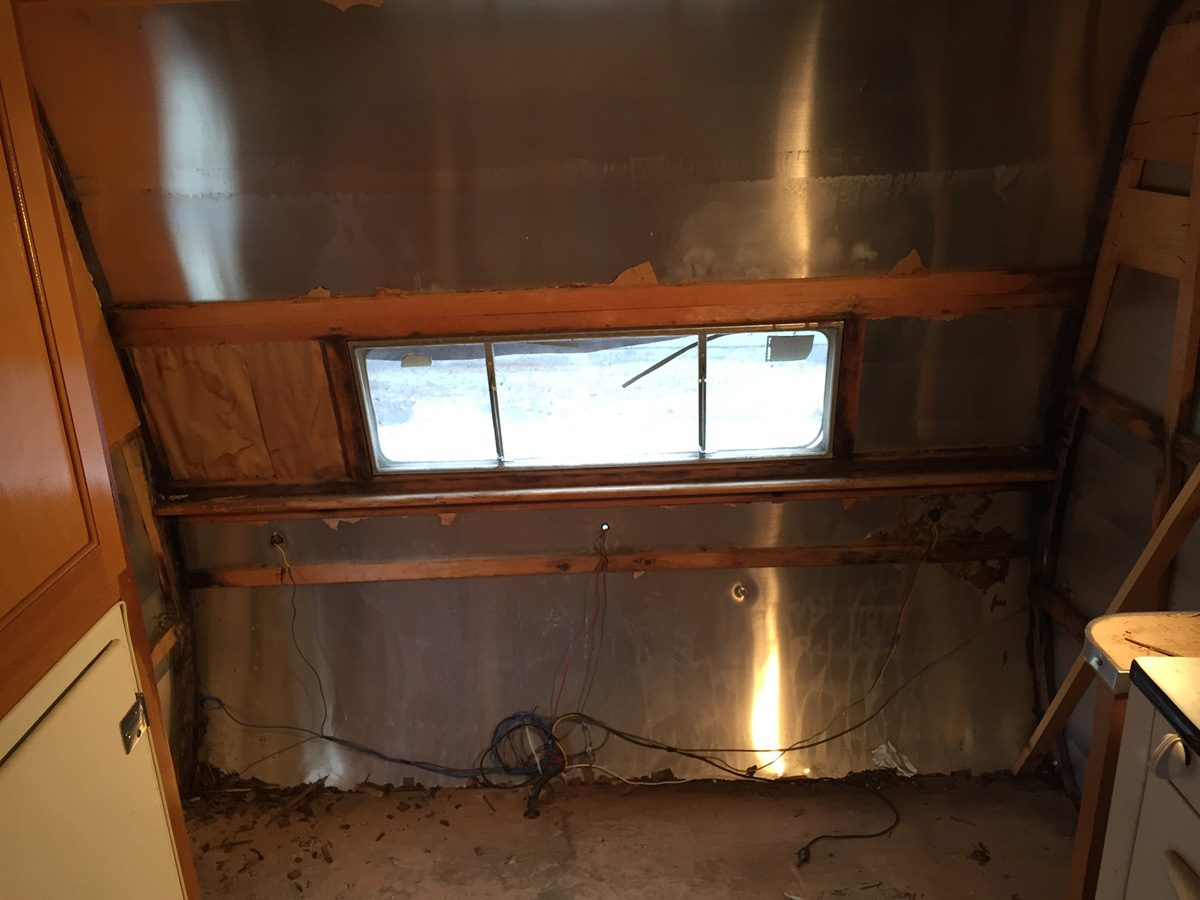
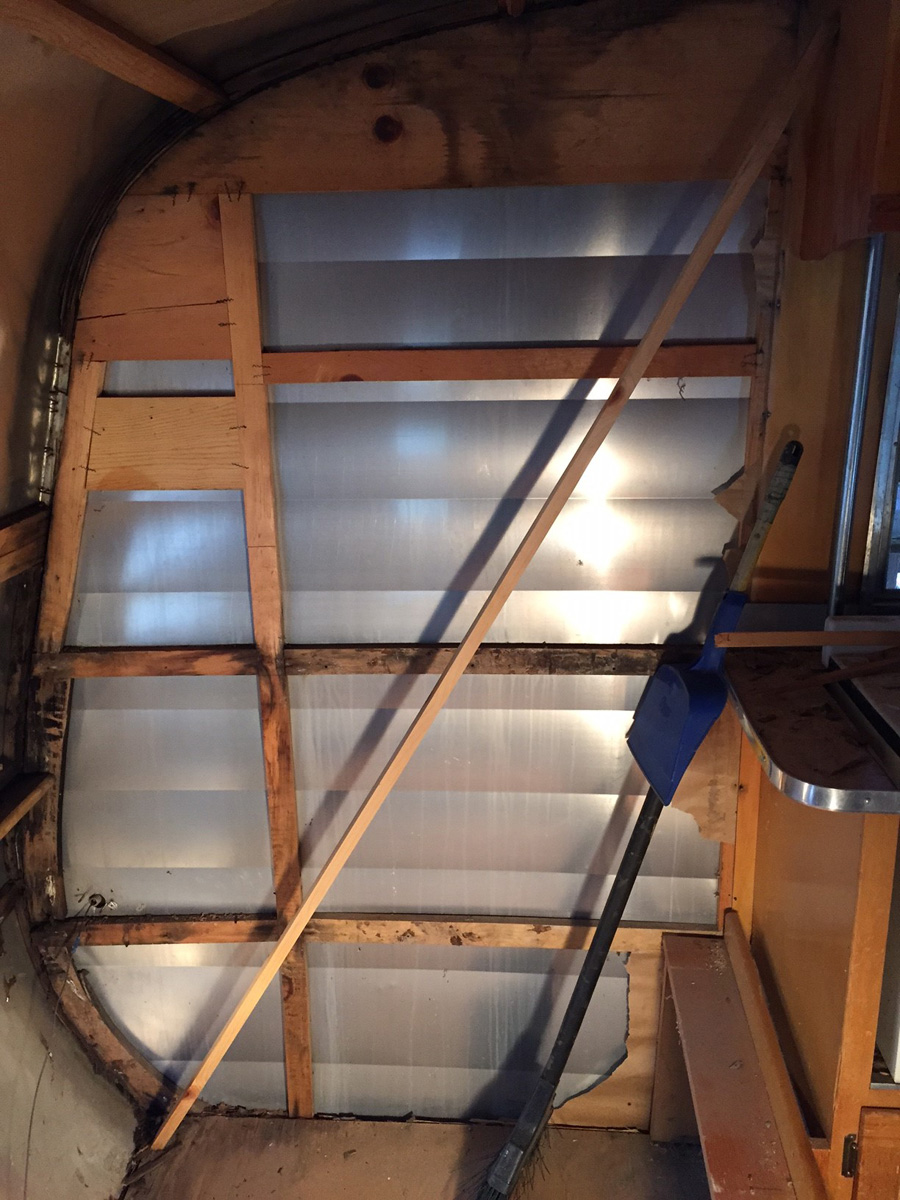
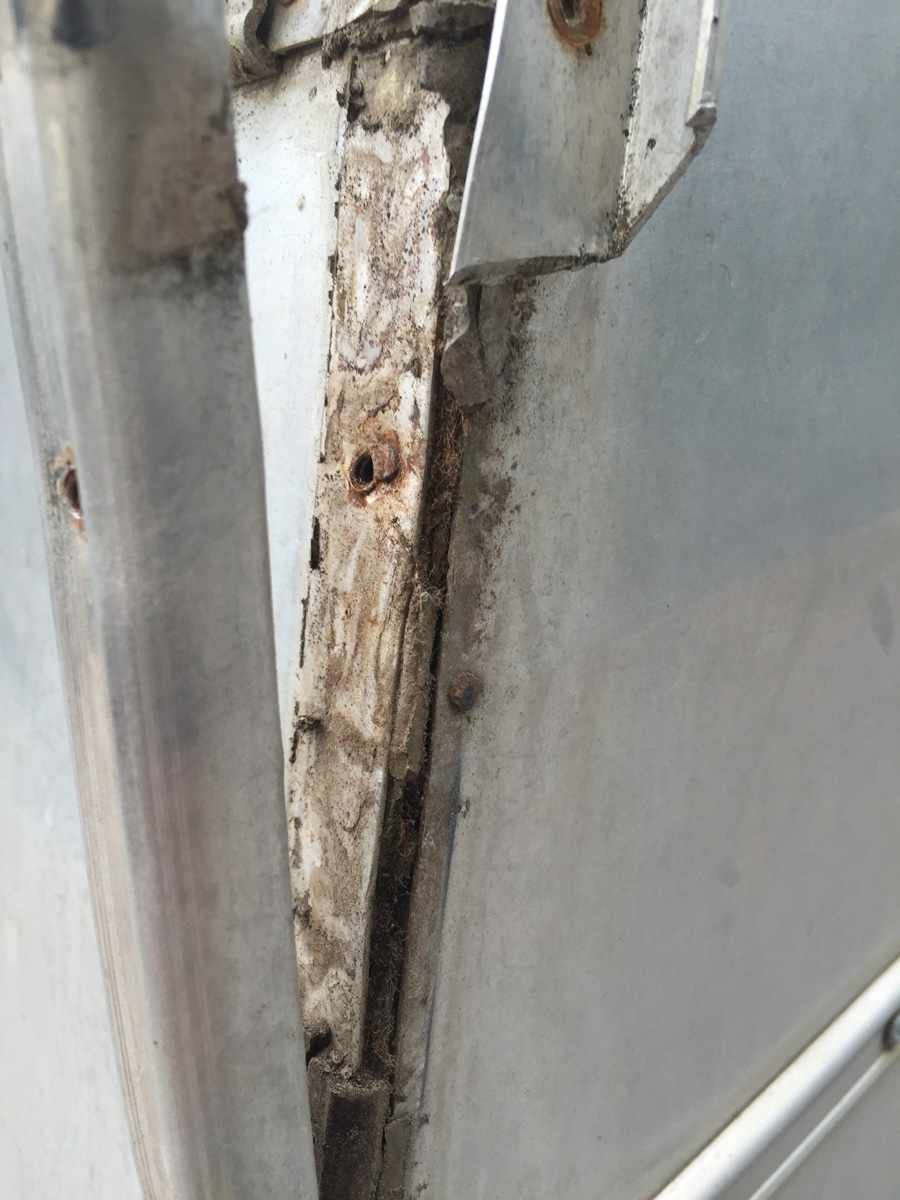
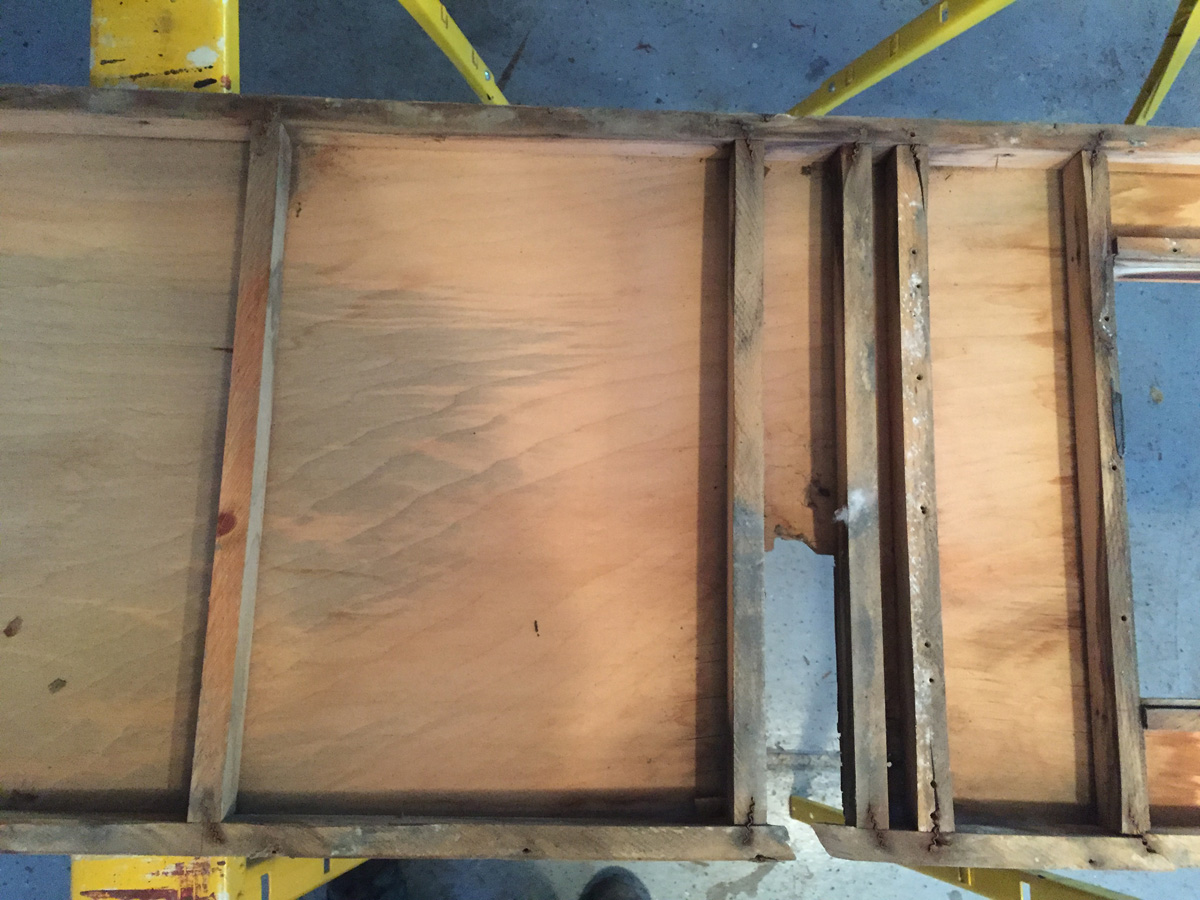
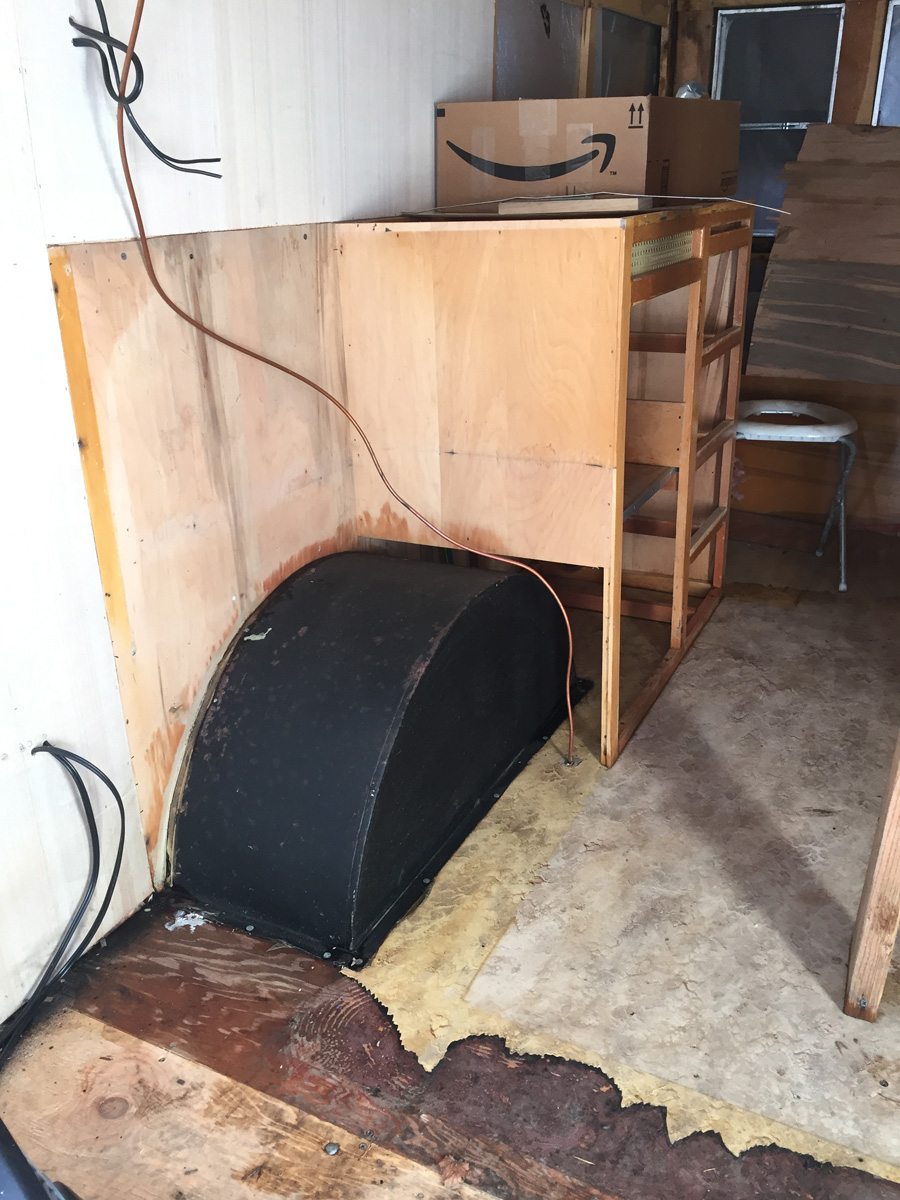
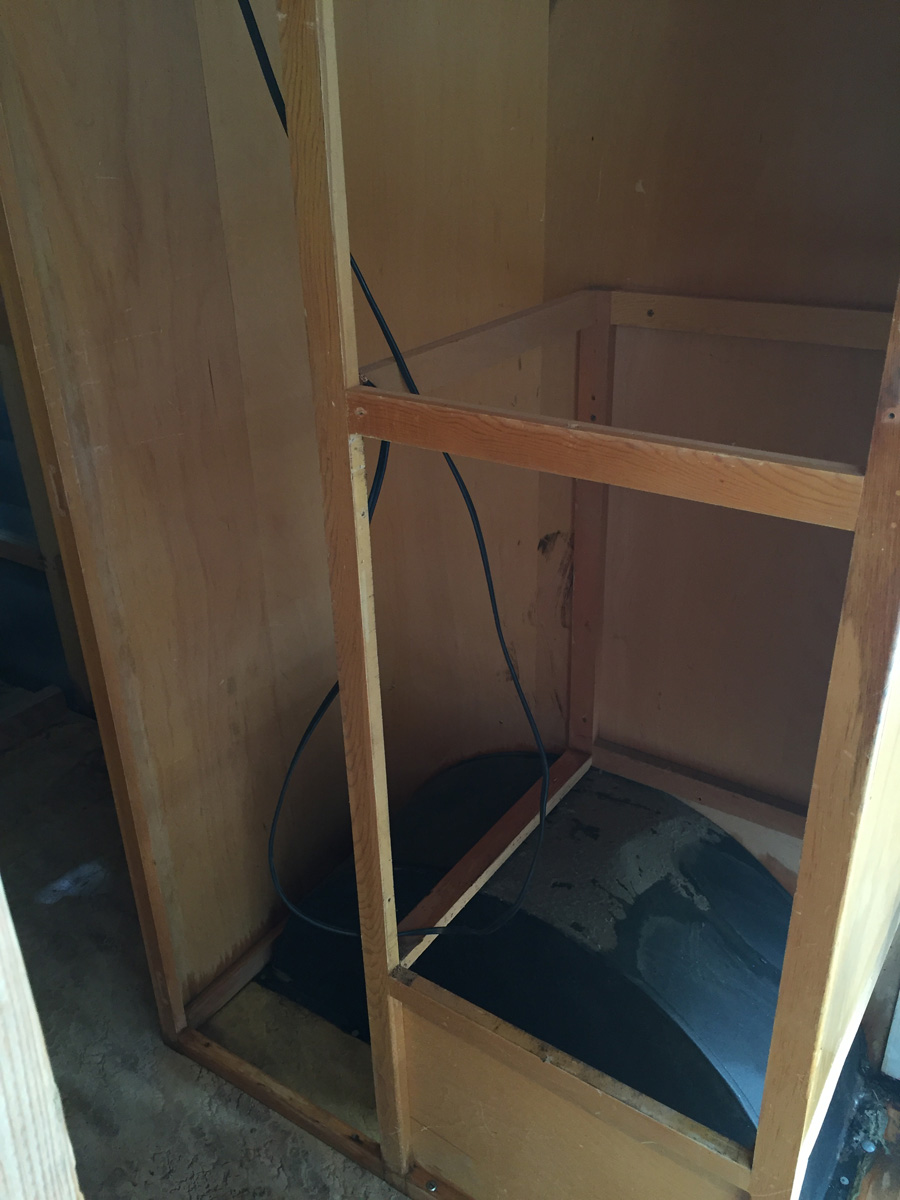
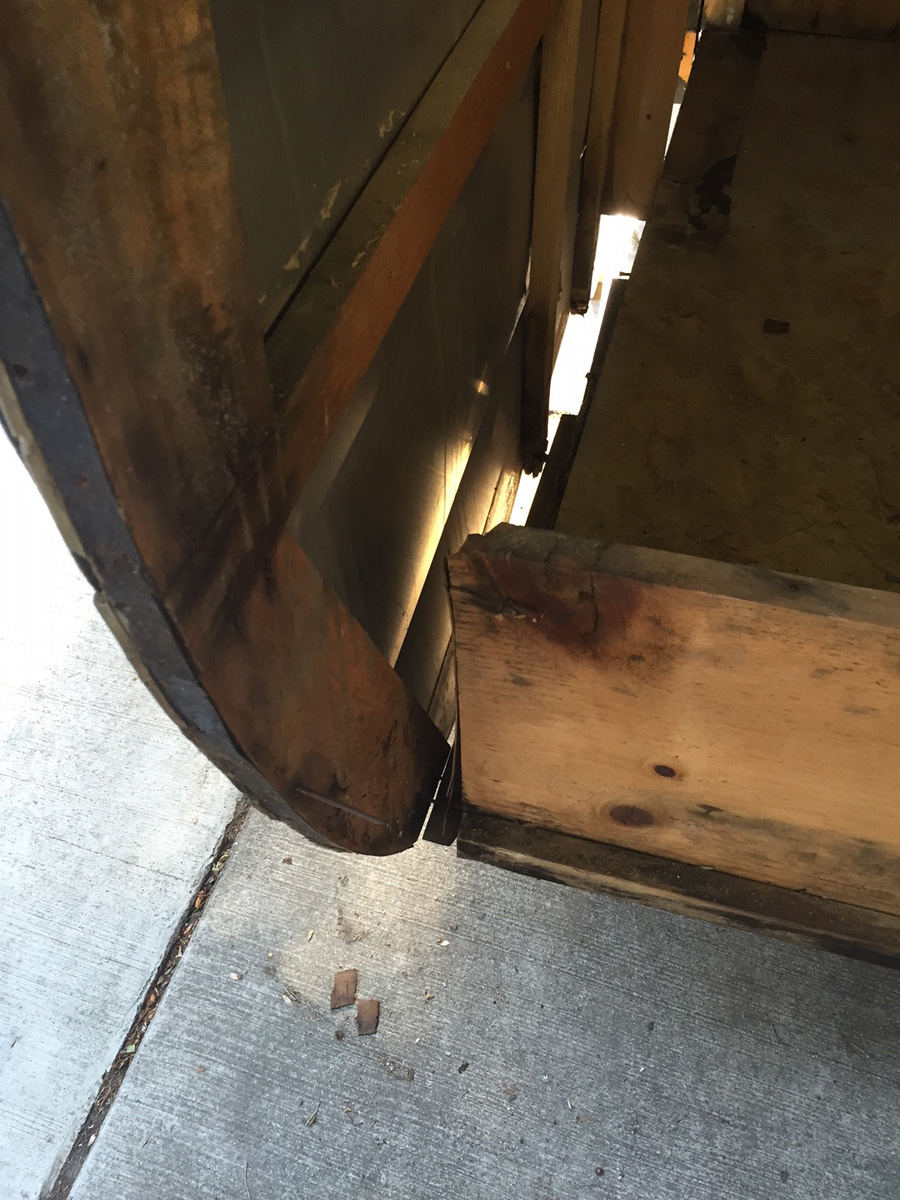
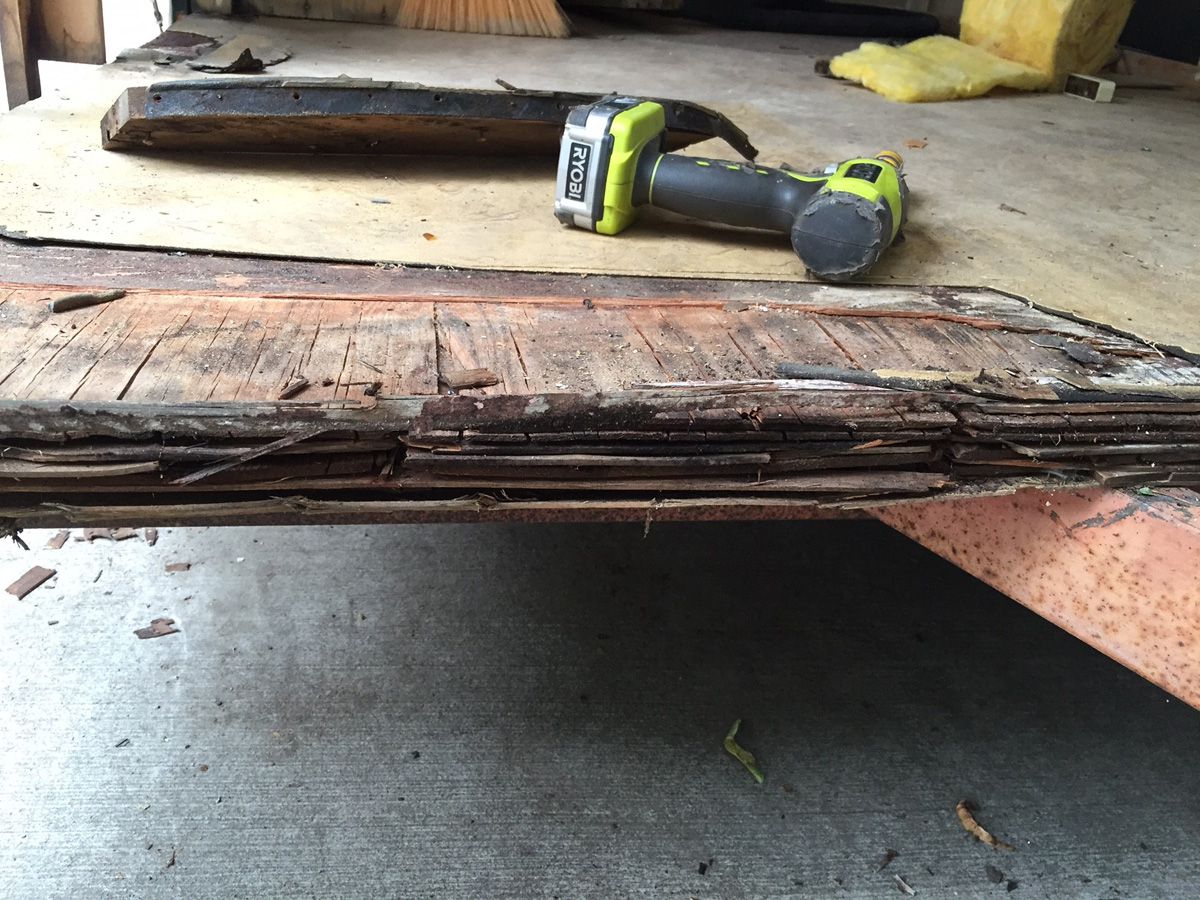
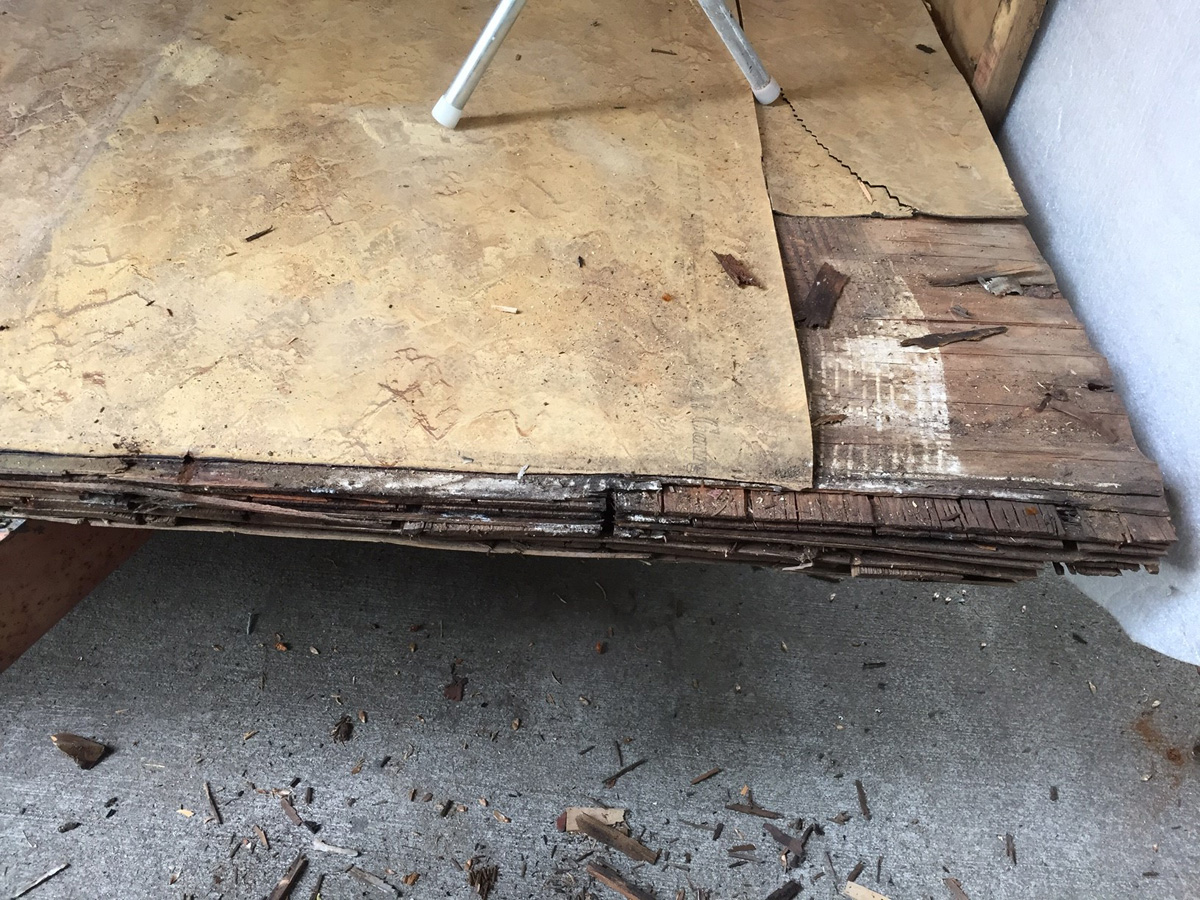
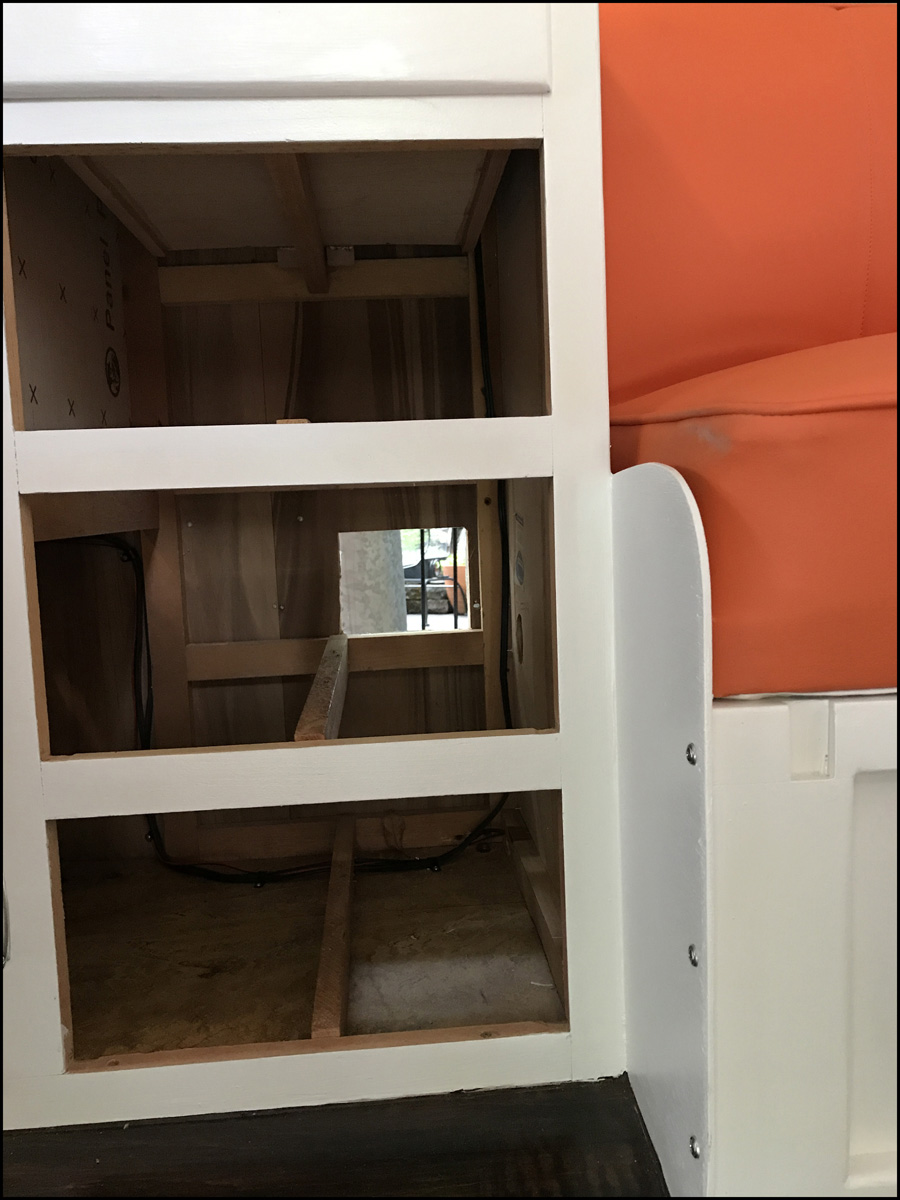
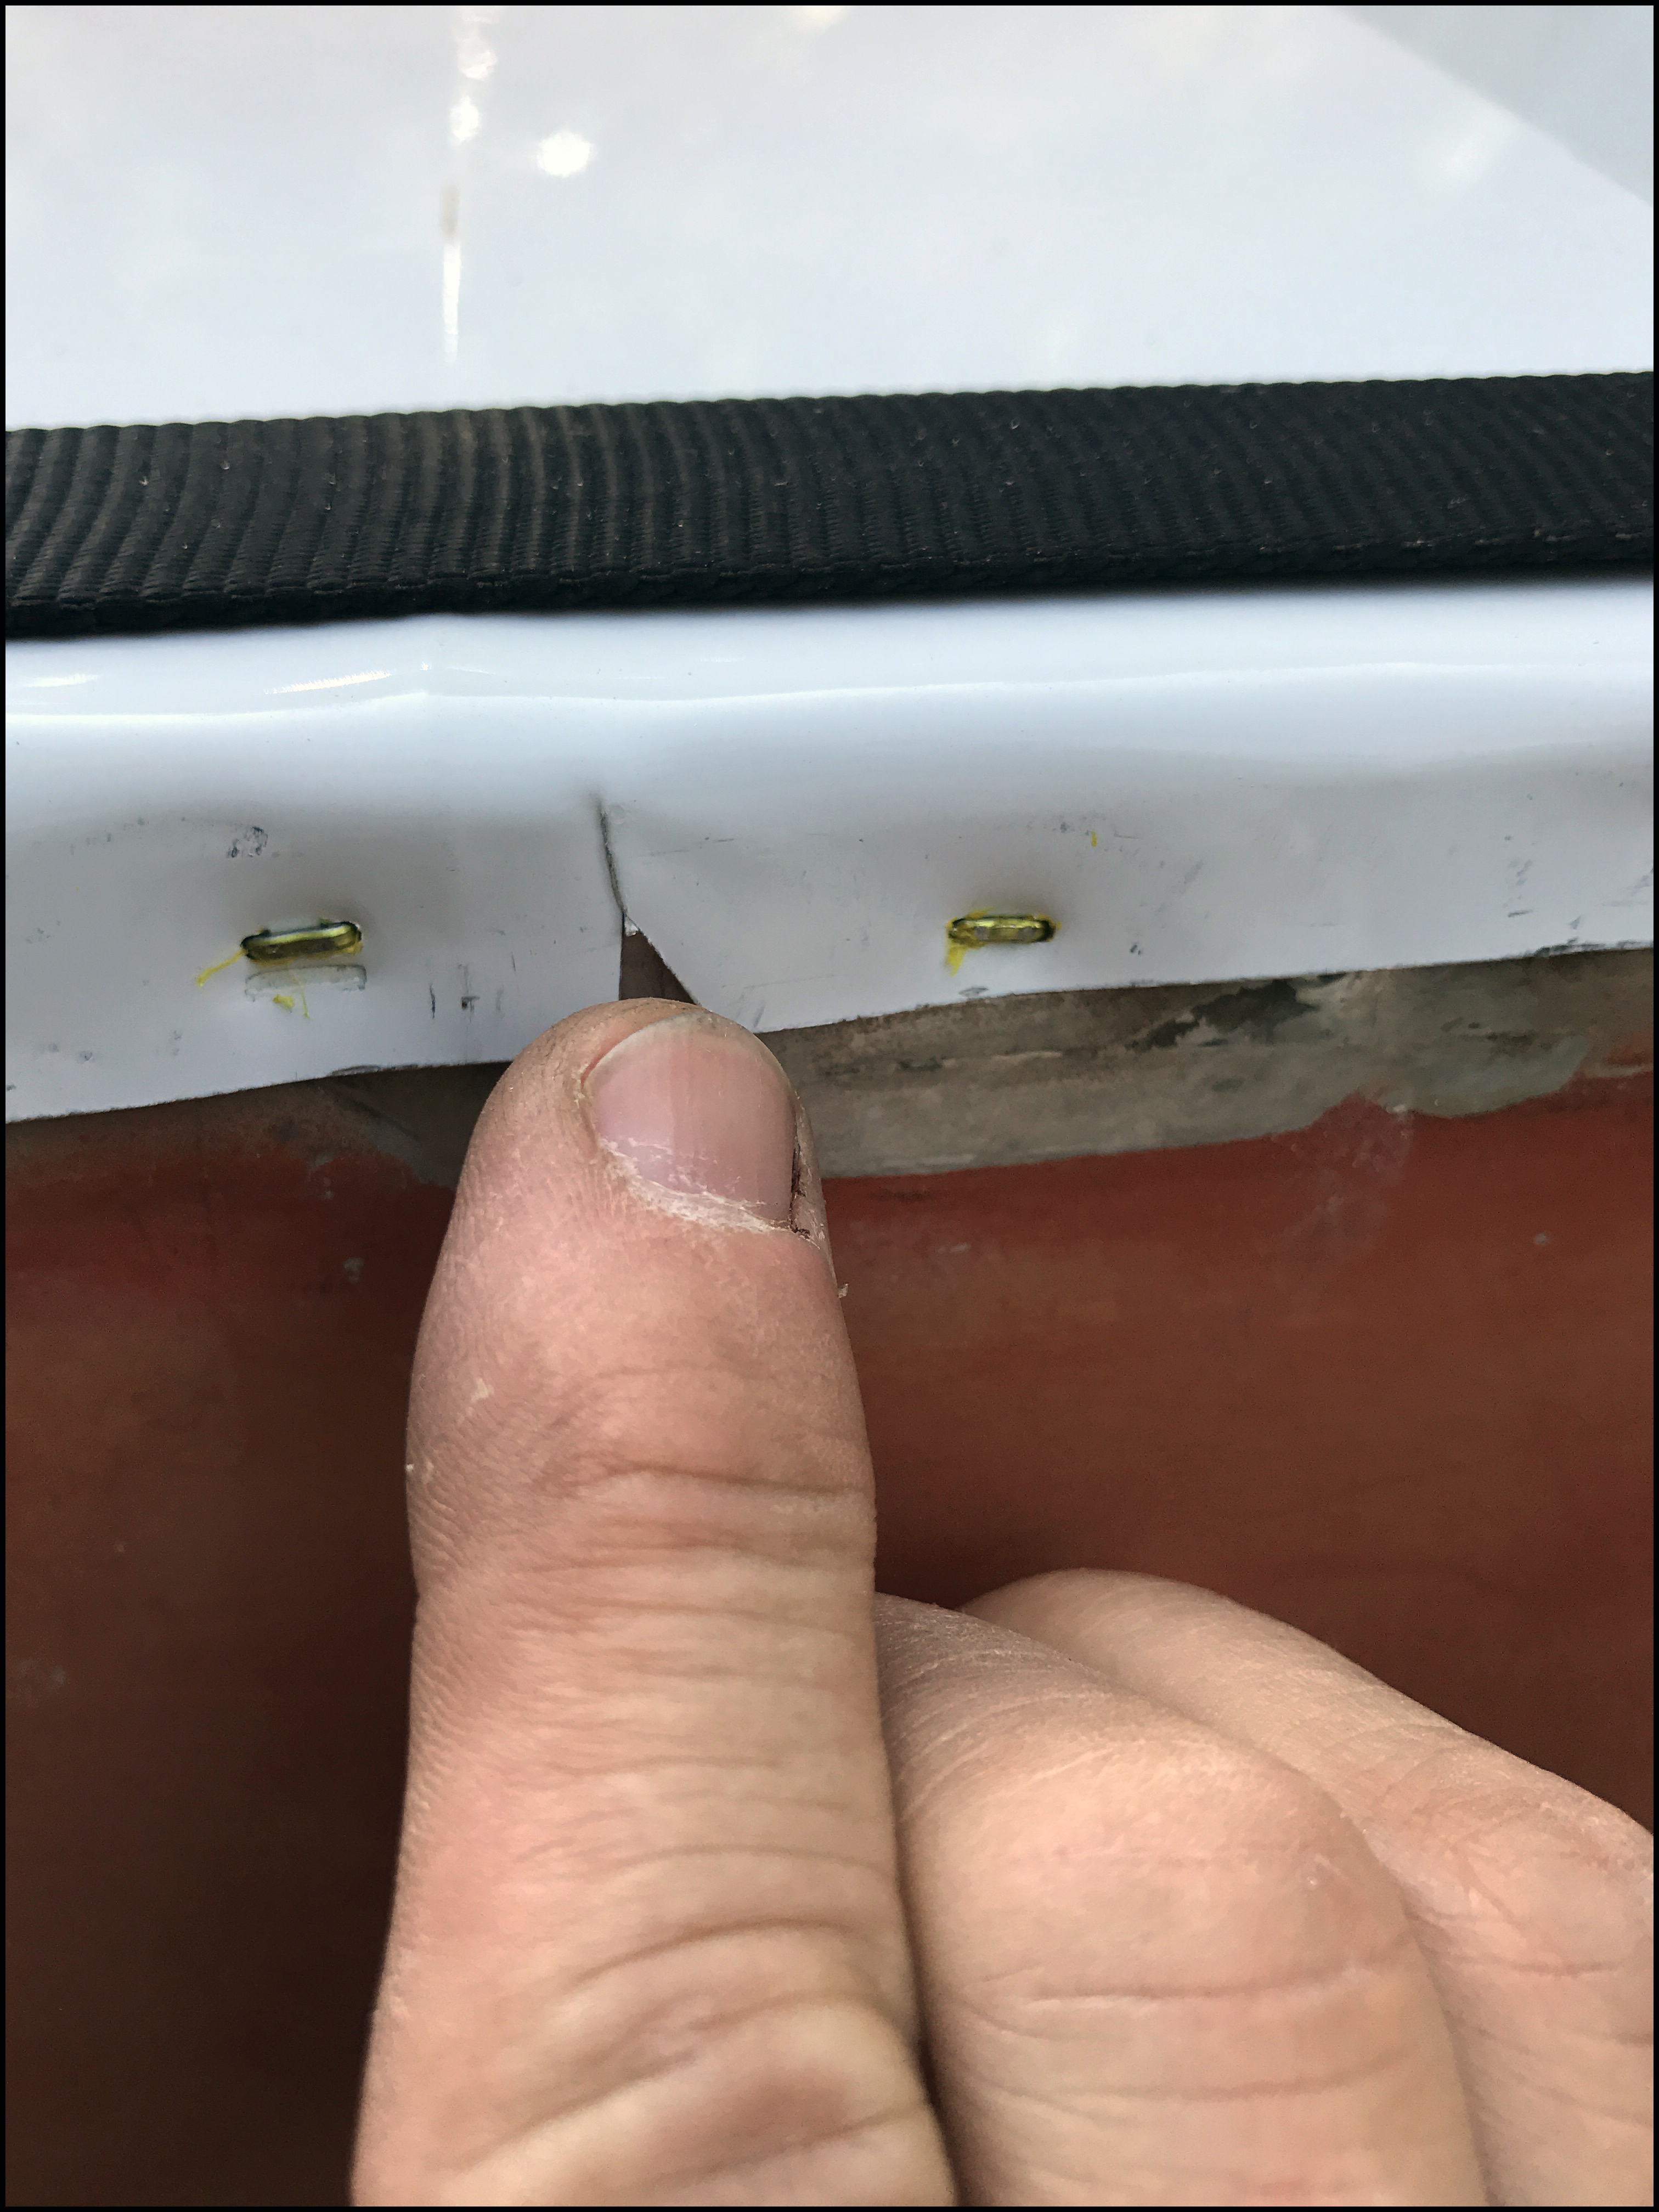
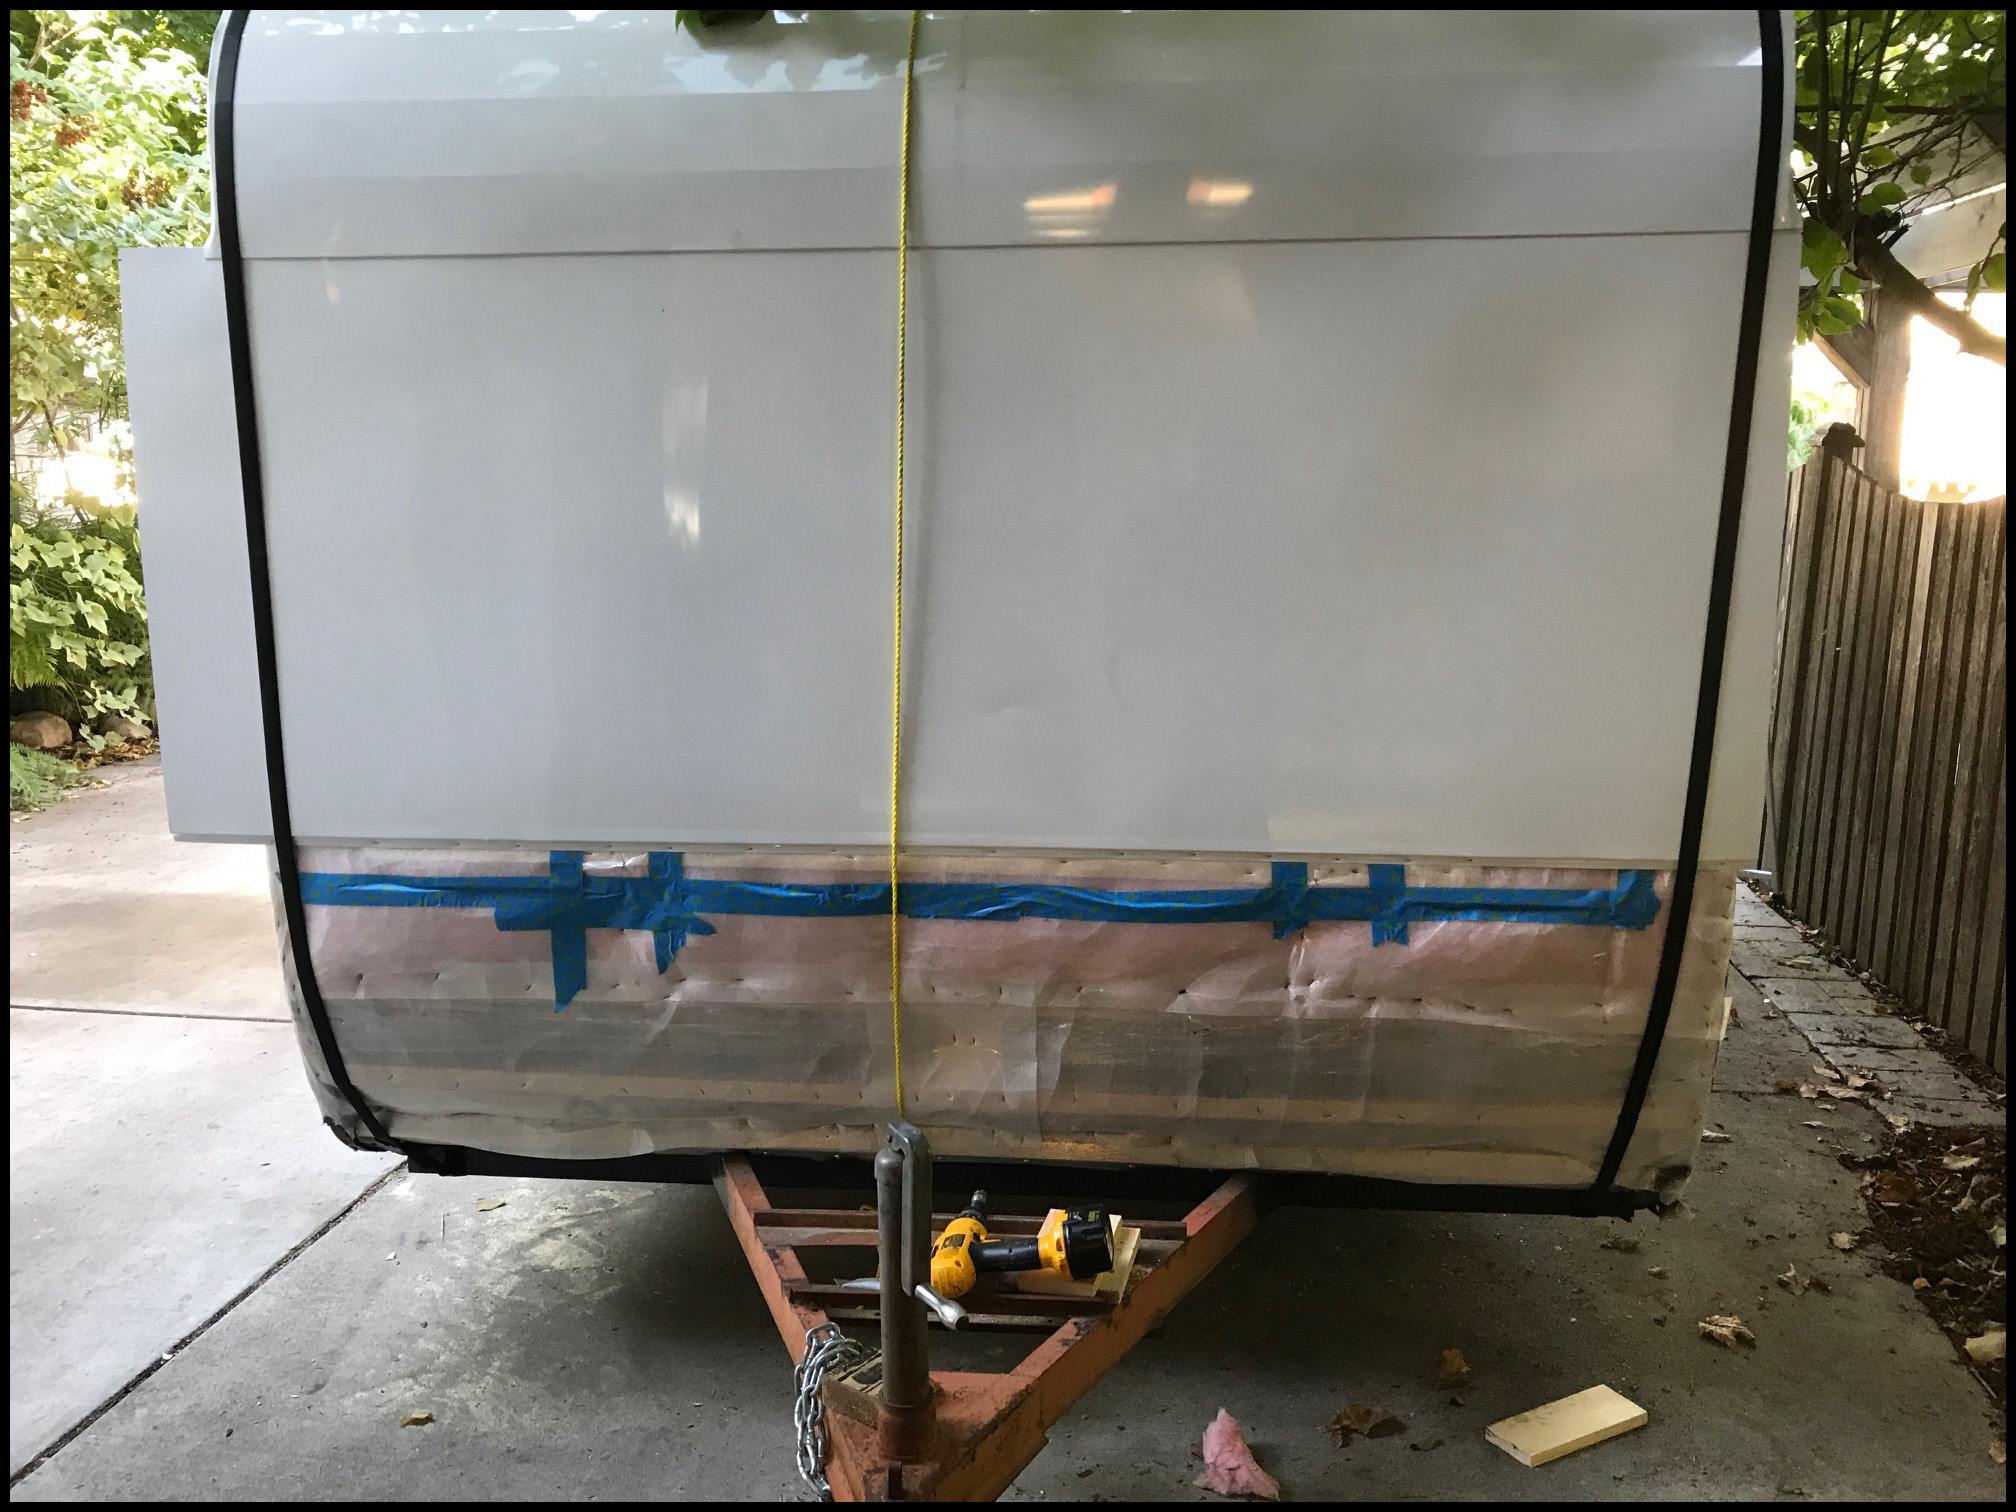
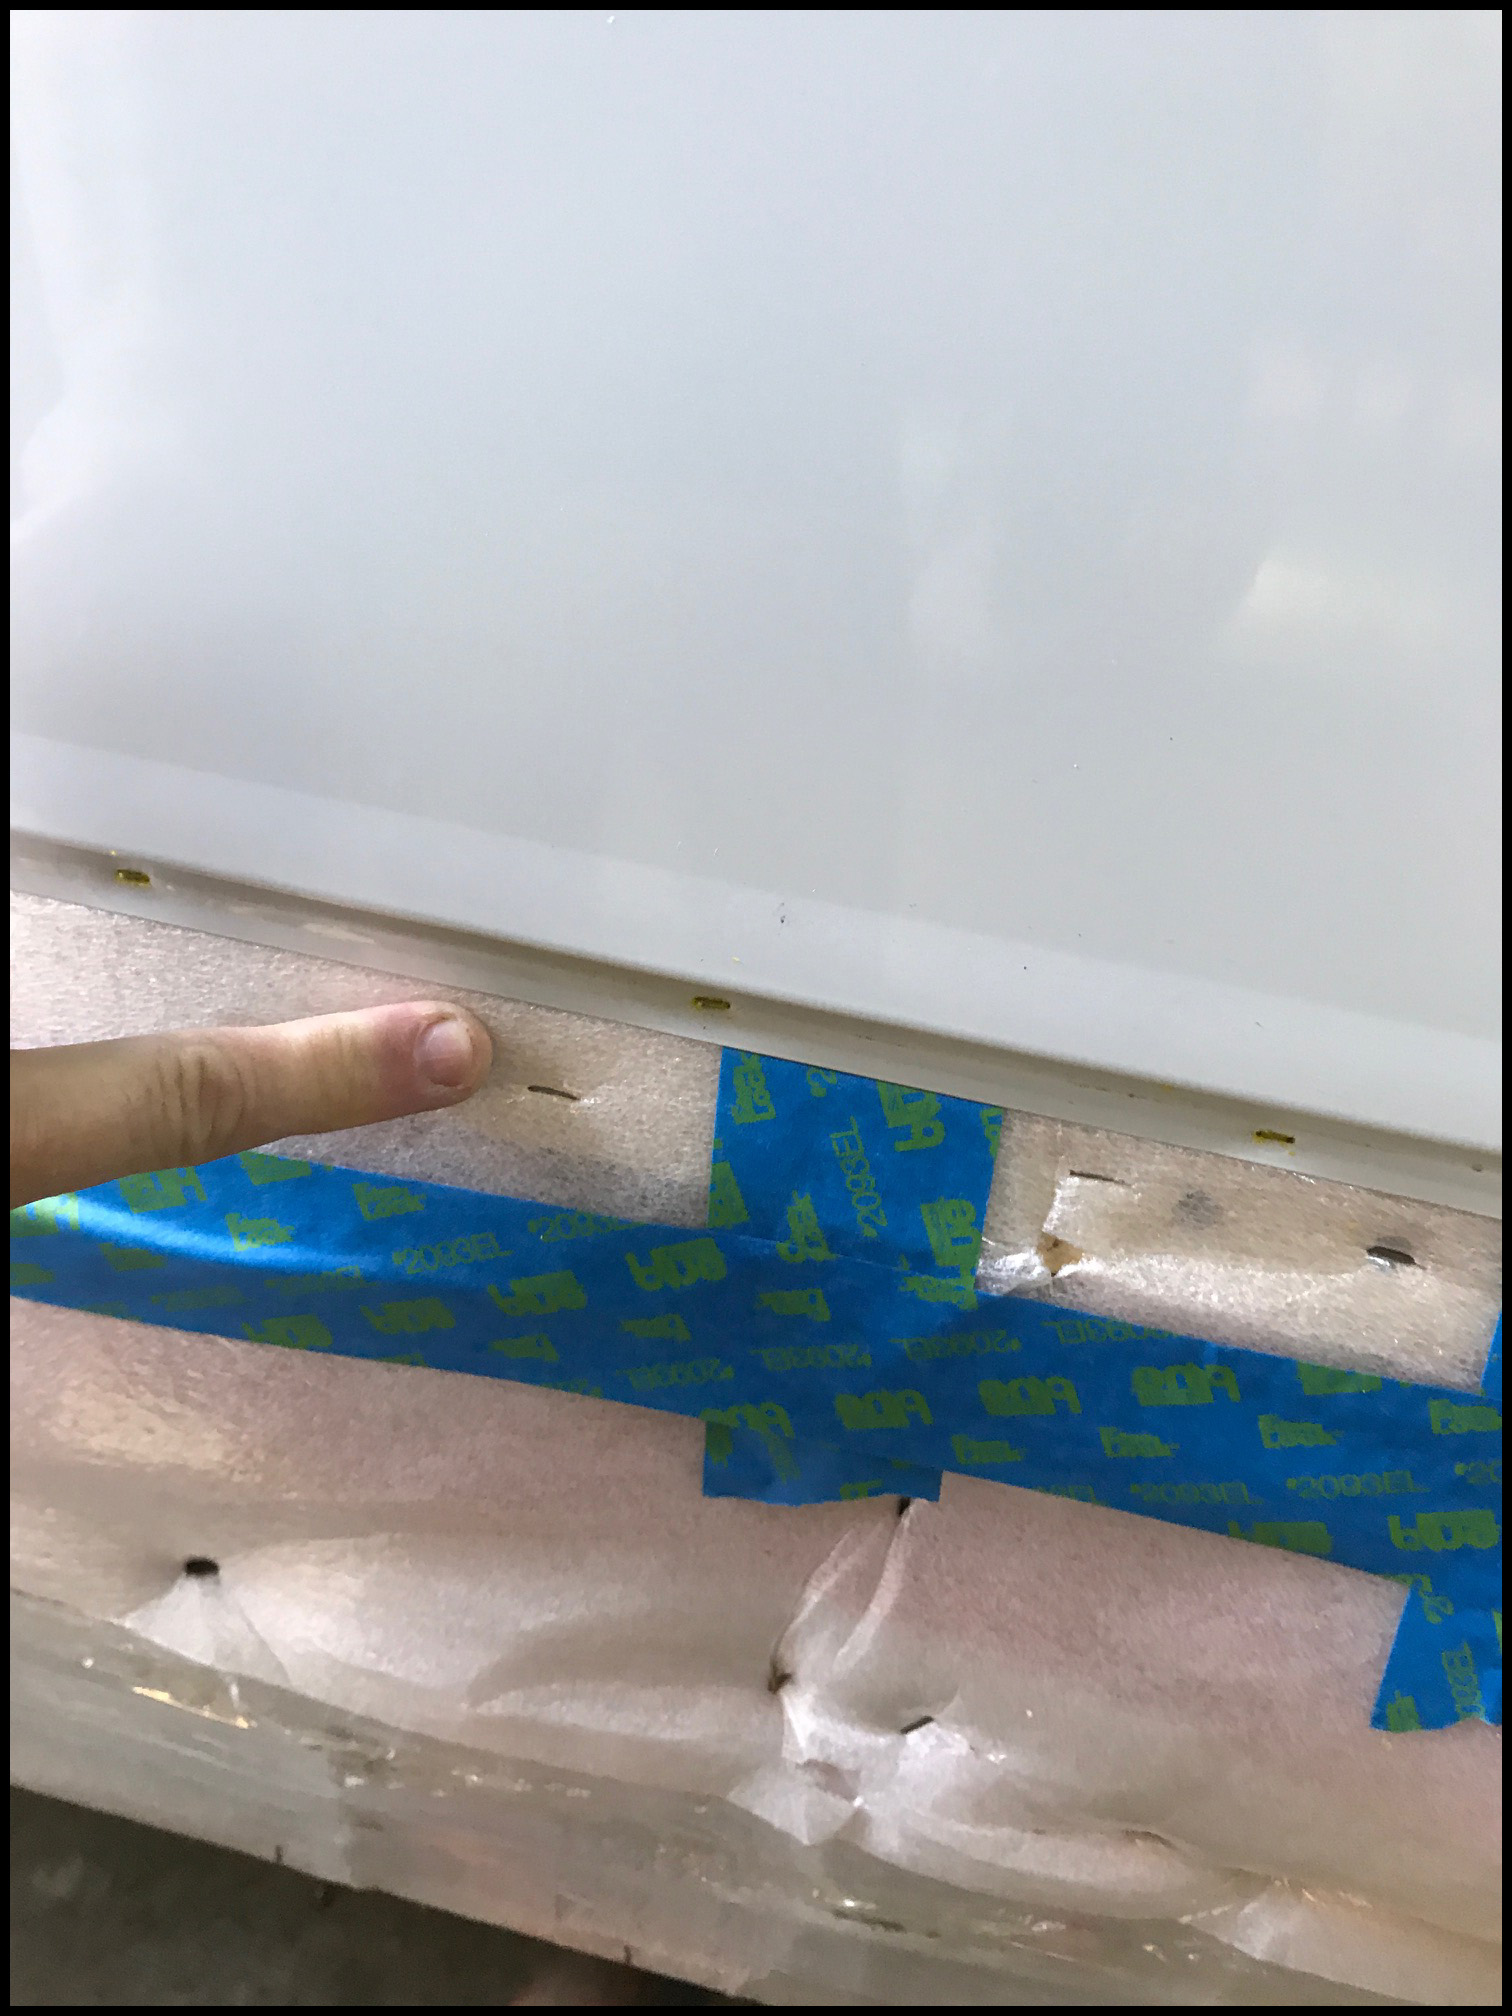
At first look the trailer looked in great condition, signs of water damage, but overall good bones. Then we started digging… — A ton of wood rot and water damage inside. At last some good news. |
 |
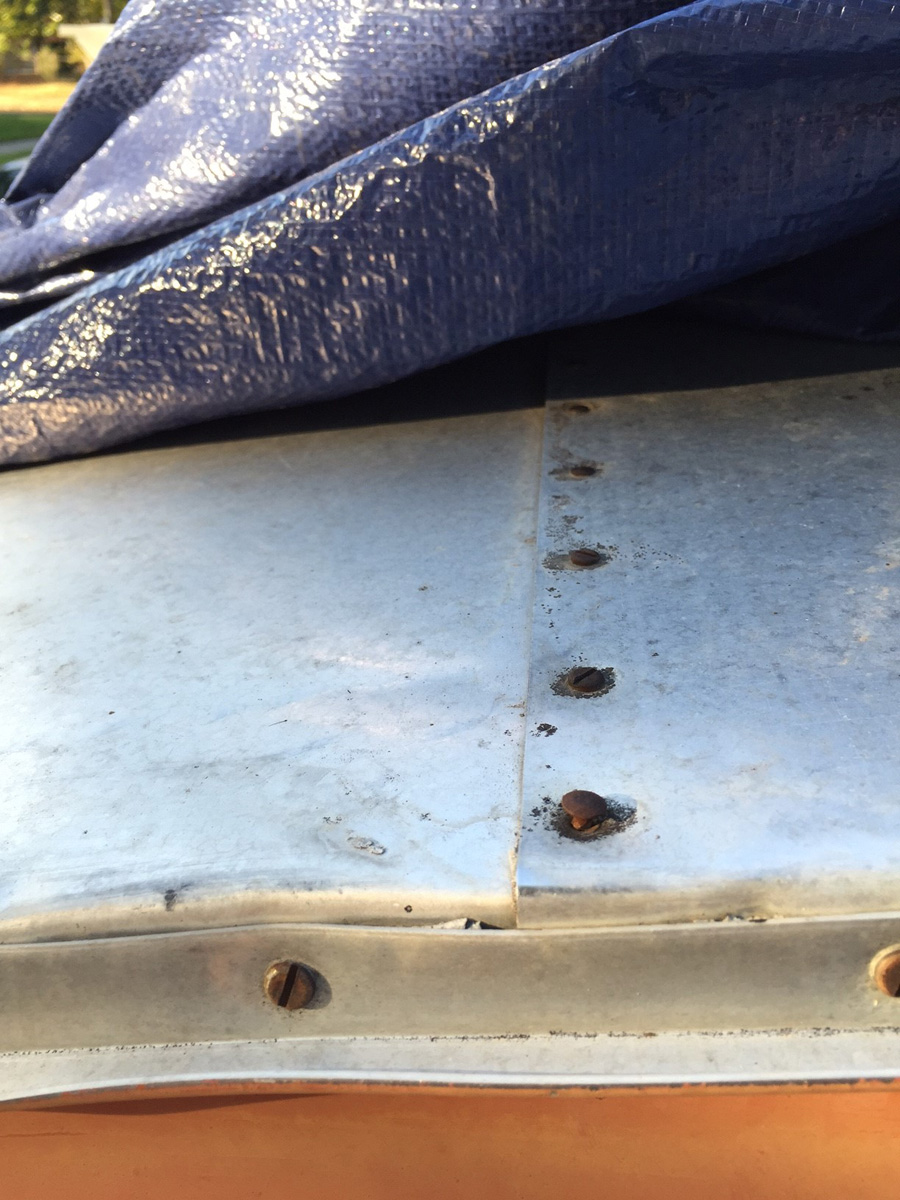
Also, I think you may have noticed... something doesn't look just right about the trailer. It took me awhile to figure it out, in fact it was Larry that explained it to me, it is reverse brake on the siding. The metal has outward bends instead of the traditional inward facing indent. Unique.
And it must have been hand done because there is no rhyme or reason to the spacing between lines, one is 6" one is 4", then 7" and 3"... Ha!
 |
 |
 |
 |
 |
 |
 |
 |
 |
 |
 |
 |
 |
 |
 |
 |
 |
 |
 |
 |
 |
 |
 |
 |
 |
 |
 |
 |
 |
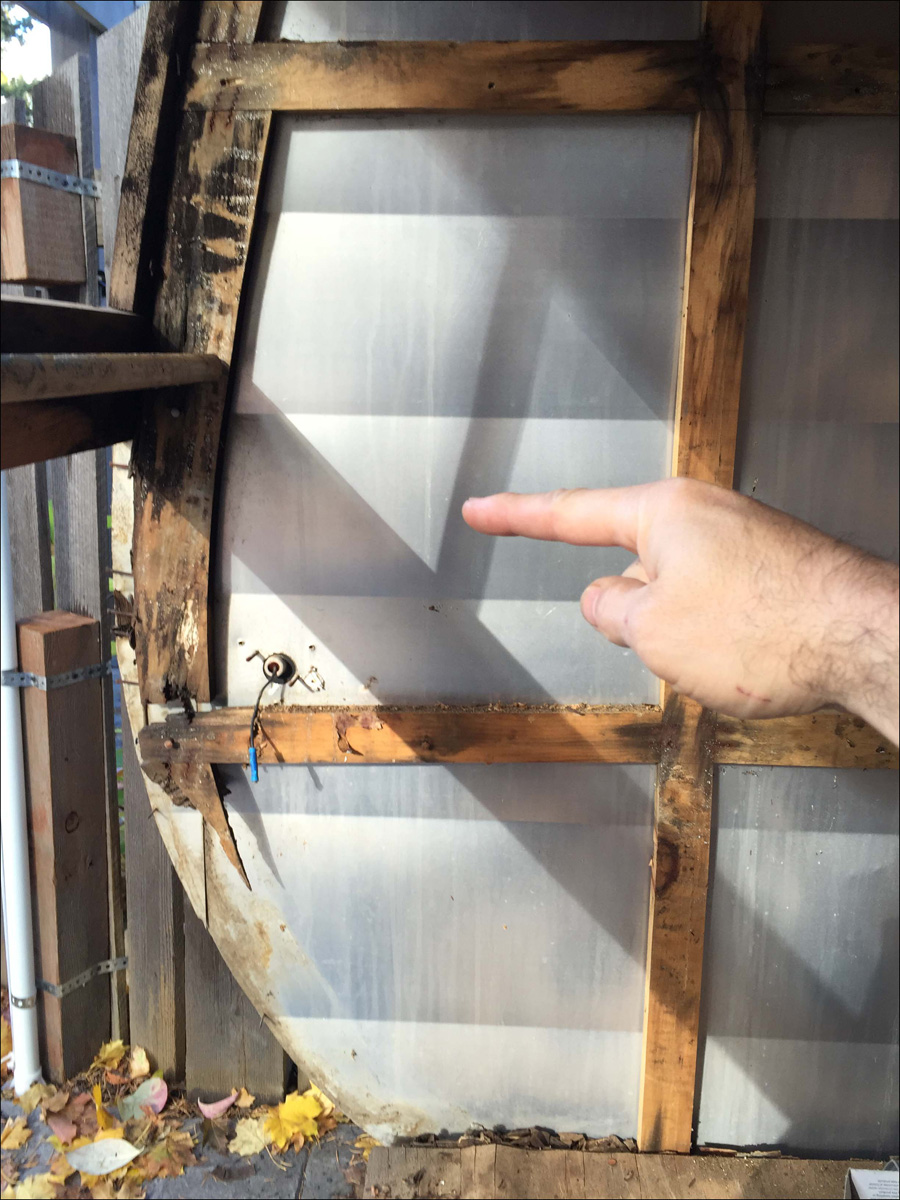
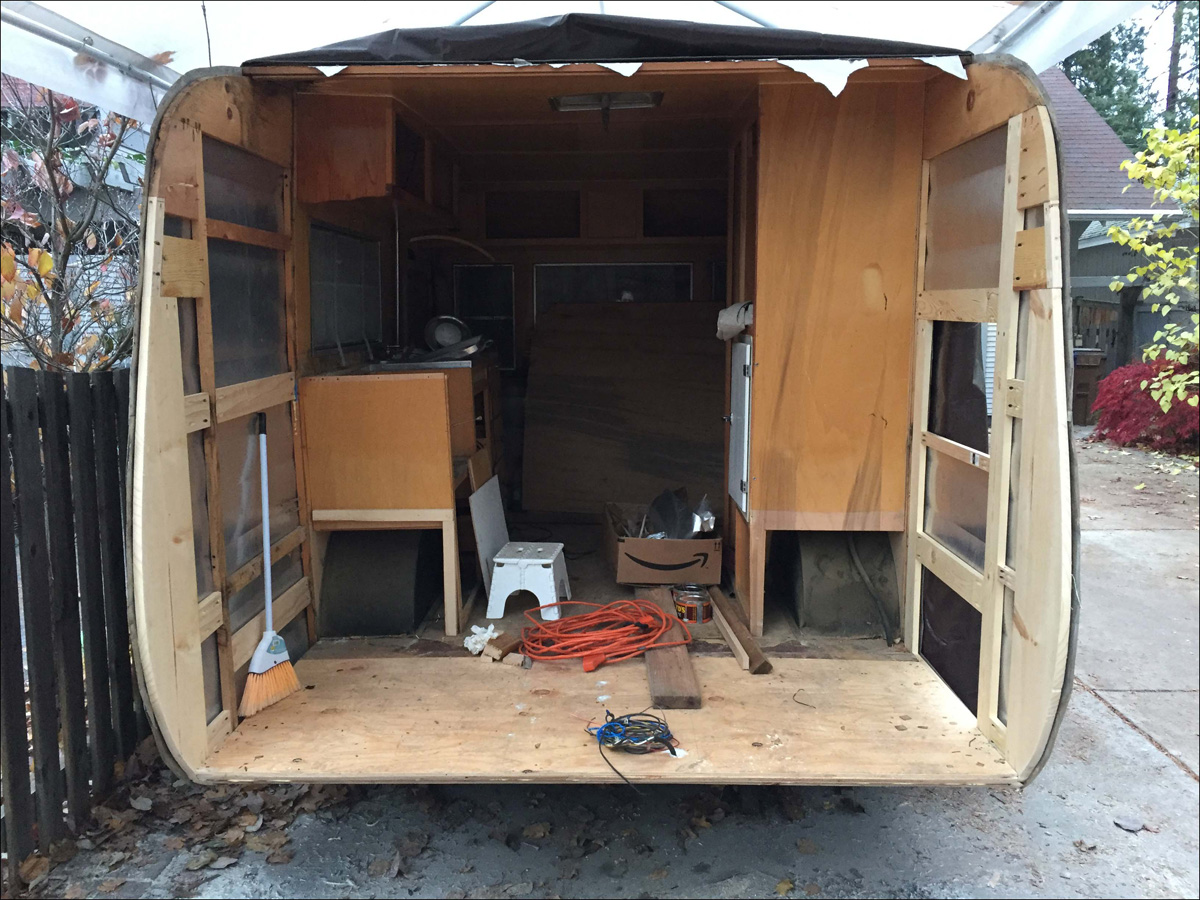
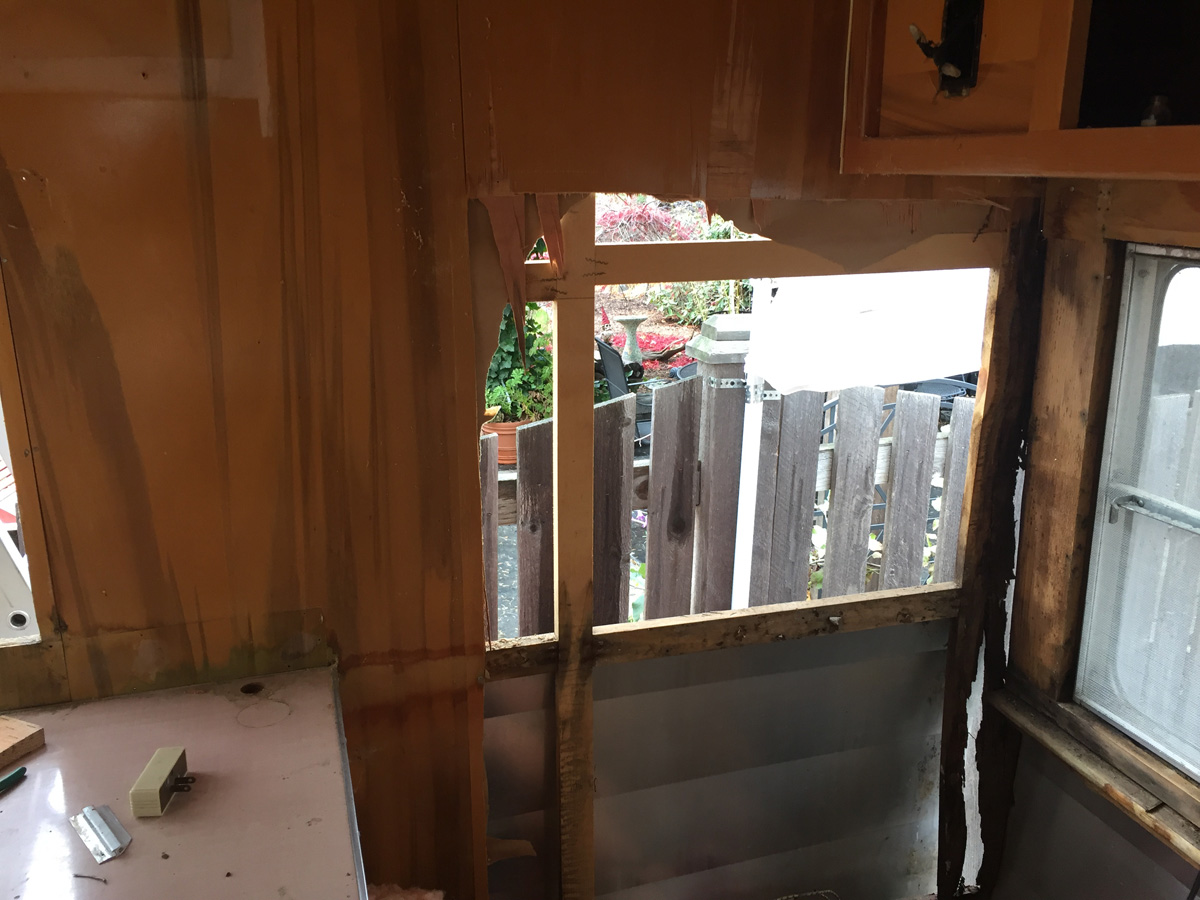
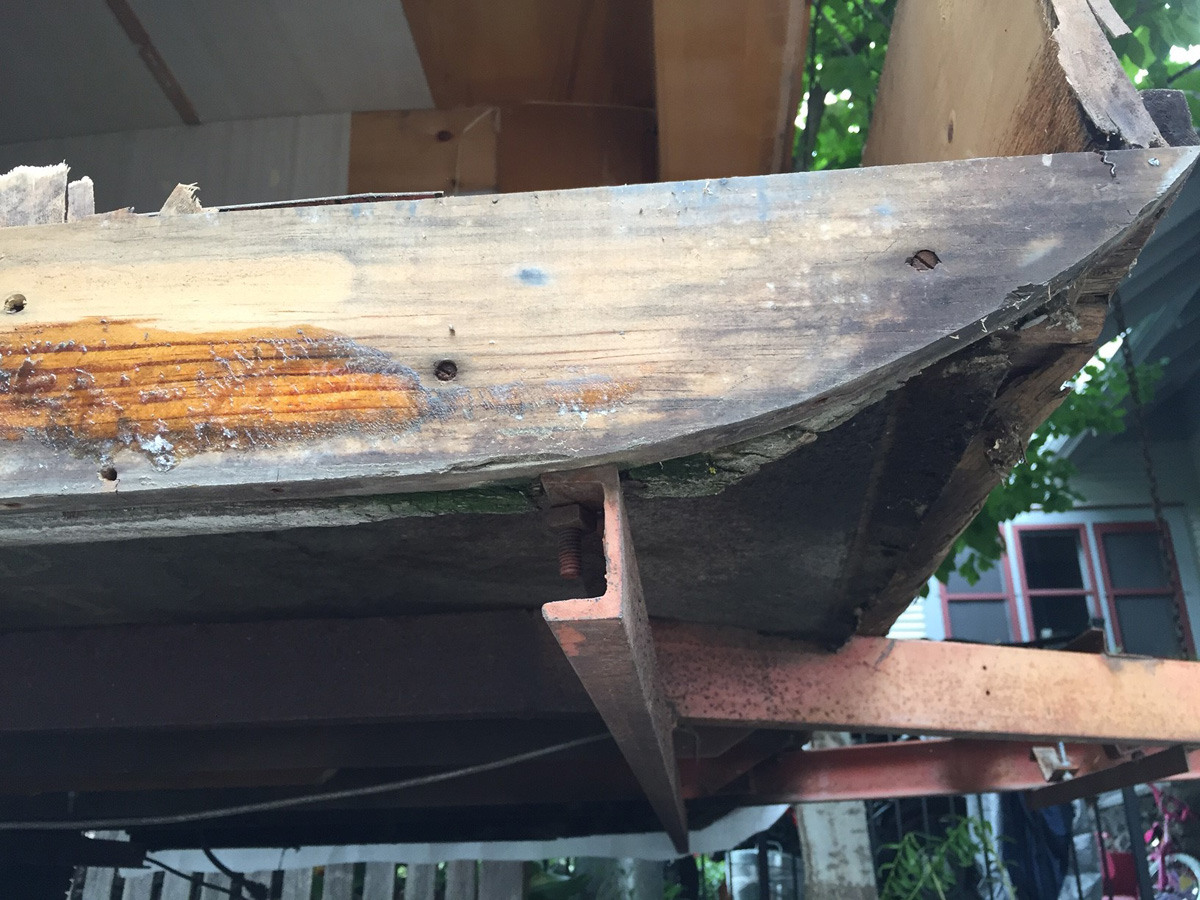
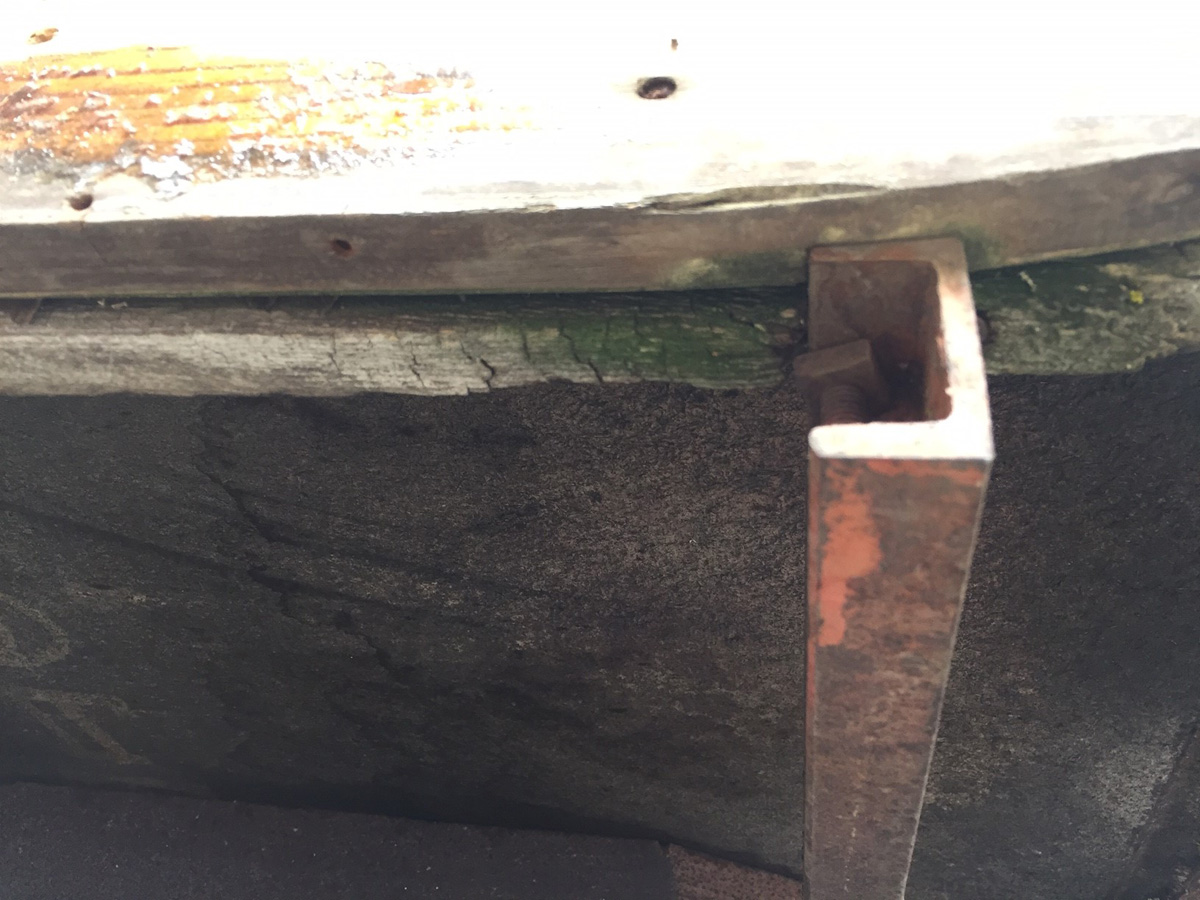
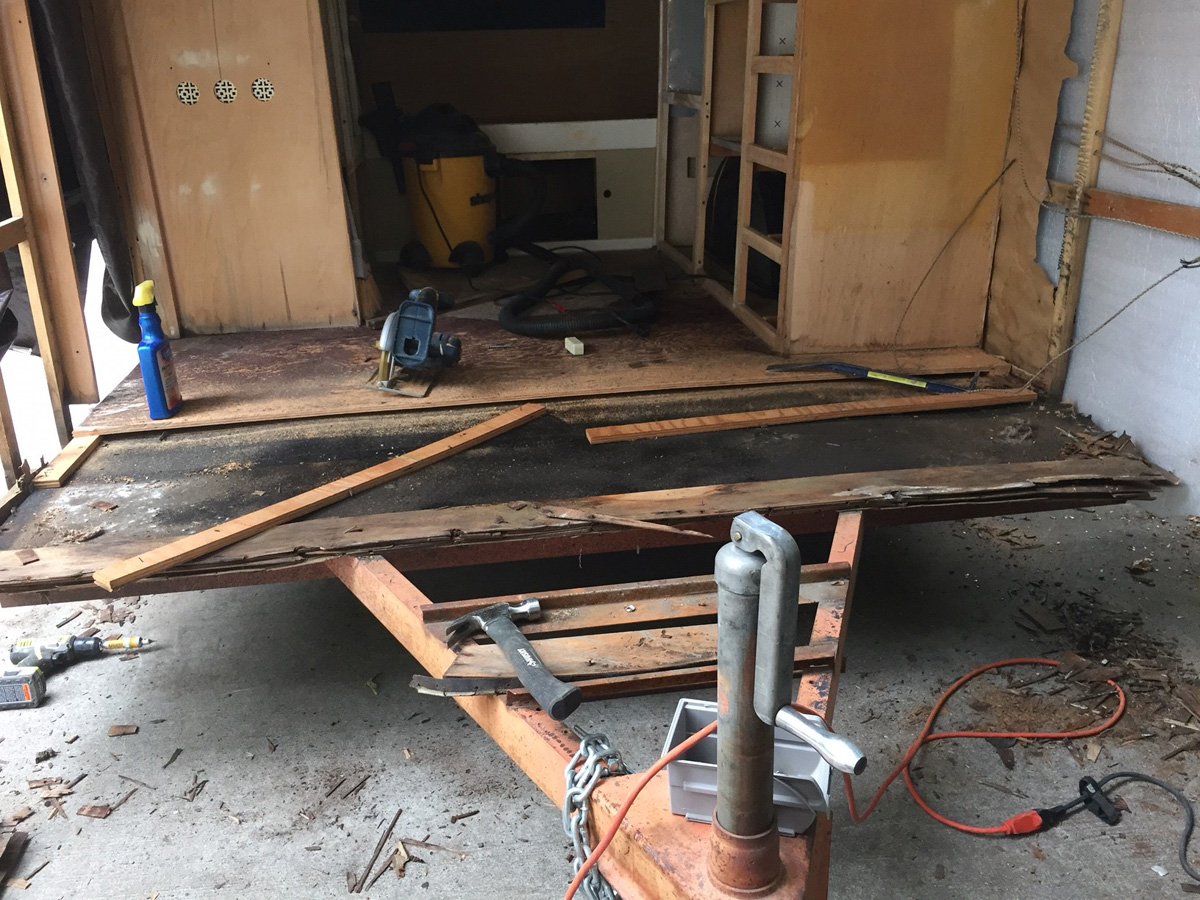
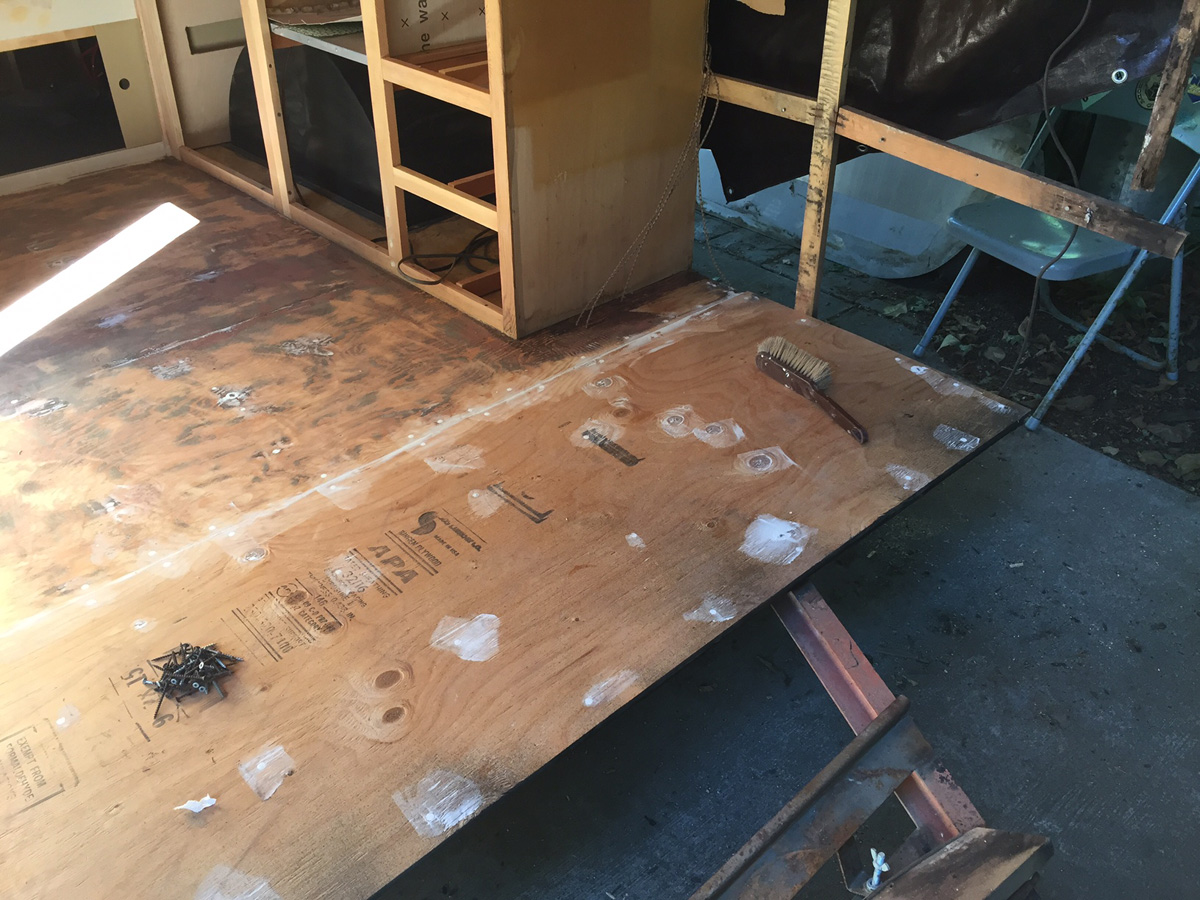
Step 3 - October, assess the damage...
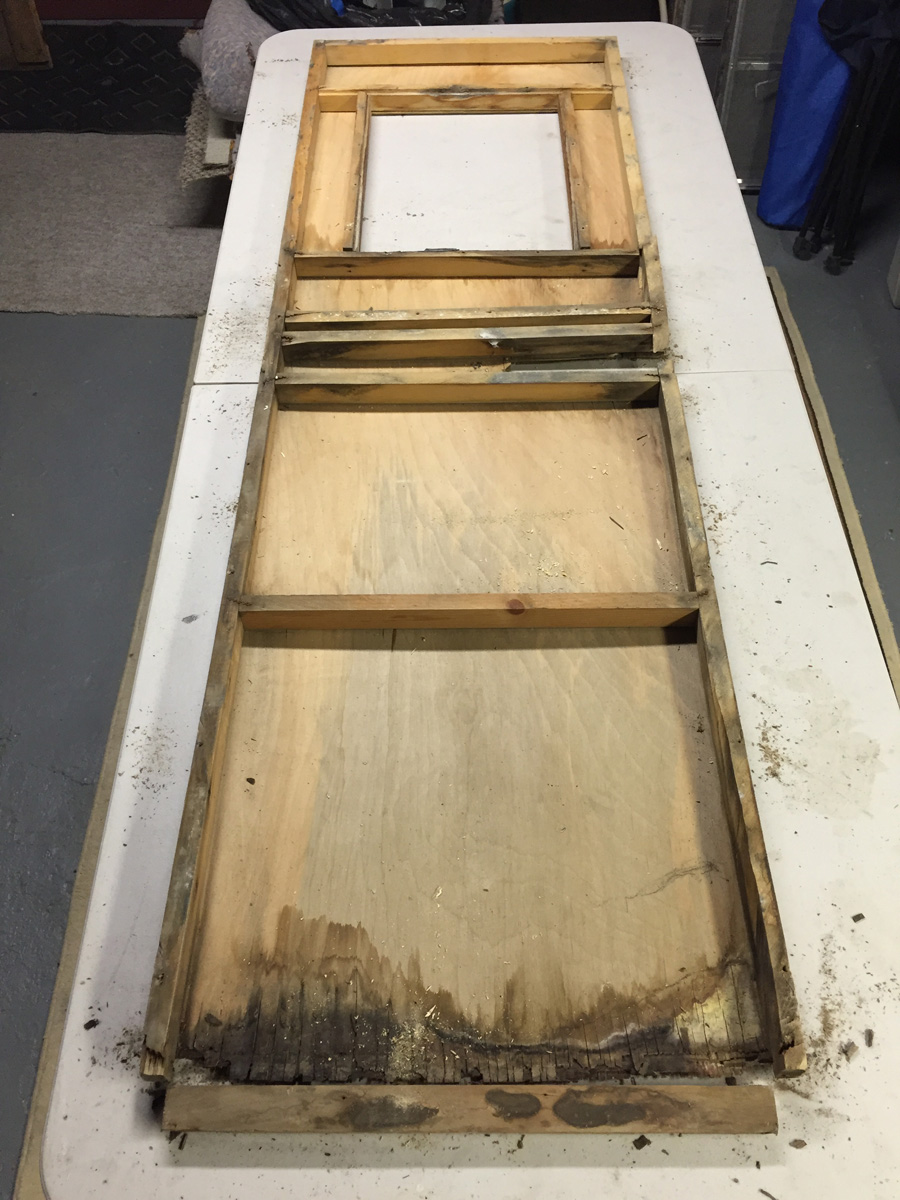
So I was tearing into it and, well..? It just kept going… more and more rot and bad wood. On the list to rebuild/replace — The rear lower section. And the list grows. Hey, at least I don’t have anything else to do… LOL. |
 |
 |
 |
|
 |
 |
 |
 |
 |
 |
 |
 |
 |
 |
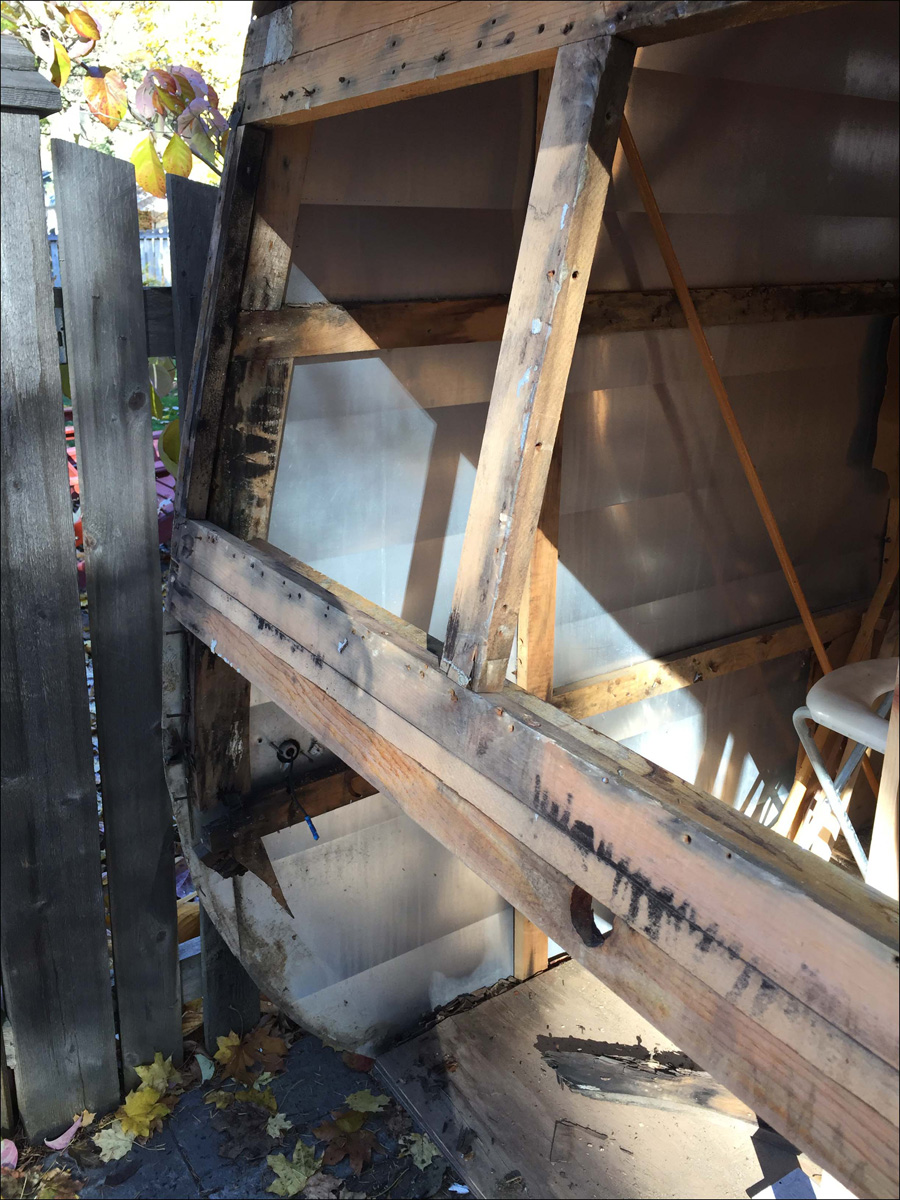
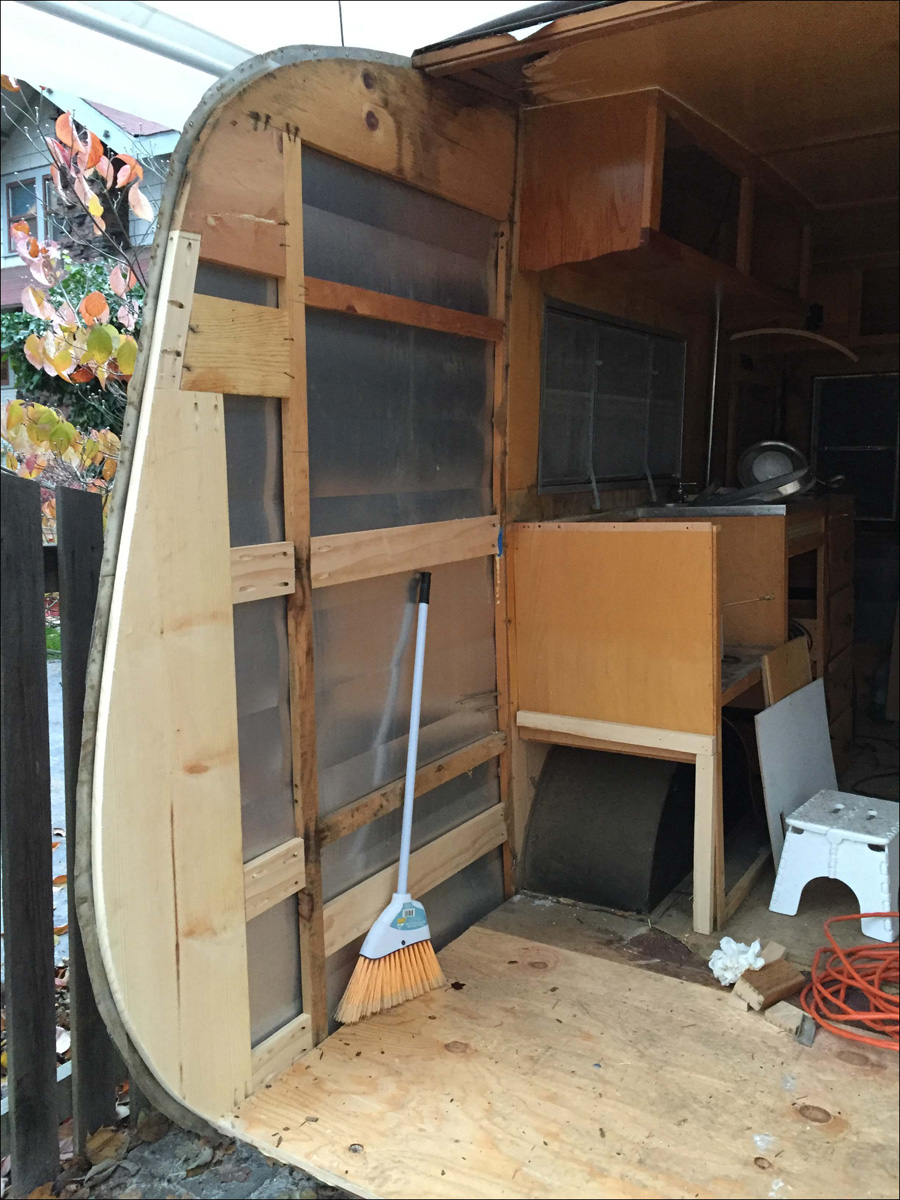
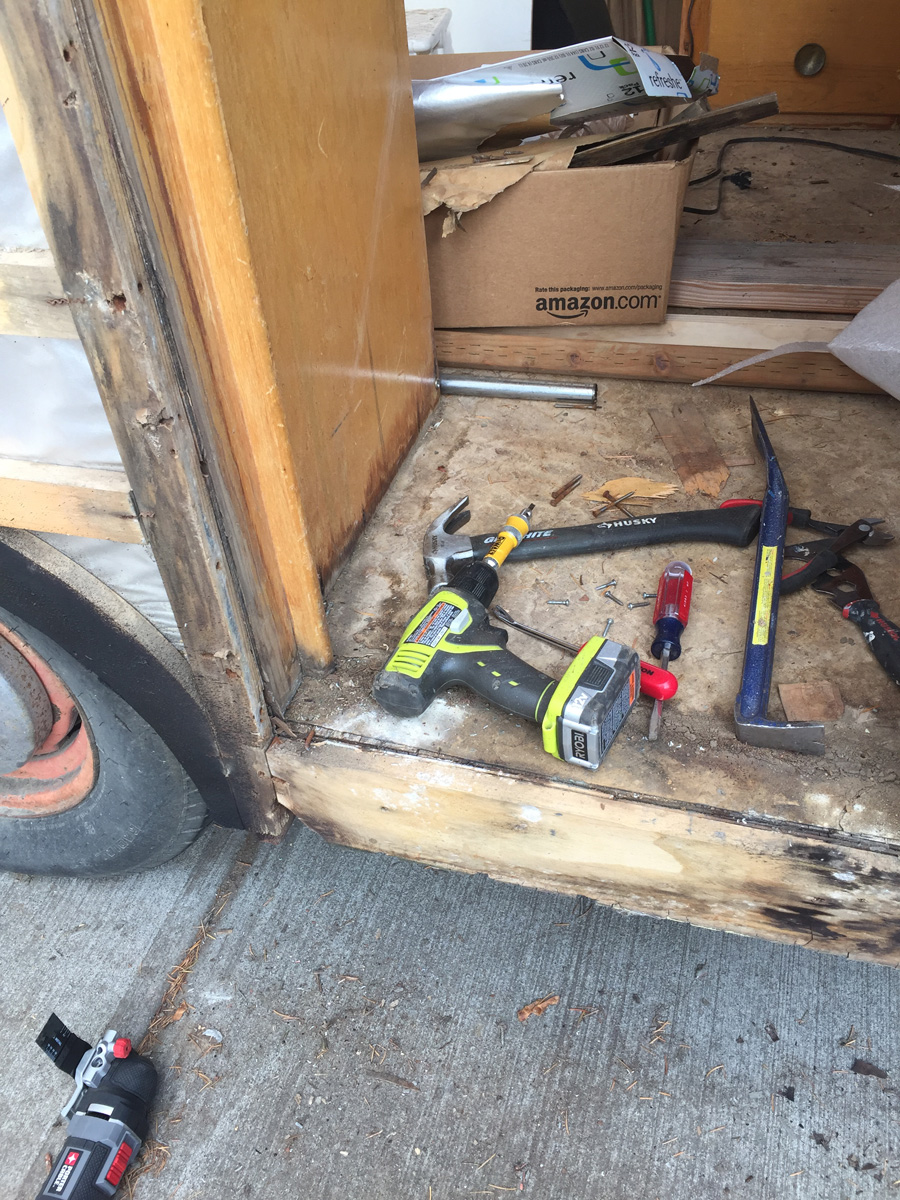
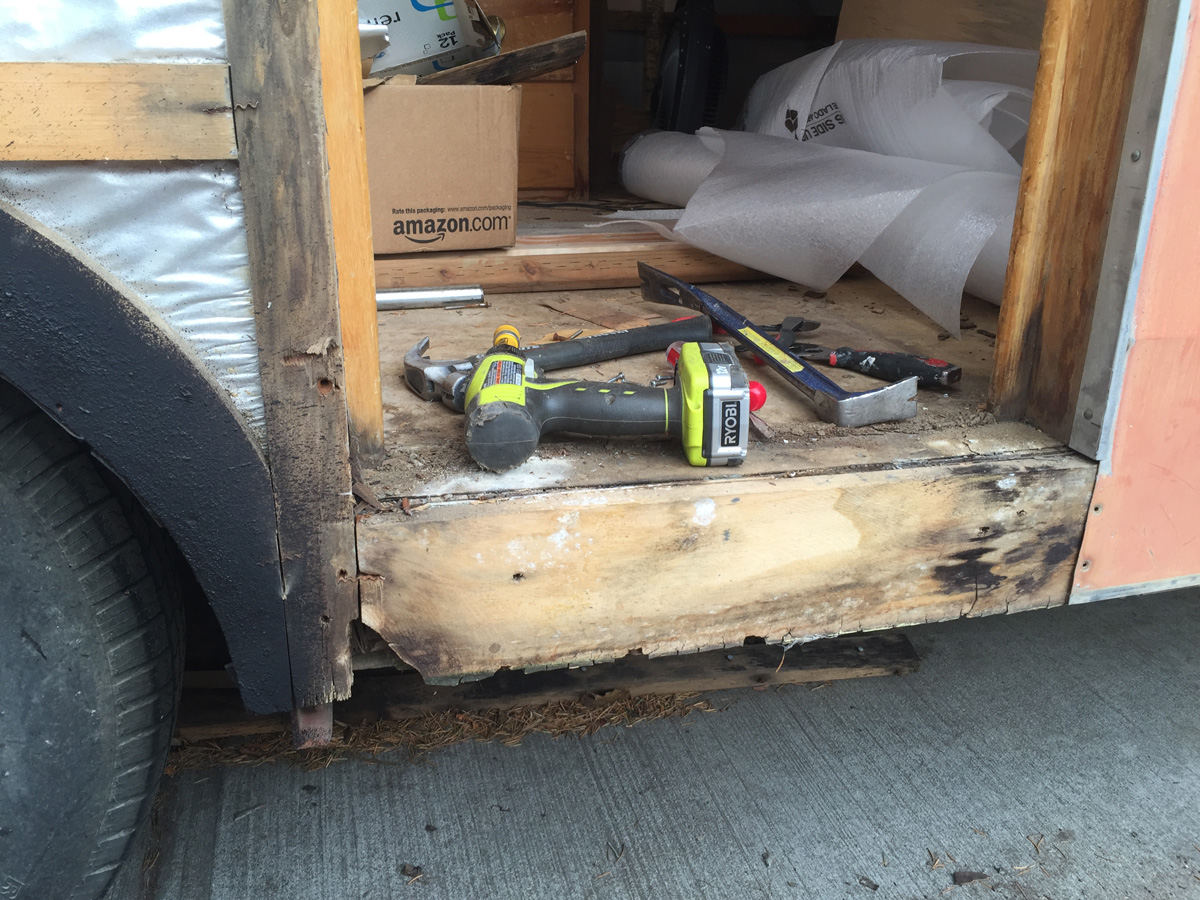
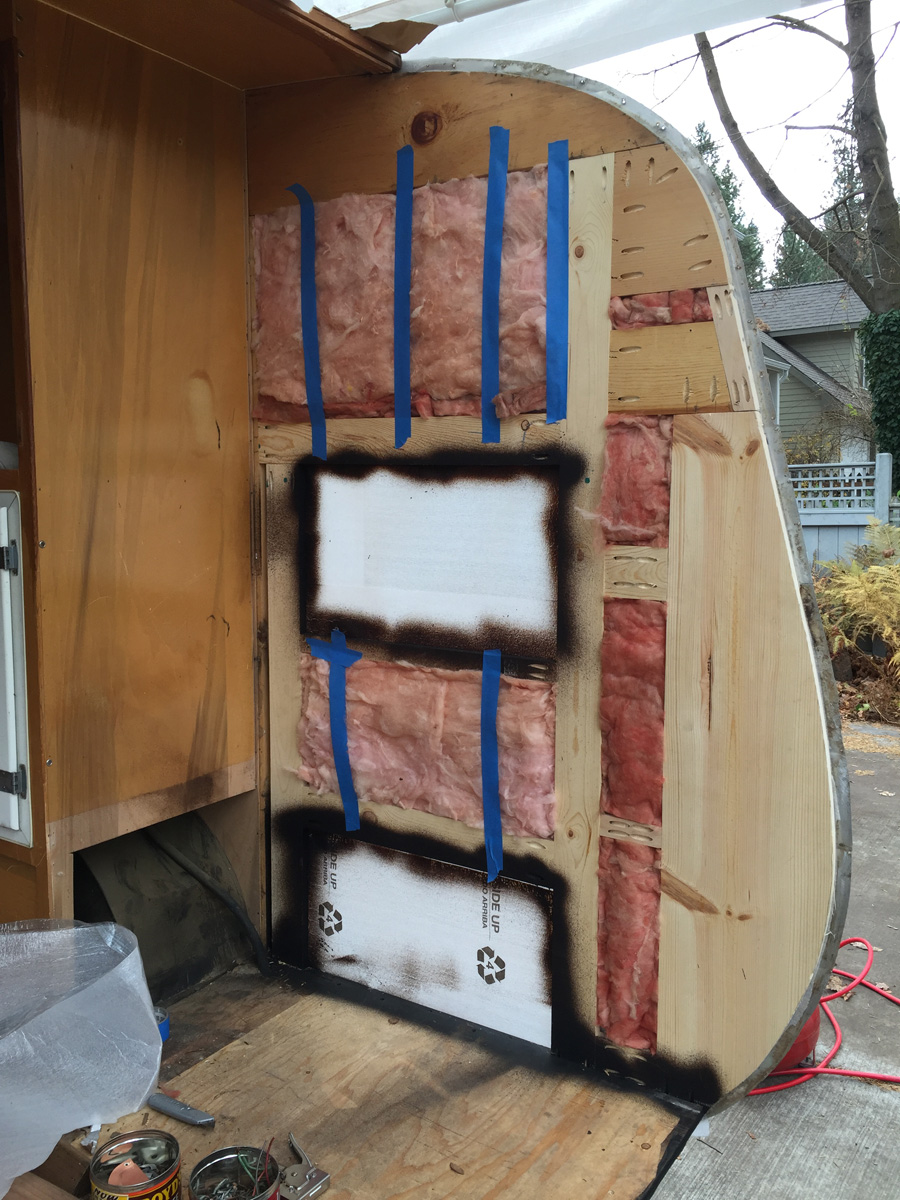
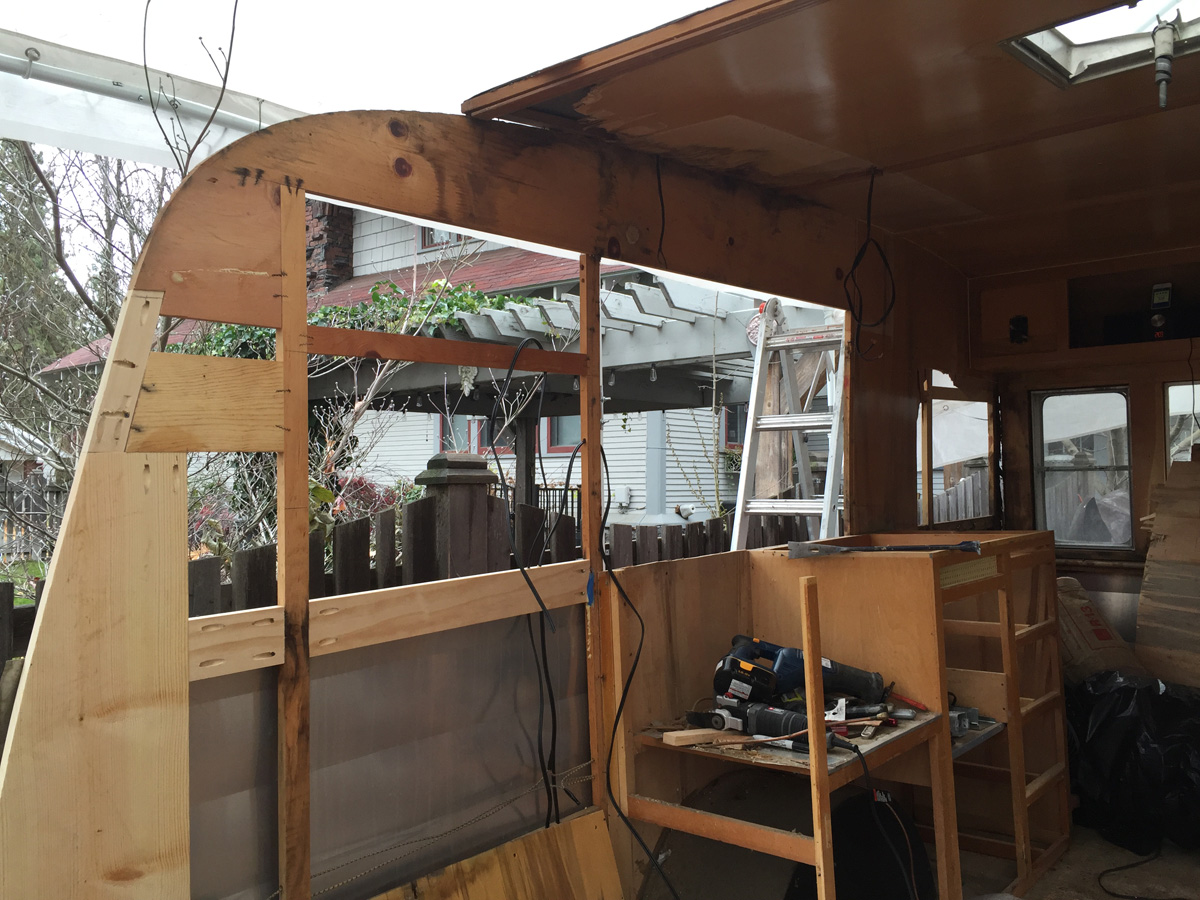
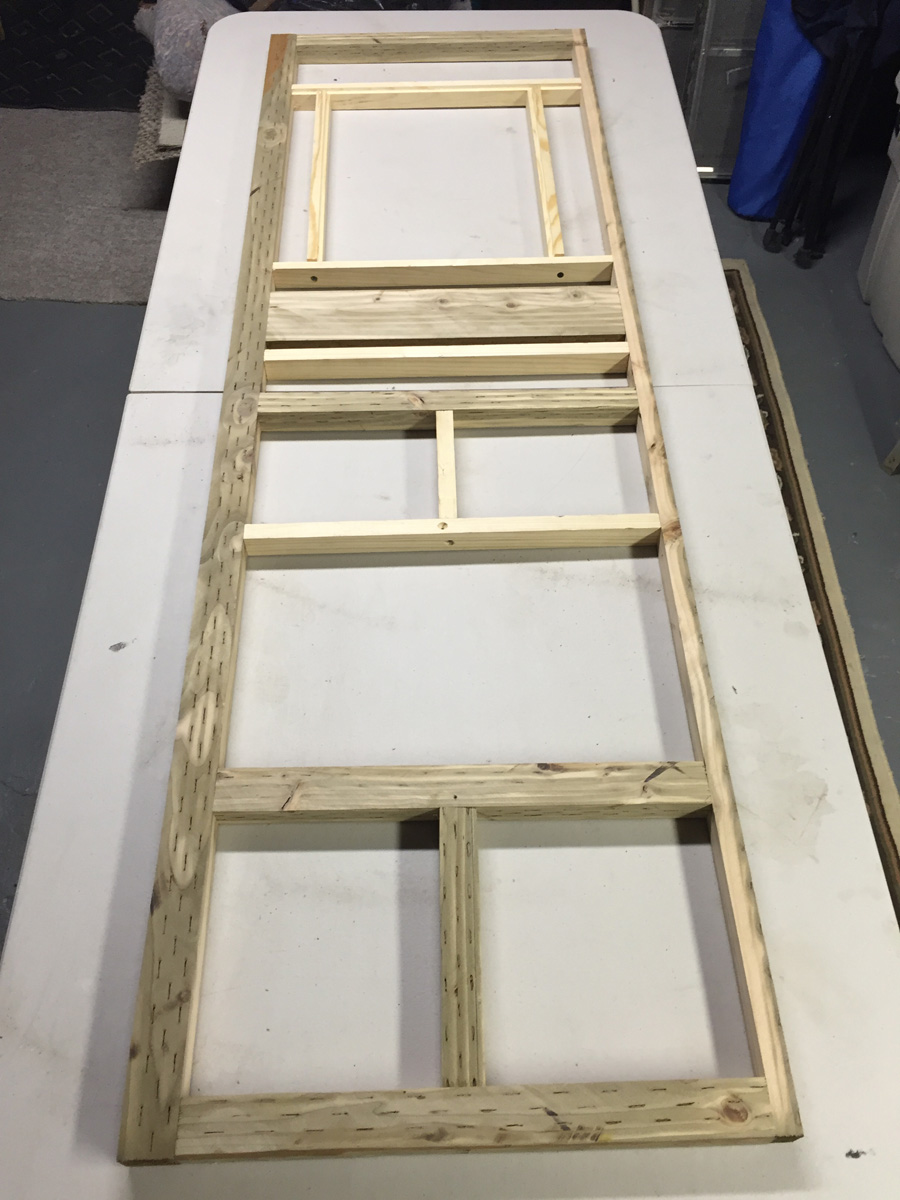
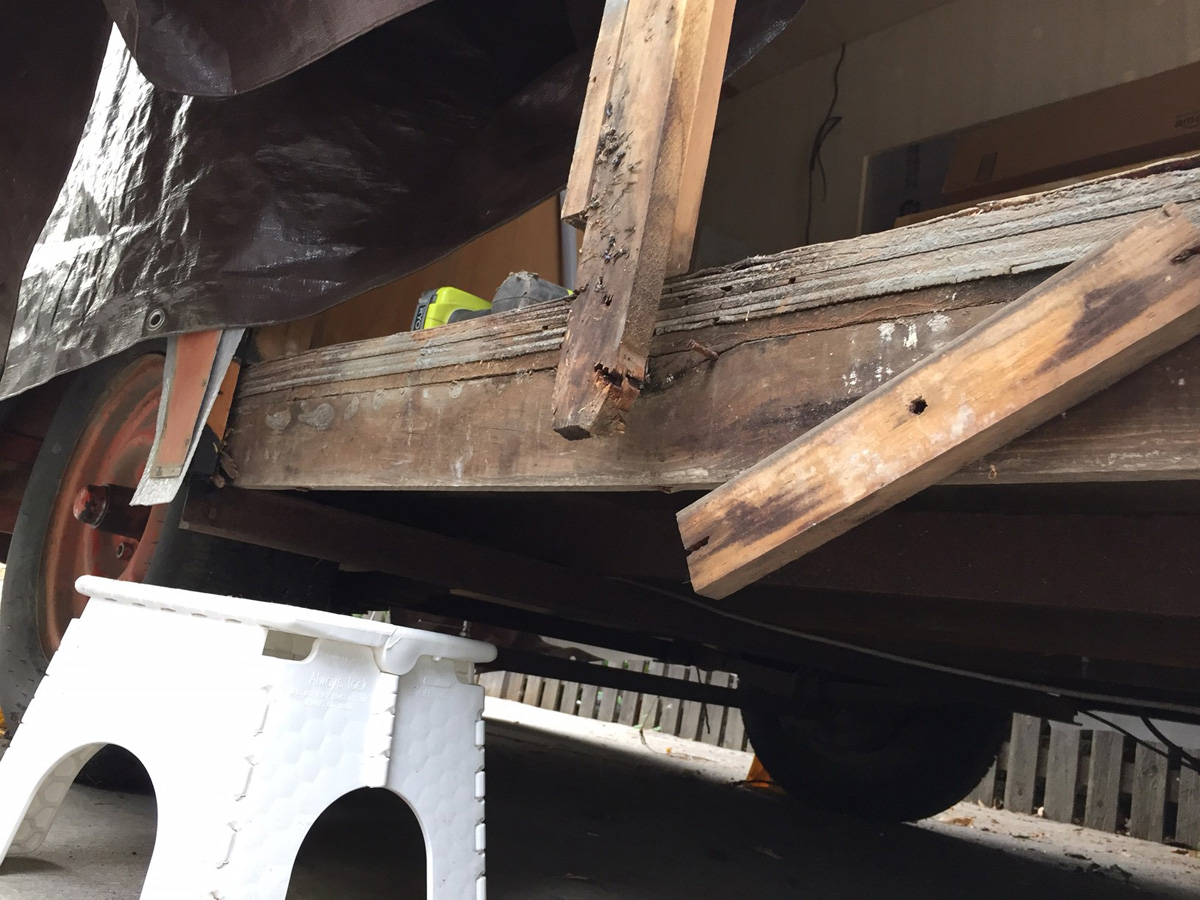
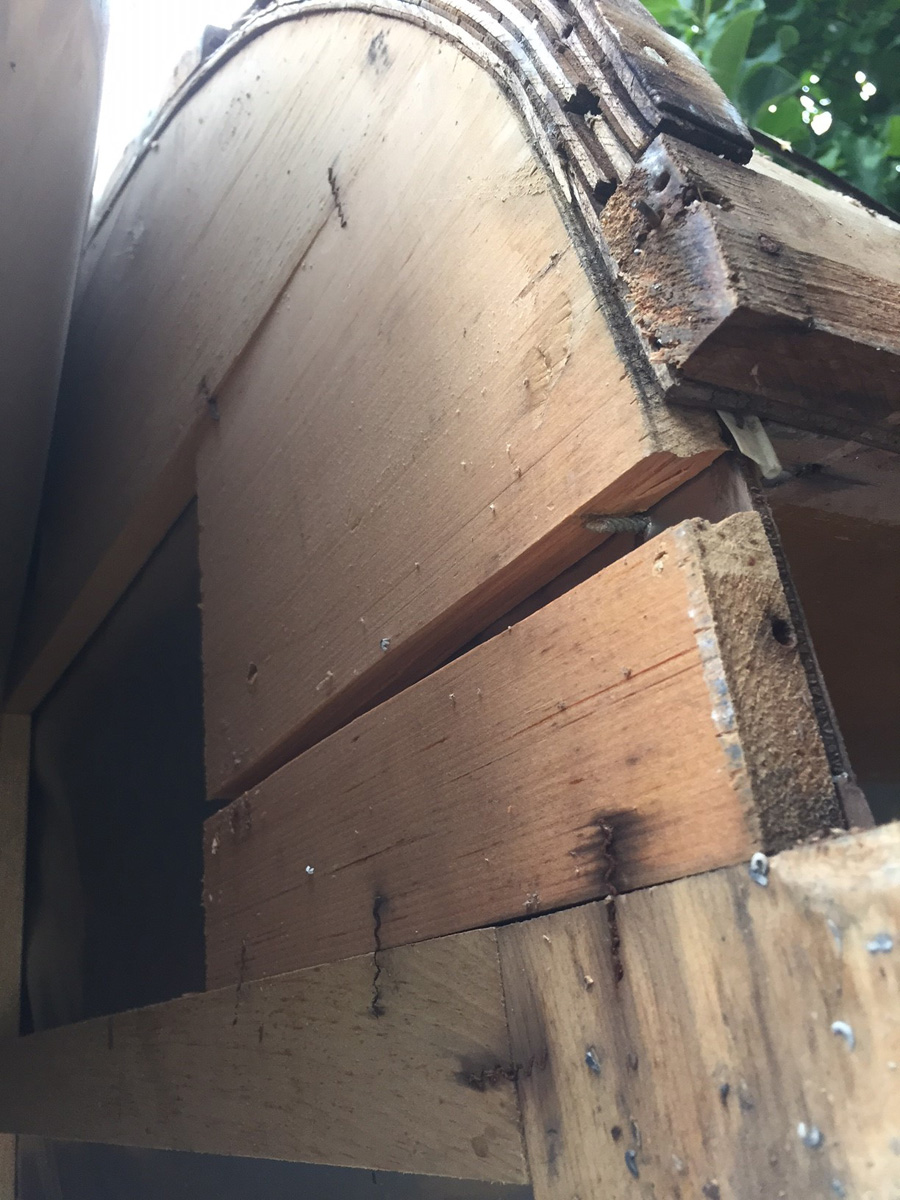
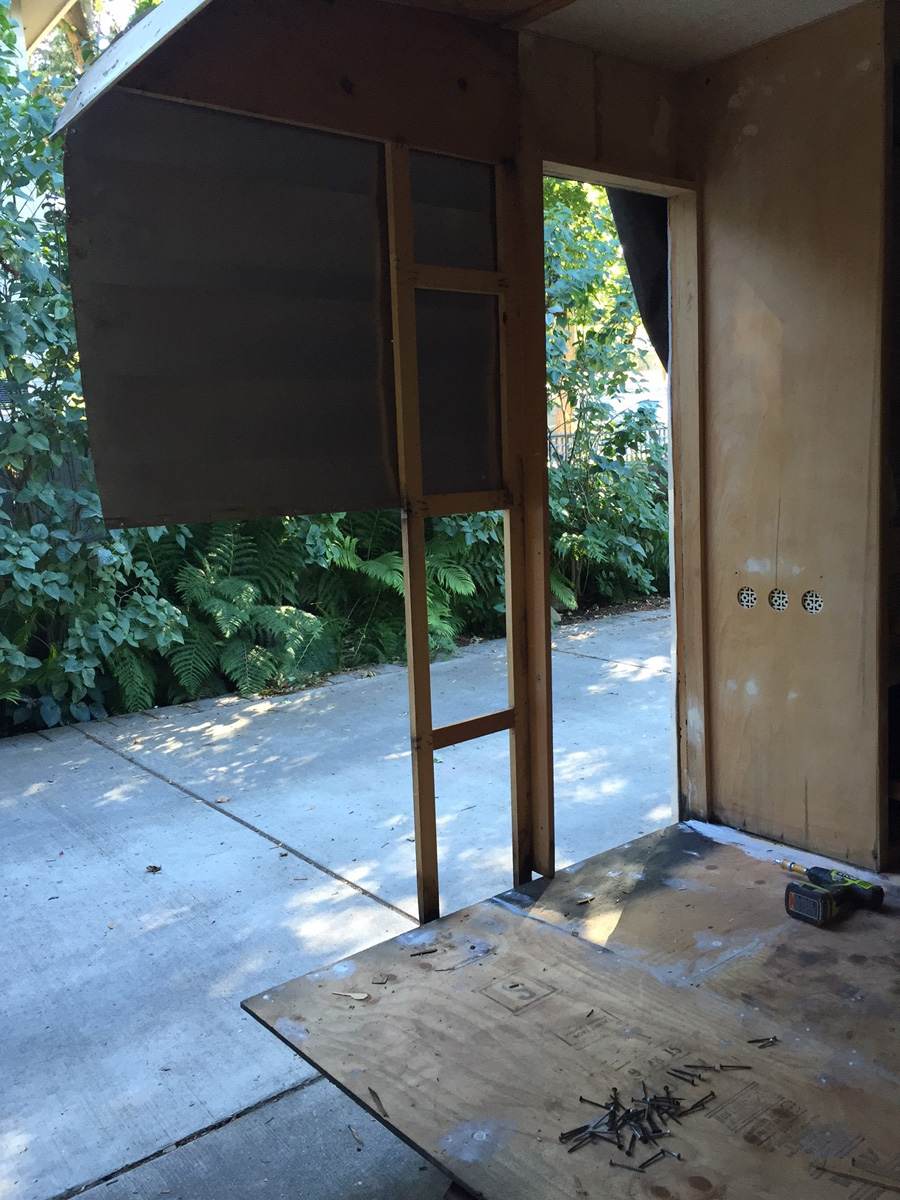
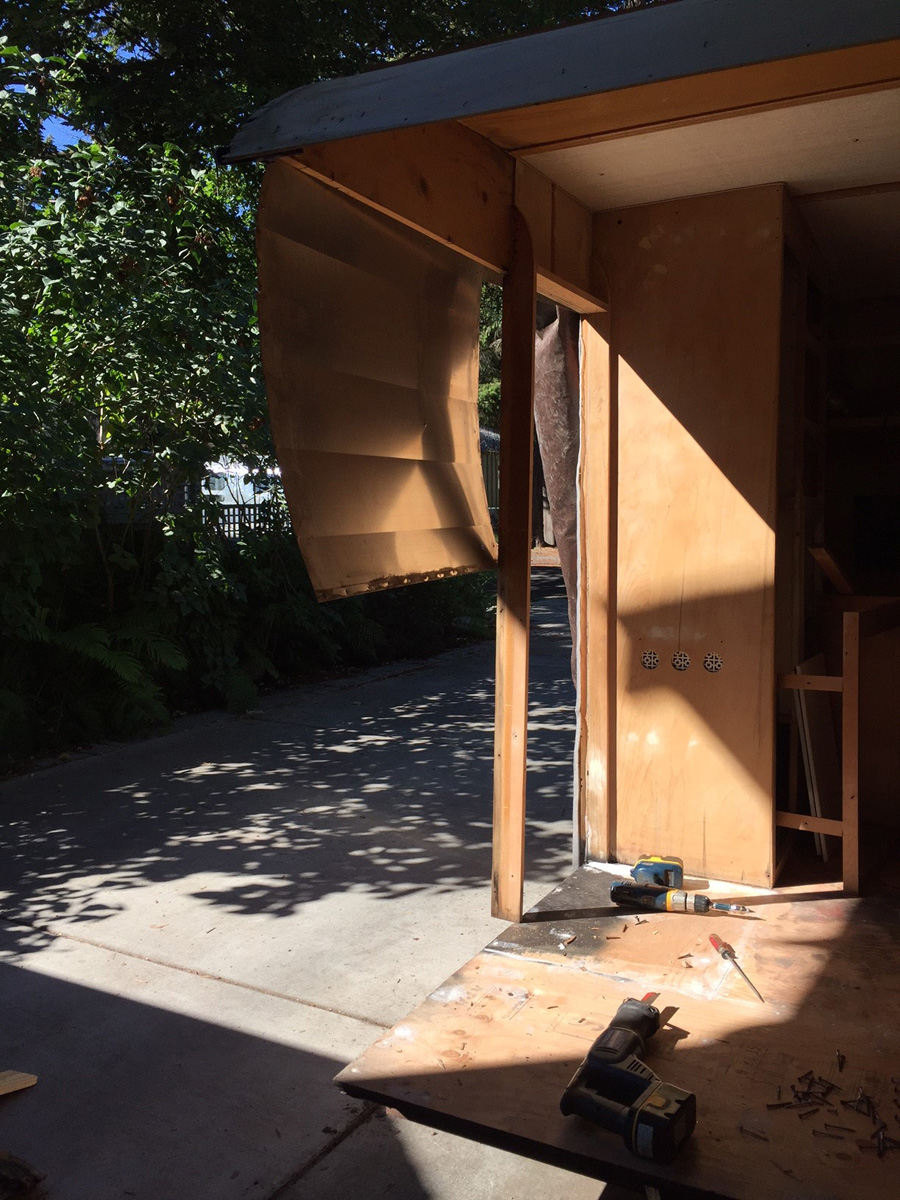
Step 4 - November, Repair the rear end.
|
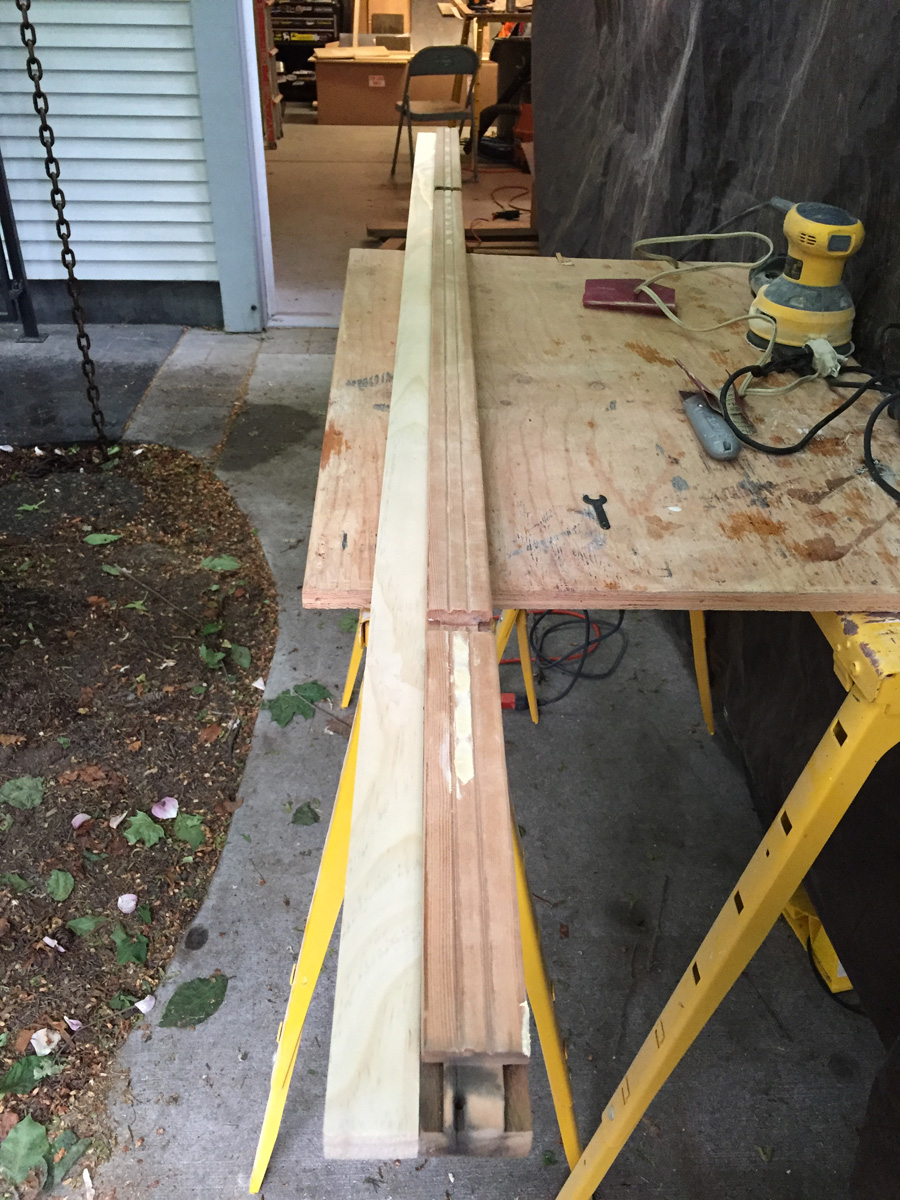
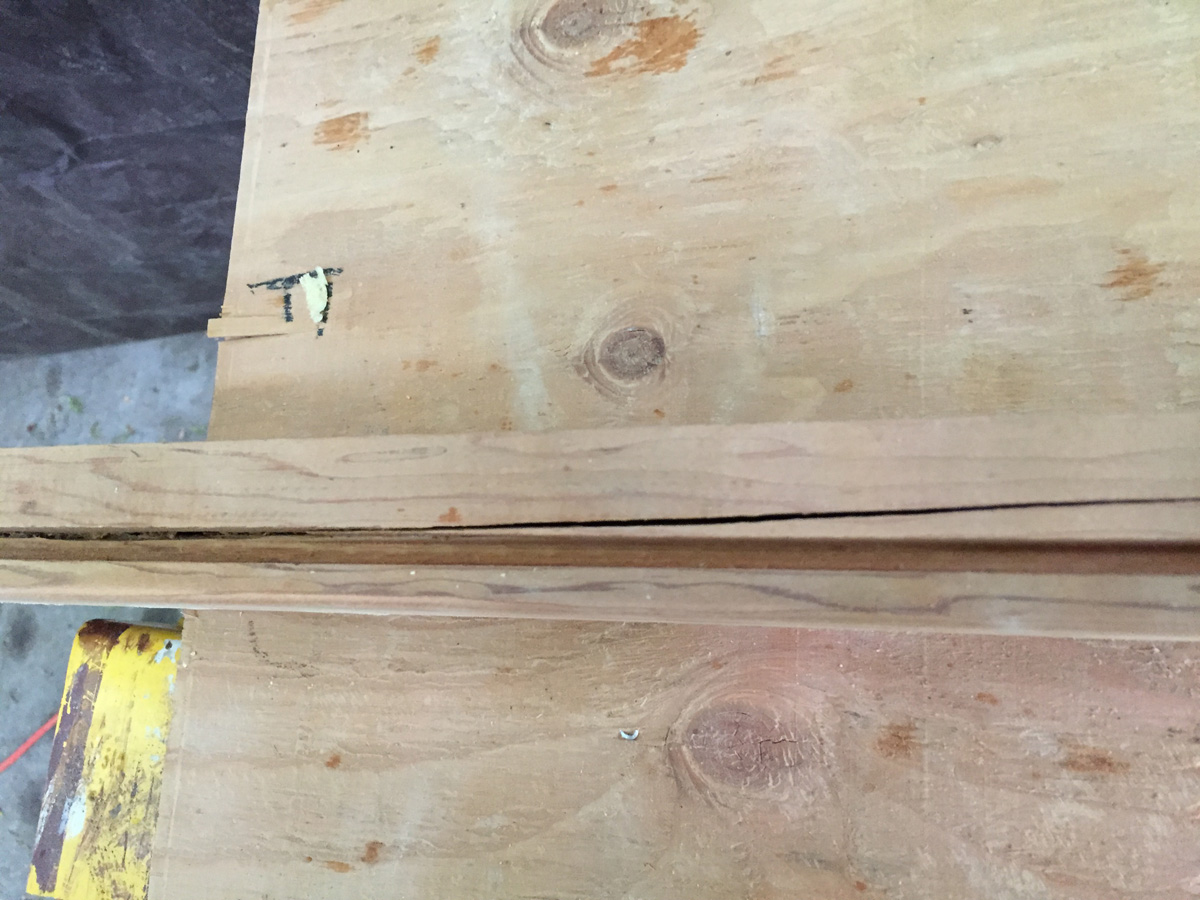
Wow, what a job. Planning, modifying, and retrofitting... Like Larry said, be prepared to think on your feet. So many plans that had to be modified on the spot to make it work in the end. It's funny, just look at some of the pictures, it's like the trailer was made from odds, ends, and scraps. There is patching on the side skin in the rear drivers/passengers, one only 2 or so inches in length. There is a vent cover over 2 holes on the upper skin… A mis-drill for the shore poer outlet? Router errors all over the sides where they were cutting the shapes. Small nails every 2 inches then none for 3 feet… Wonder what else I’ll find as I move along. Its like they had a new trainee and he made mistakes, but had to deal with them and figure it out? |
 |
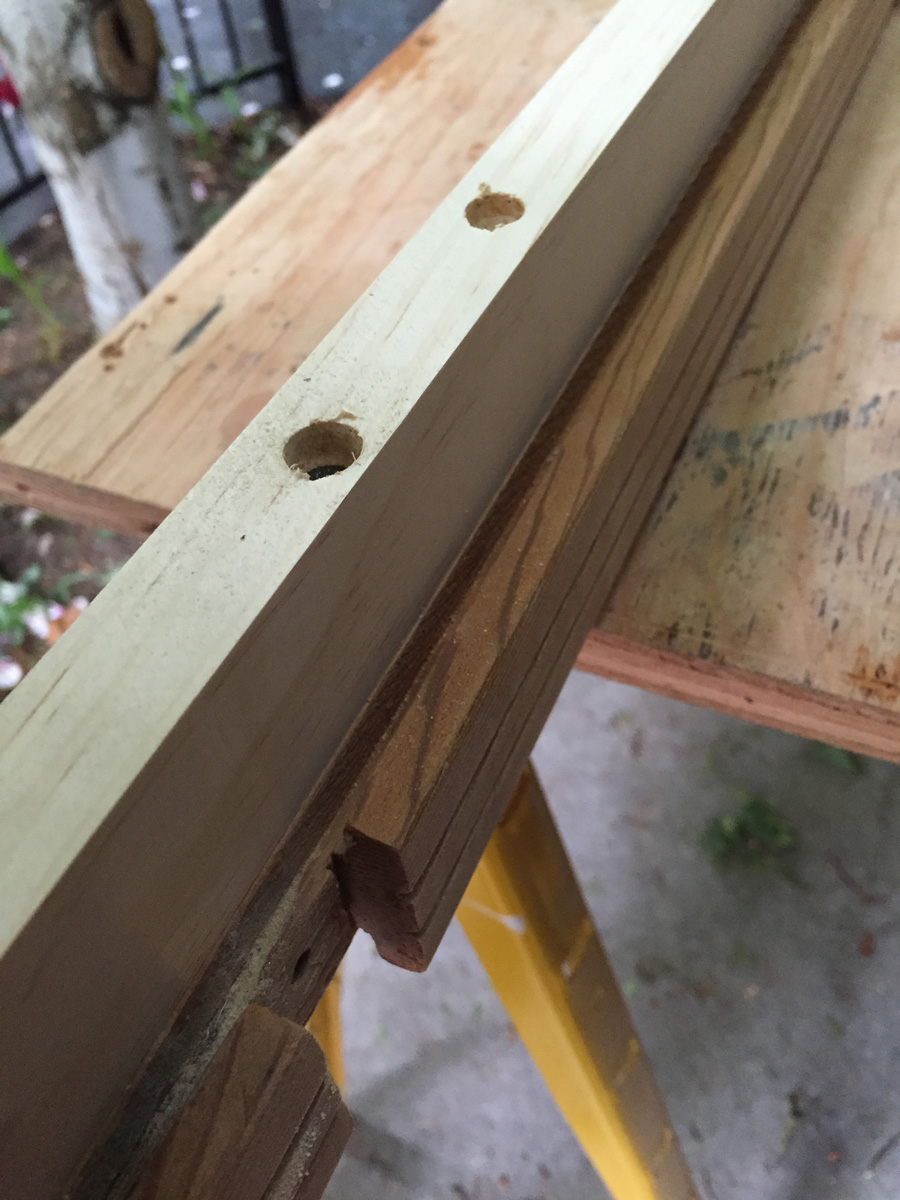
I have to say the 2 tools that made this at all possible were the Harbor Freight Pocket hole jig and the plumbers pliers… Without those?.. I don’t even want to imagine that.
I bought a pocket jig at Home Depot and tried it… don’t waste your time, the one from Harbor Freight is way better designed and easier to use. When I was working on the trailer over the weekend and had a few neighbors stop by and comment on the boards that were installed with it, and think I sold 3 more of them... get one.
And the Pliers? Don’t even think about it, just get them, your knuckles will thank you. Worth every penny.
So here is what has happened;
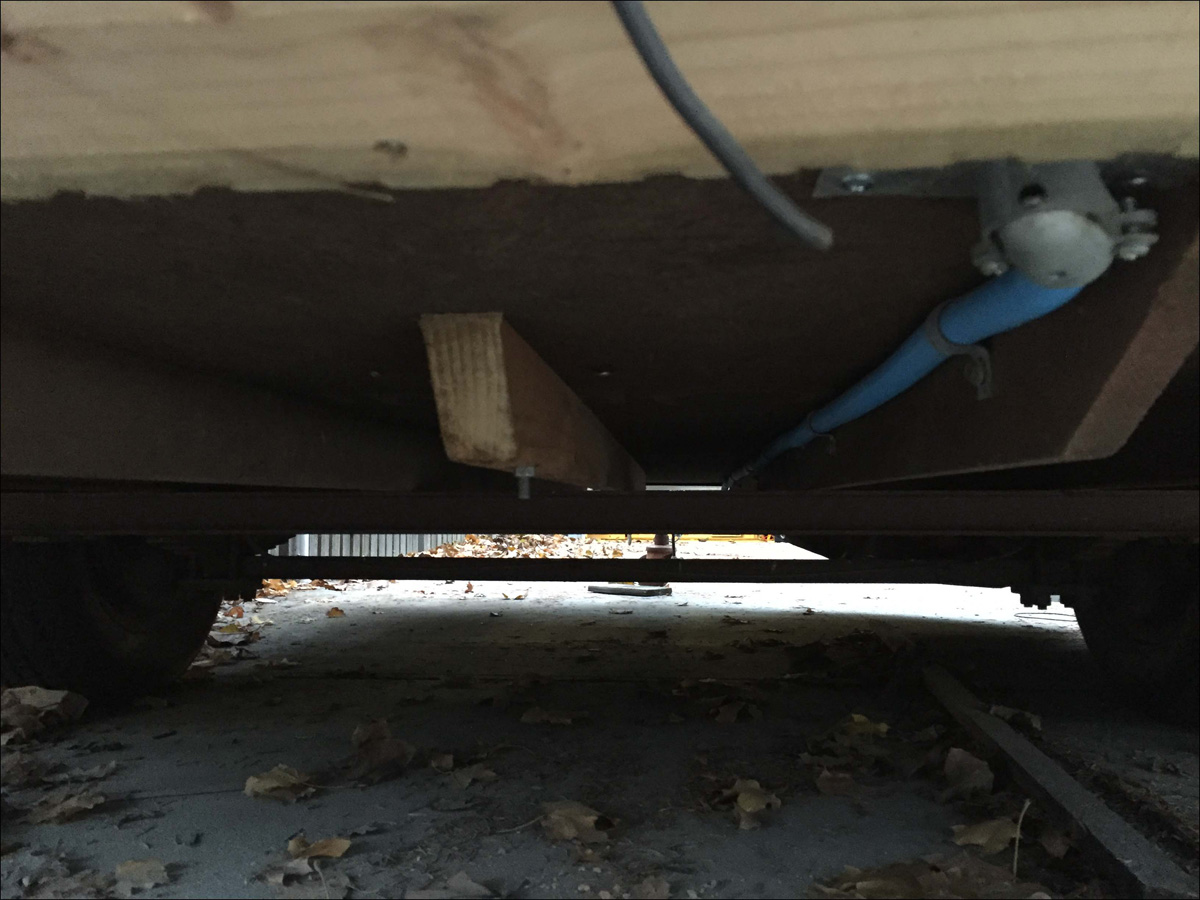
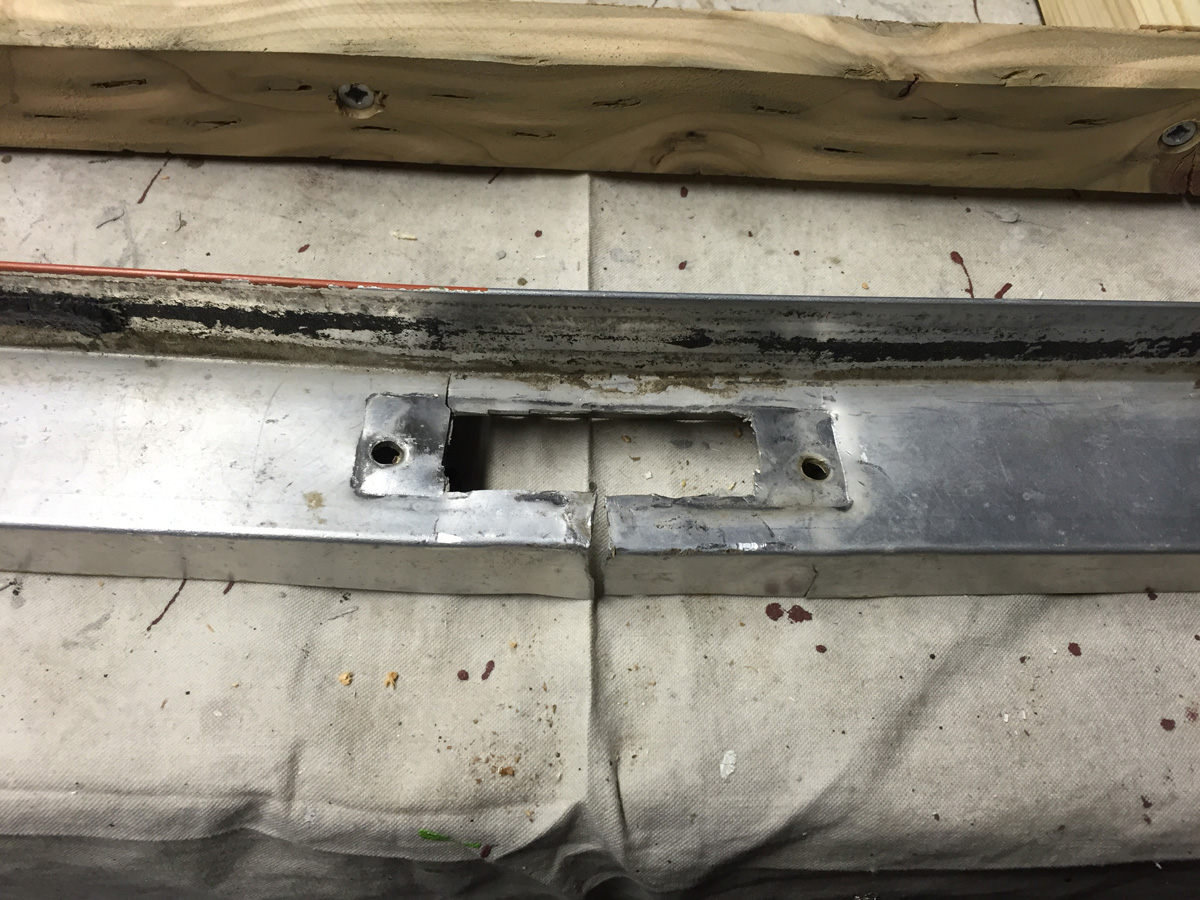
— Totally rebuilt the rear floor and support system, to include both side support rails, I combined the 2 - 3/4 in 1x4s into one treated 2x4 cut to fit. And added supports under the body to the frame in the rear wheel wells.
— Both side walls, with larger lumber.
— Added a center treated 2x4 support under the main galley.
— Inverted the storage access hatch so it will open down instead of up (Look for pictures later when I mount it).
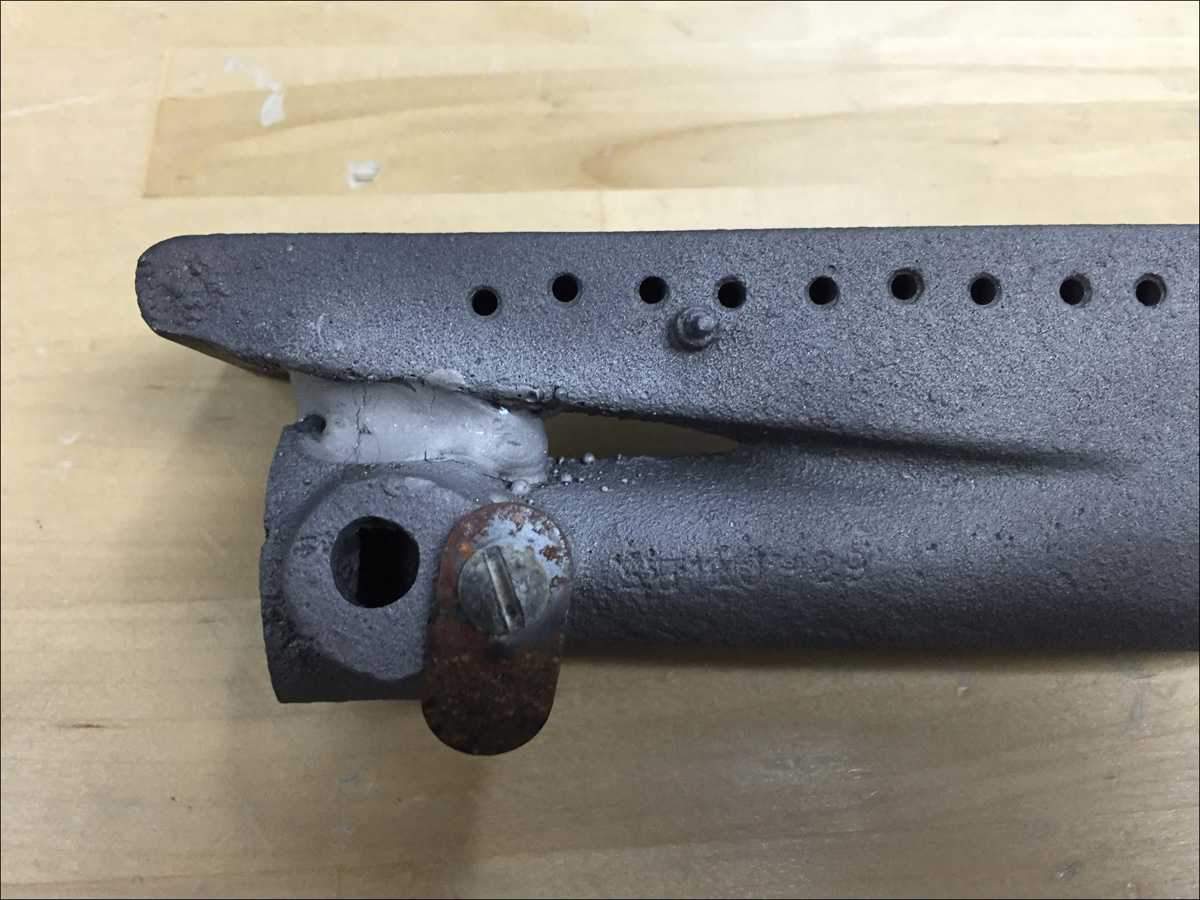
— Welded that hole in the oven burner.
|
 |
 |
 |
 |
 |
 |
 |
 |
 |
 |
 |
 |
 |
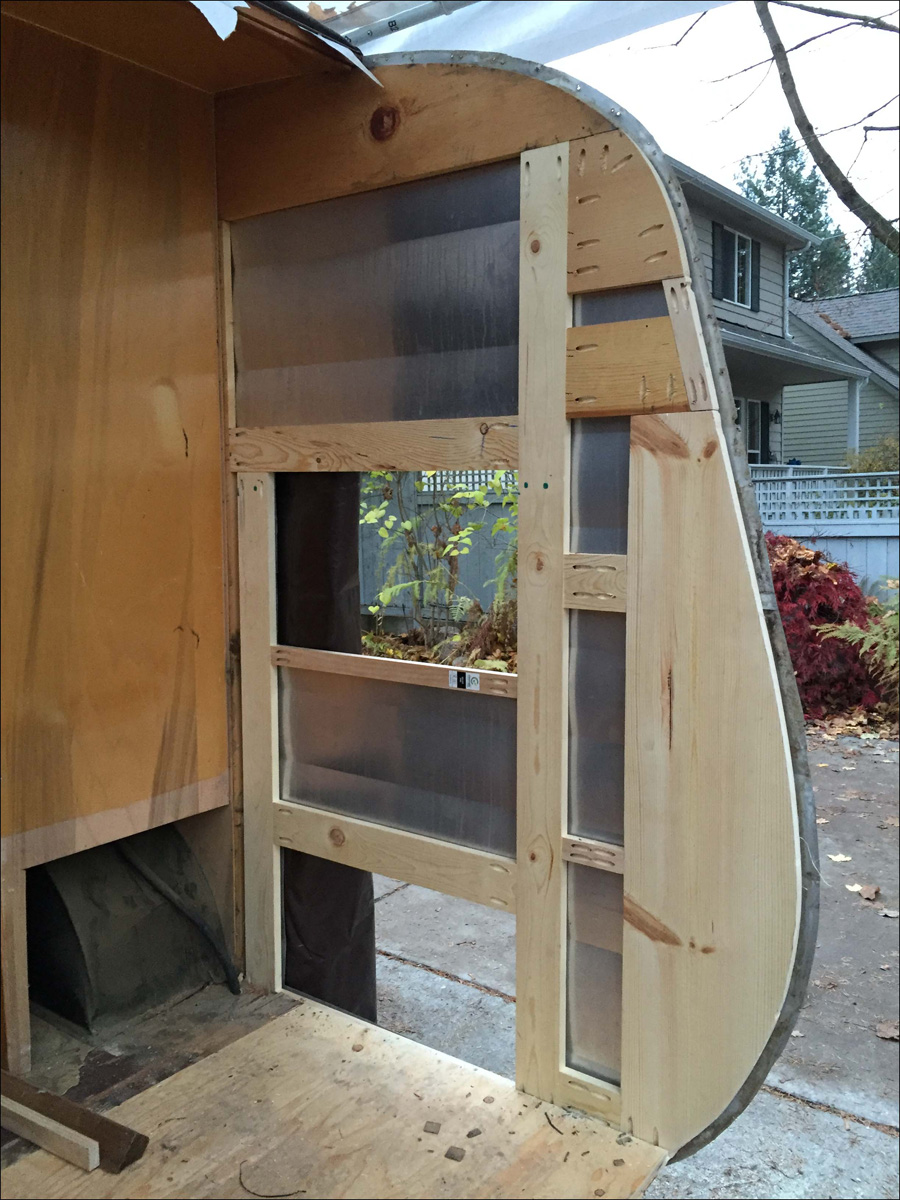
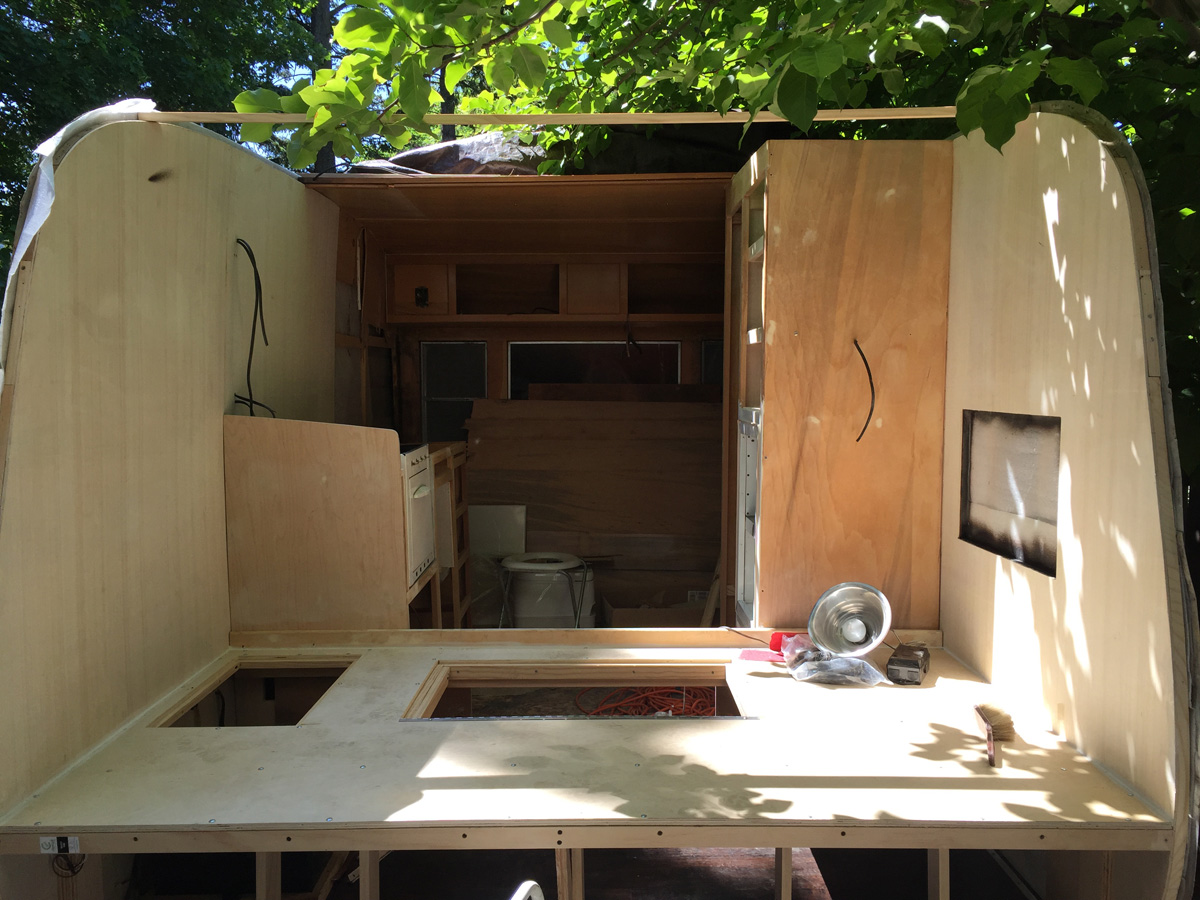
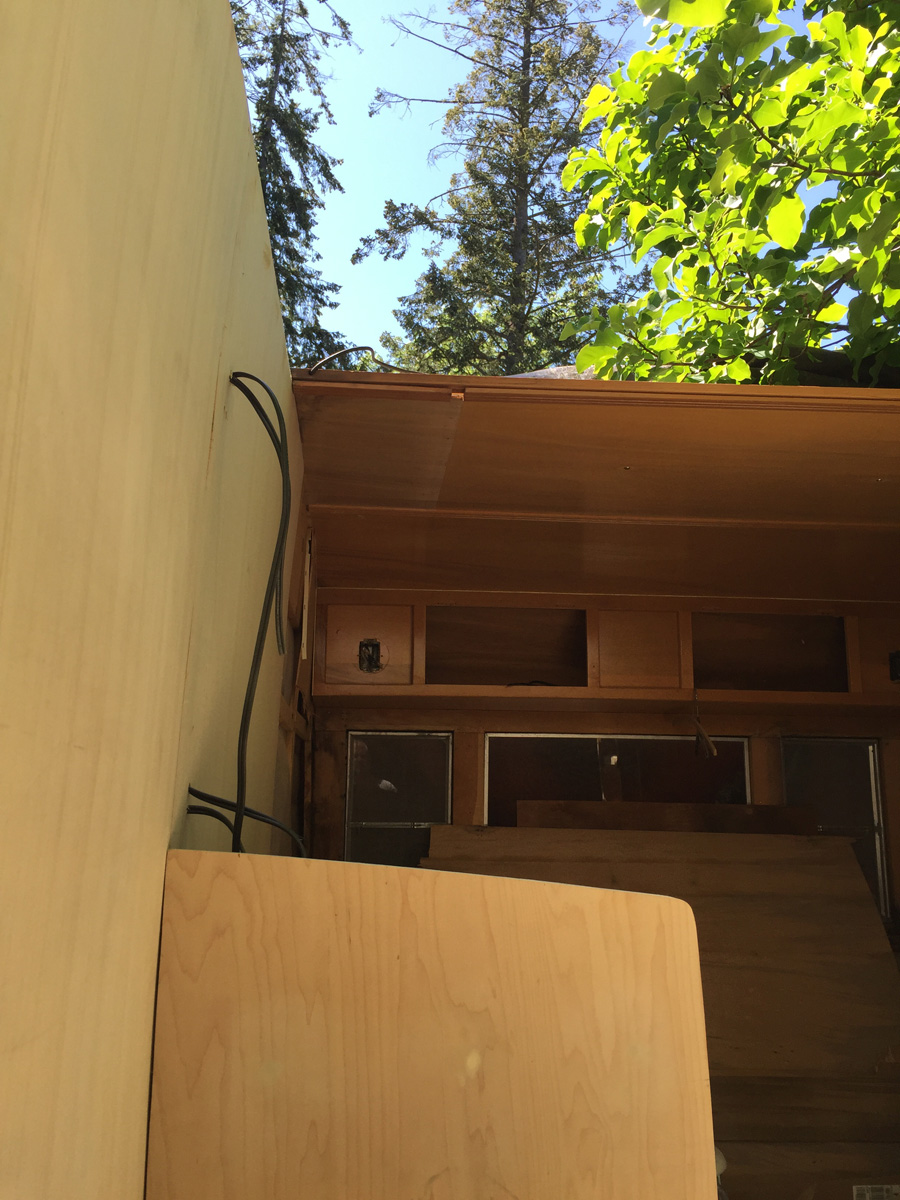
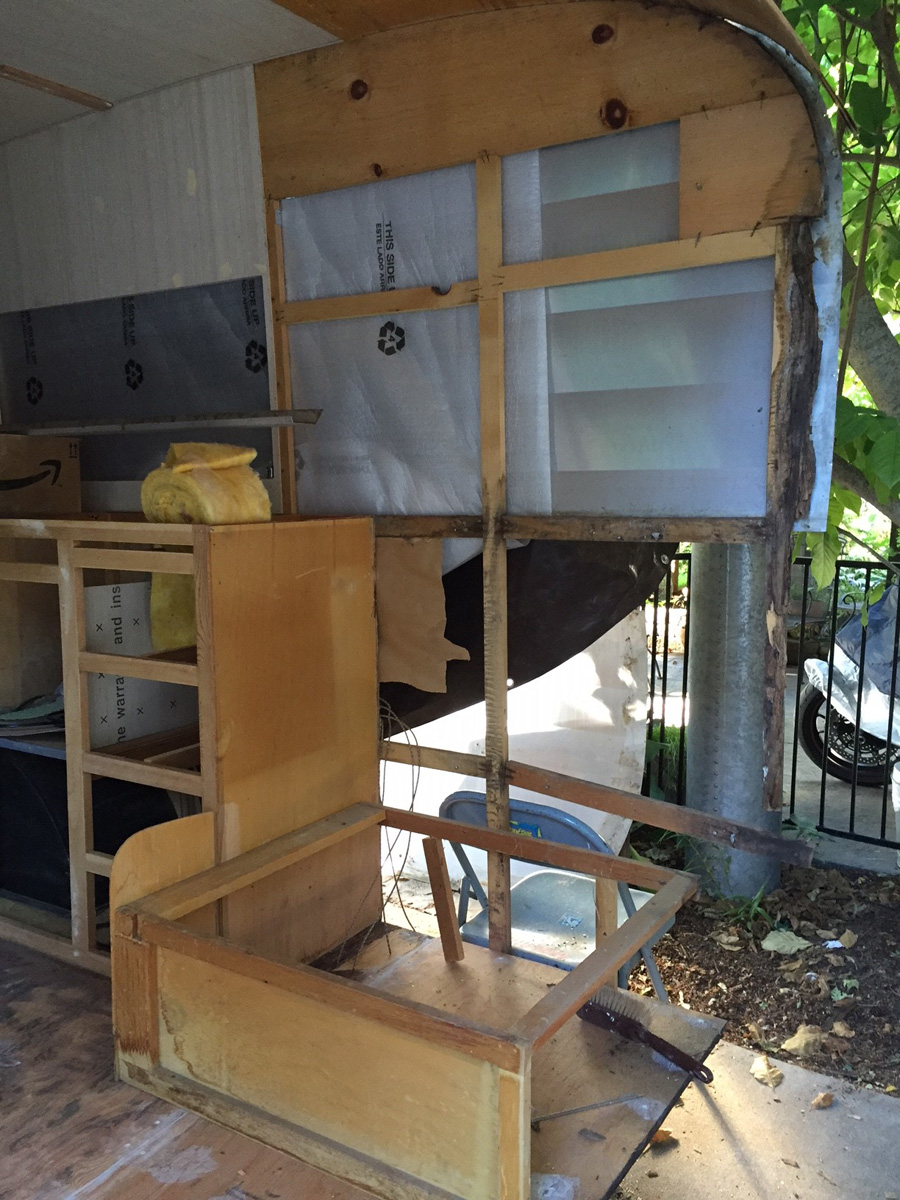
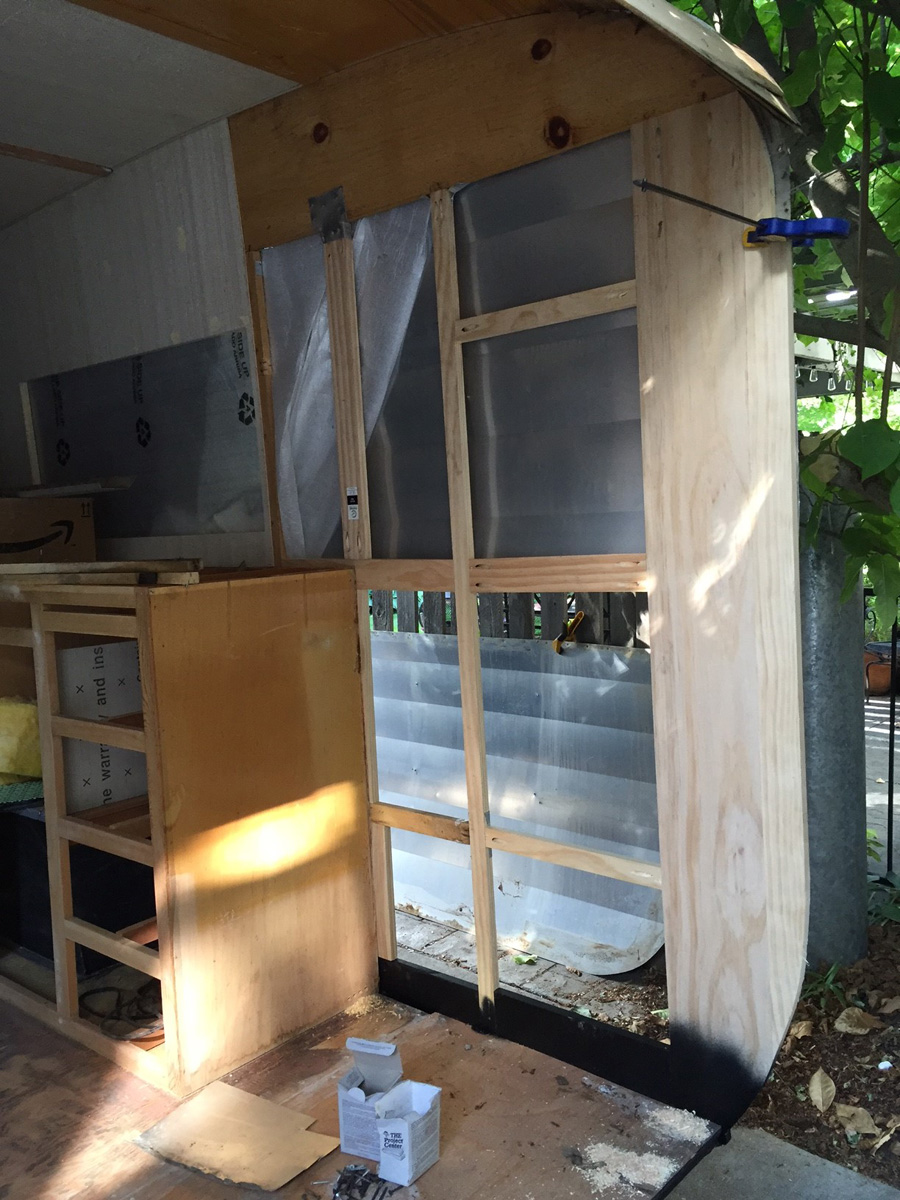
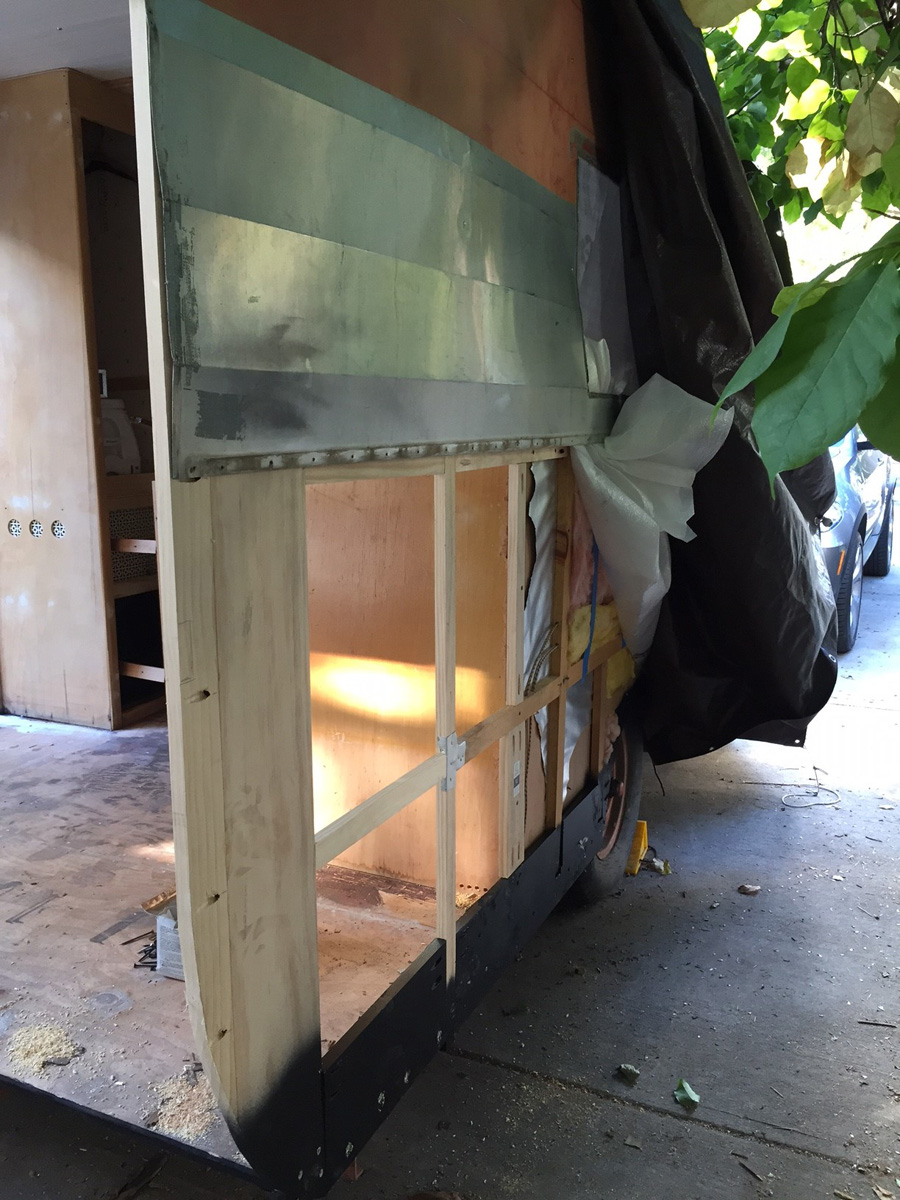
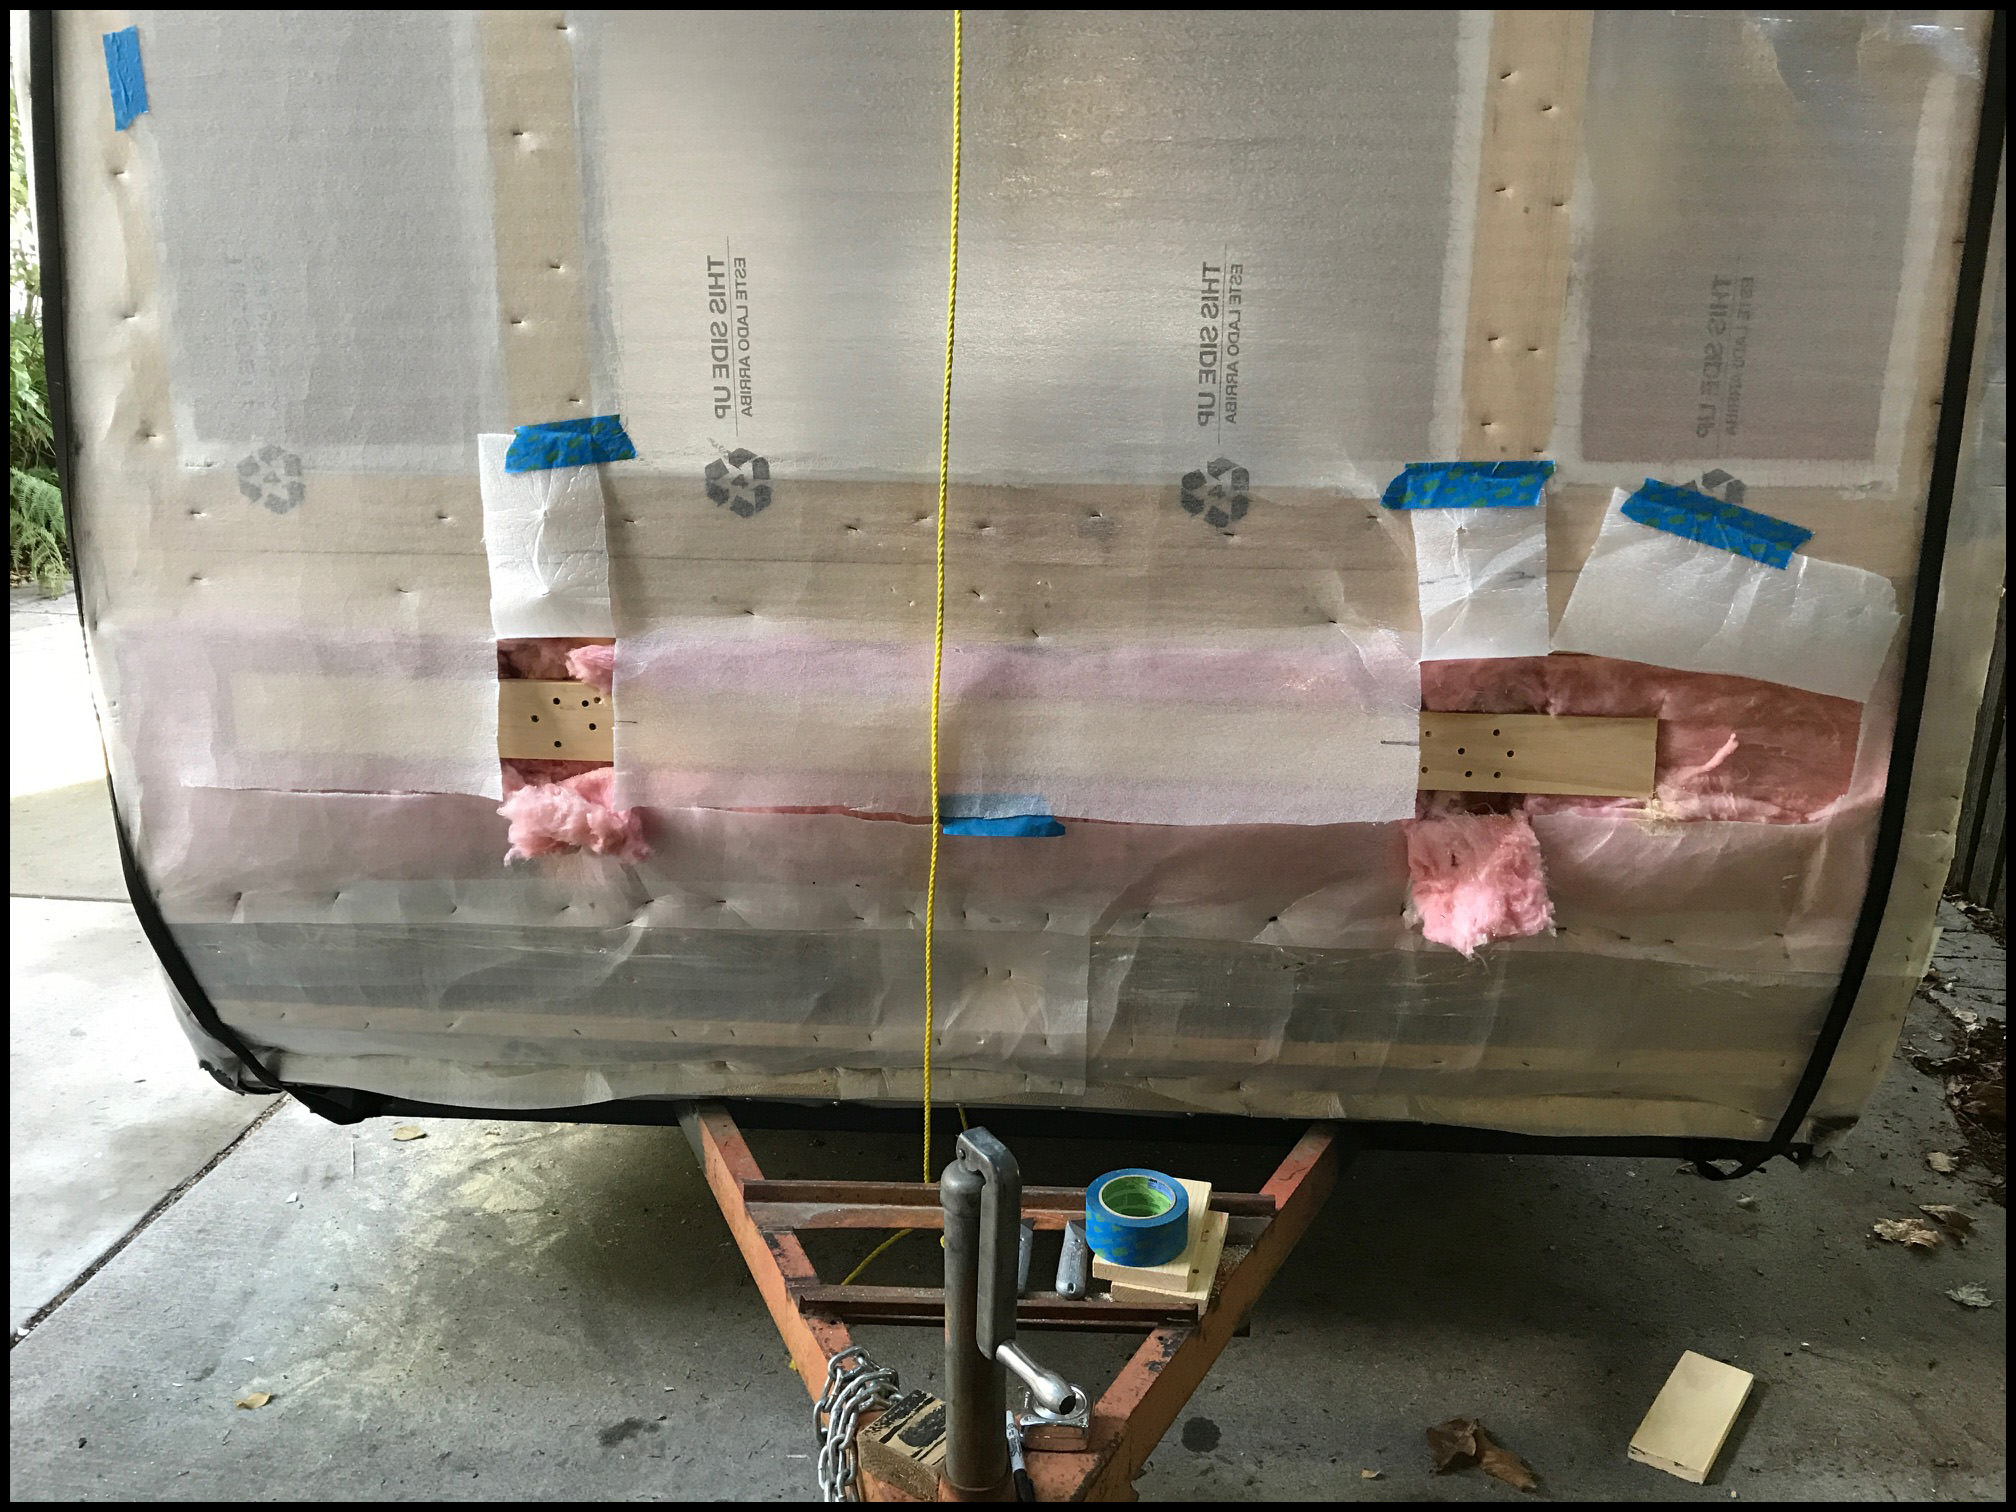
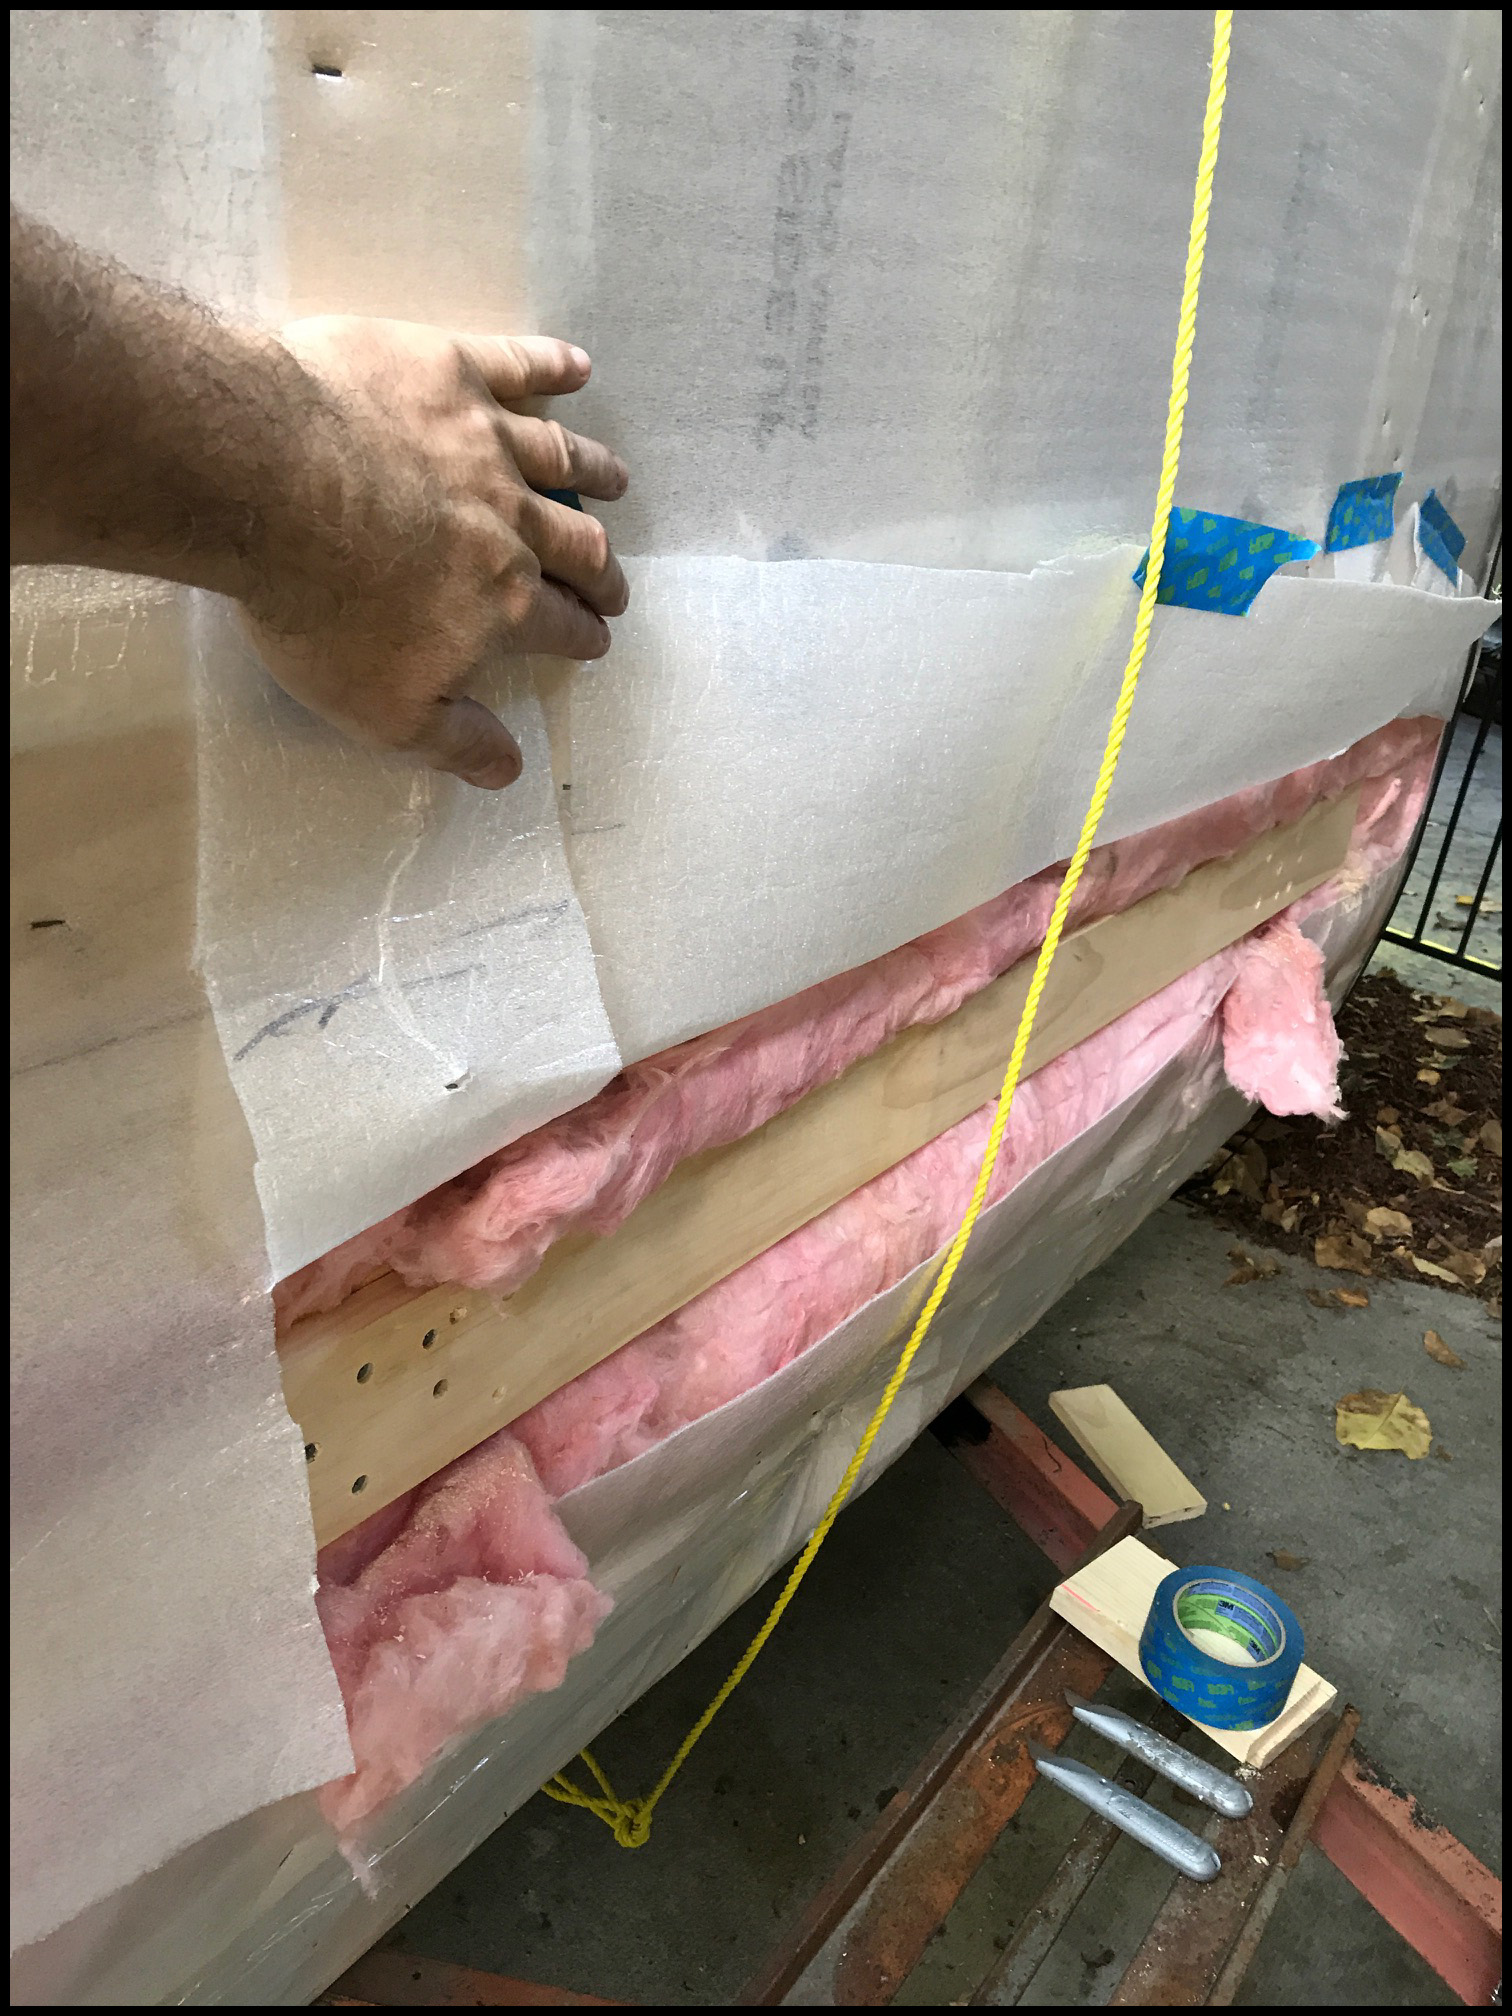
Step 5 - Winter... Got more done that expected.
|
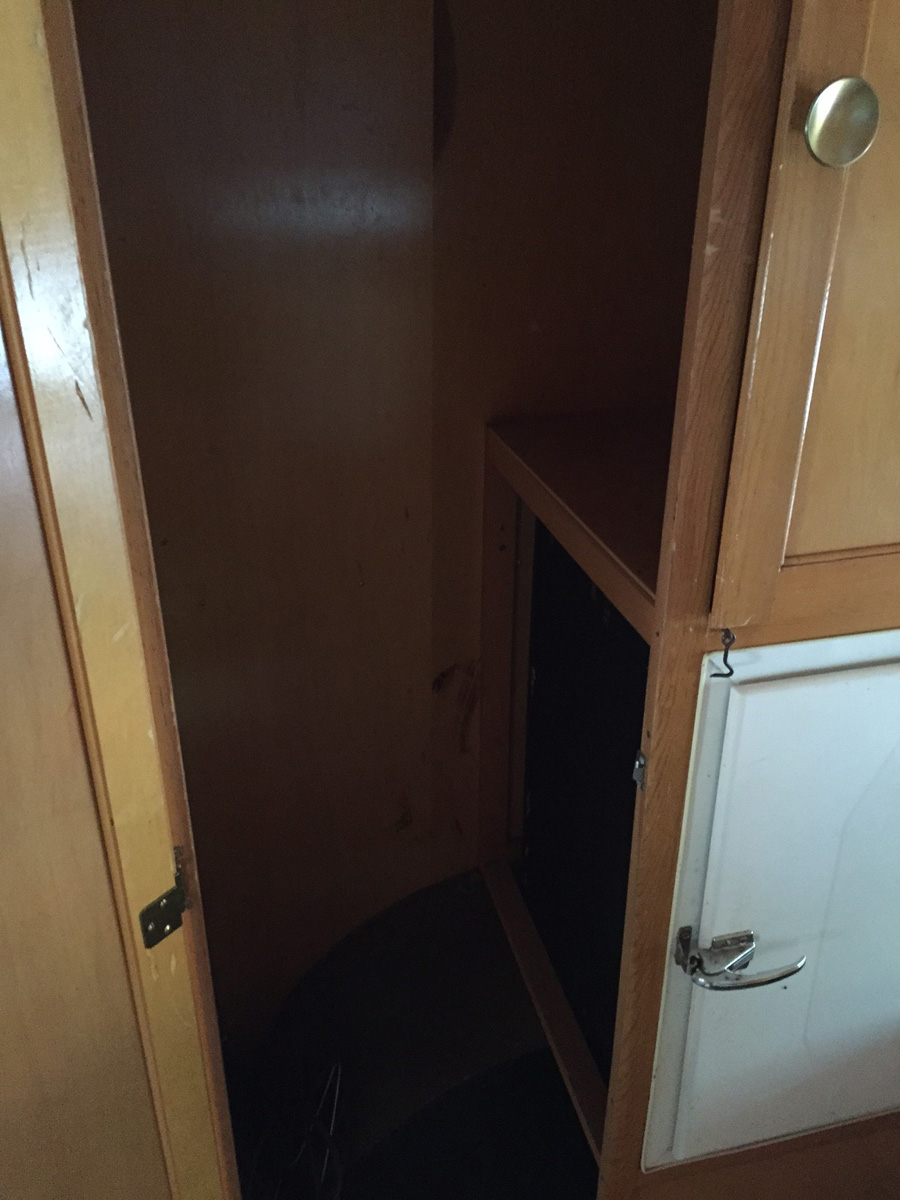
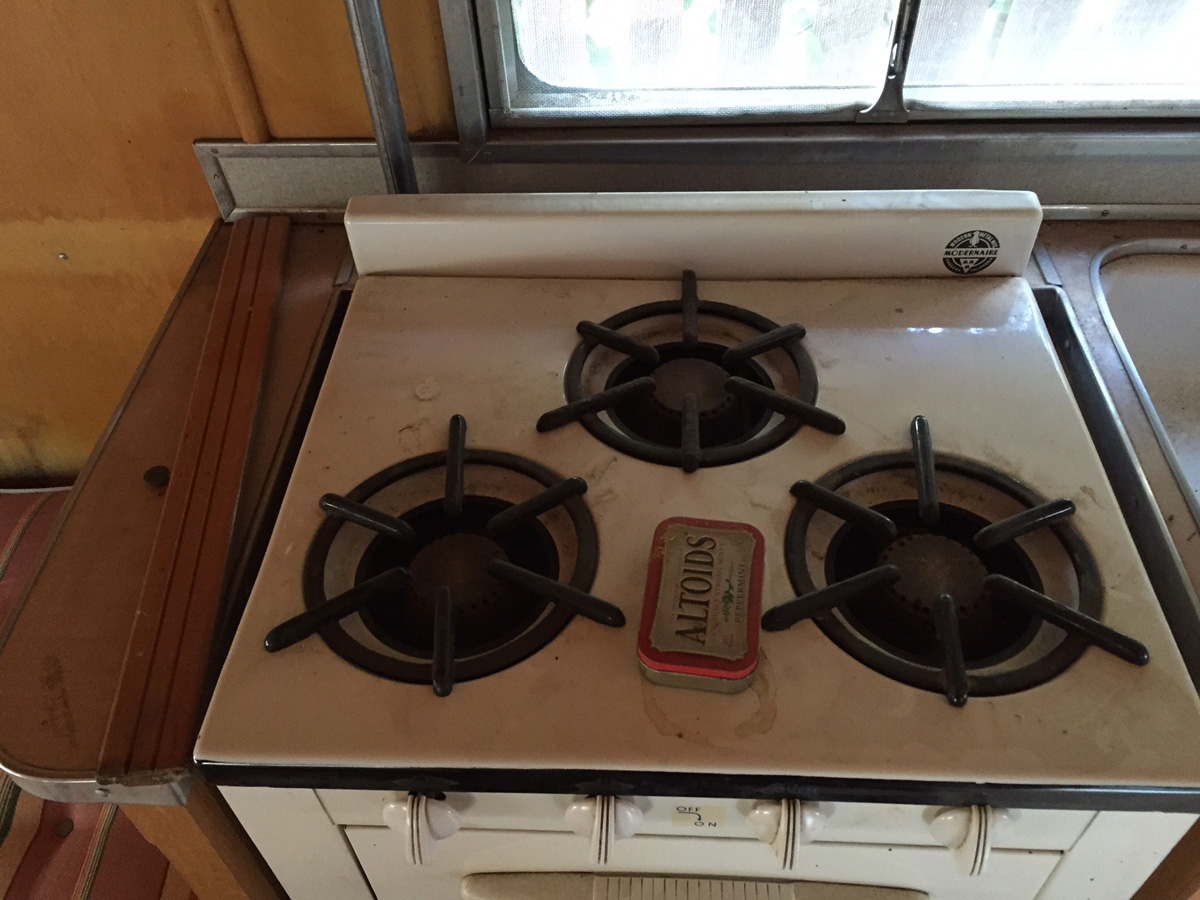
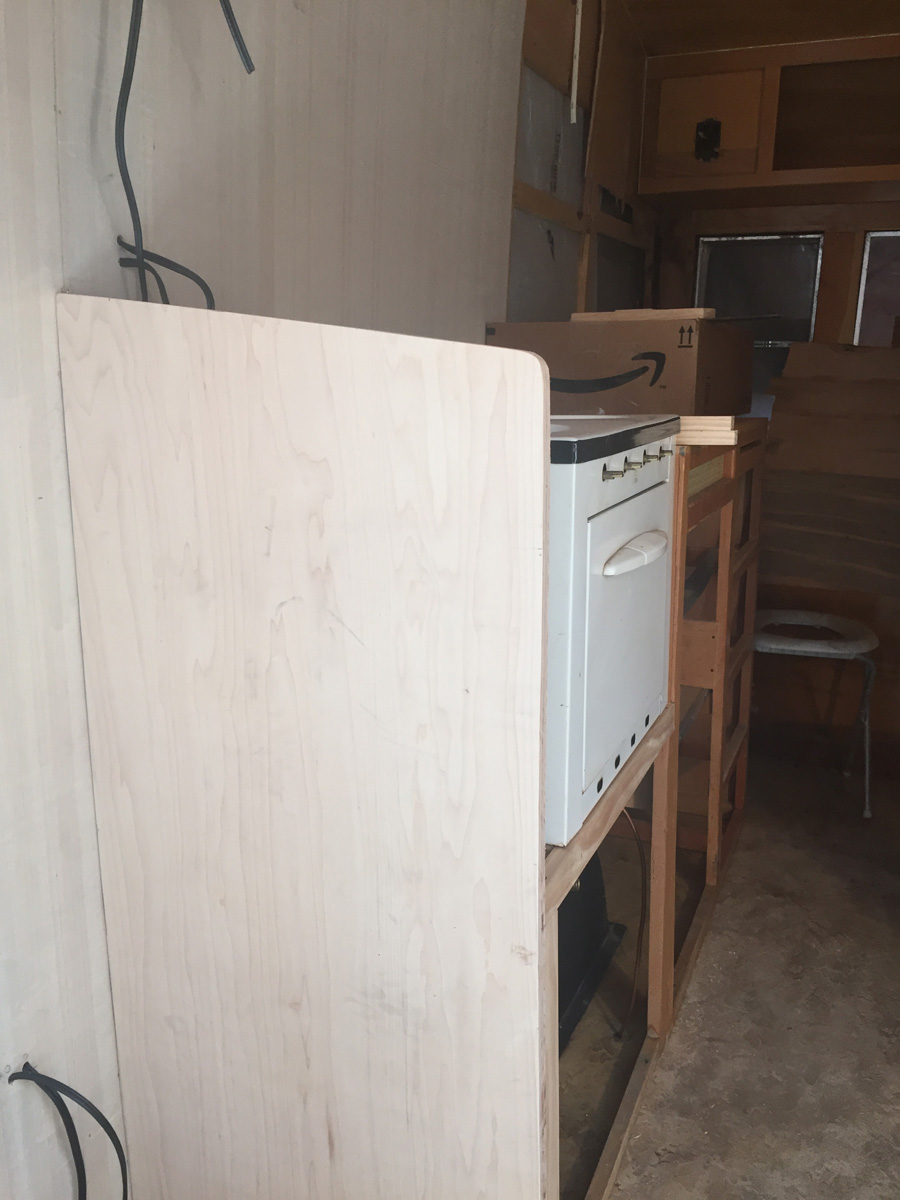
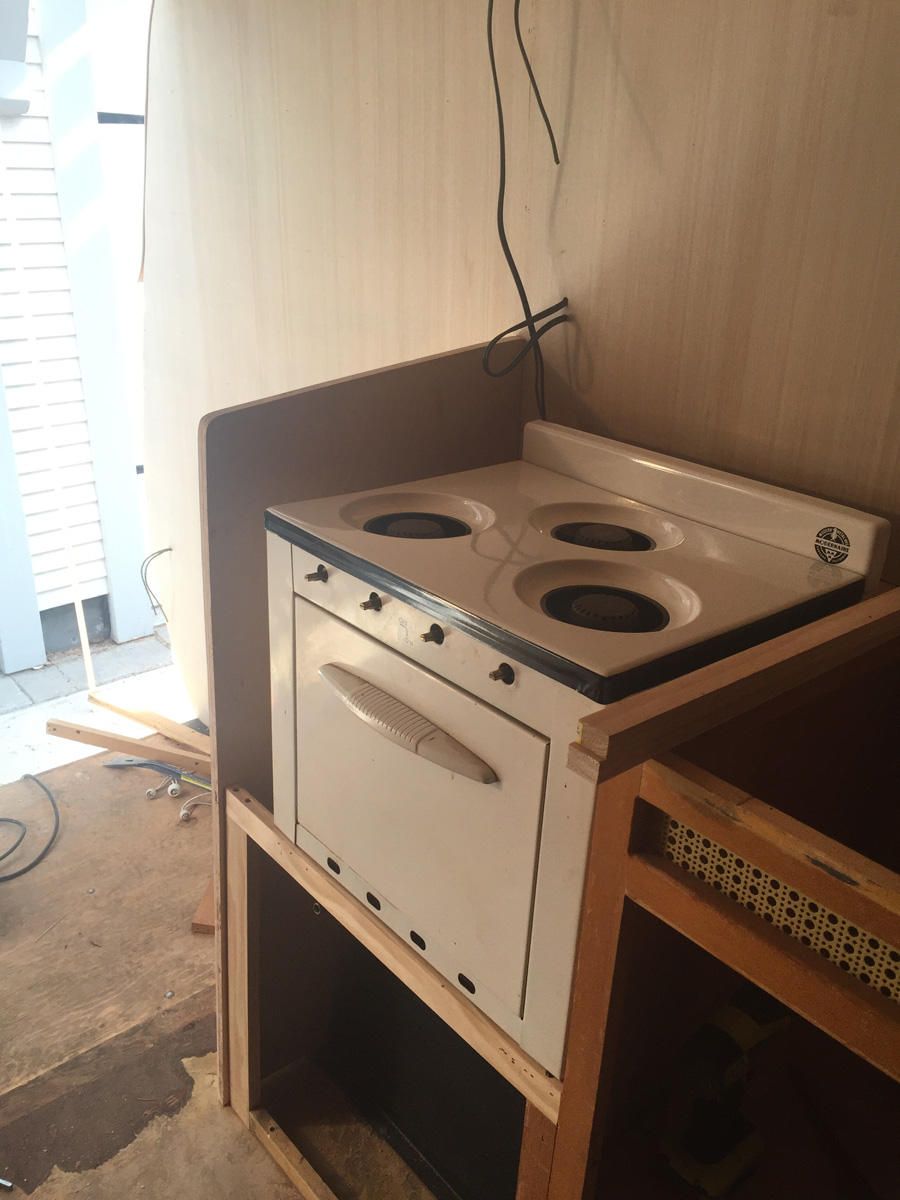
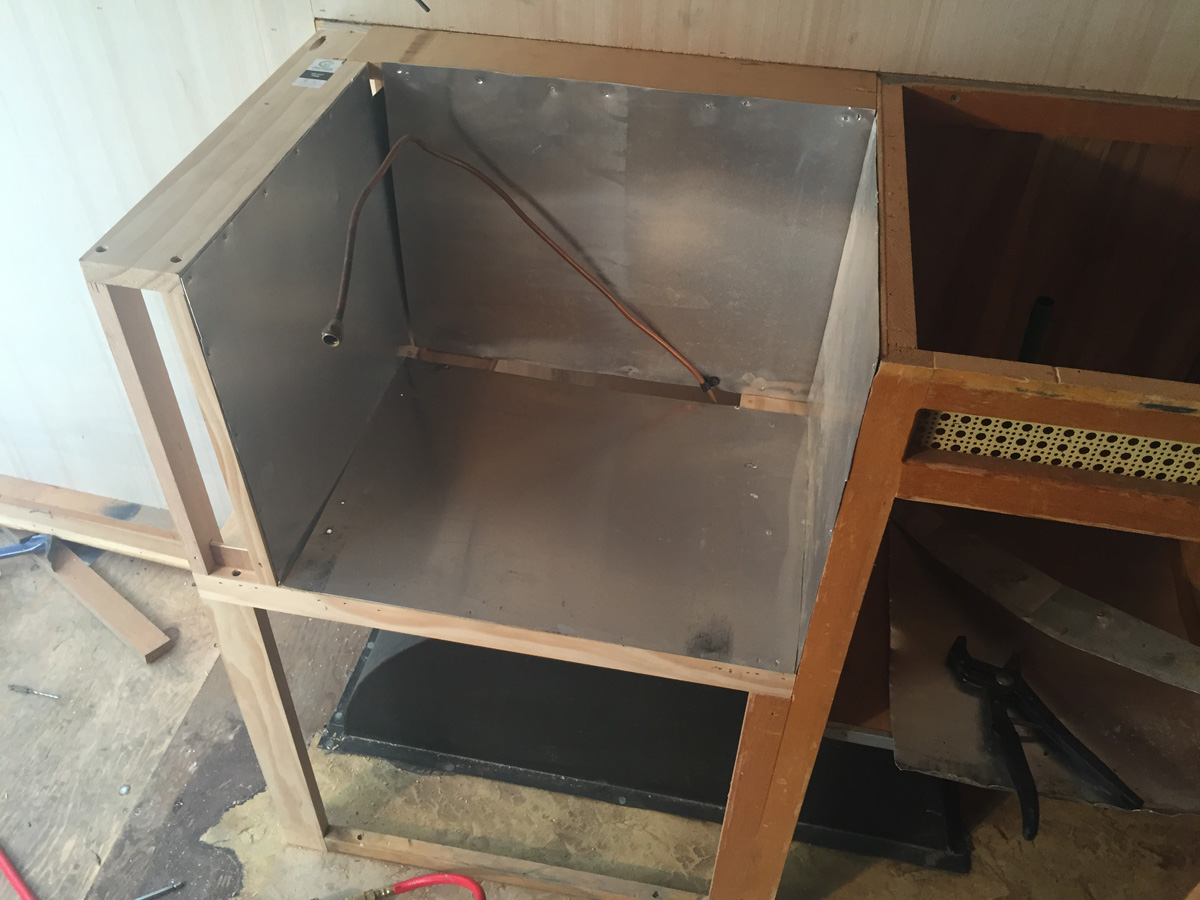
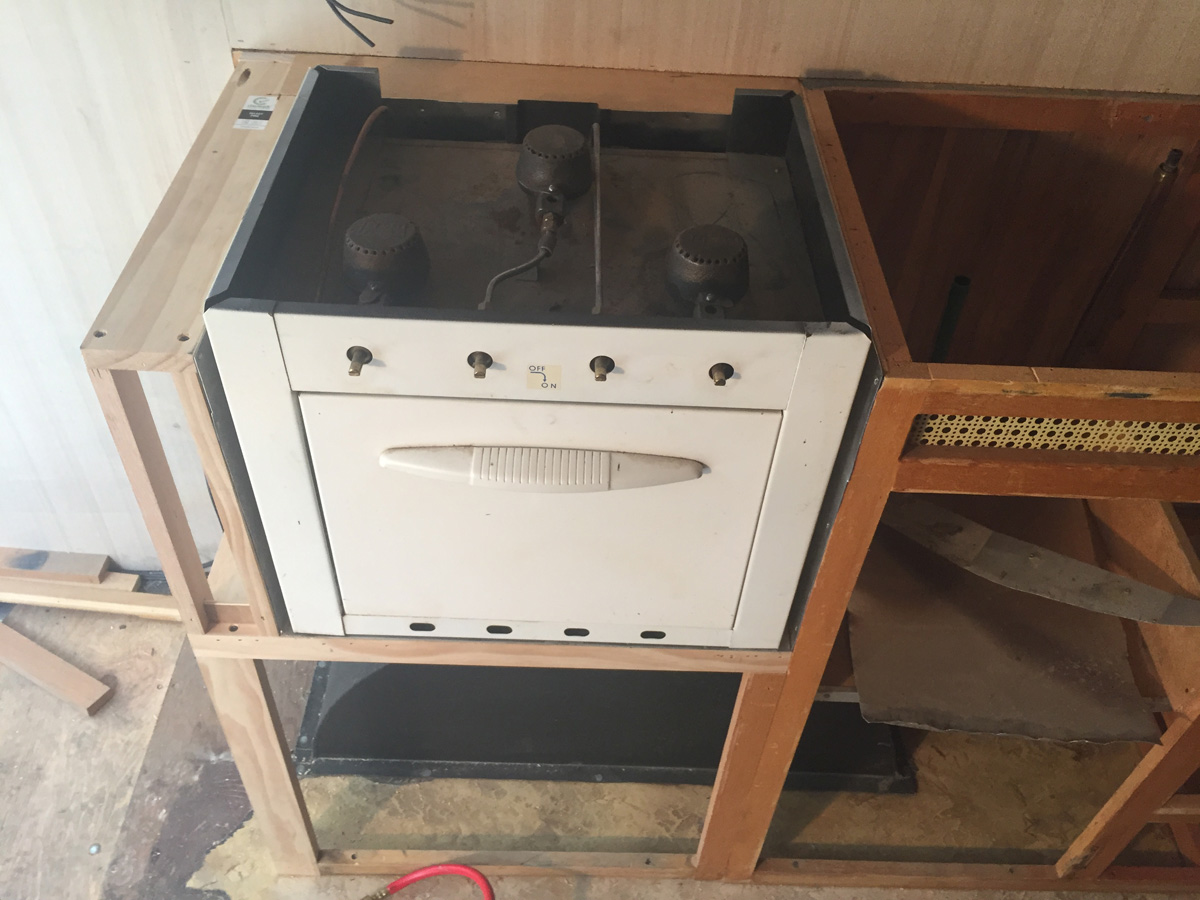
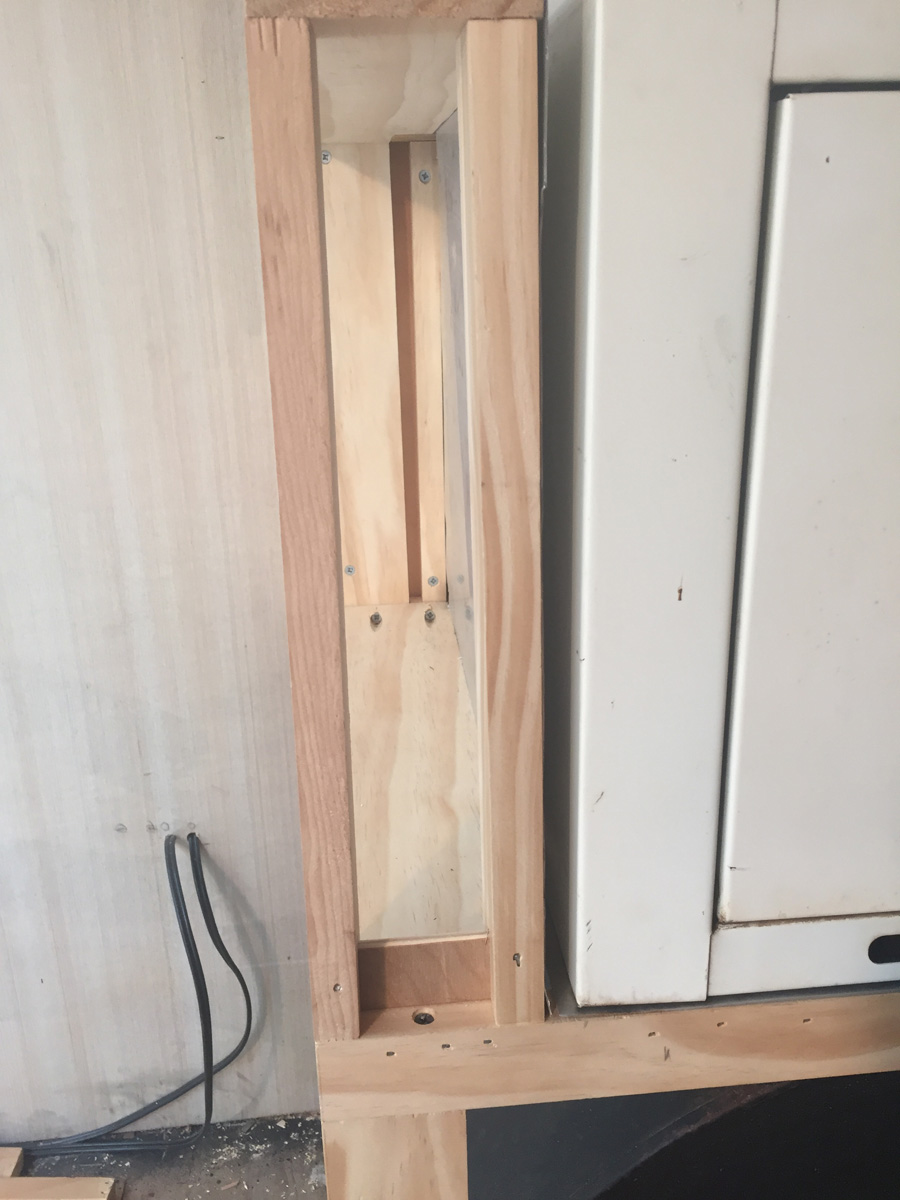
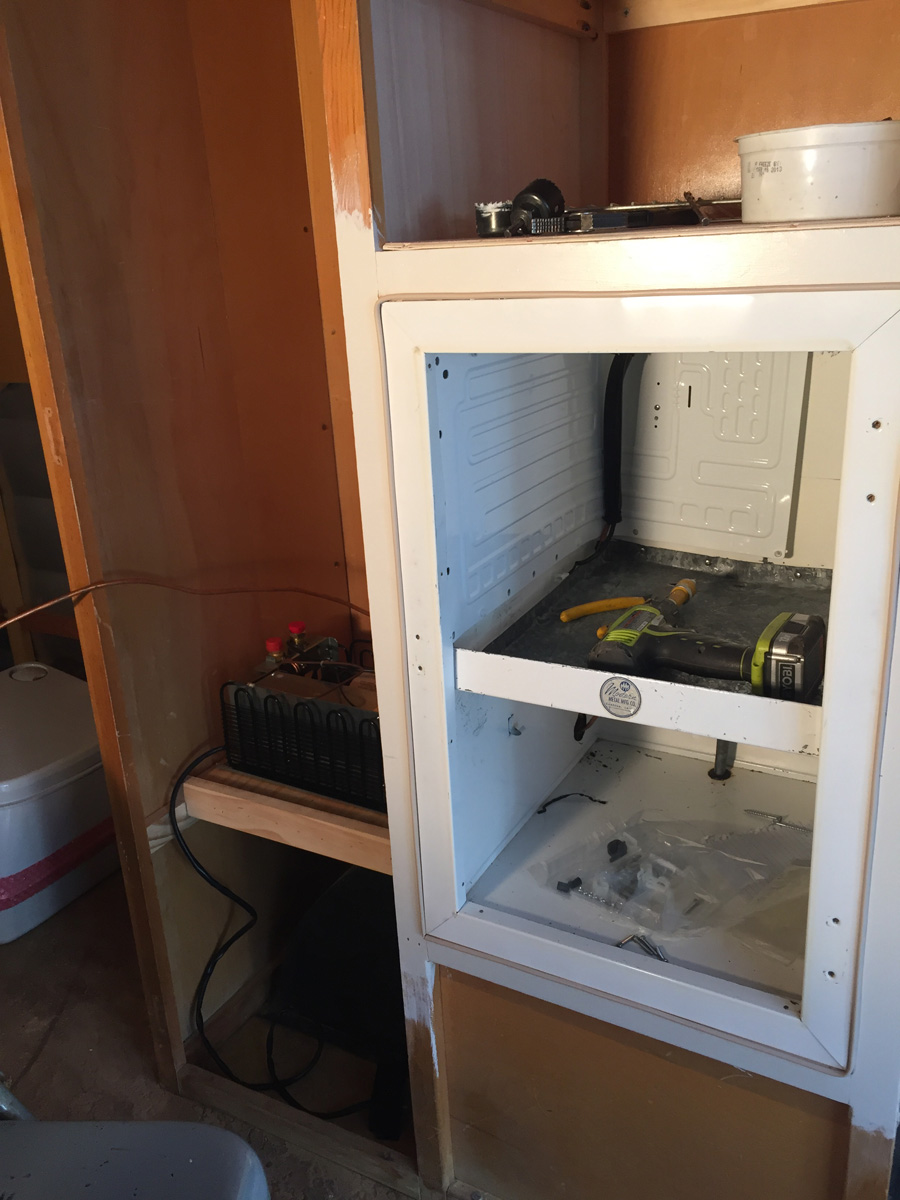
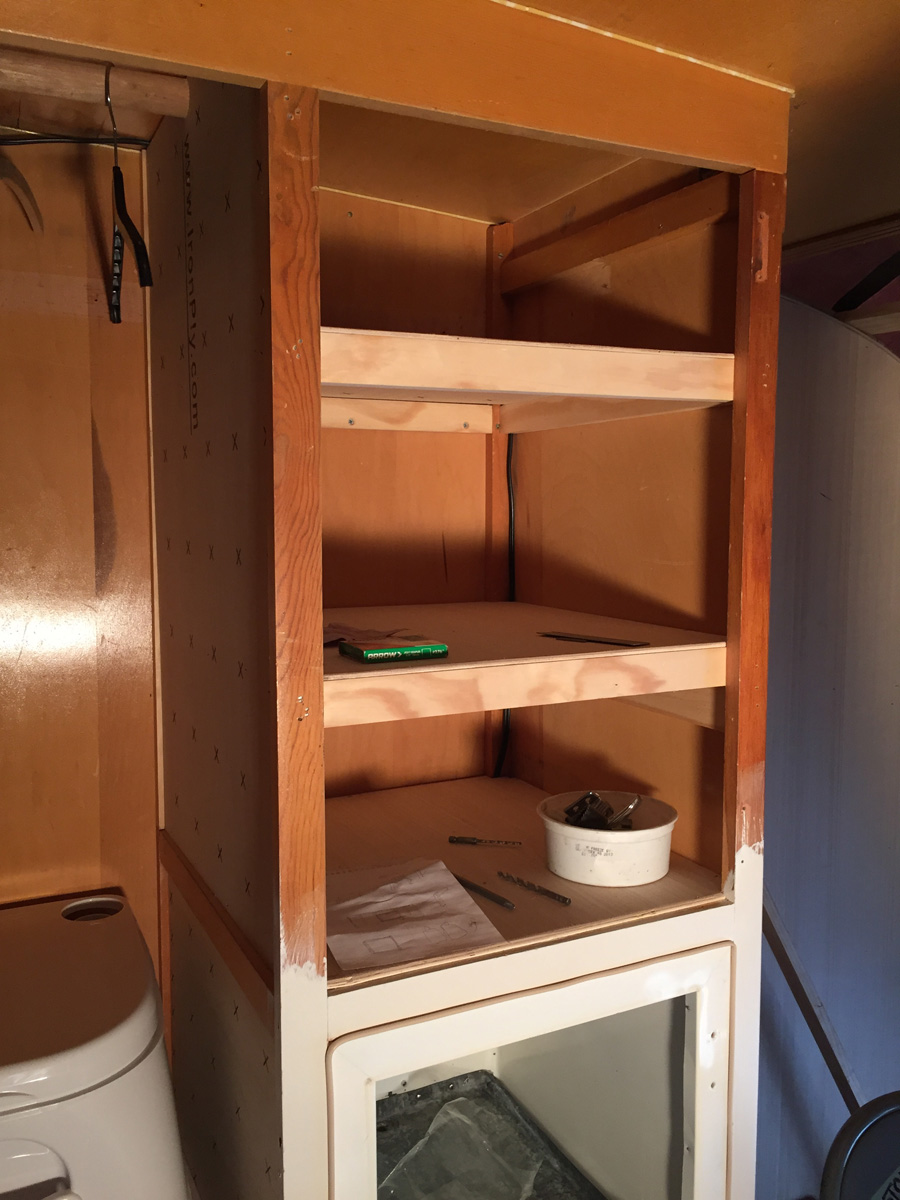
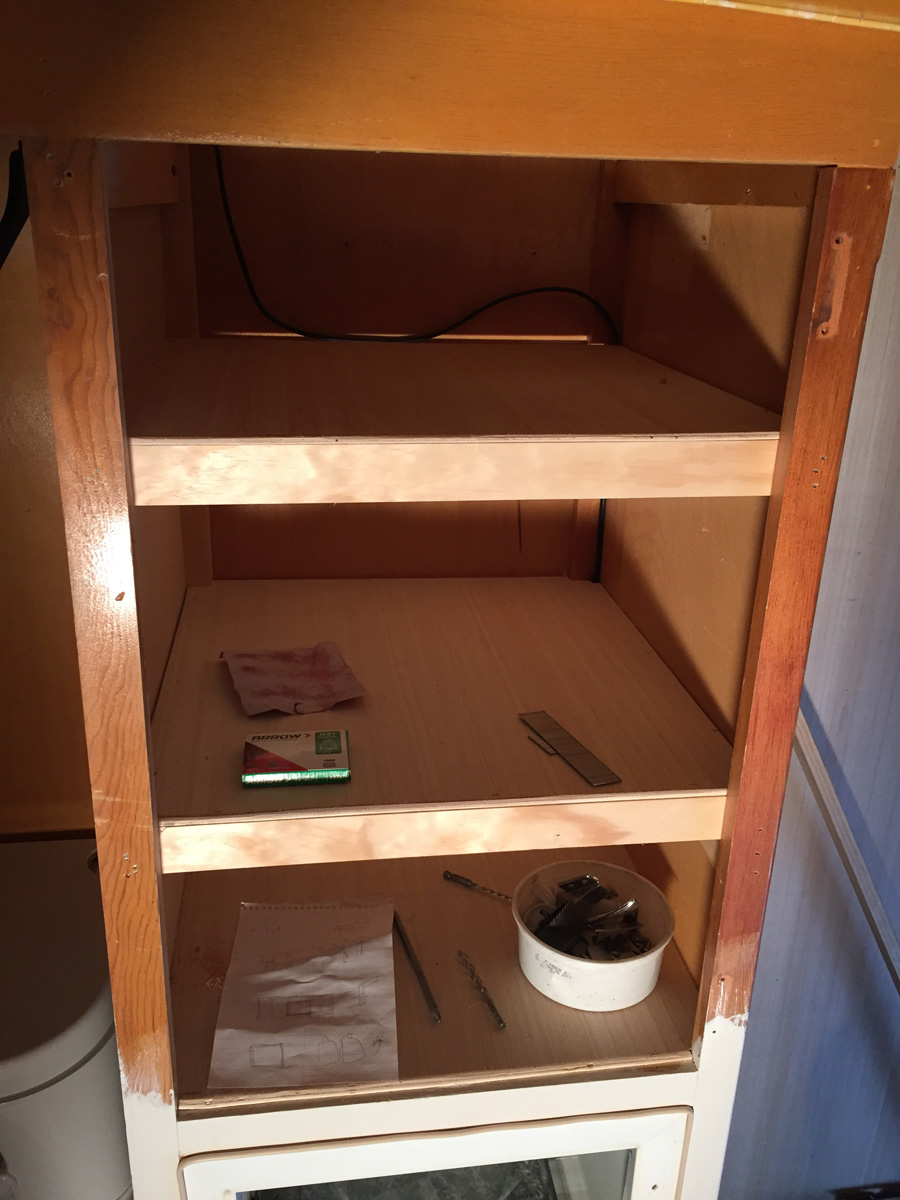
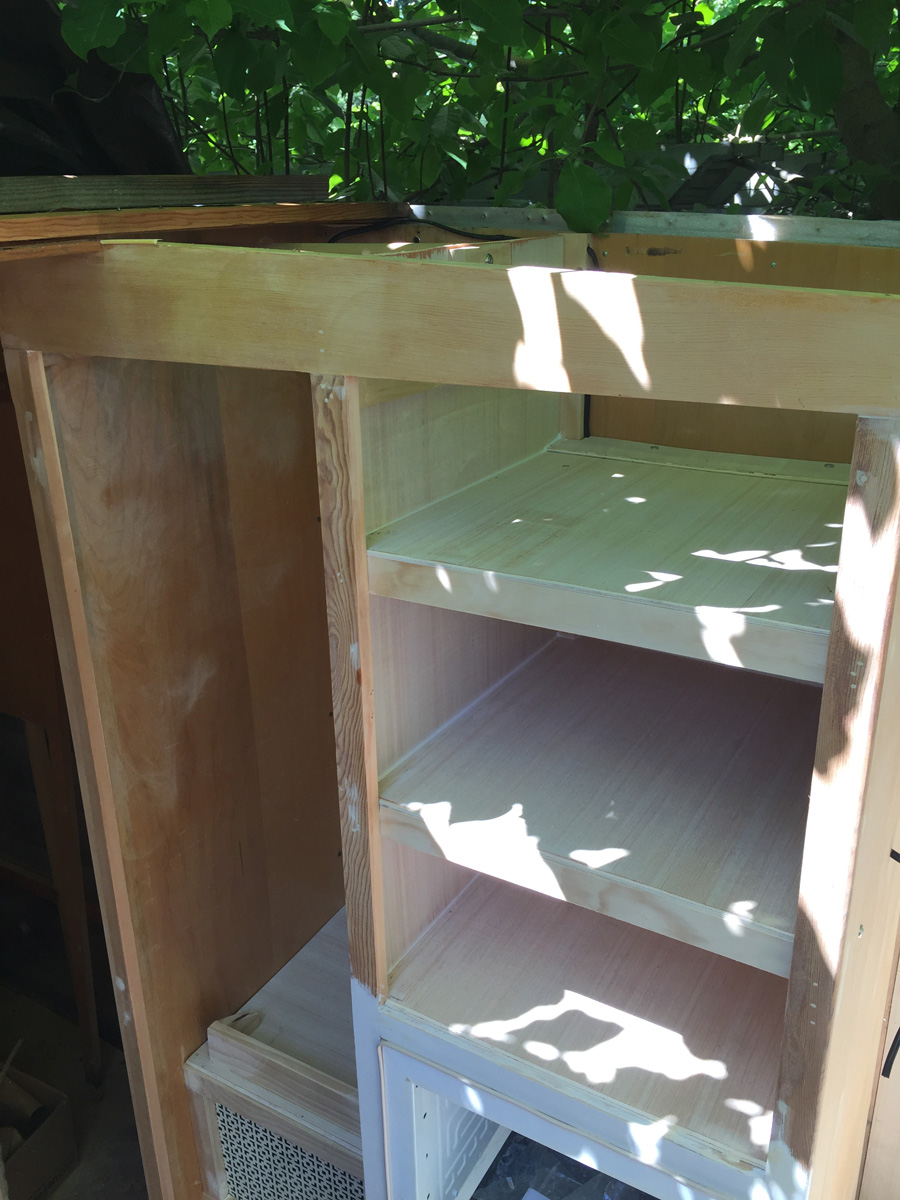
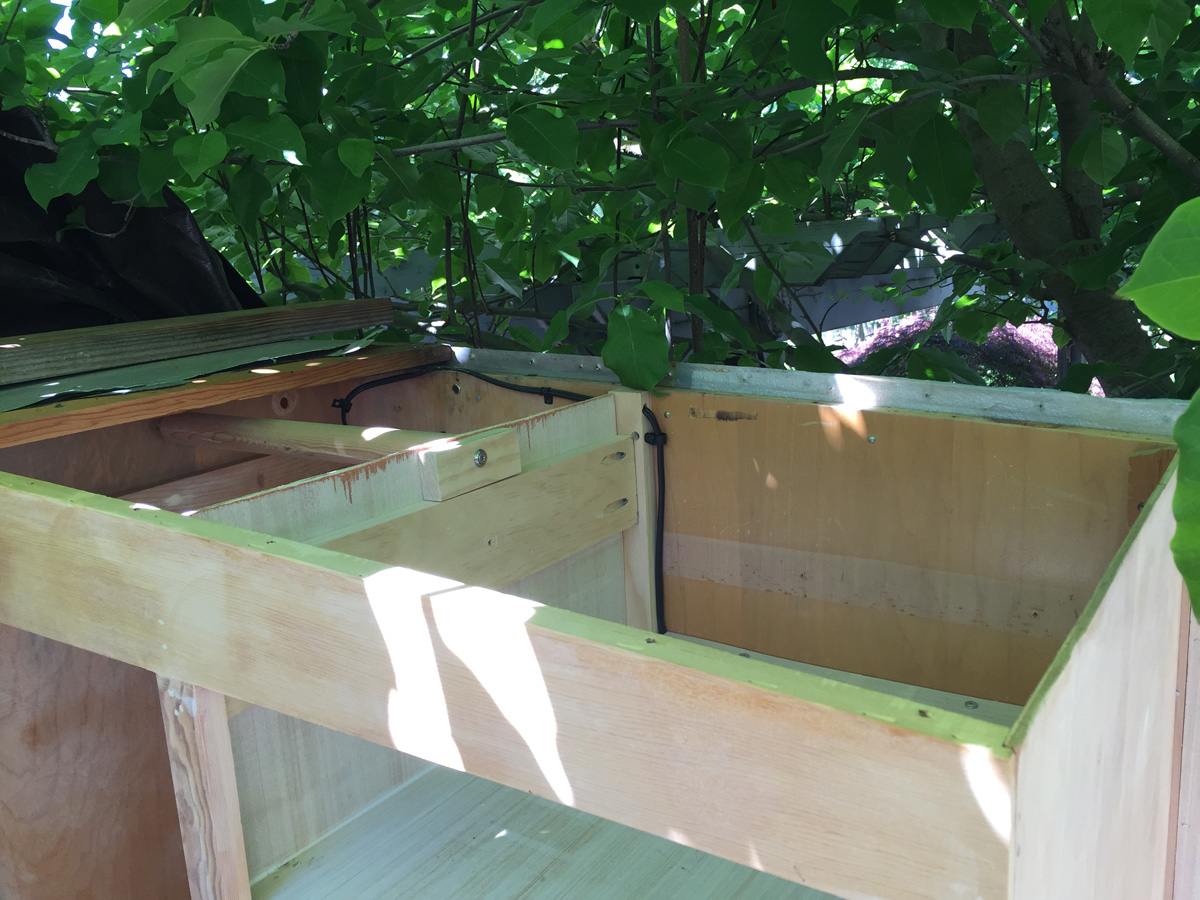
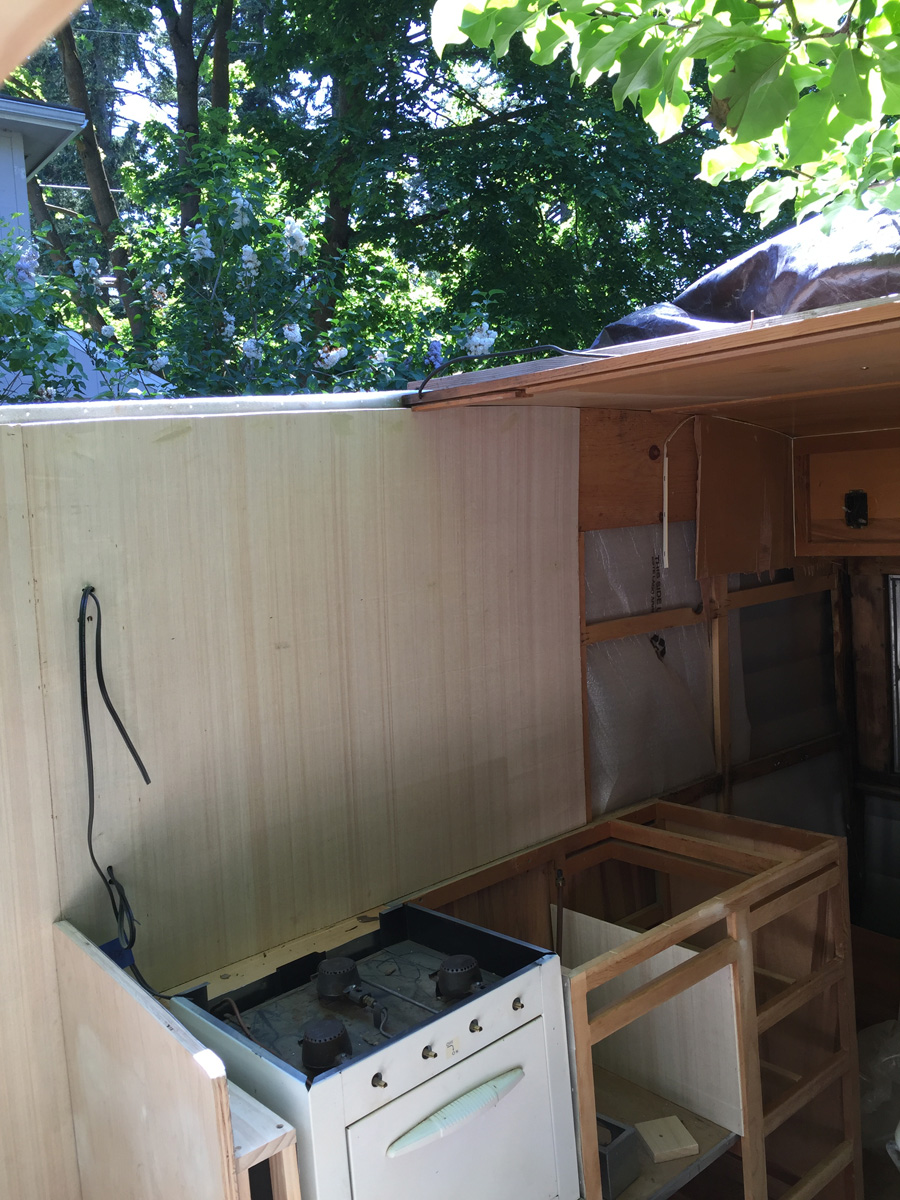
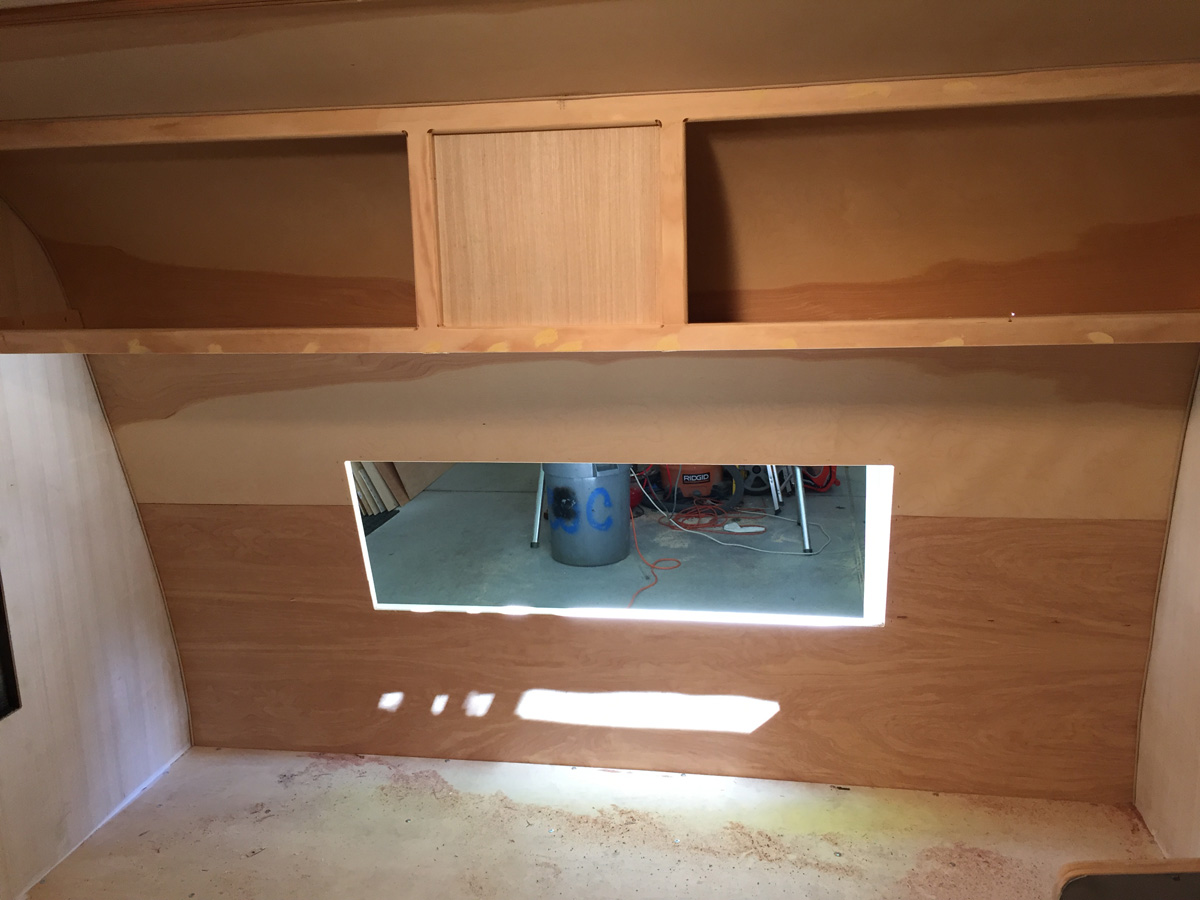
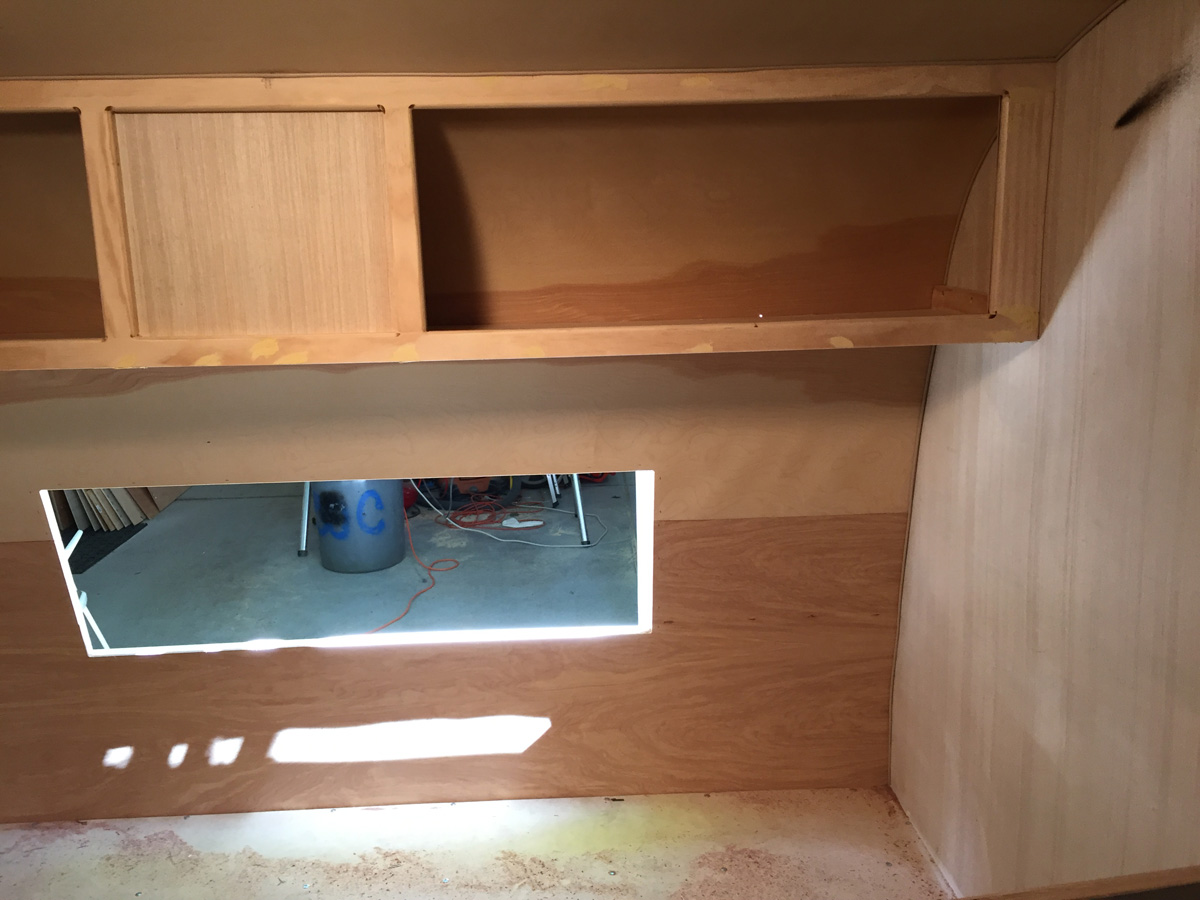
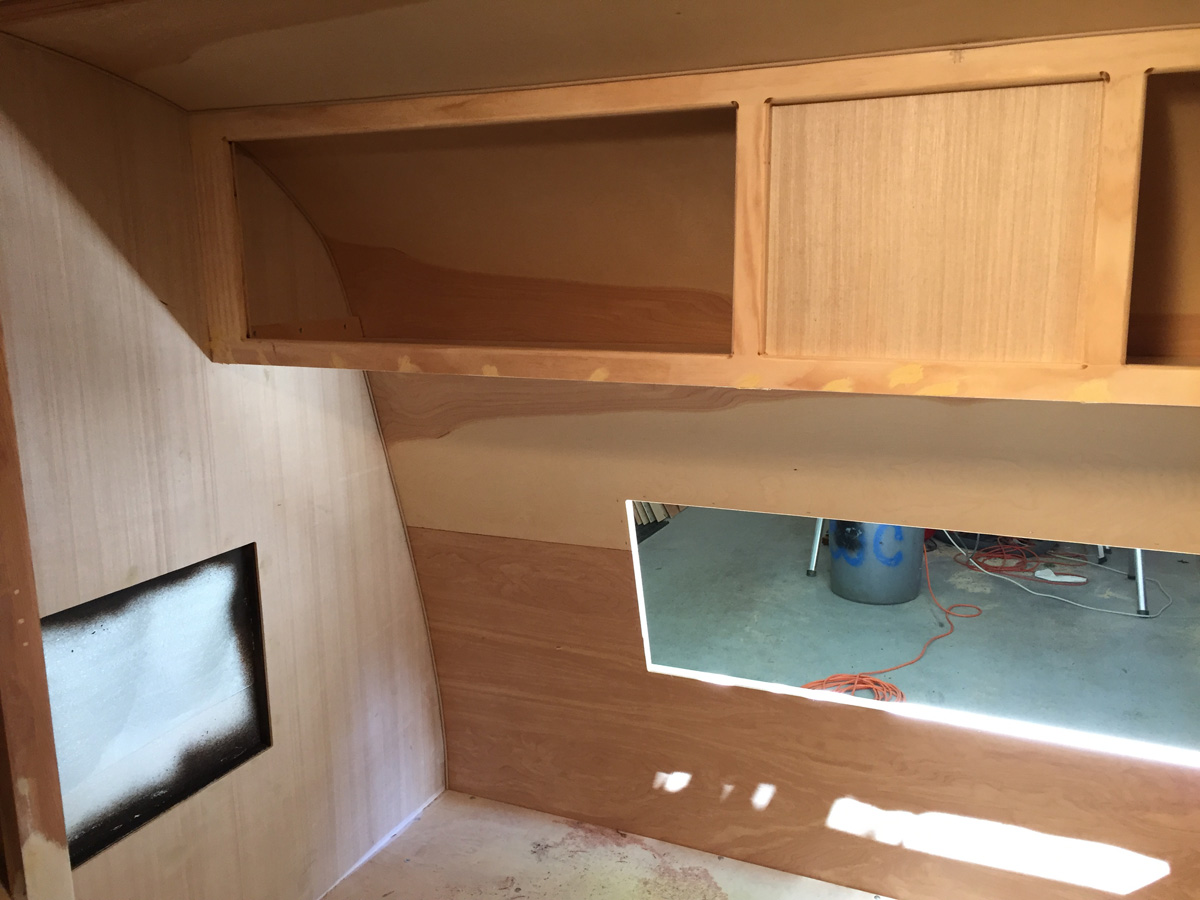
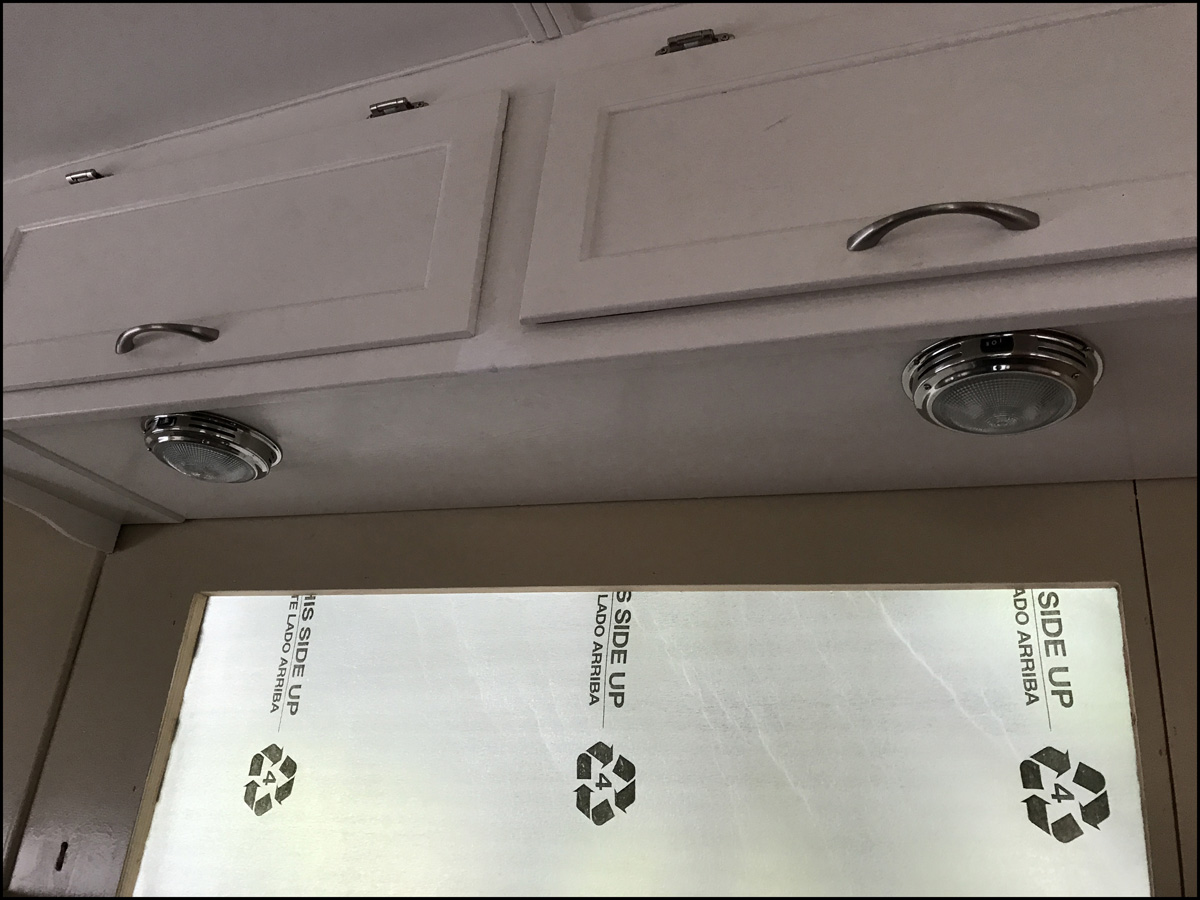
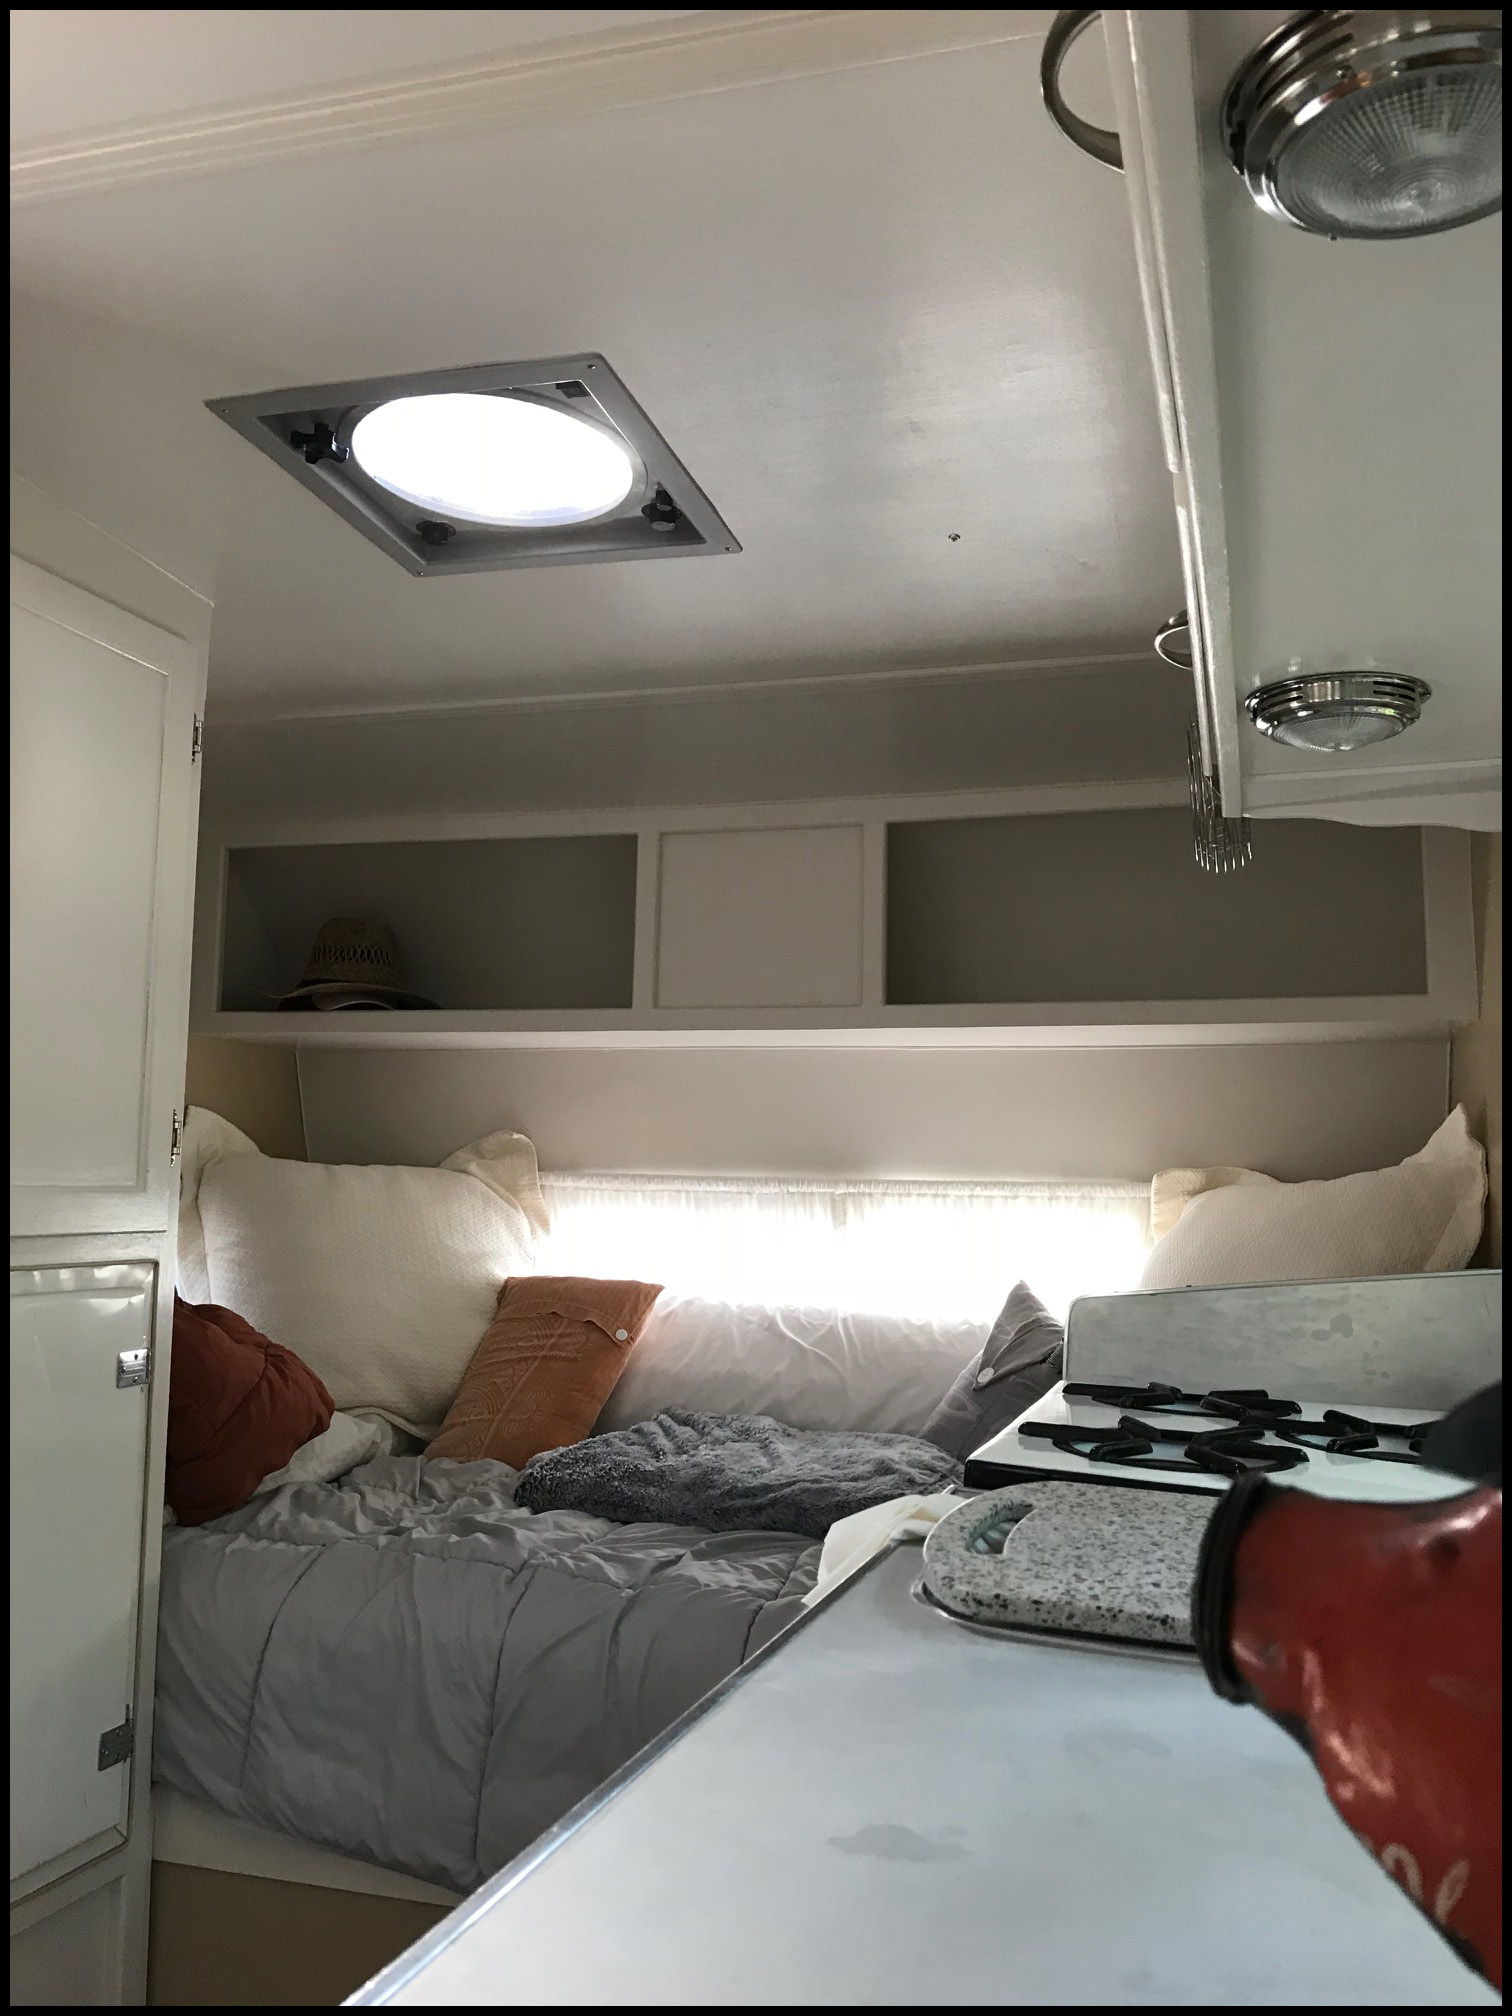
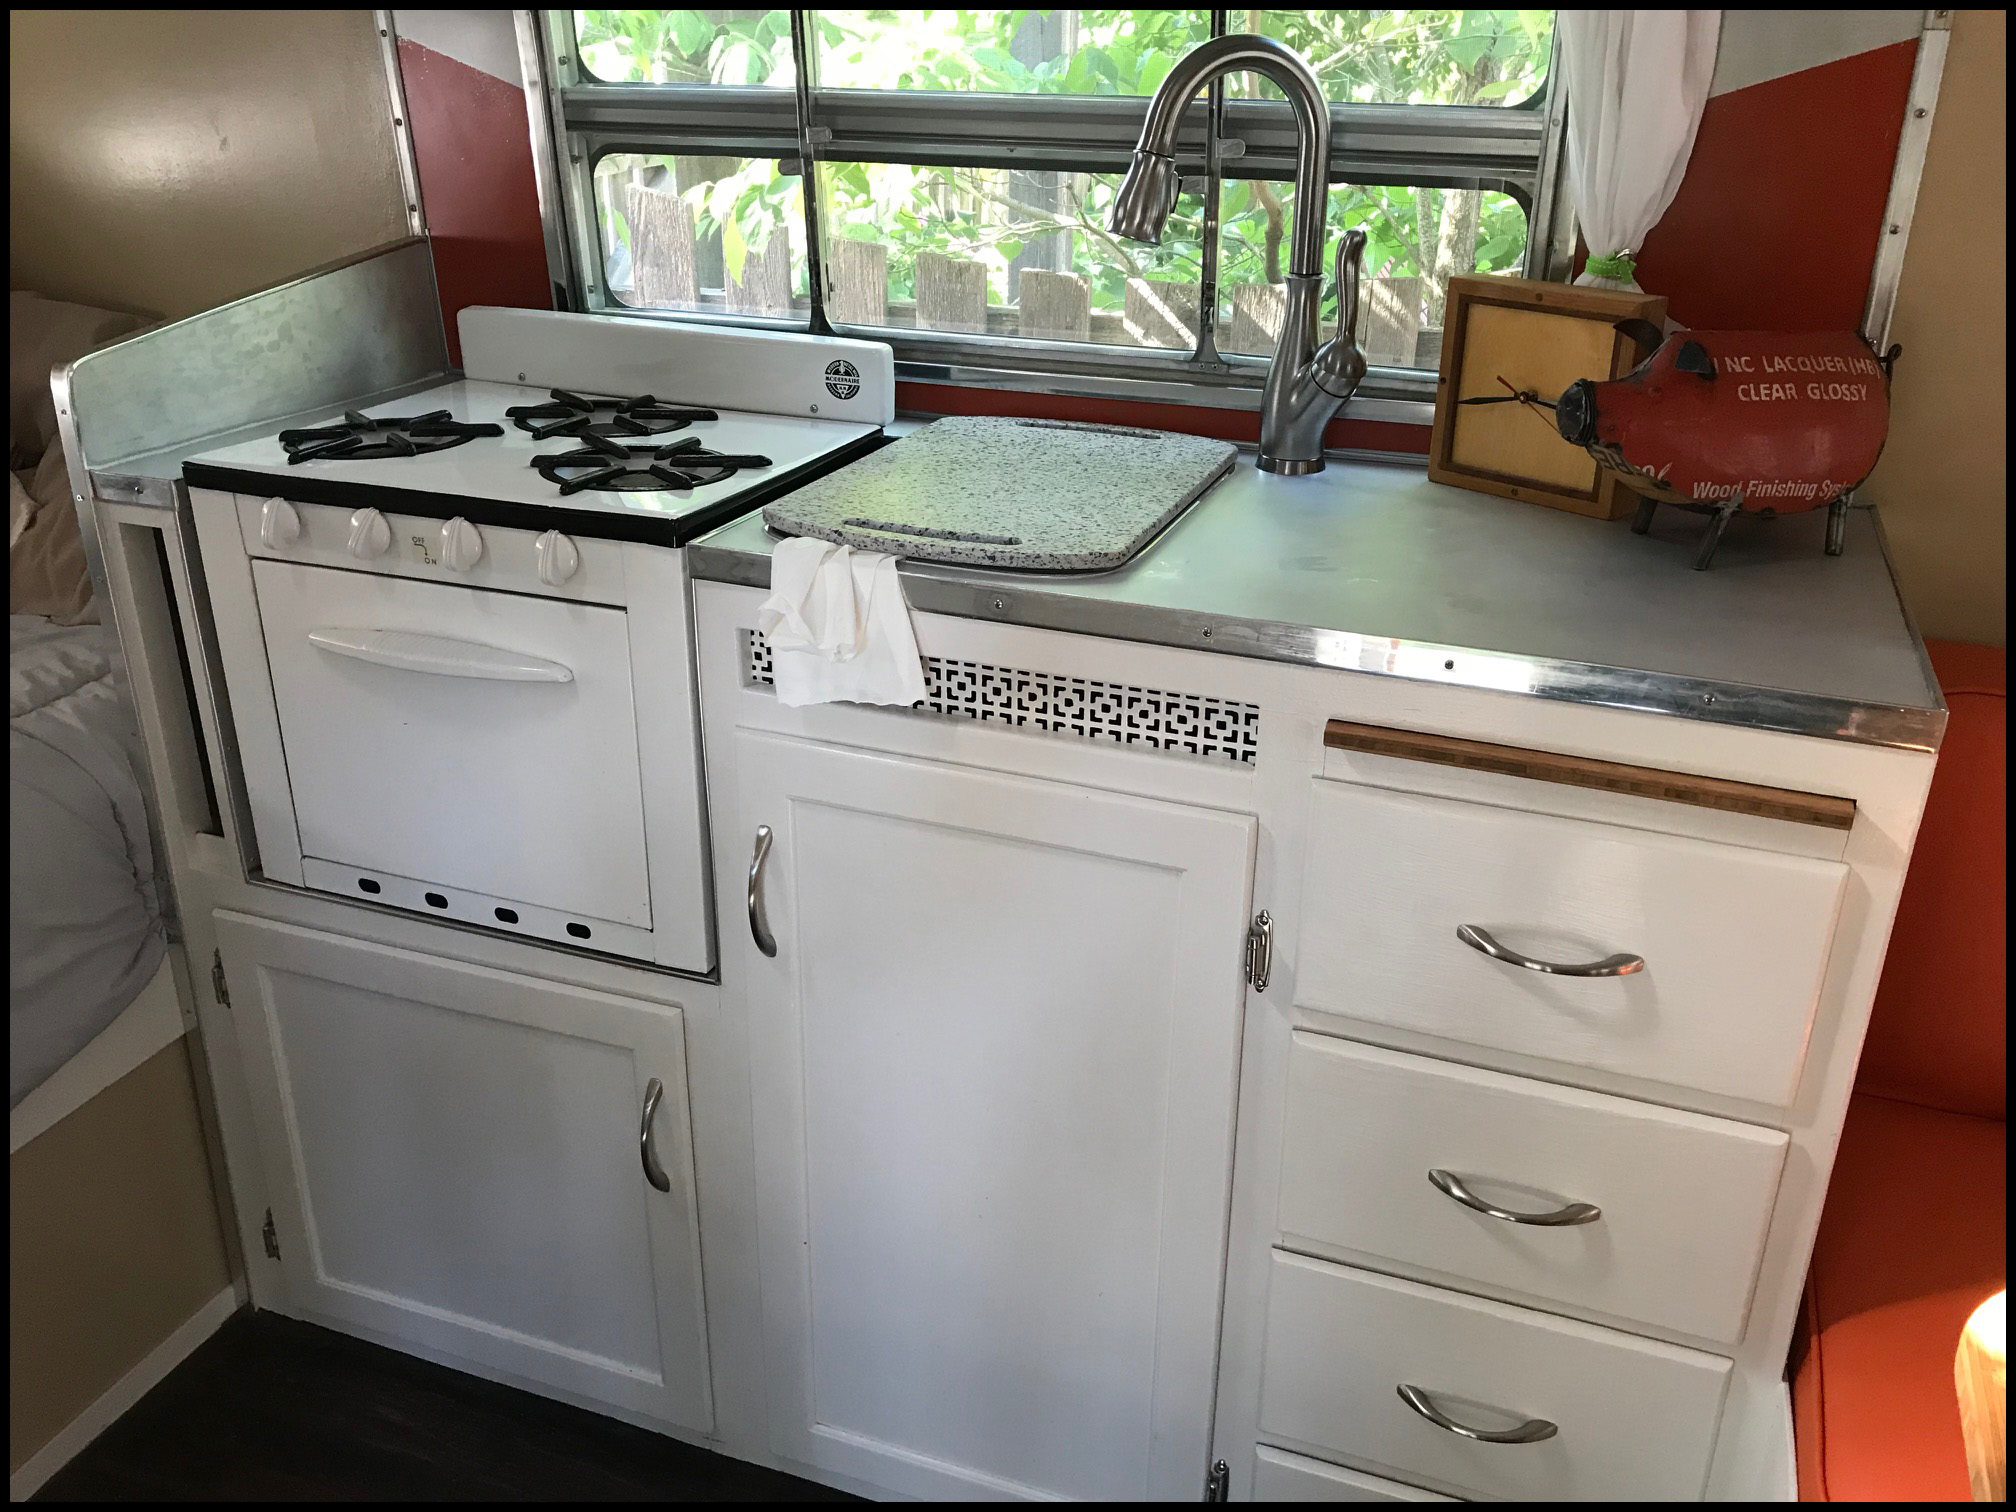
What a long Winter. Or at least it felt like one. I was feeling like I didn’t get anything done, then I looked at my pictures and the last post I did… I got a lot done. Still a long way to go, but how else do you eat an elephant? One bite at a time. 1. Rebuilt all the framing from the front of the wheels back. Vapor barrier and all new wood. 2. Finished modifying the stove cabinet to have a “pan” storage area (the slit to the left of the stove, pic #80-82) and added aluminum sheeting all the way around the stove for heat dispersion. 3. Made shelves for the refrigerator cabinet. And rebuilt to upper kitchen area cabinet to include flush mounted lights(not pictured). |
|
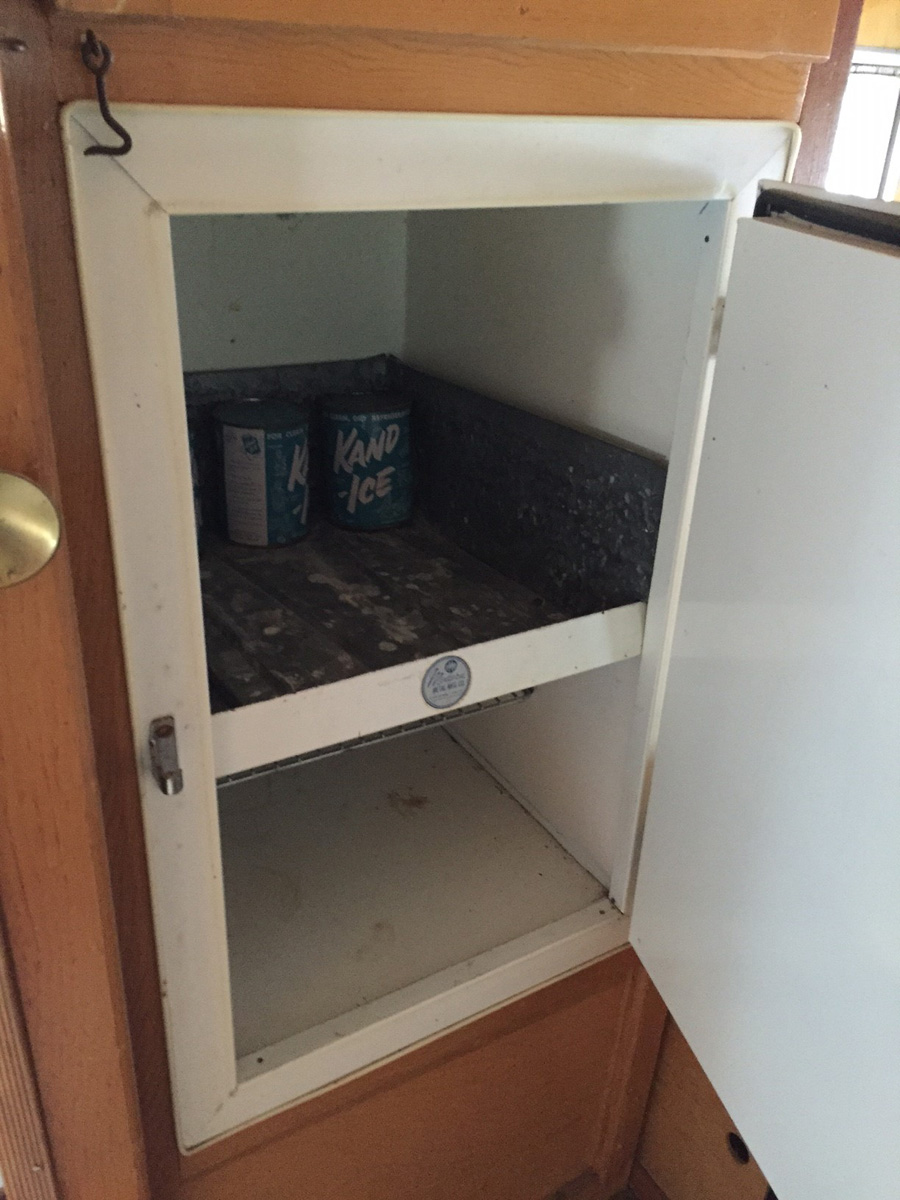
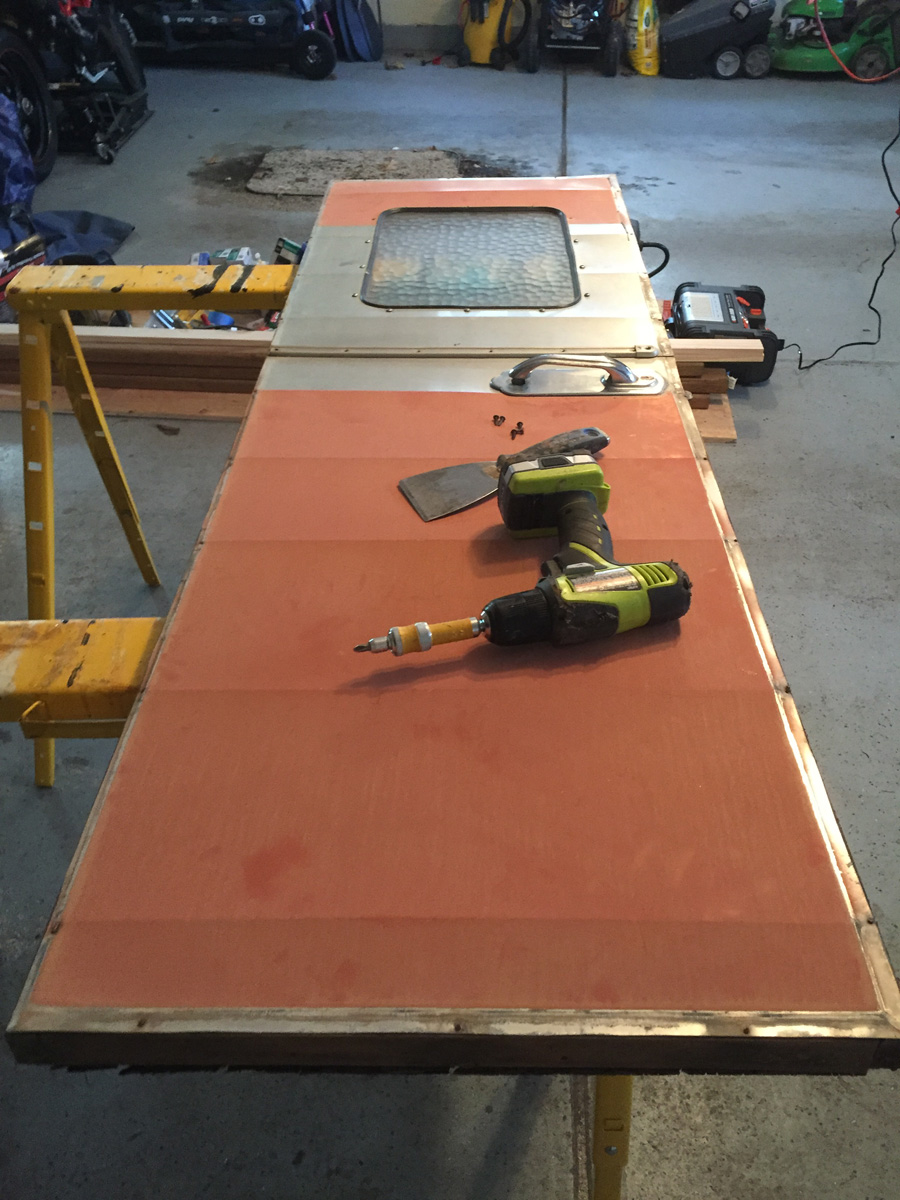
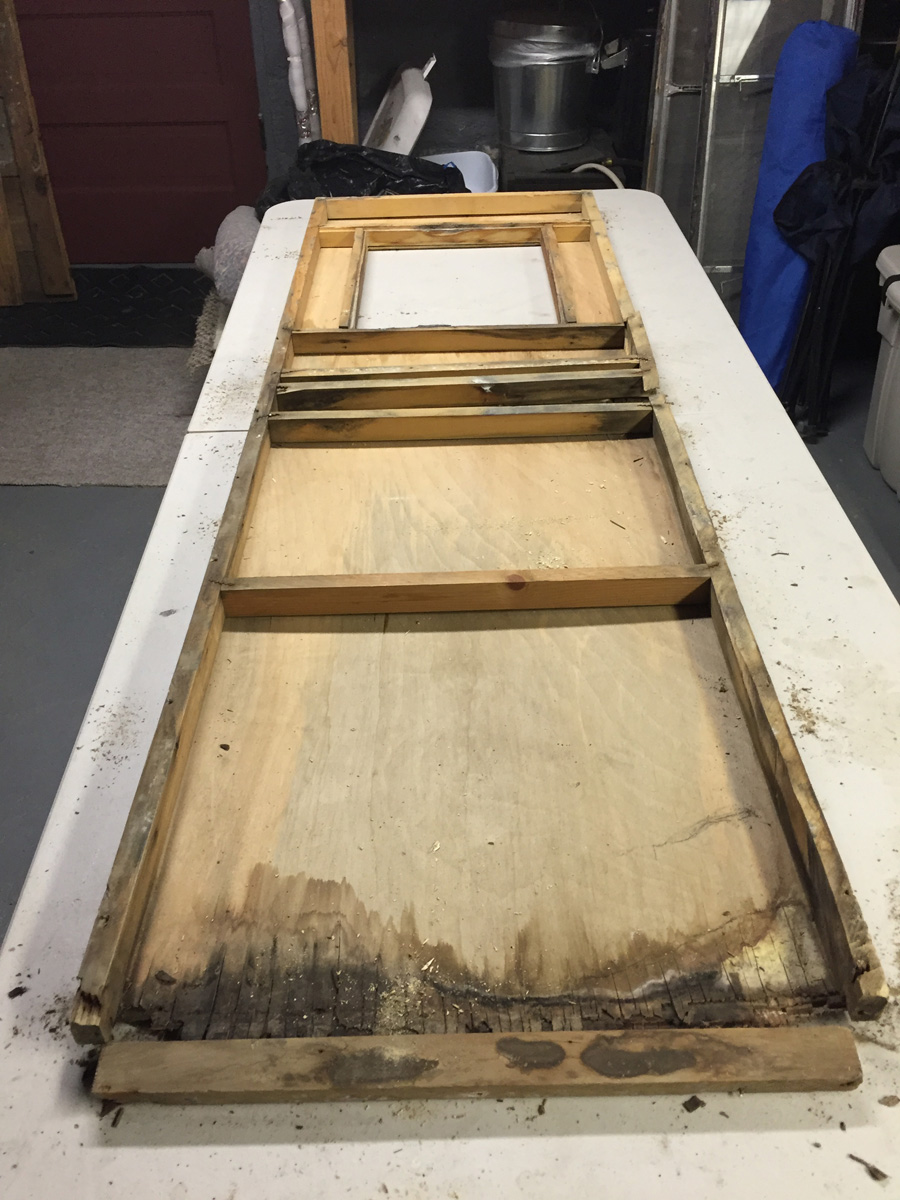
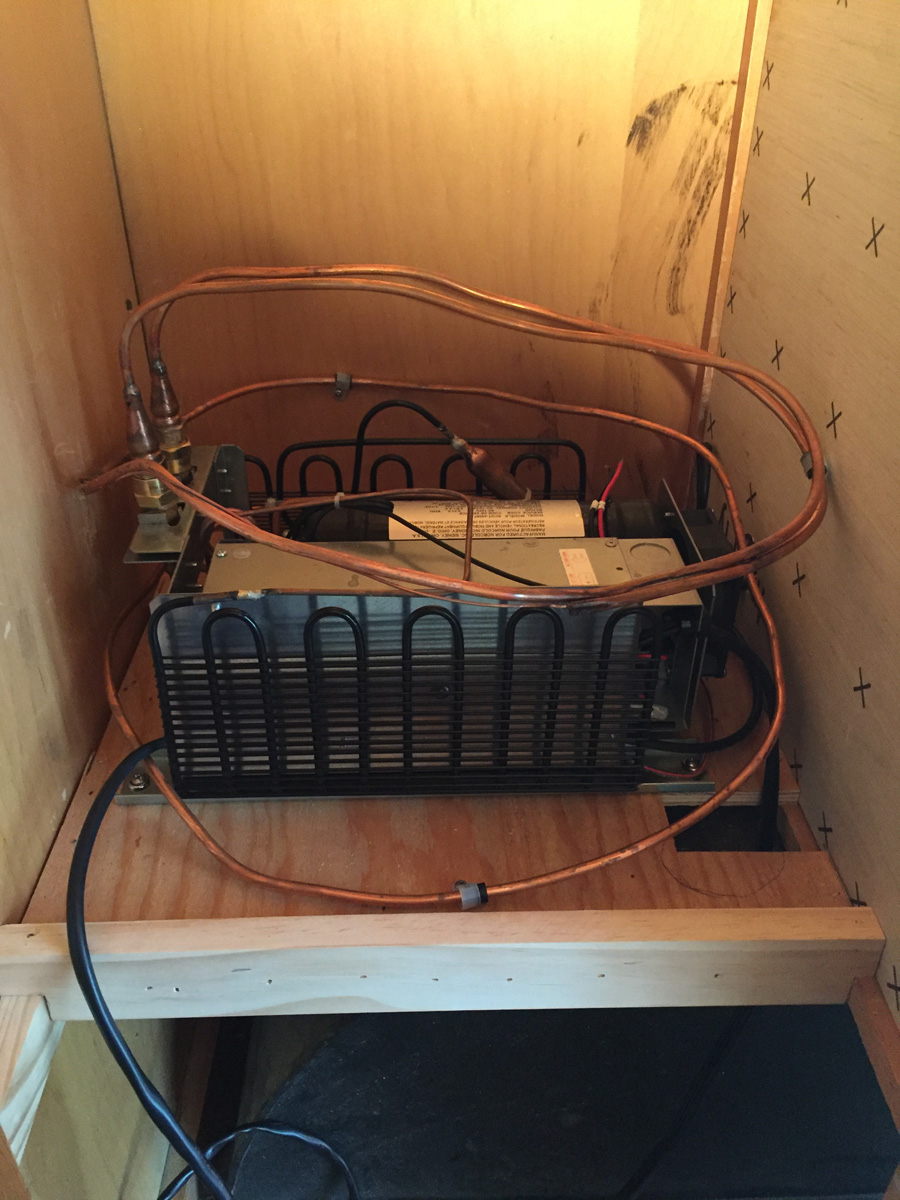
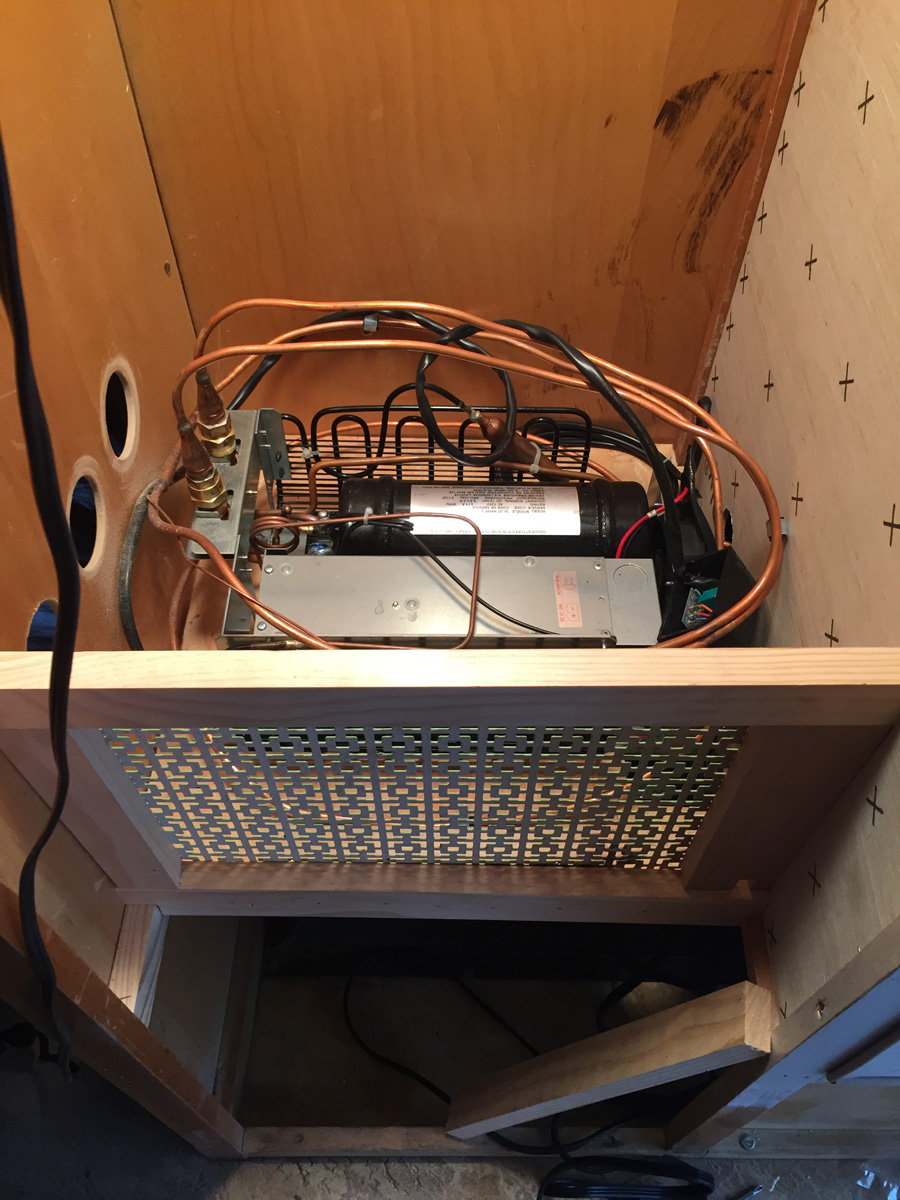
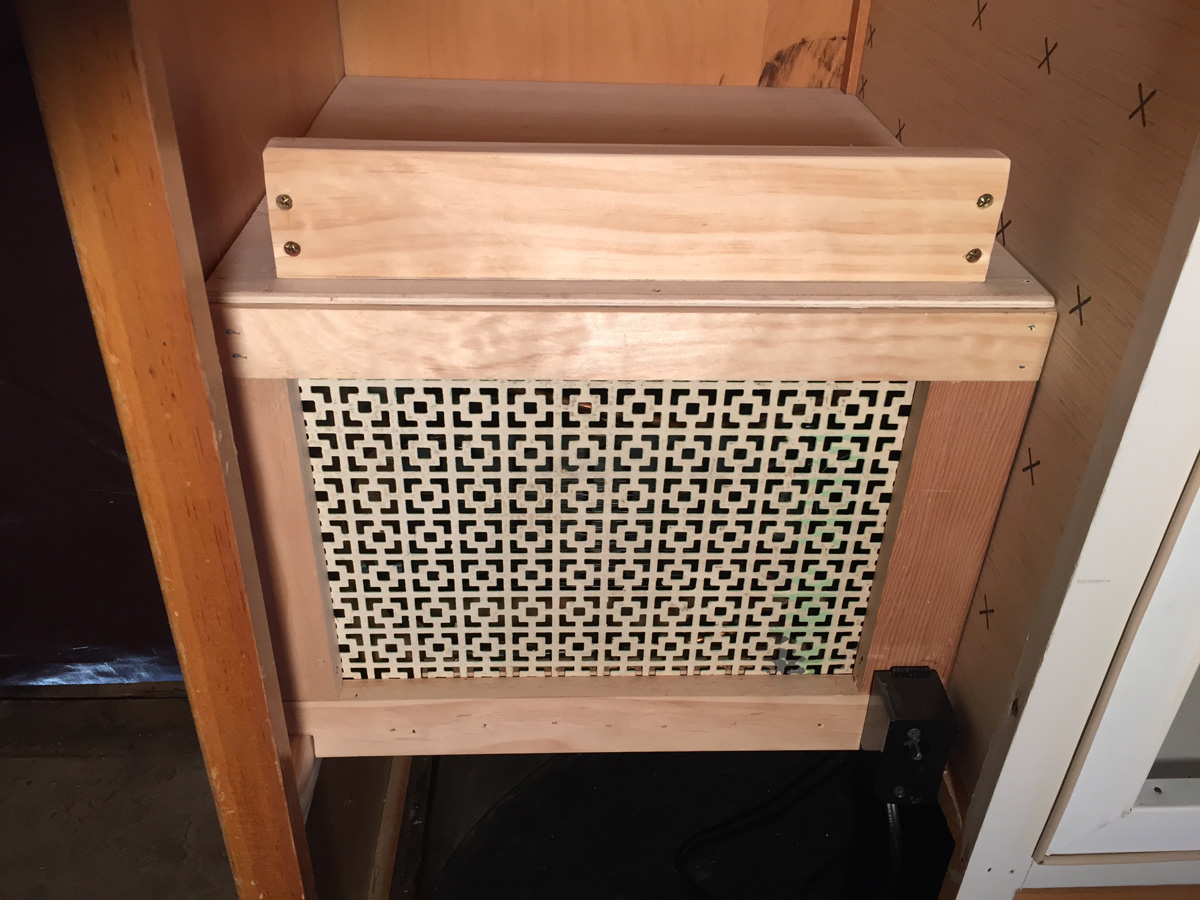
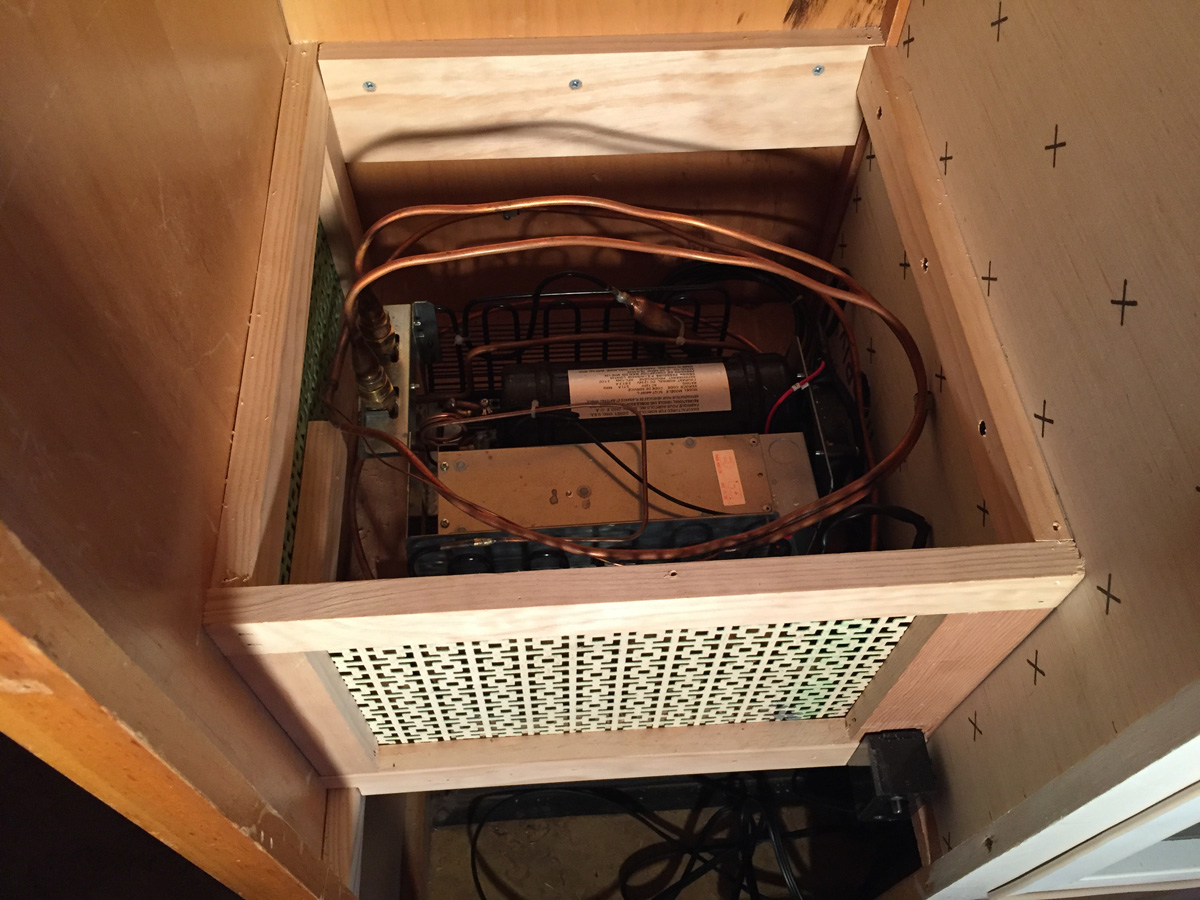
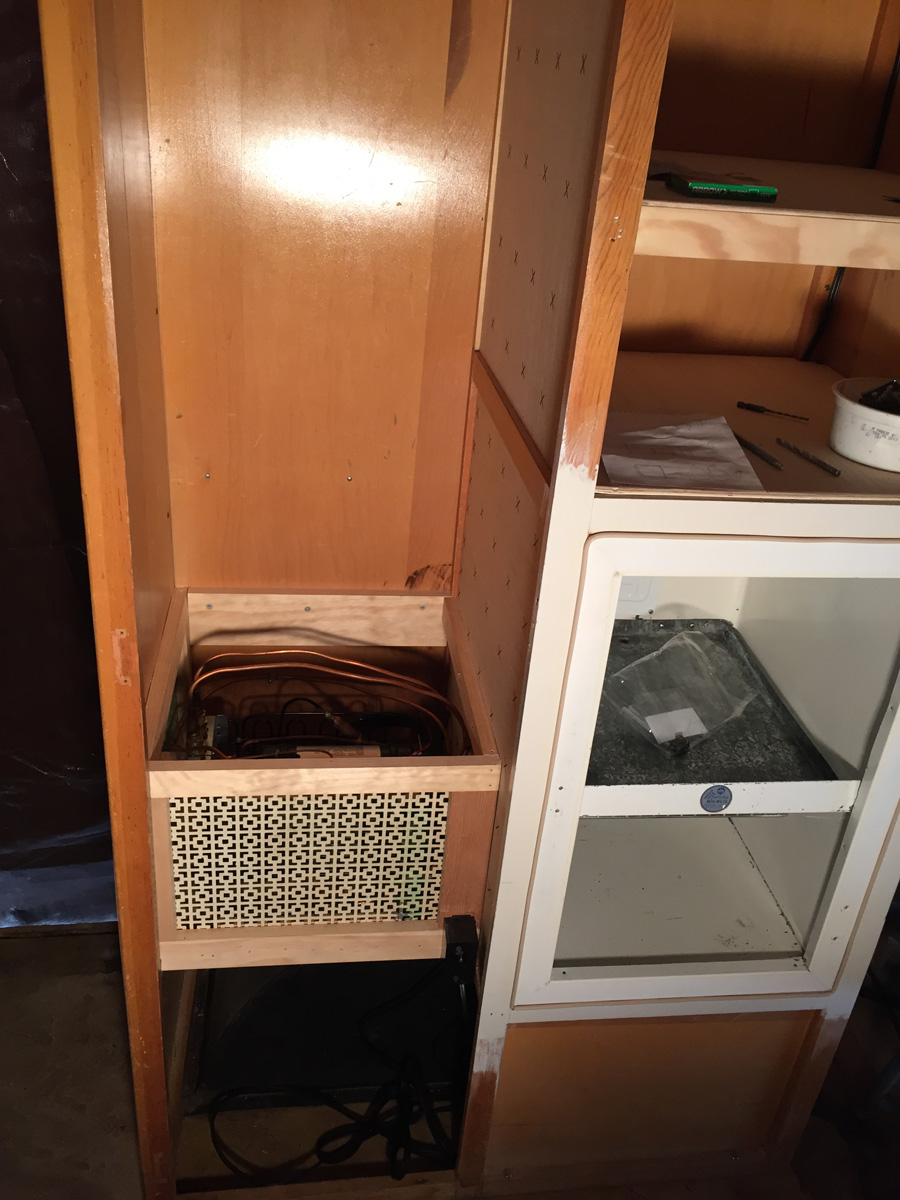
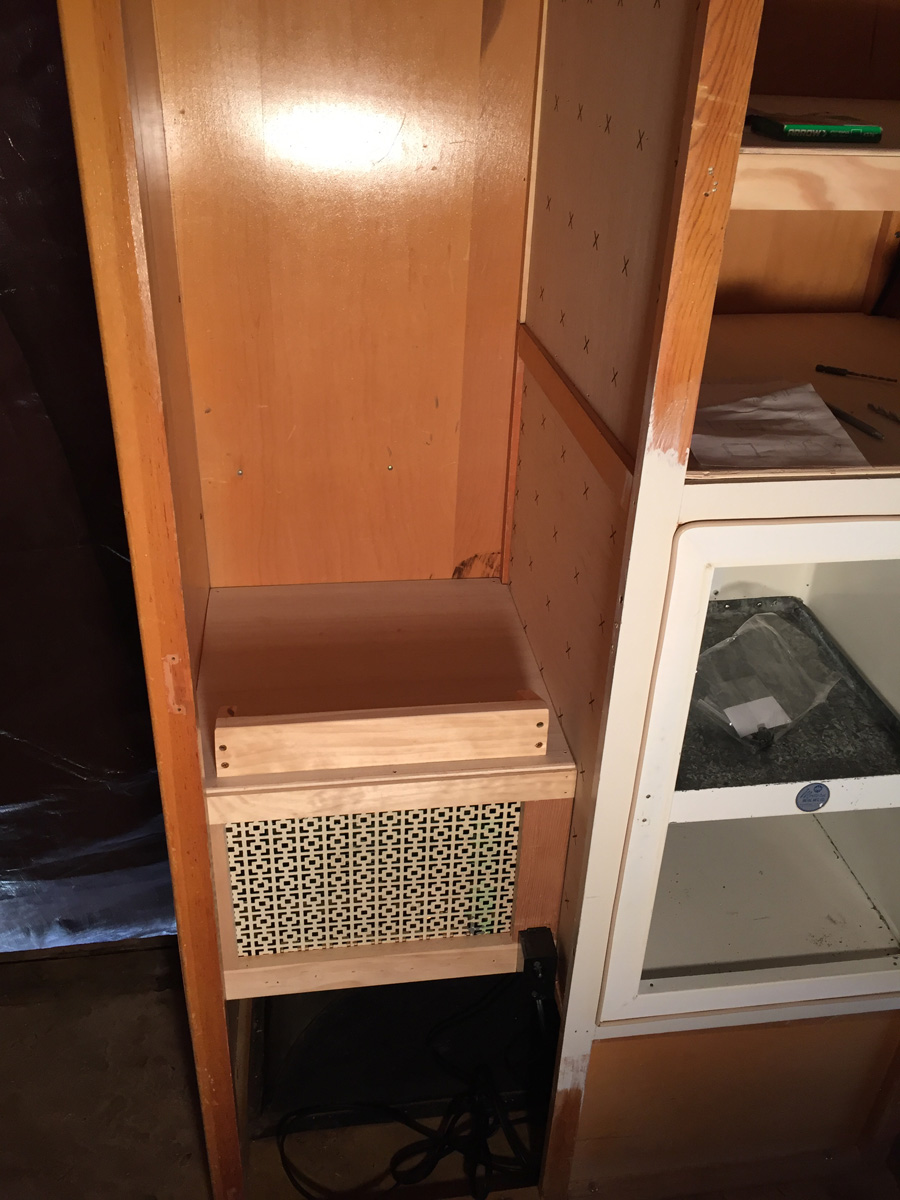
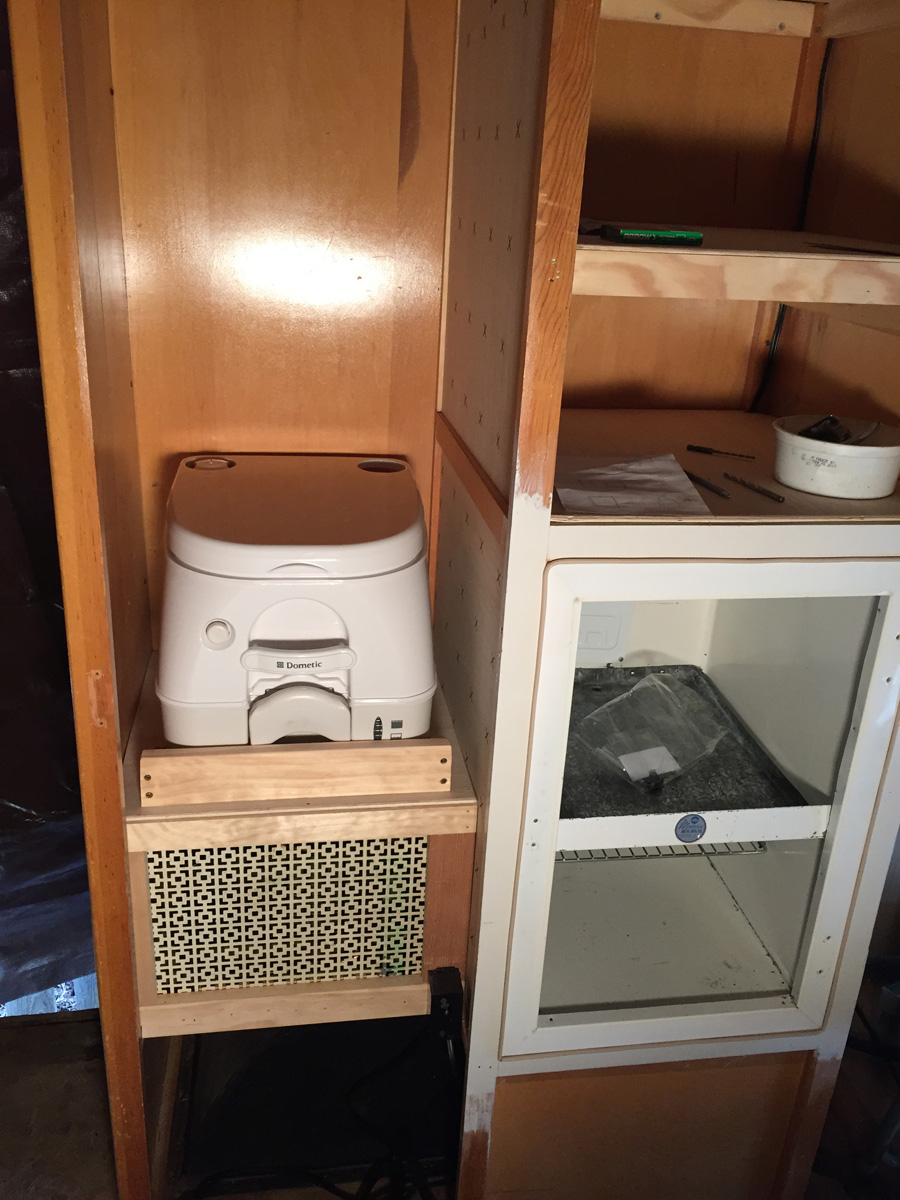
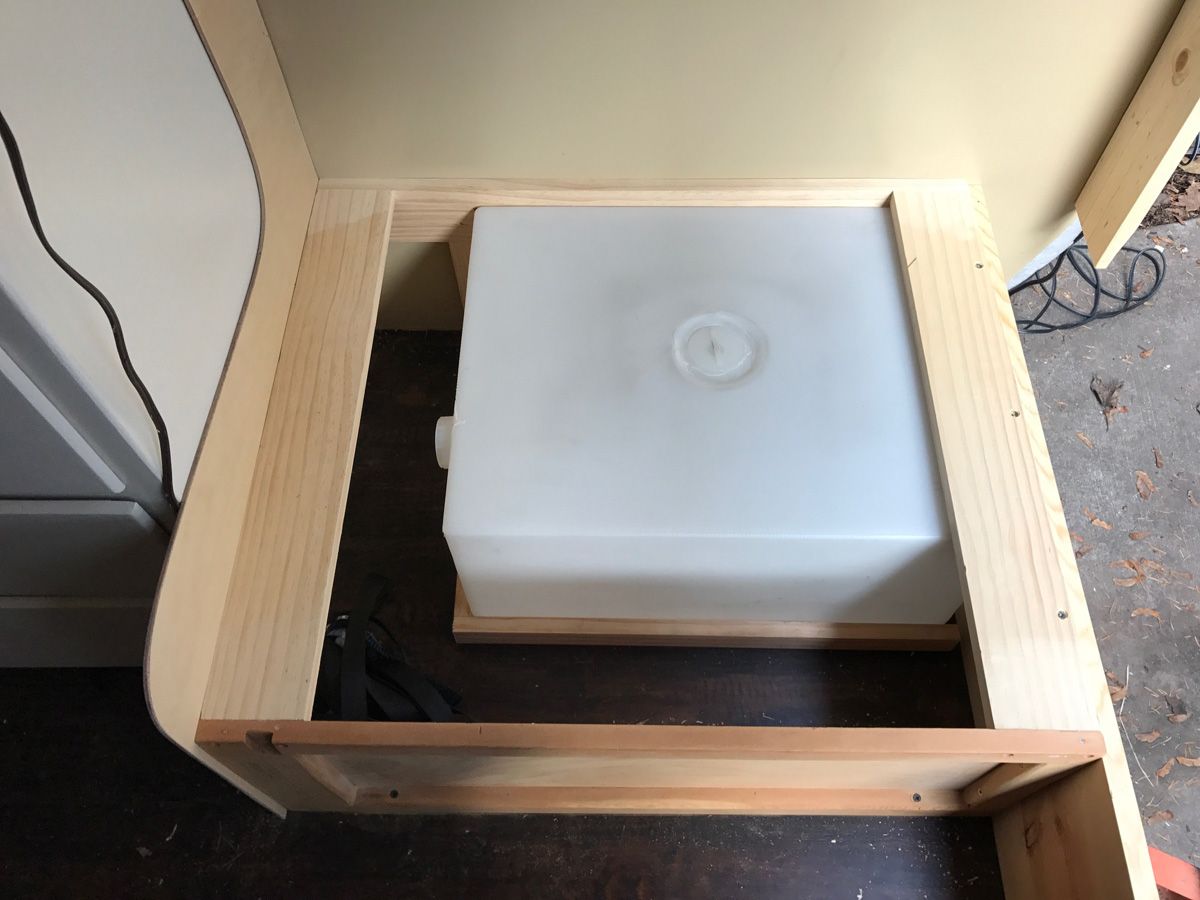
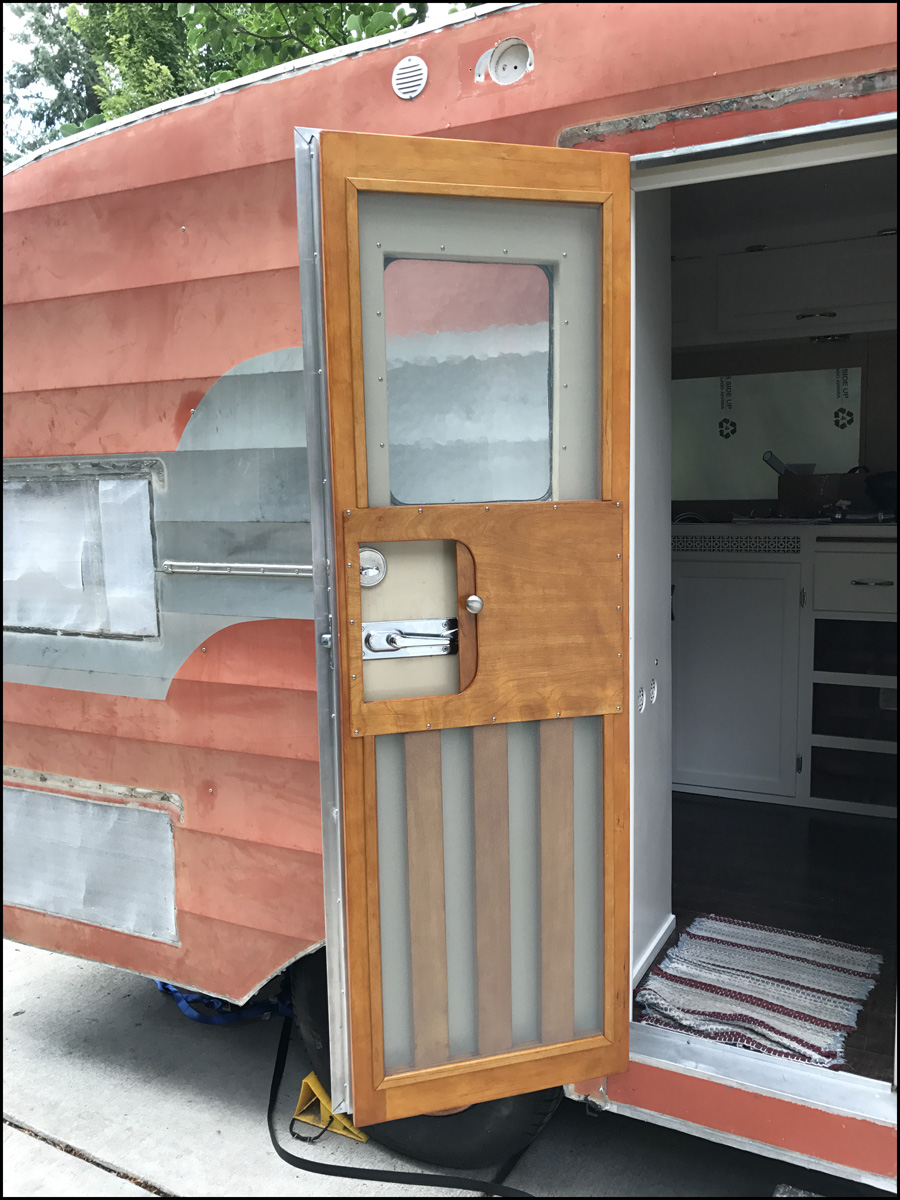
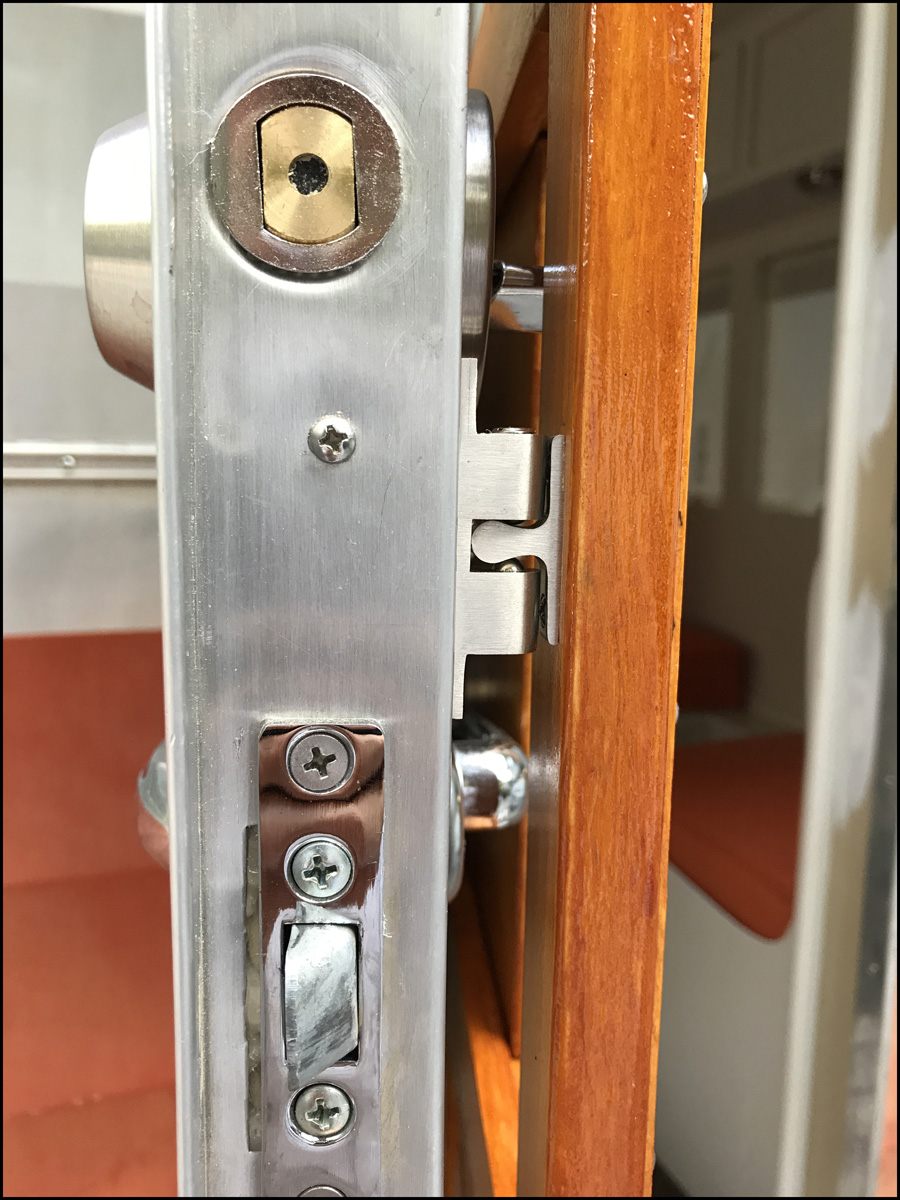
4. Reframed the front door and began the rebuild of the front door frame and installation of locks. 5. Installed the Ice Box Conversion kit (turns an ice box into a refrigerator) More here: http://www.vintagetrailersupply.com/Ice-Box-to-12VDC-110VAC-Conversion-Kit-p/vts-2057.htm 6. And built the vented cabinet to house the condenser for the refrigerator retrofit. With a dock for the porta pottie.
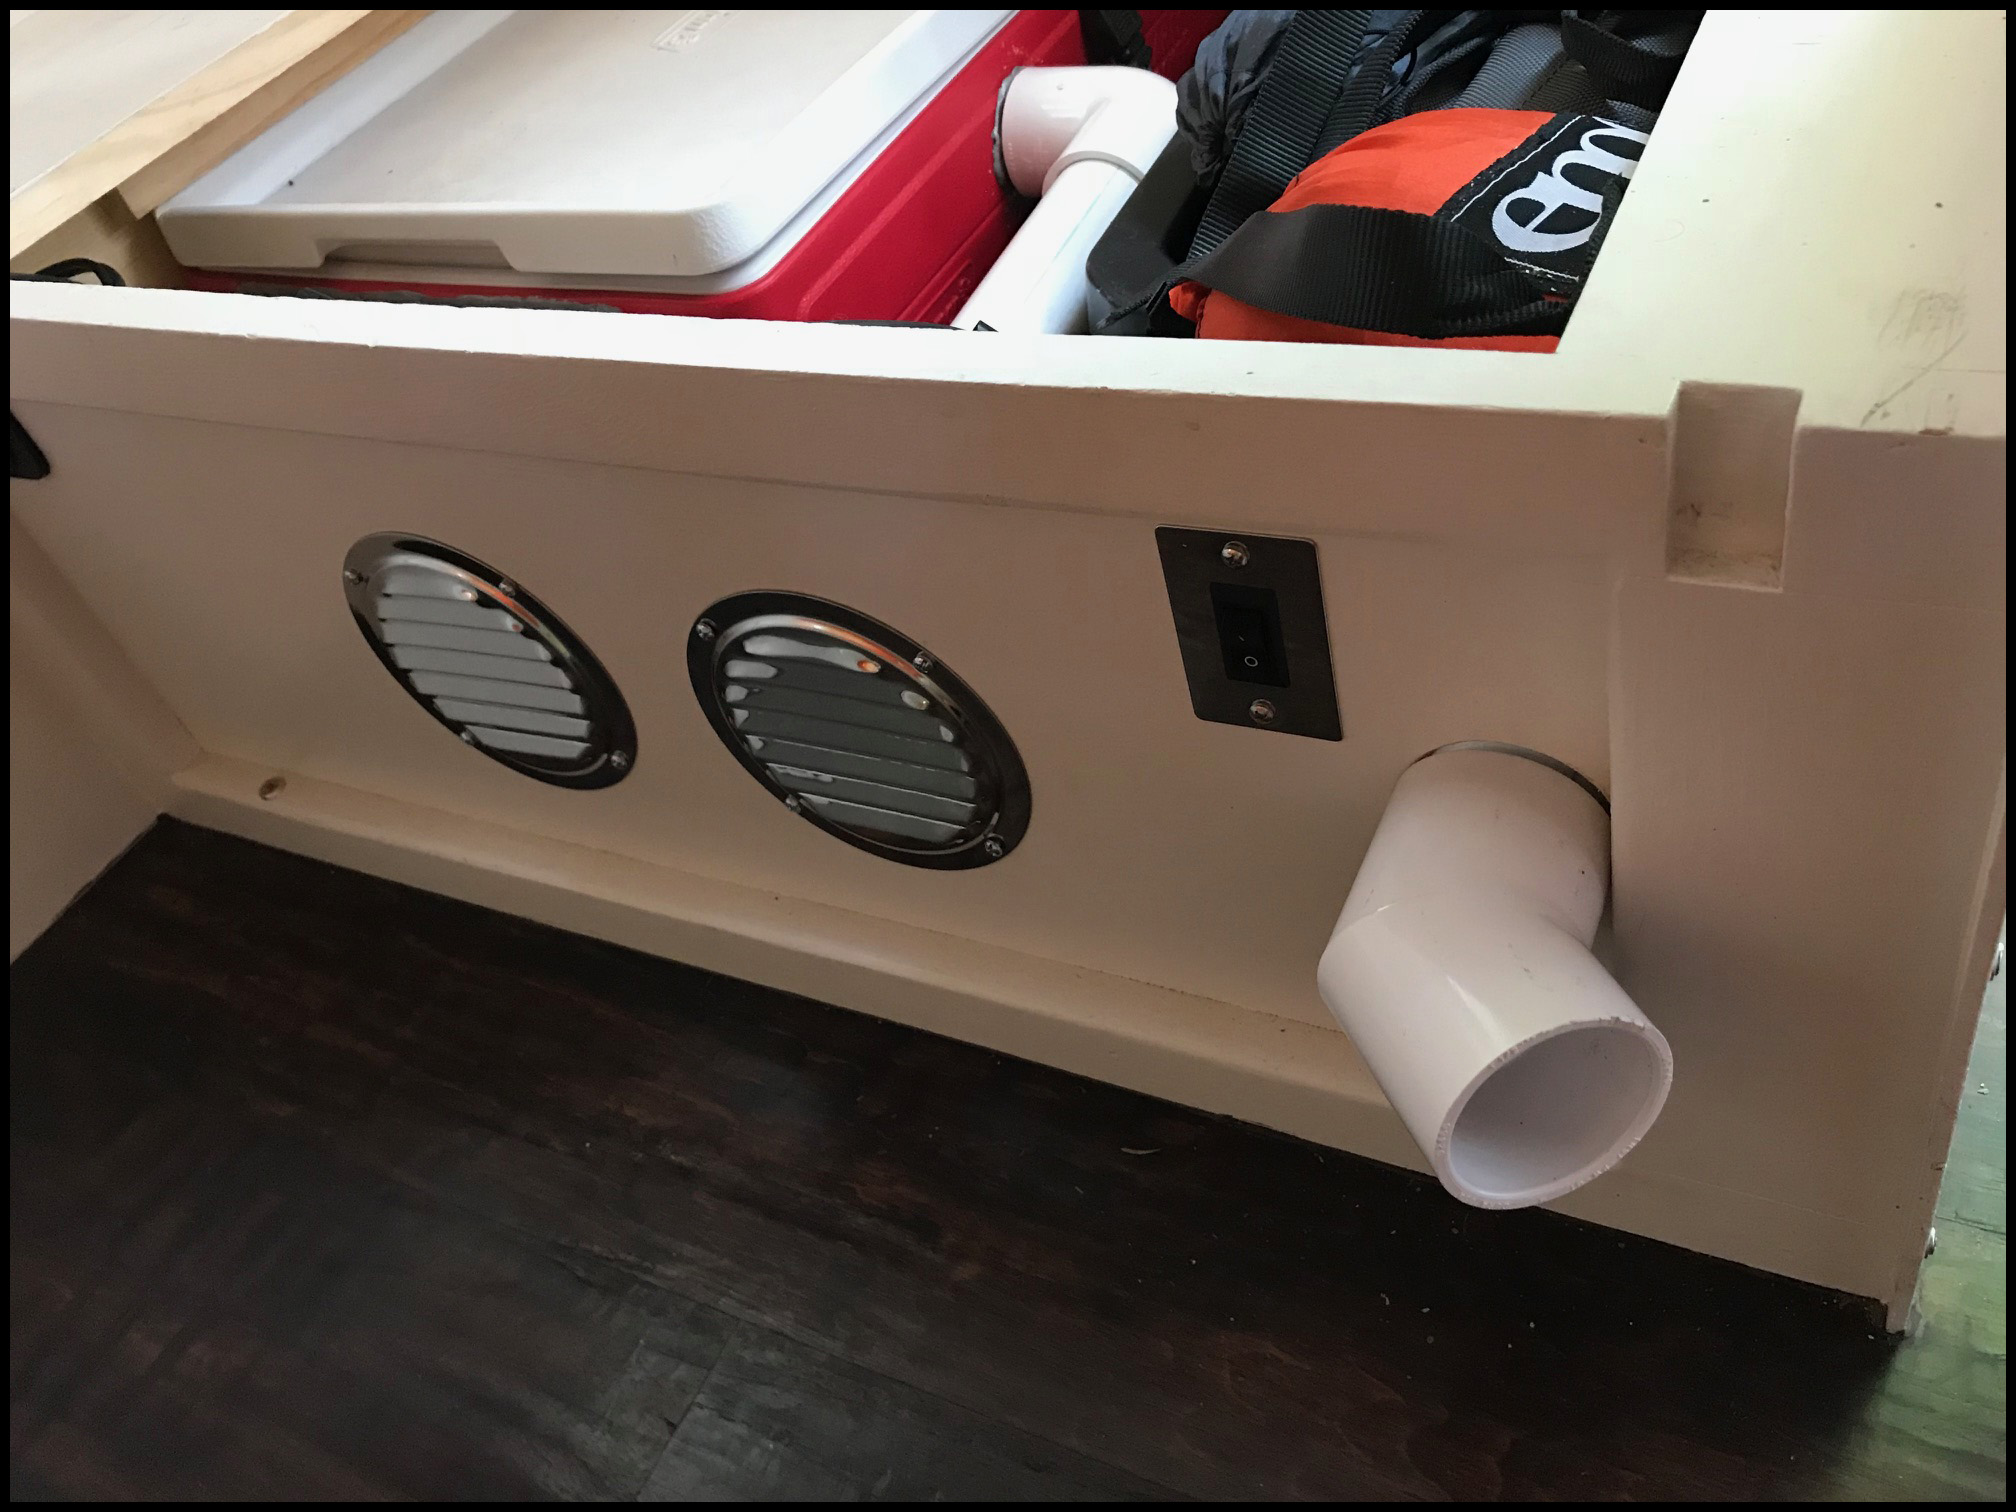
On the refrigerator retrofit… It is an awesome gizmo. Easy enough to install, but one note: most of you are probably wondering why I put it in the closet instead of under the bed? Well as it turns out you cannot mount the condenser (the part outside the refridge) lower that 50cm, about 20in, from the evaporator (the white part inside the refridge). And where my fridge is mounted it would have been almost 4 feet to the bed area. So in the cabinet it went, what you can barley see in pic #87 are three large vent holes on the left outside of the cabinet, using the same grating as the front, for full ventilation of the unit. All in all, it was easy to install. There is good documentation and videos on YouTube to help. Also, over the winter I got to head up north and see Doug Johnson from the Vintage Trailer Forums, he has been a ton of help with getting me some contacts on upholstery and metal fabrication. Definitely worth the time to talk with and has an awesome shop setup for his restorations. Check him out when you get a chance!
 |
 |
 |
 |
 |
 |
 |
 |
 |
 |
 |
 |
 |
 |
 |
 |
 |
 |
 |
 |
 |
 |
 |
 |
 |
 |
 |
 |
 |
 |
 |
 |
 |
 |
 |
 |
 |
 |
 |
 |
 |
 |
 |
 |
 |
 |
 |
 |
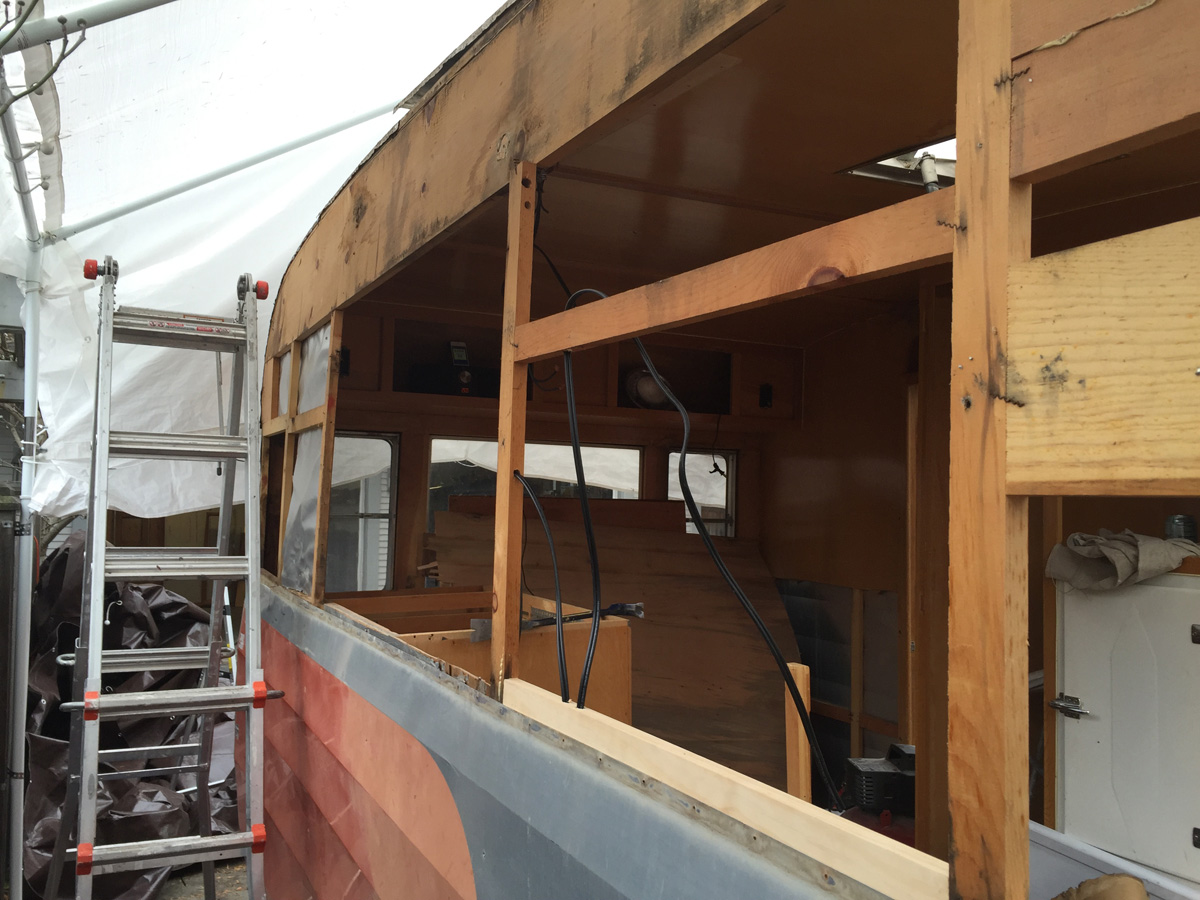
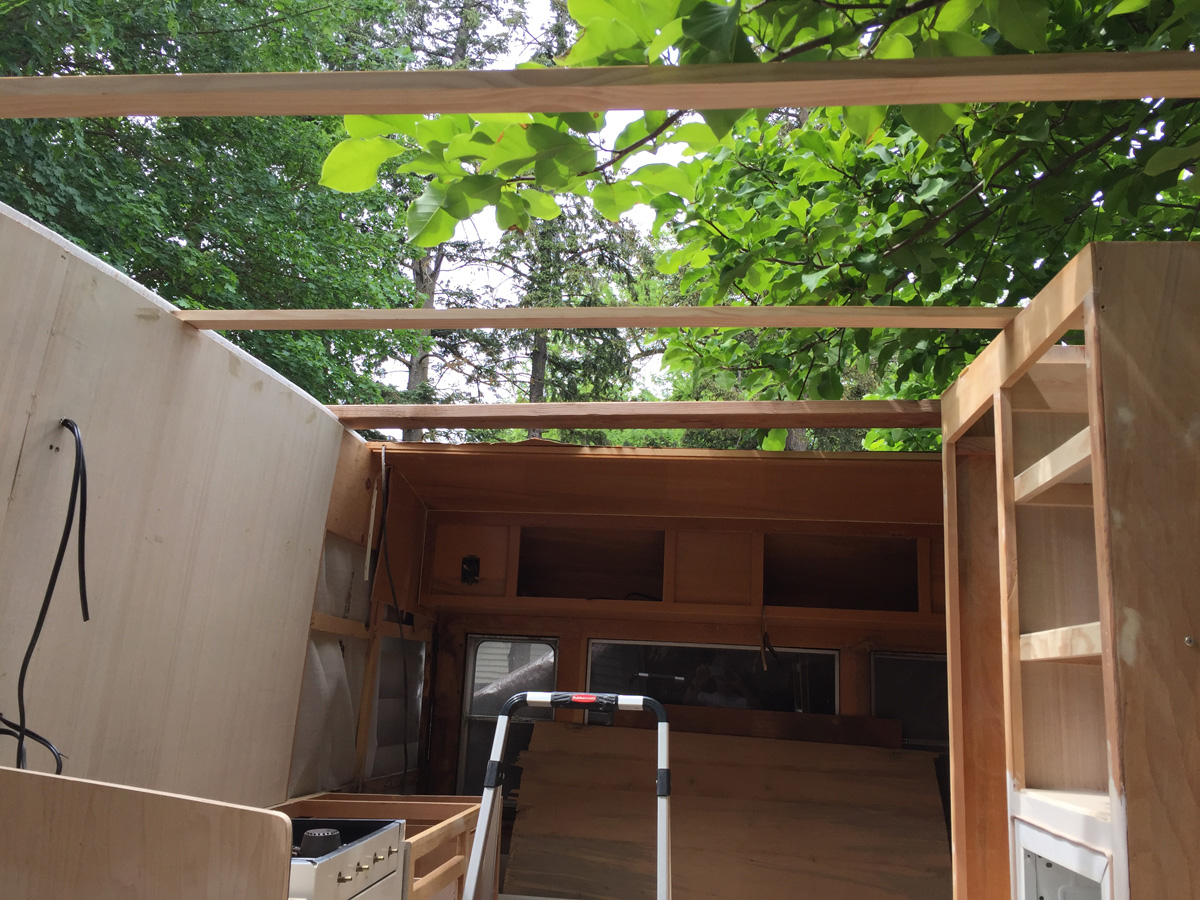
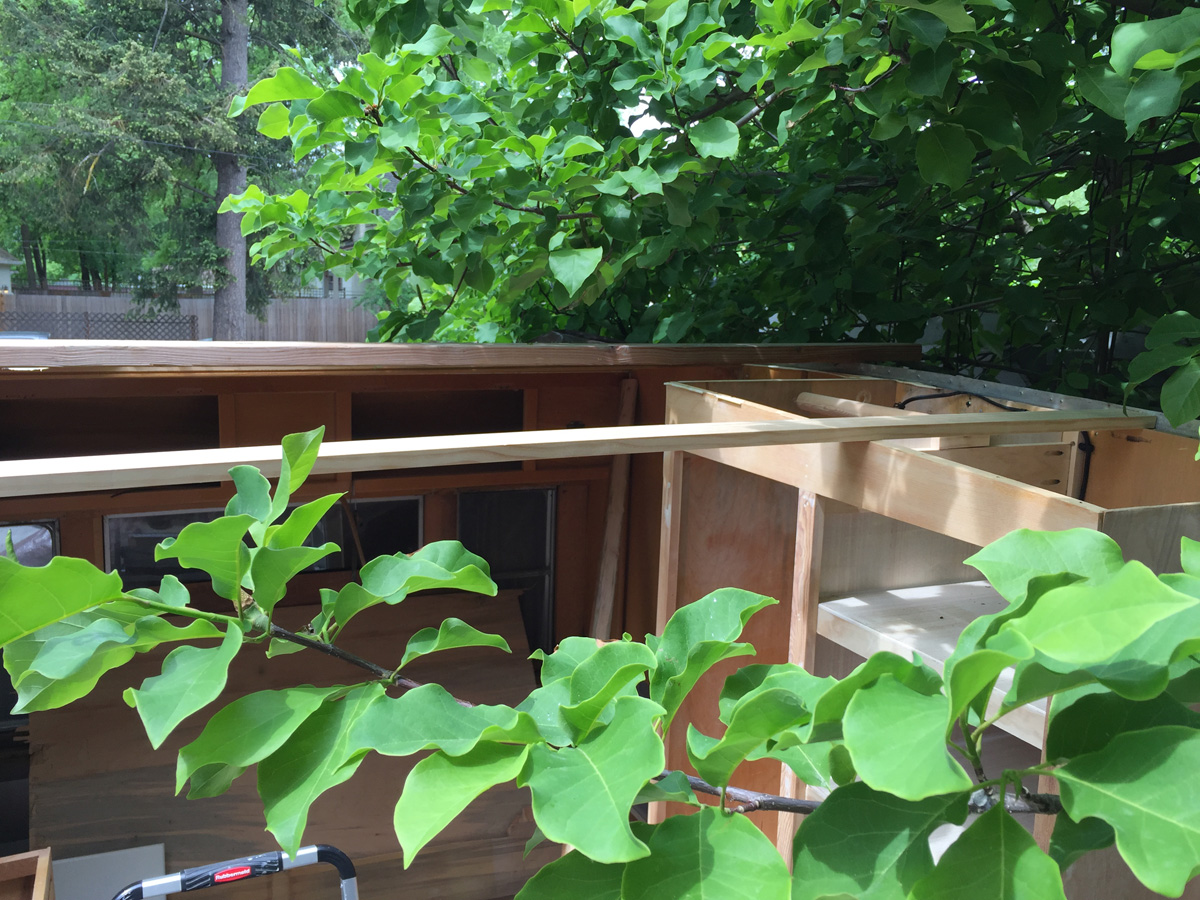
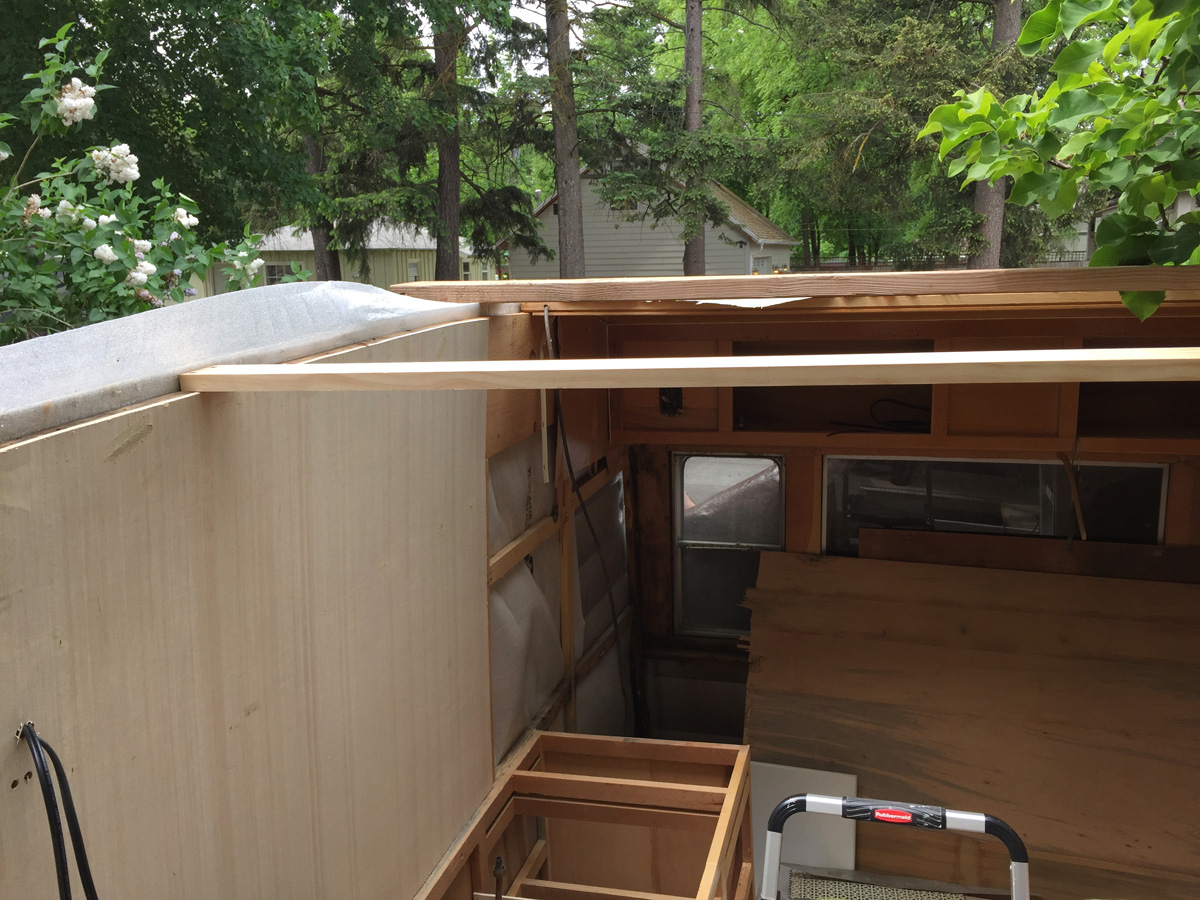
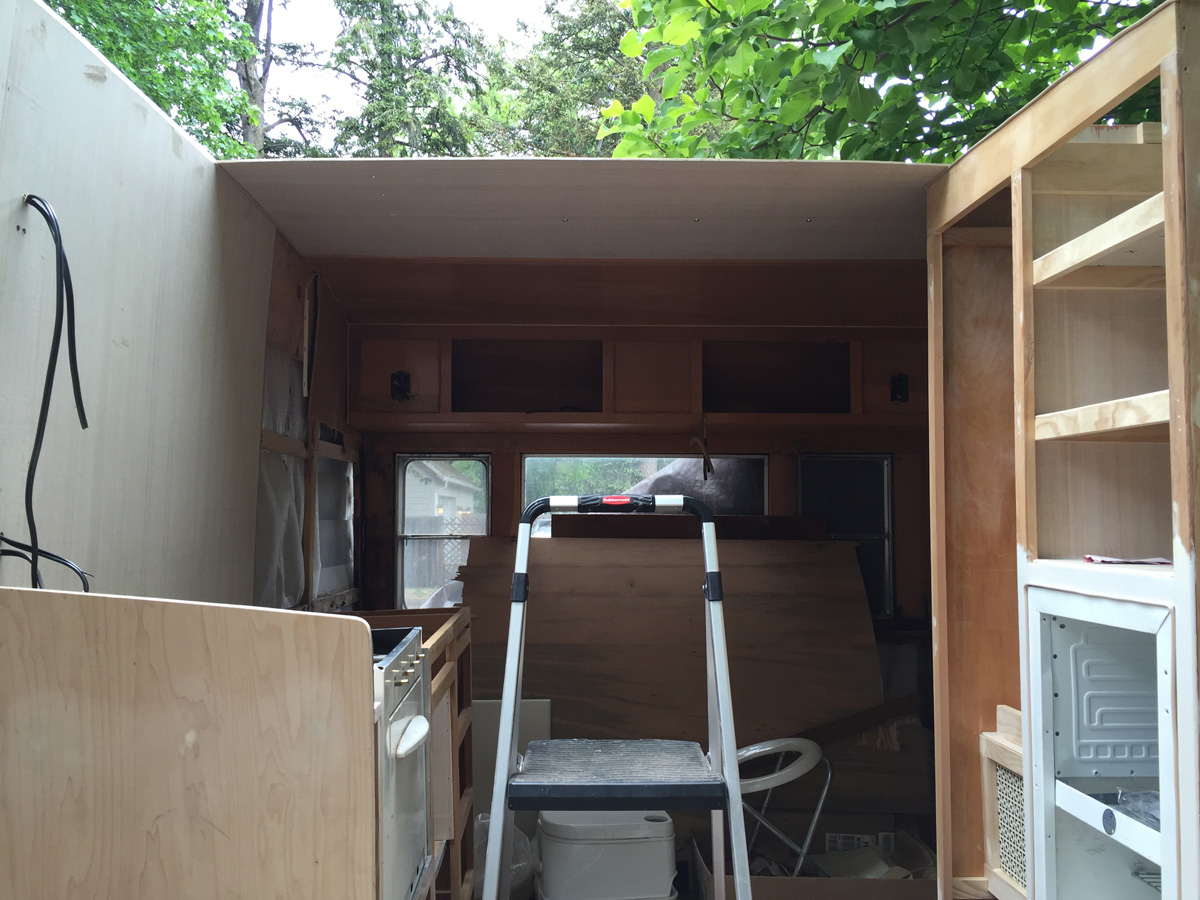
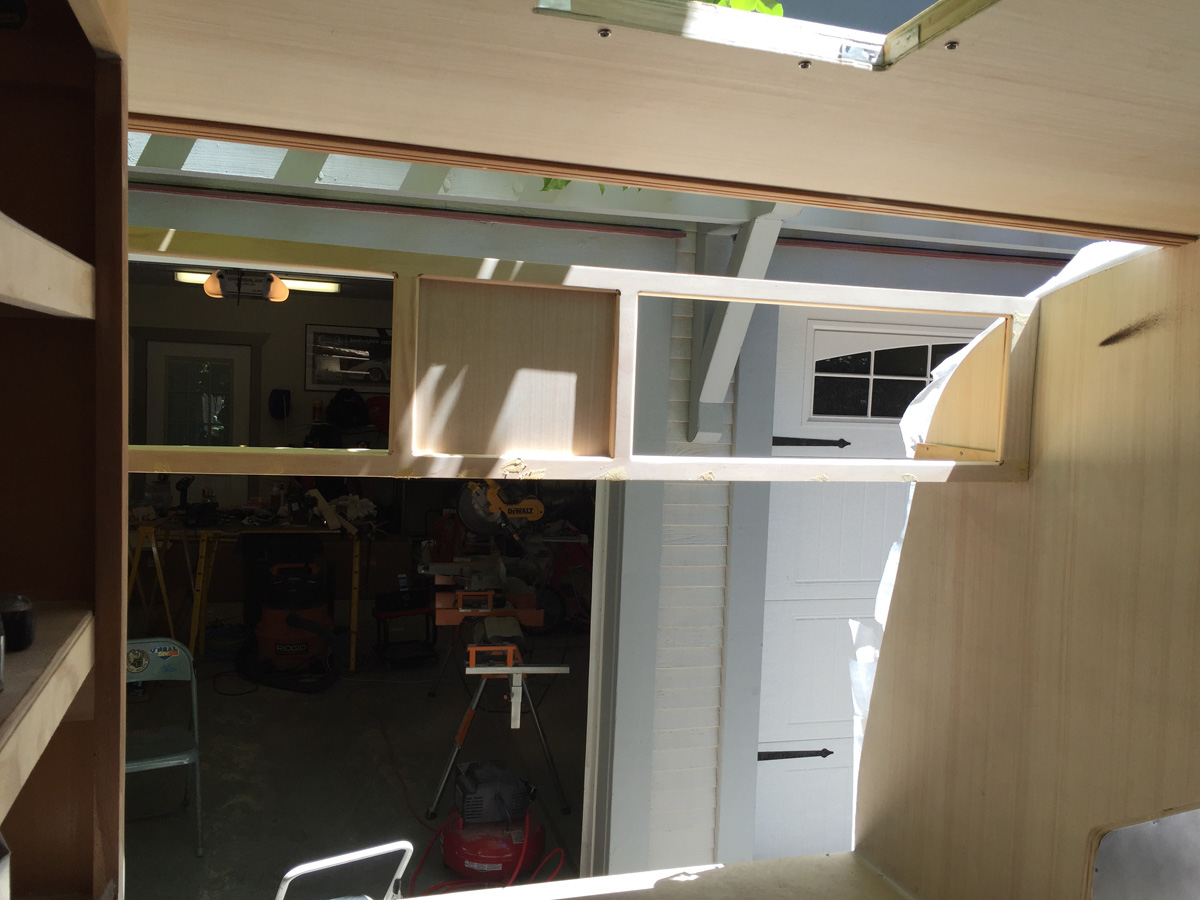
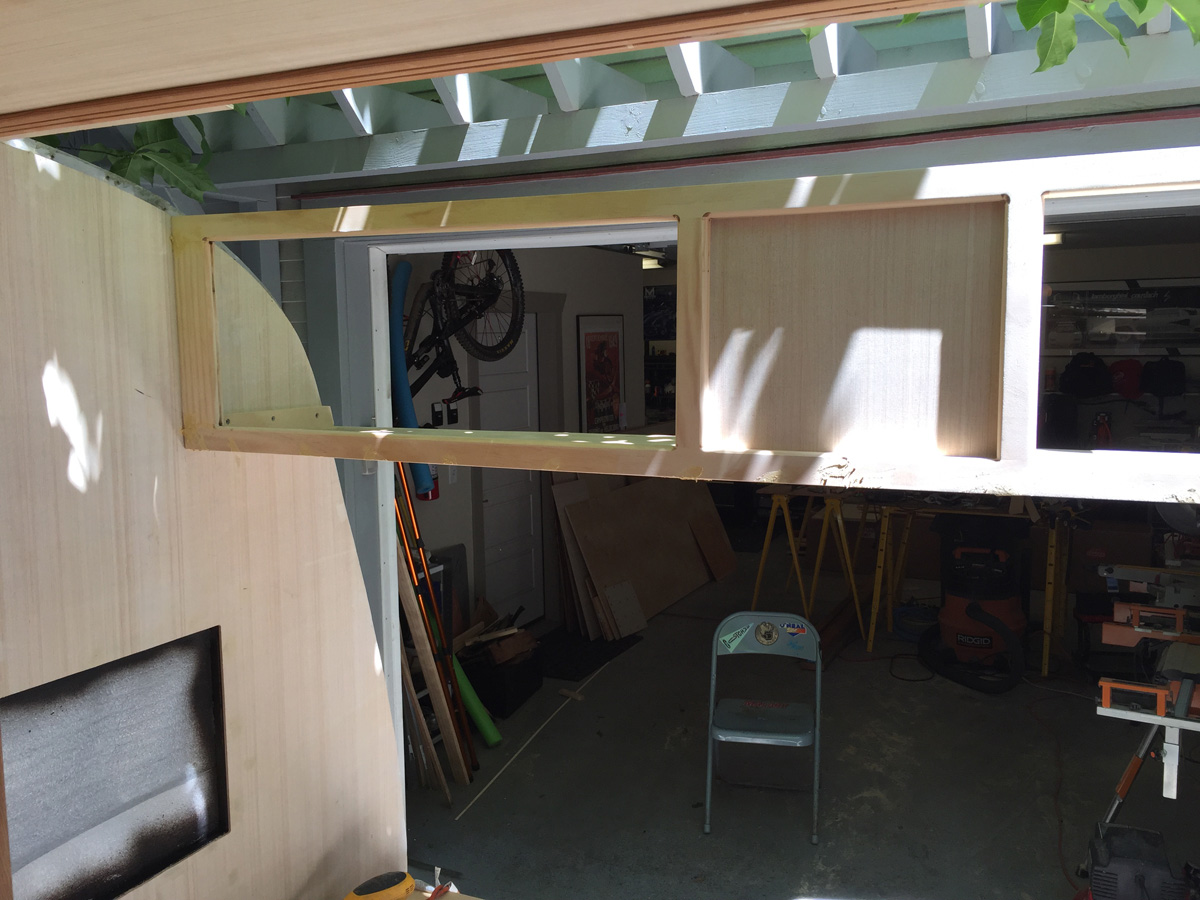
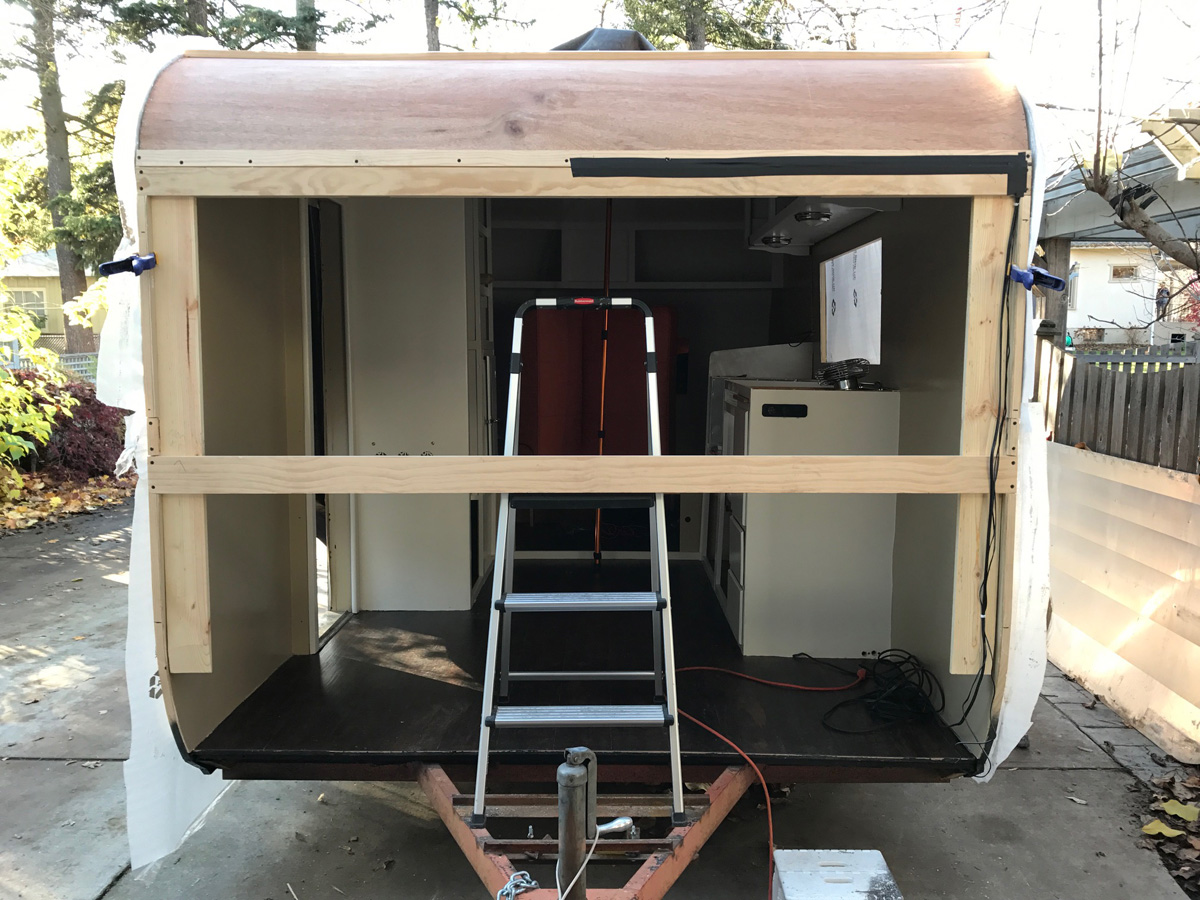
Step 6 - Spring! Yeah!
|
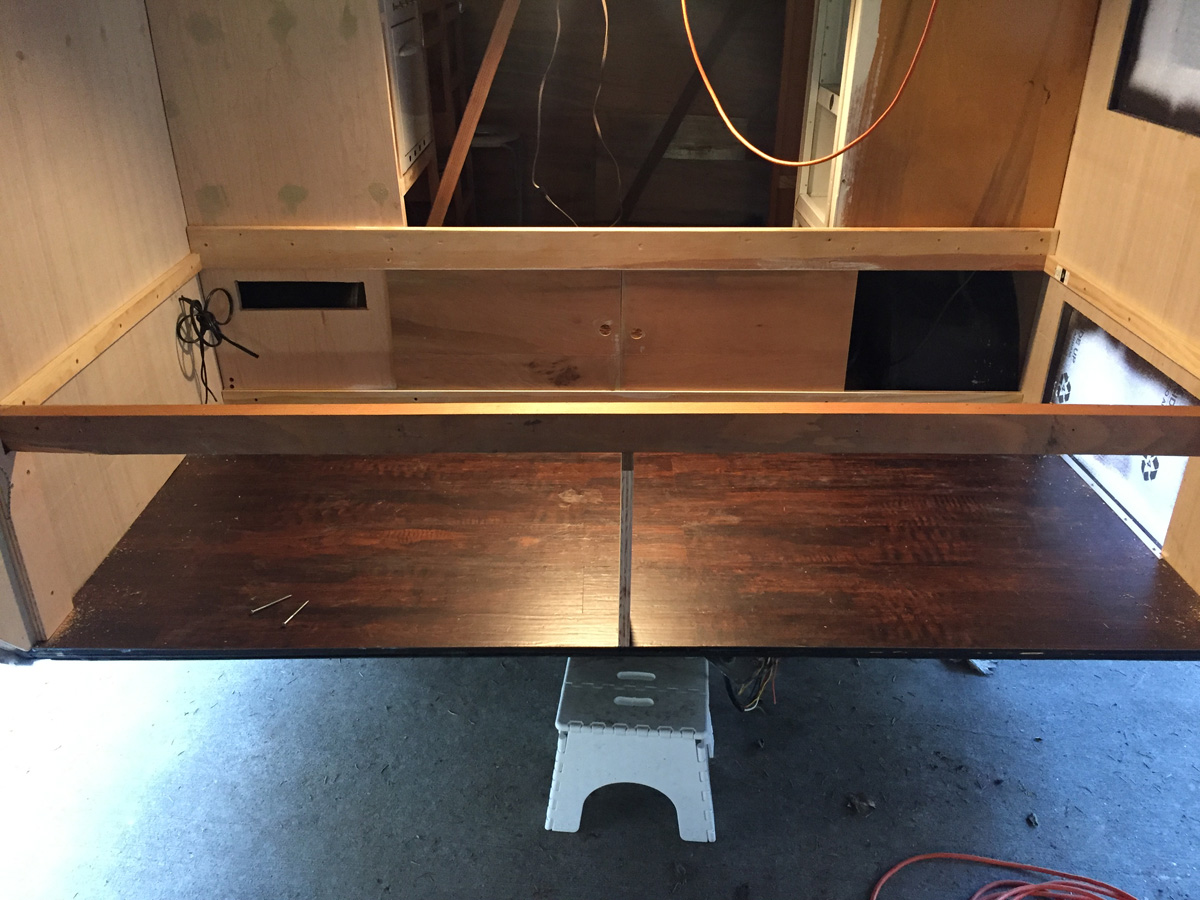
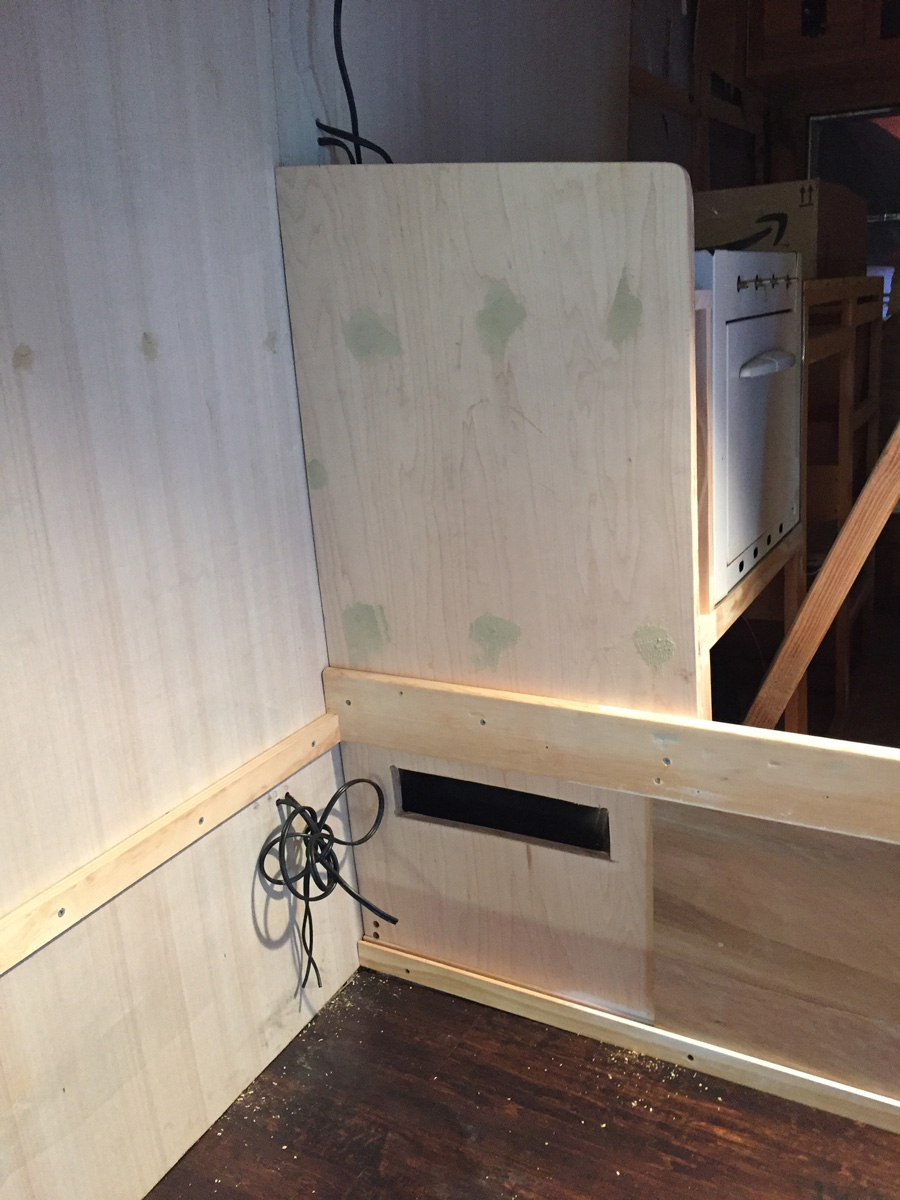
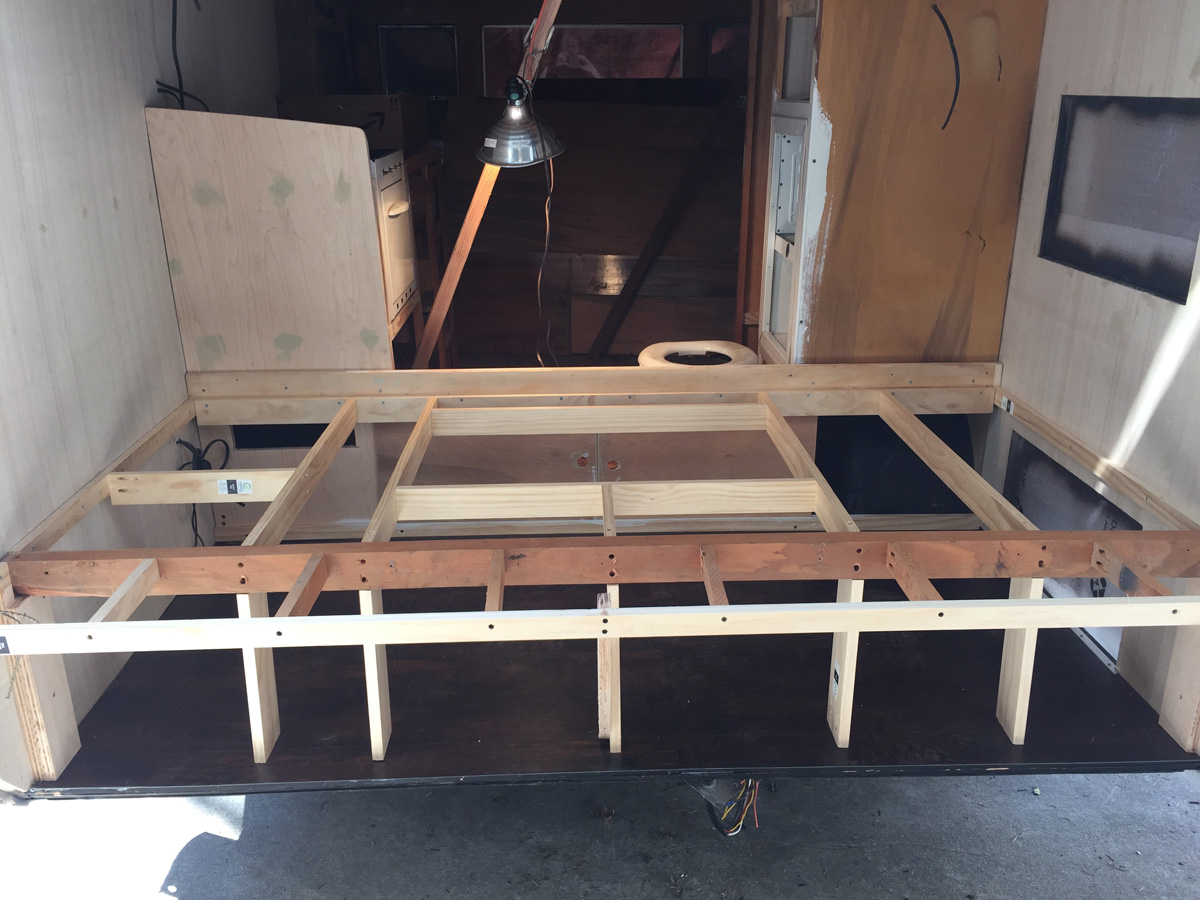
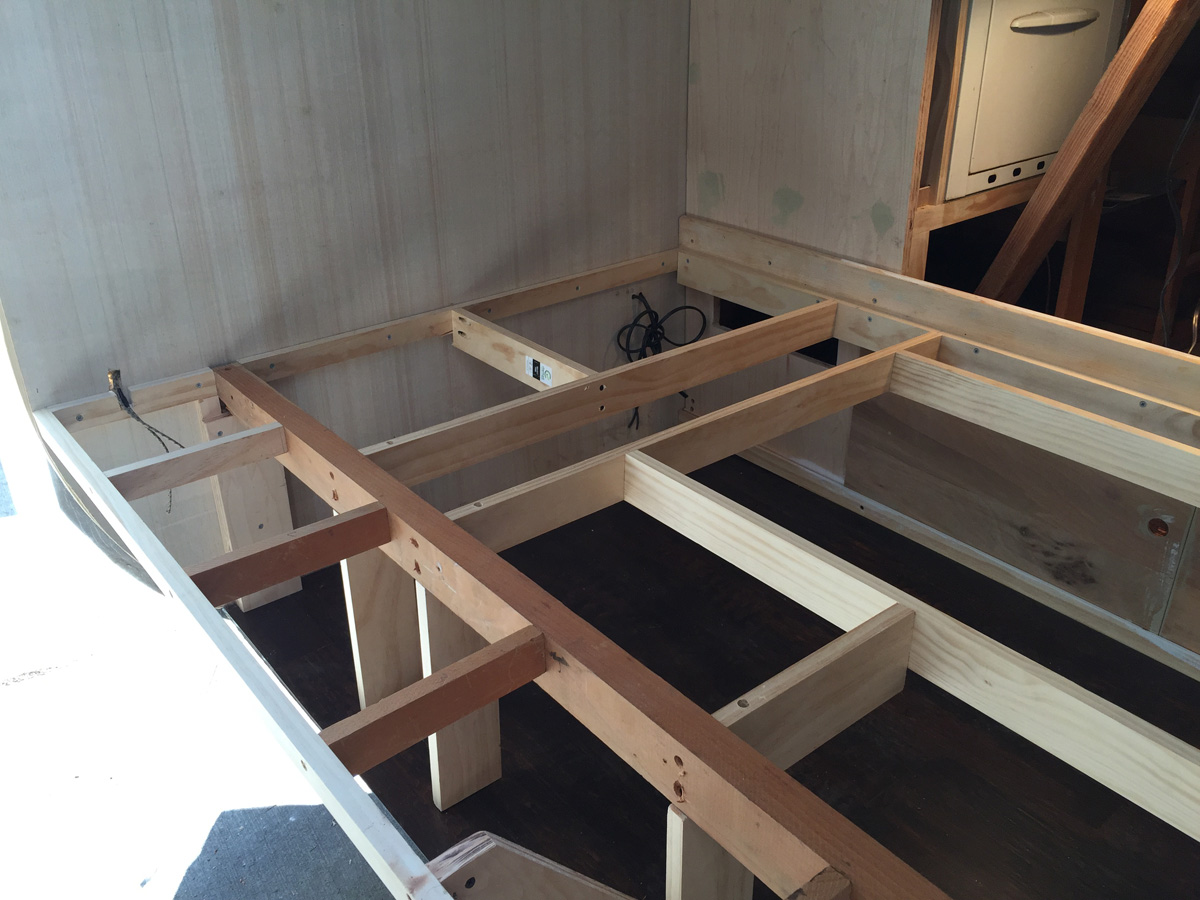
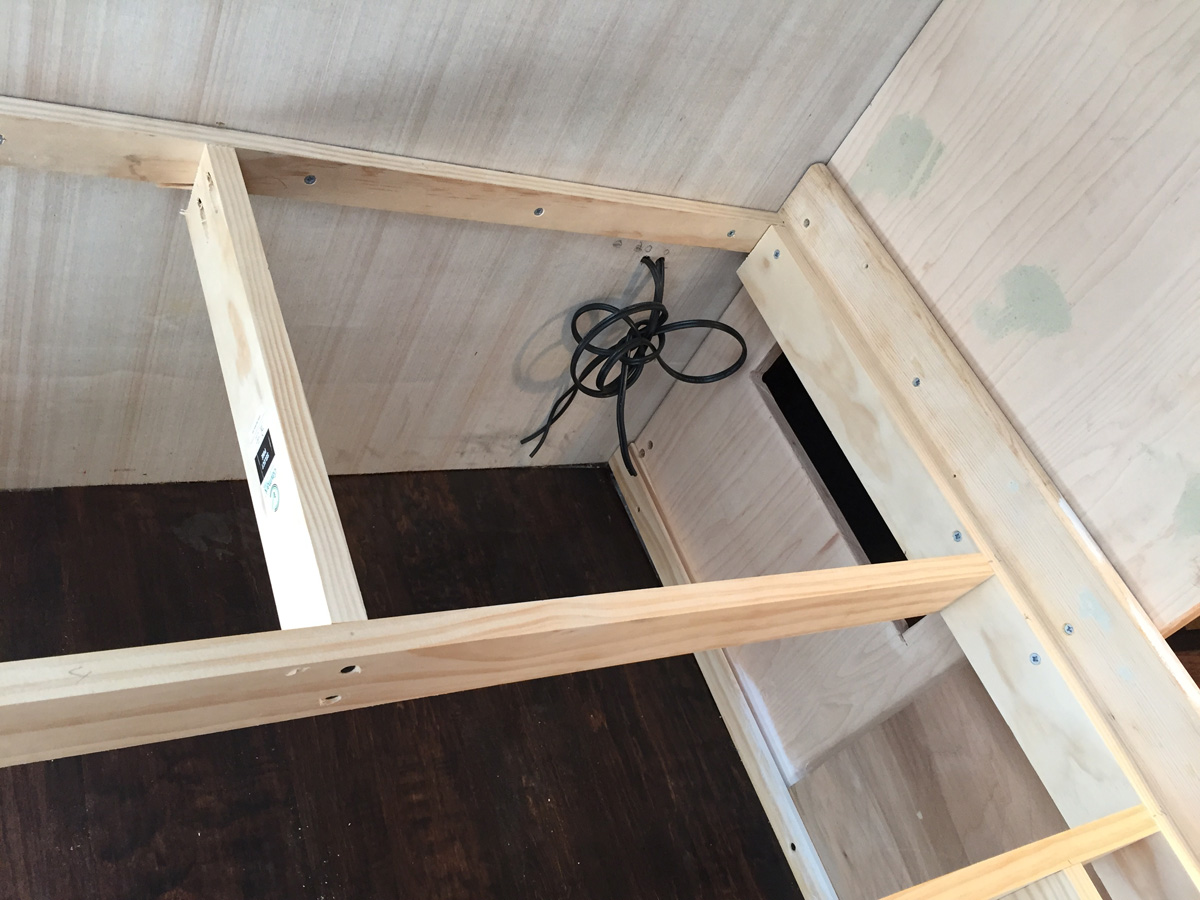
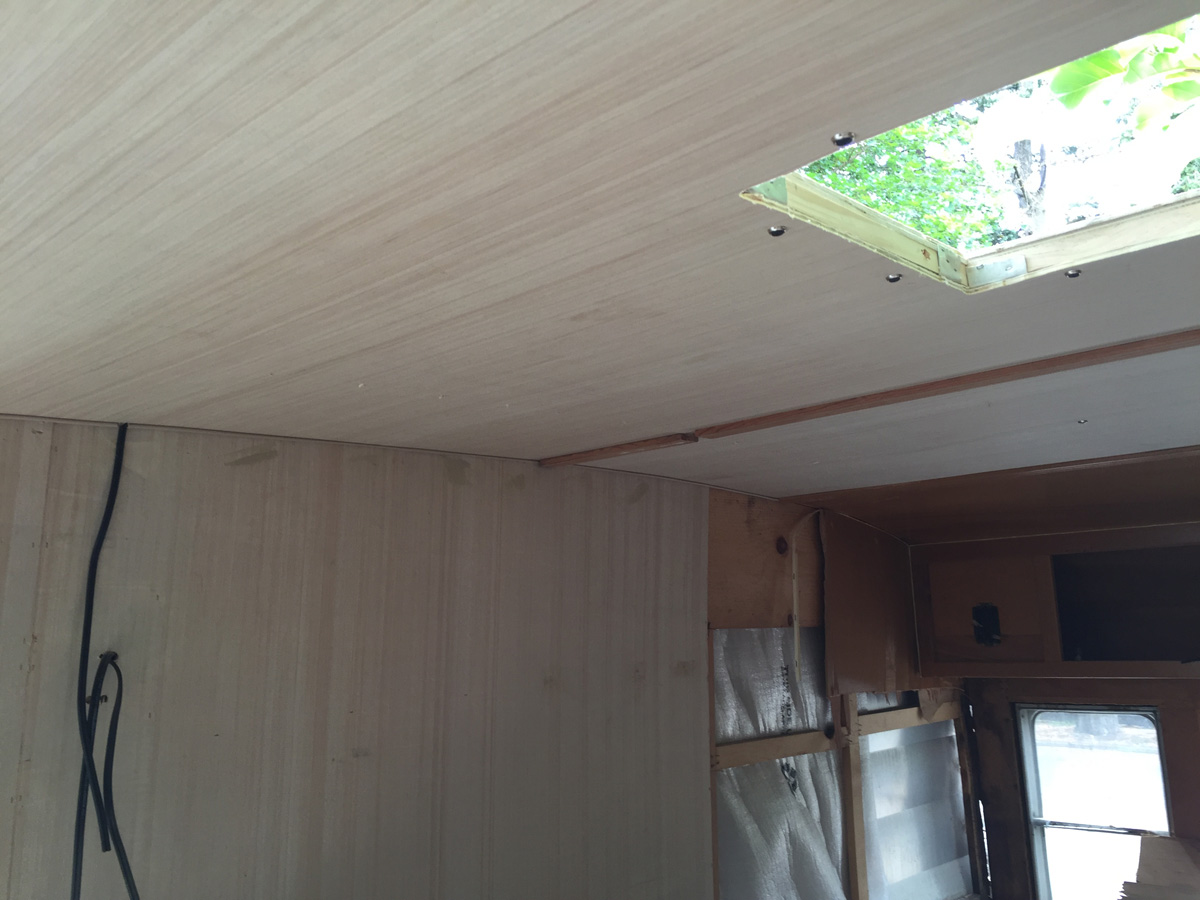
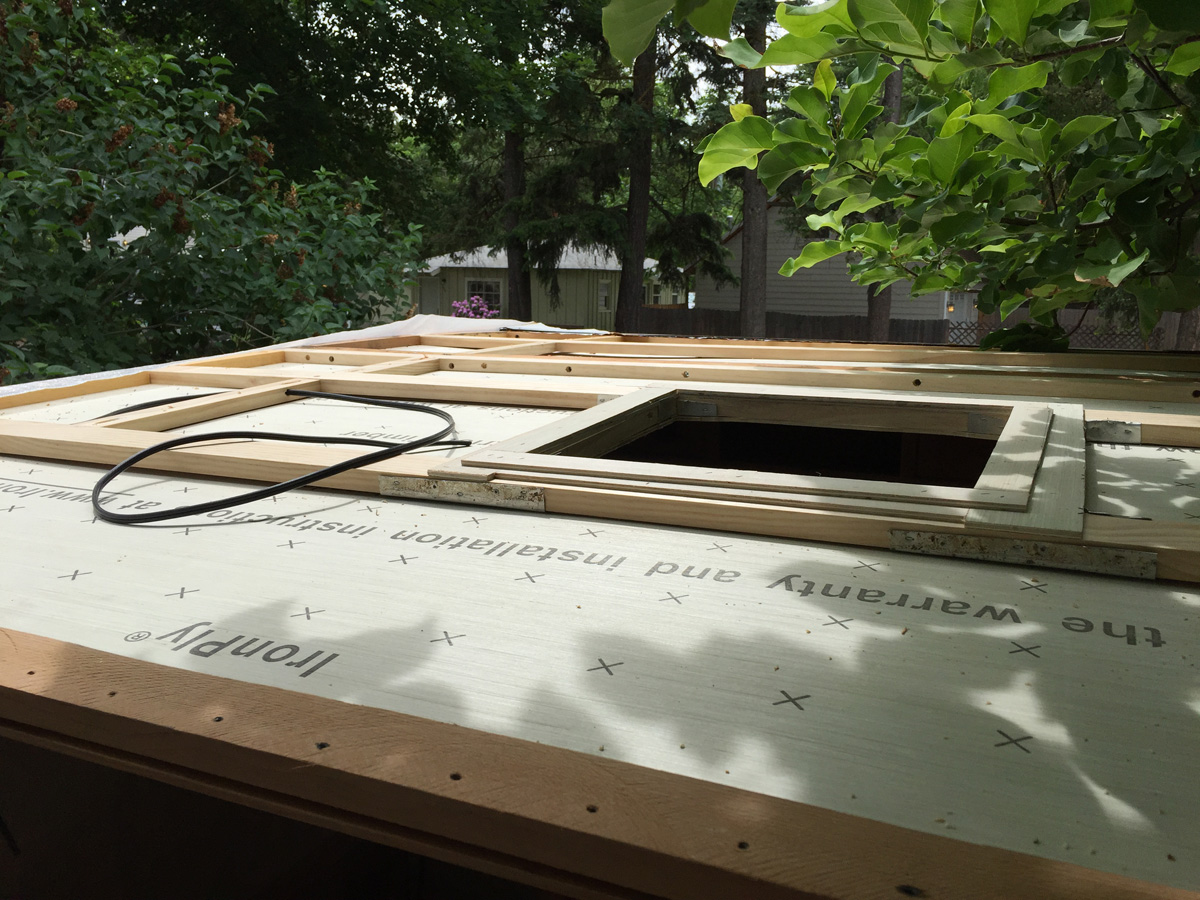
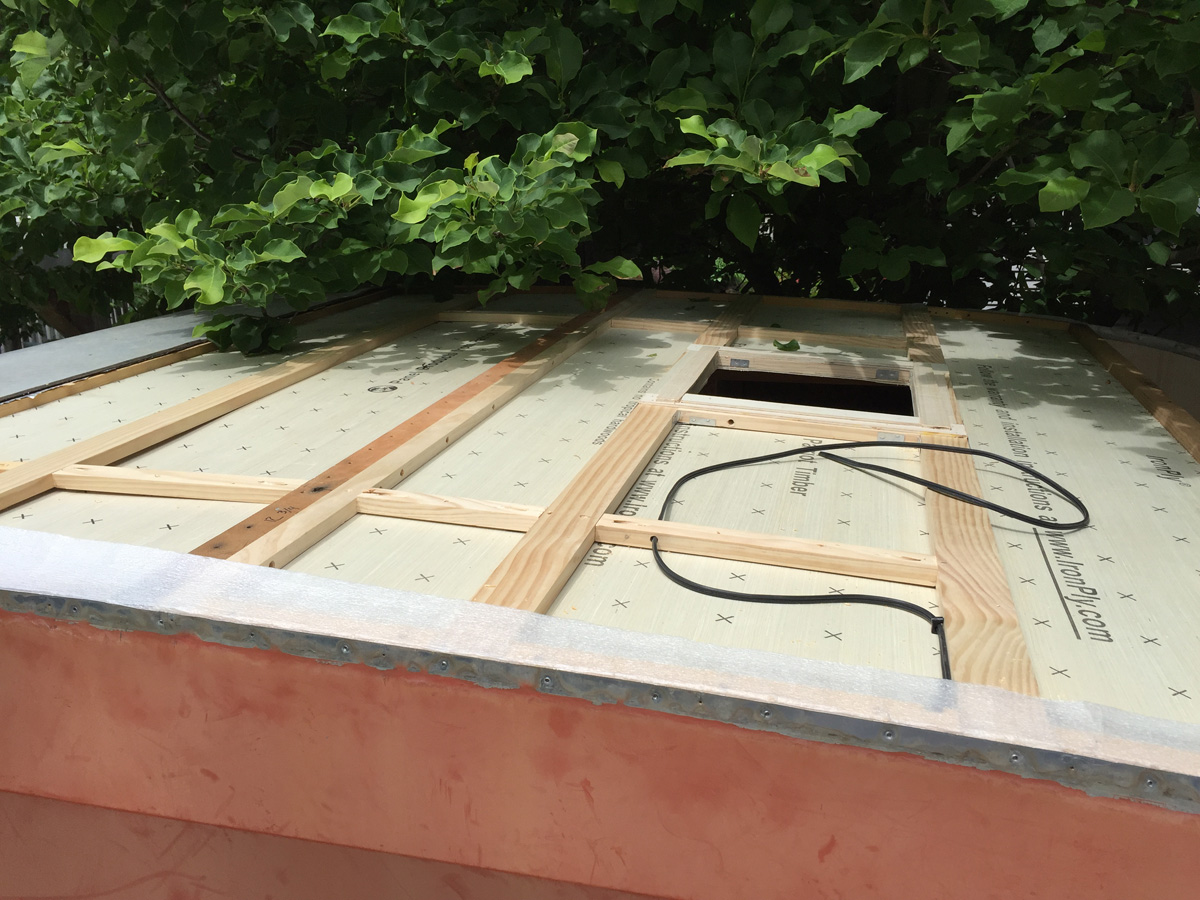
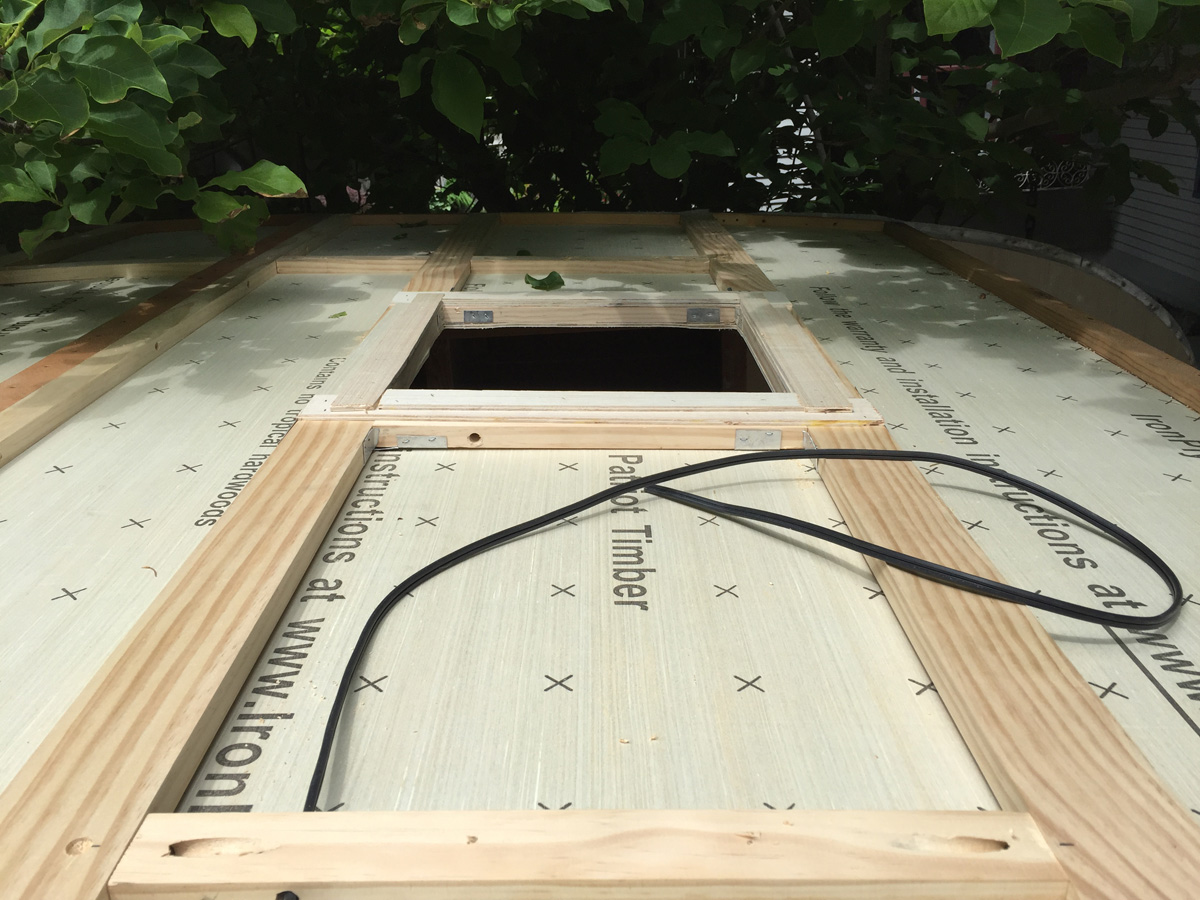
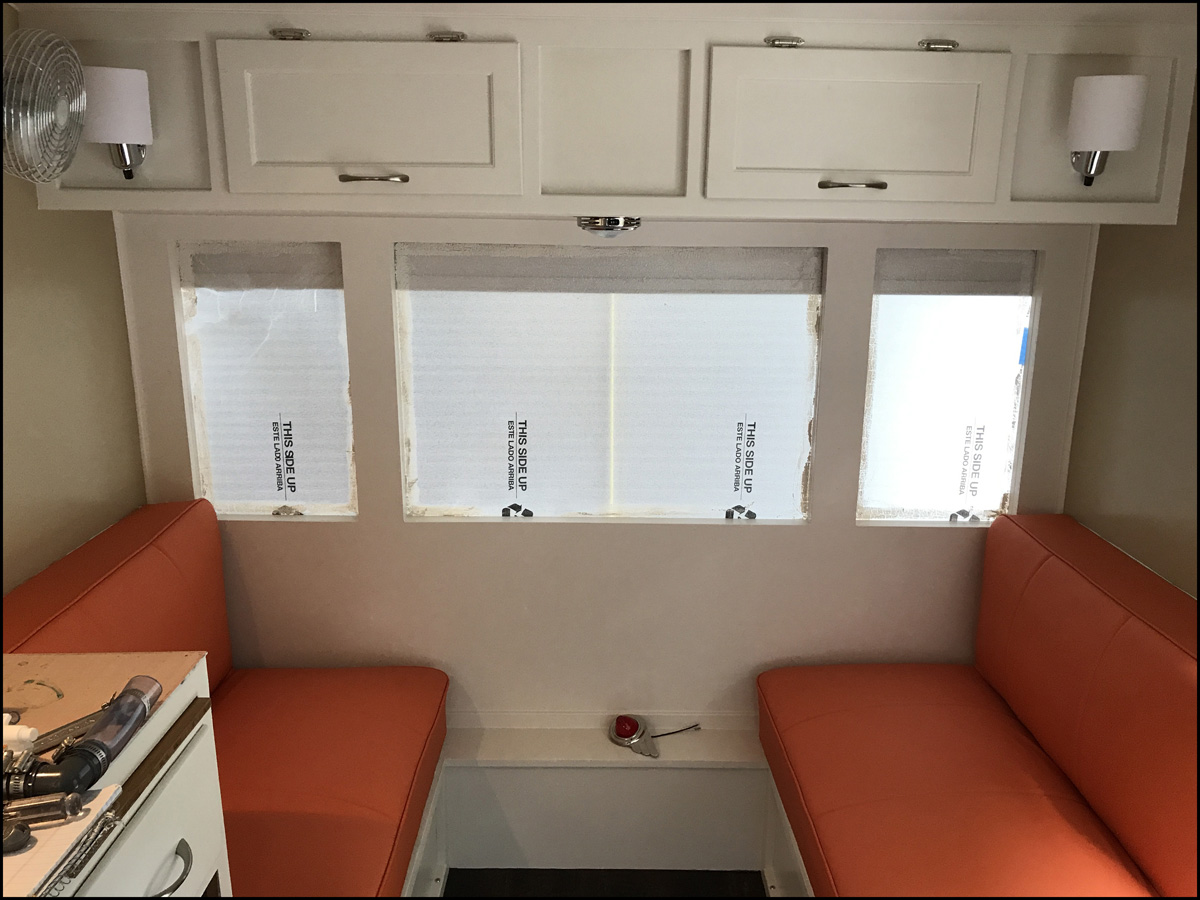
So with the spring came great weather and I got rolling fast. Did a ton of framing, built the bed, wiring and fridge, roof fan mount, framed up the roof, installed the back wall and more. Some notes: the original drill bit that came with the Harbor Freight pocket hole jig went dull quicker that I can write this, but not to worry there are better ones on Amazon for about $10 with shipping. Link here: In-tool-home 3/8" Replacement Twist Step Drill Bit Flooring went in under the bed and got it all framed up, came out pretty nice. Put in an access door for the main area and one for the electrical access. Using the router to cut the doors worked like a charm. |
 |
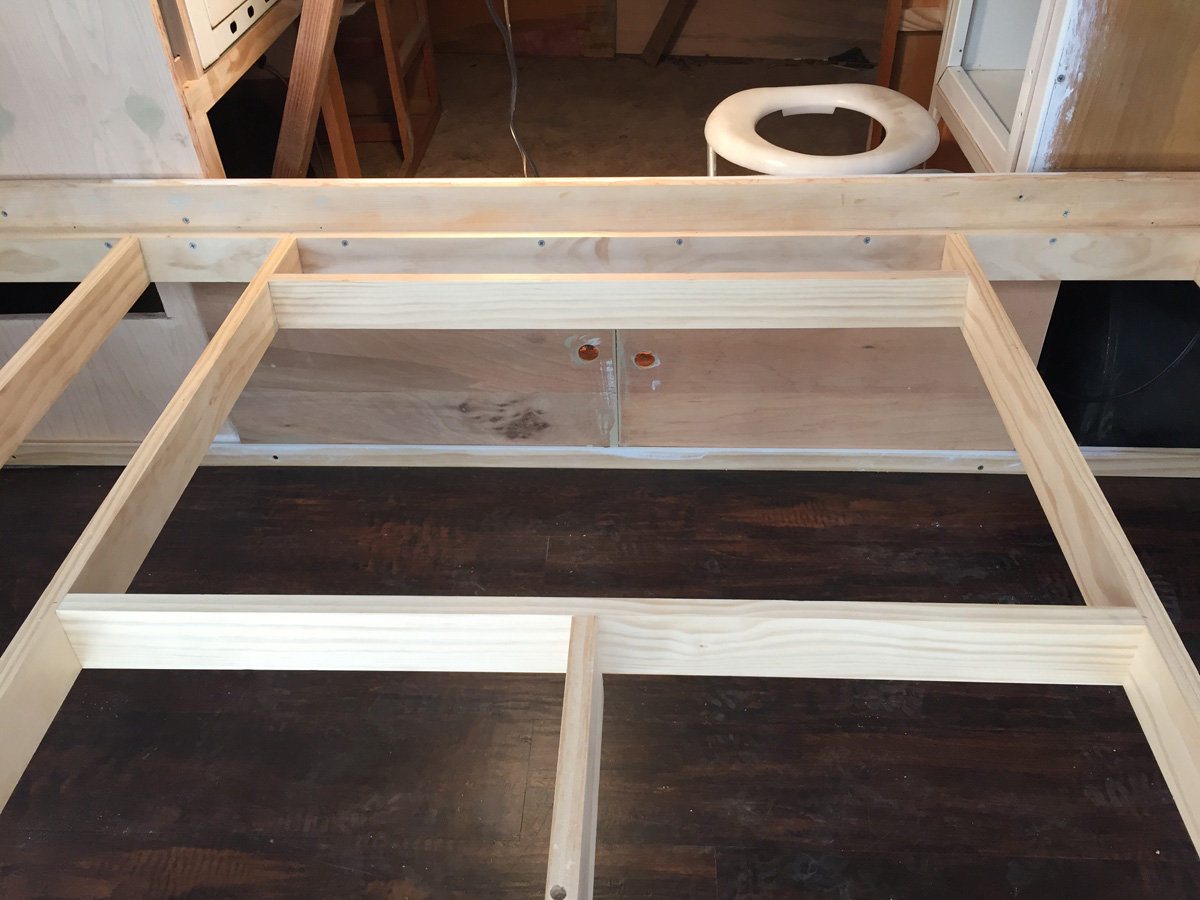
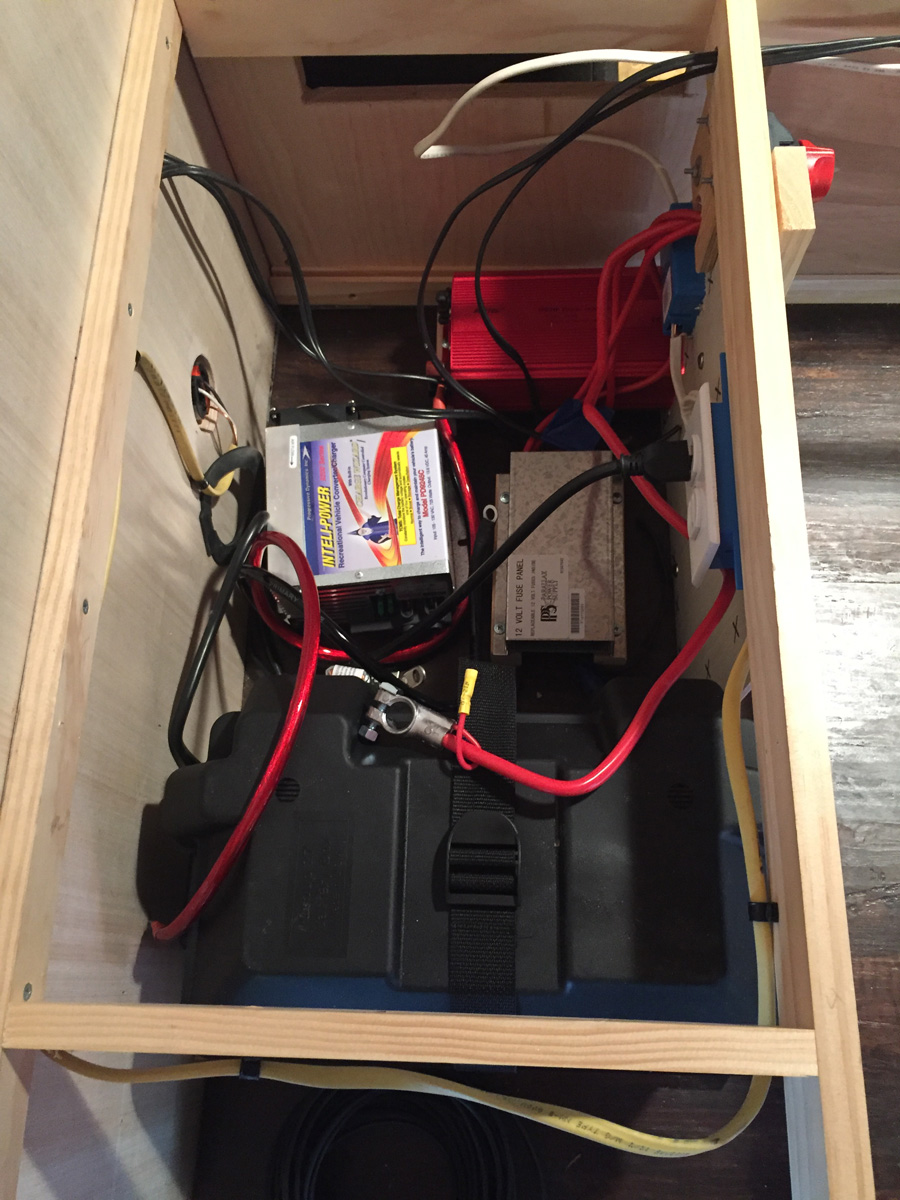
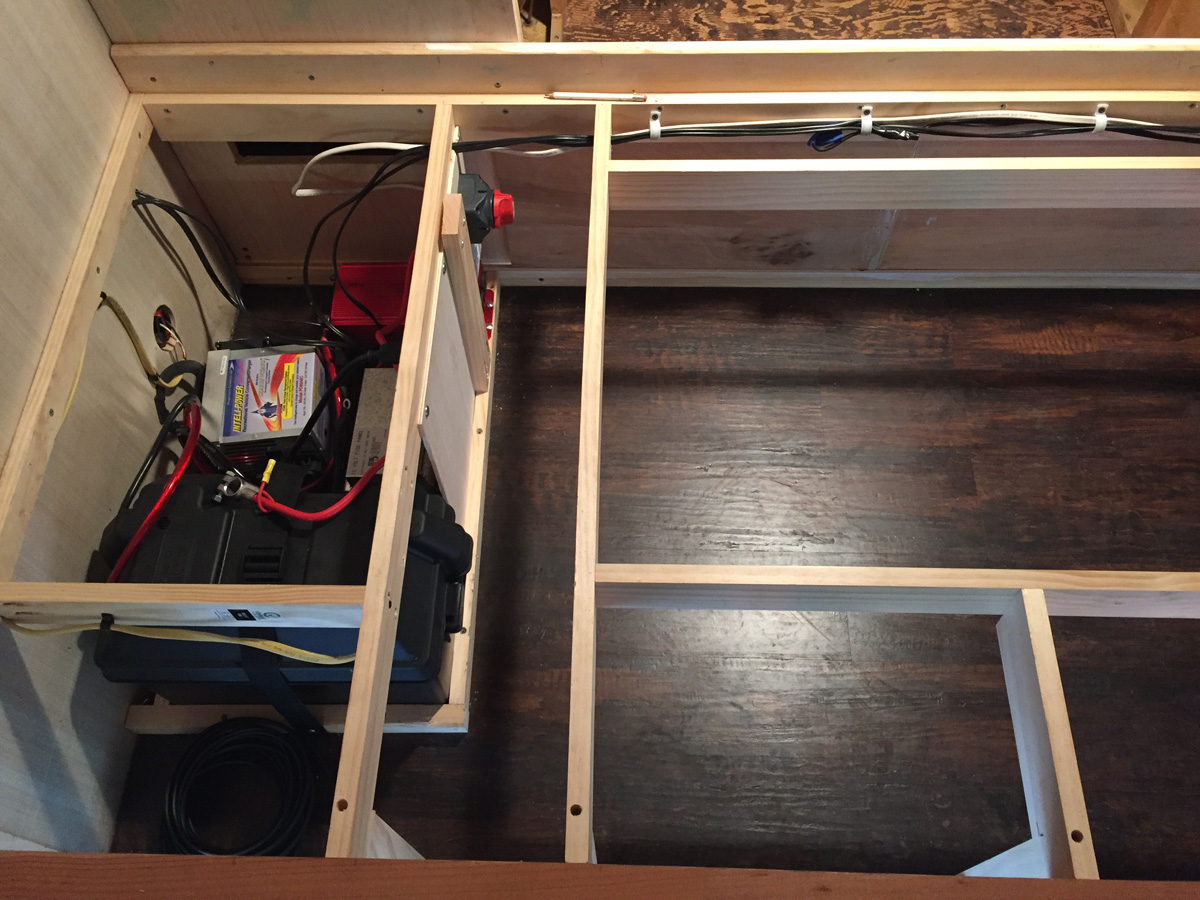
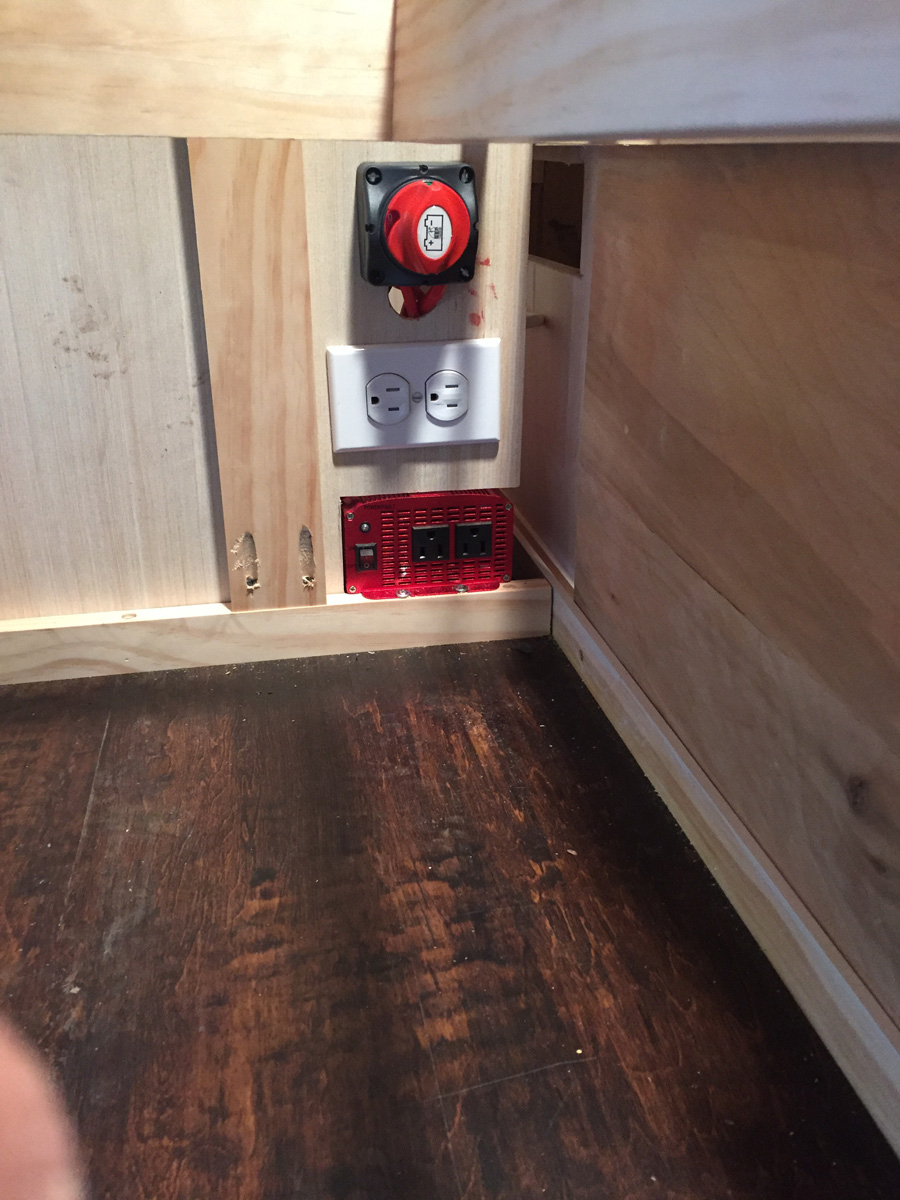
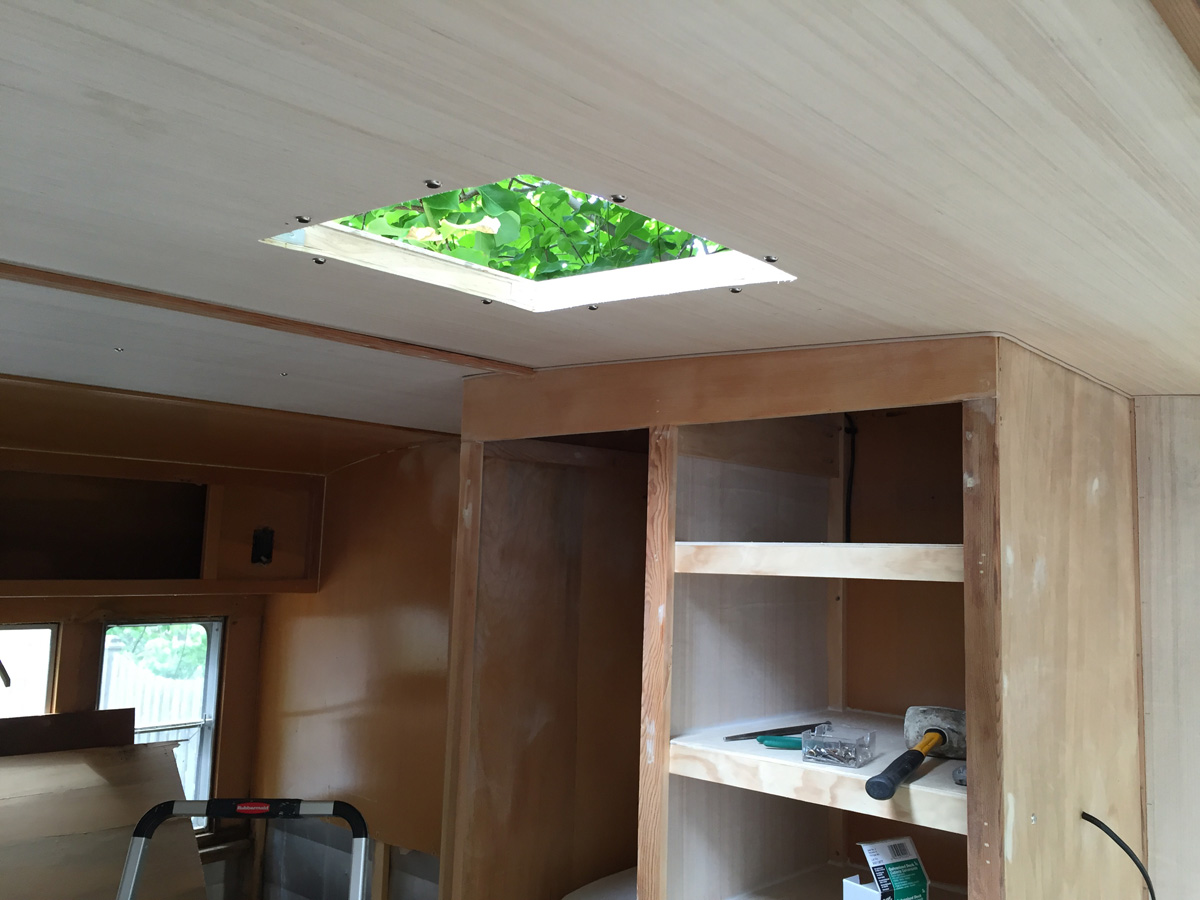
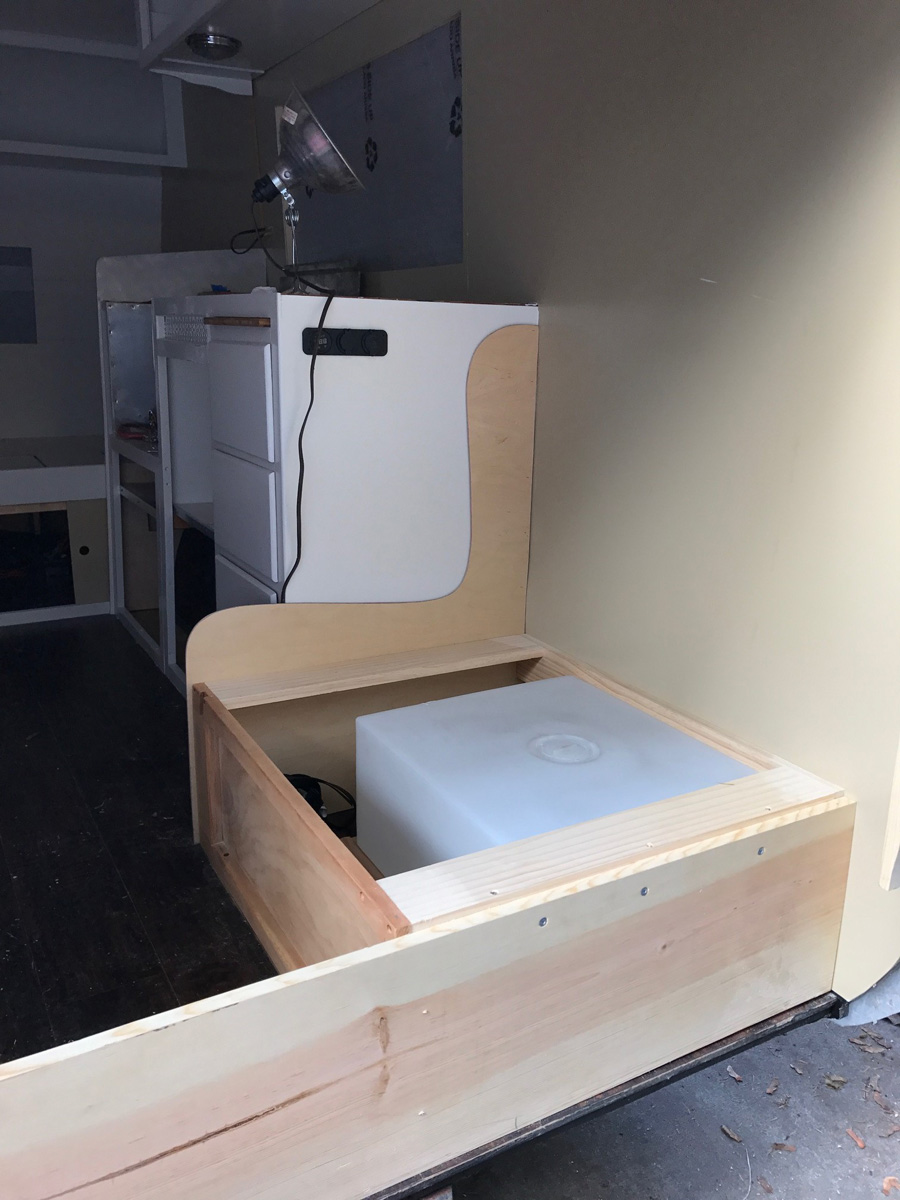
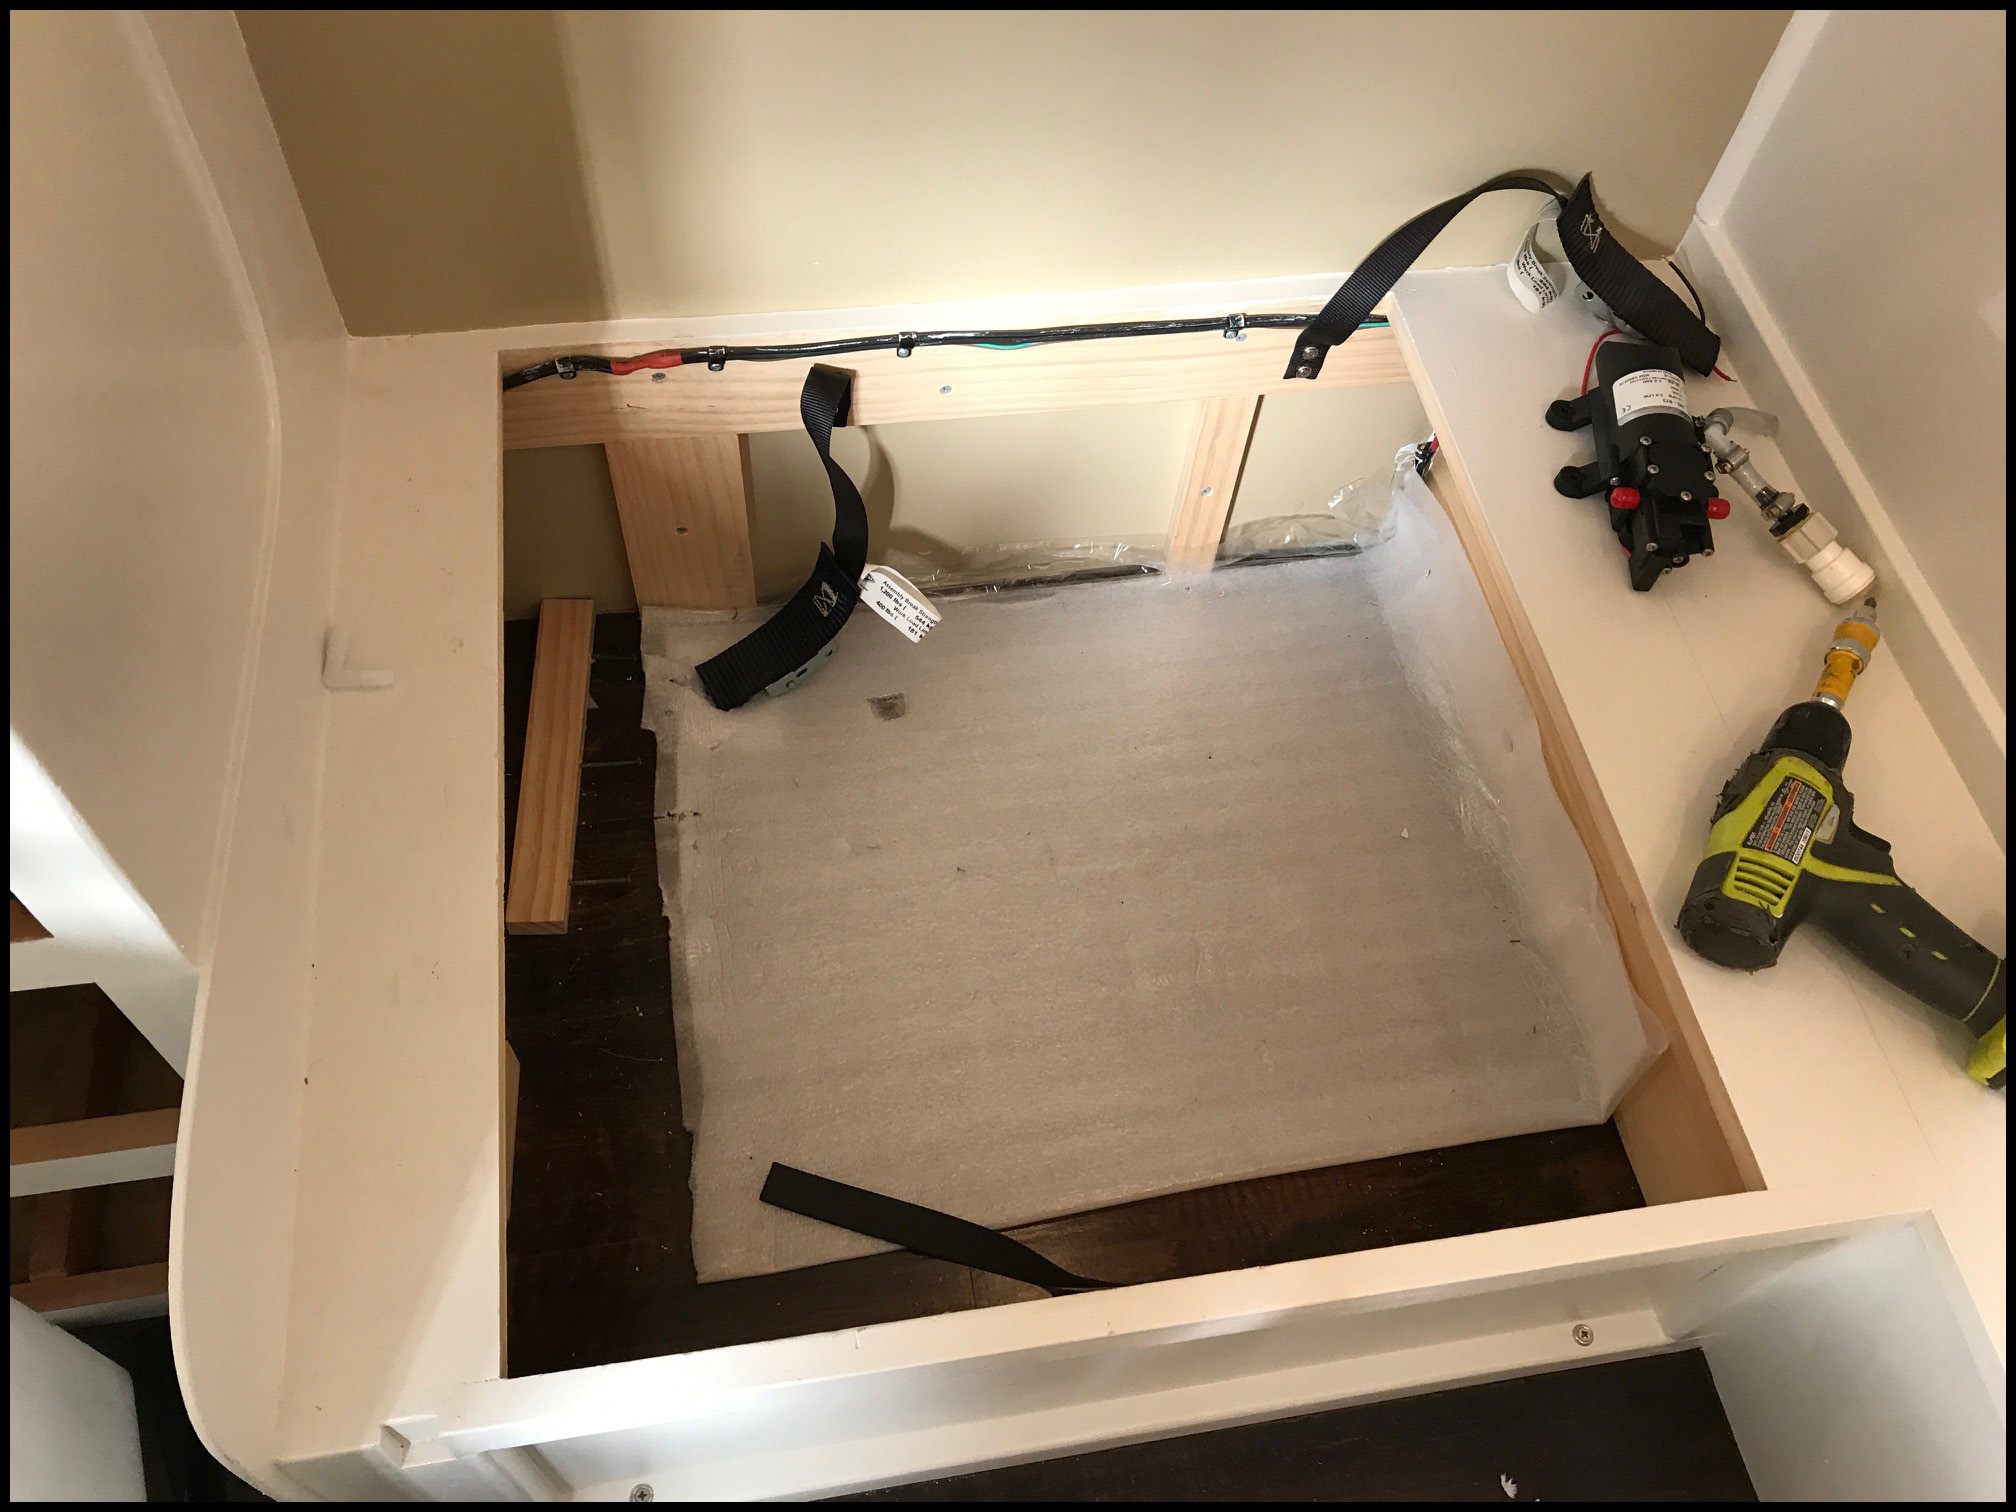
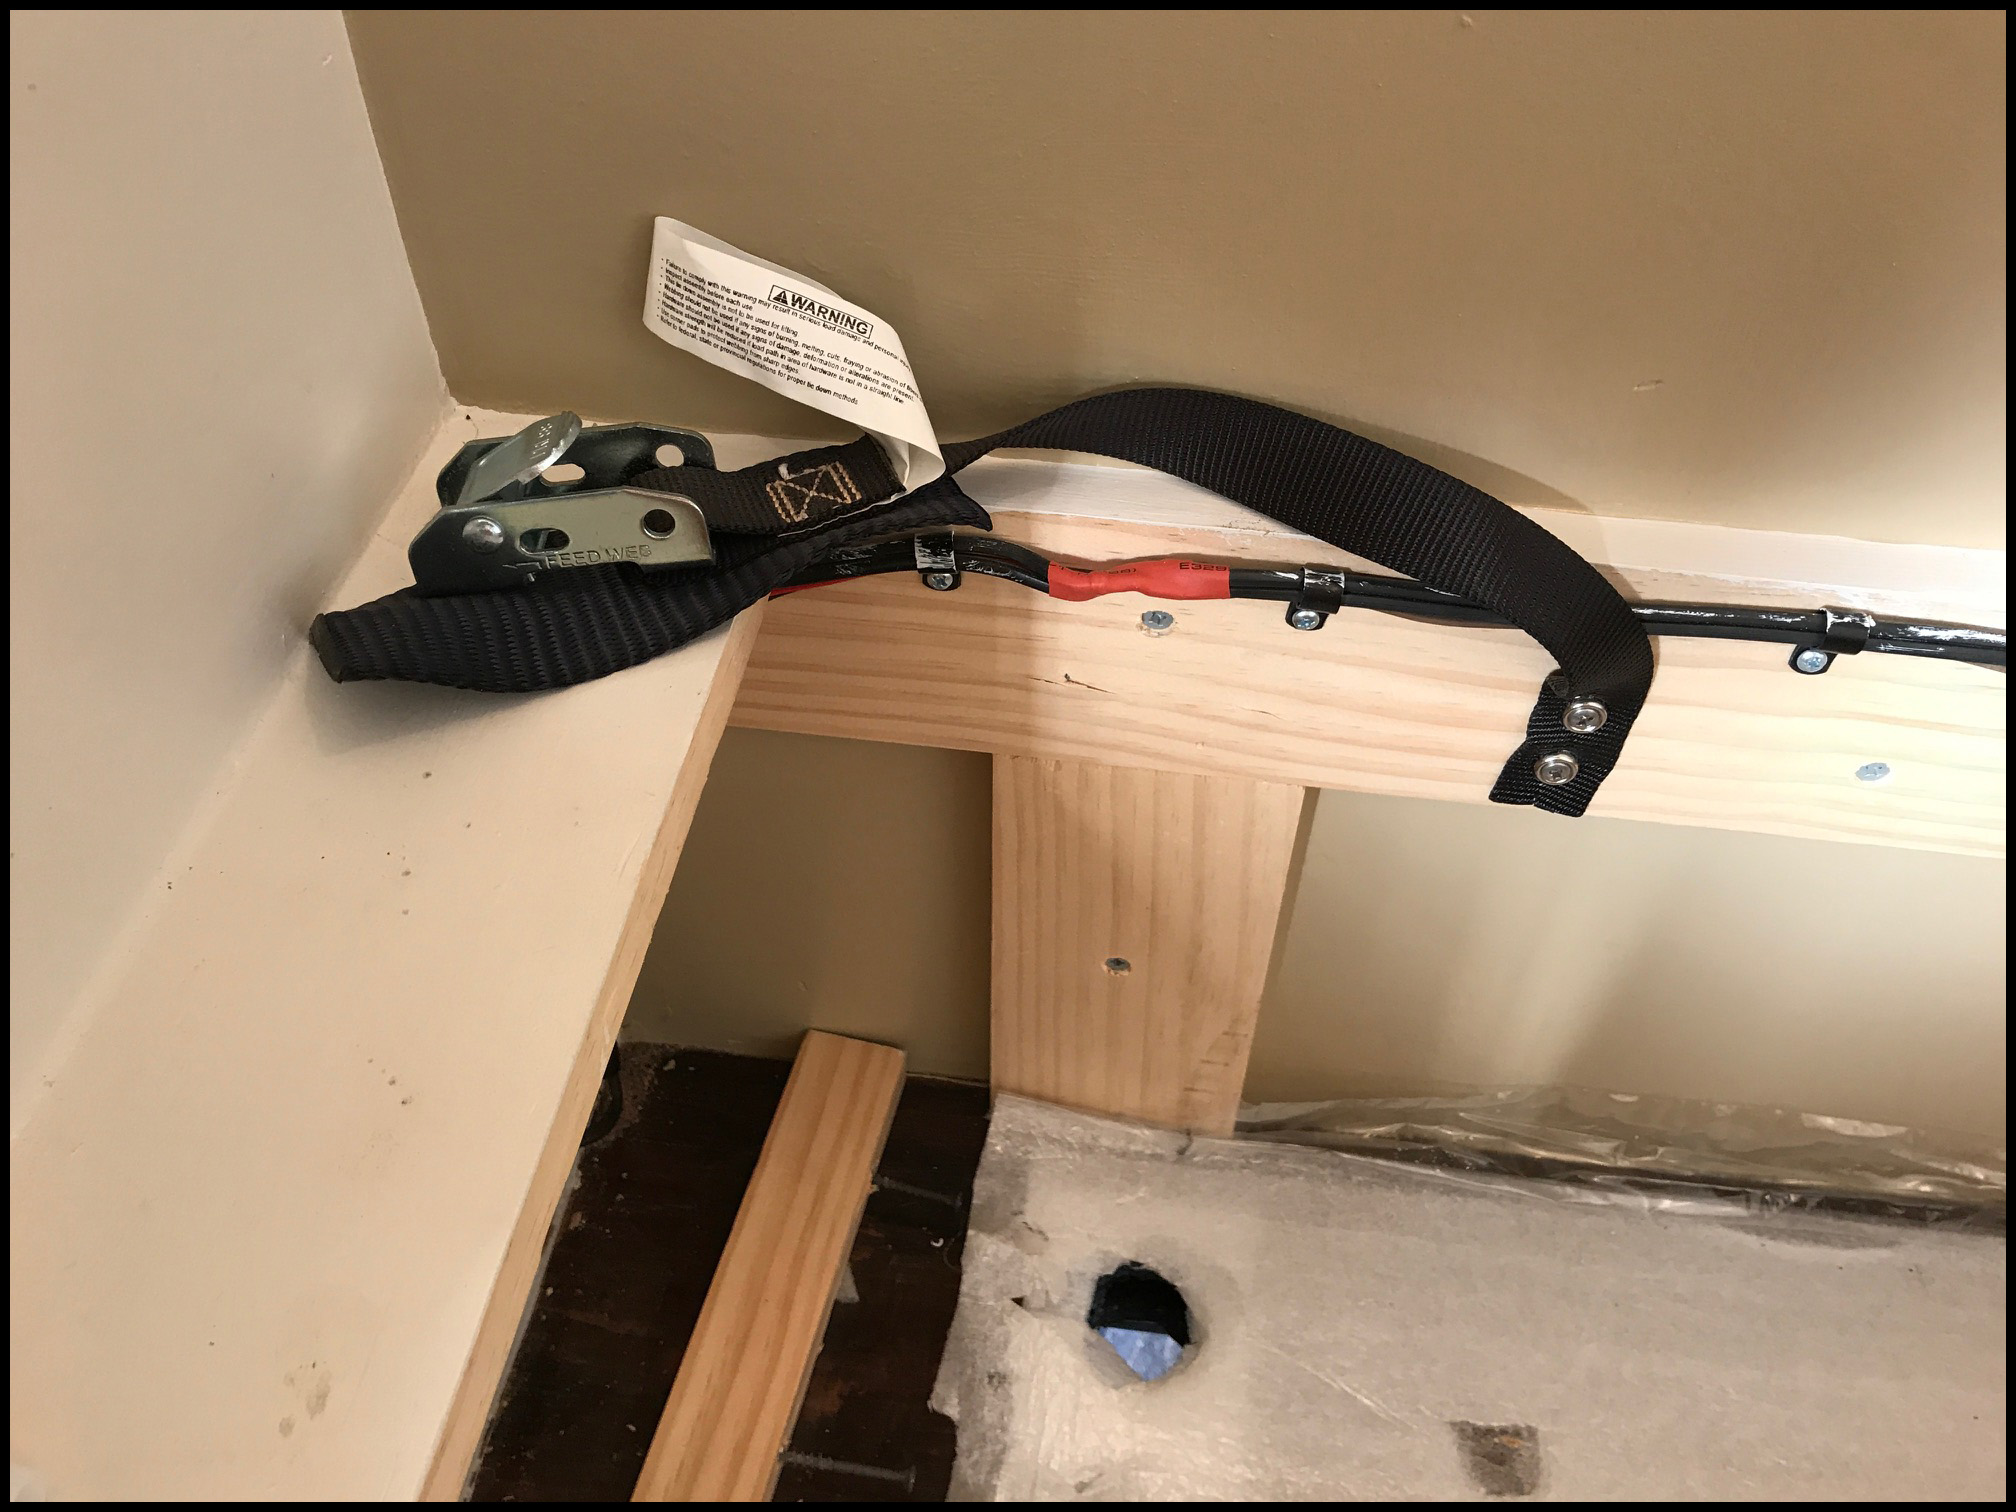
As for the electrical, I added a 110v to 12-volt system and installed 3 110v outlets in the rear of the trailer. But mostly the system will run off the battery and when on shore power and the Inteli-Power inverter will charge the battery to keep the system running. The truck will be wired to charge the batt while on the road and I also have a generator to use when shore power is not available. Mounted all the electrical components under the bed, fit rather nice. I cut a few vent holes to keep it cool. The framing for the fan and top vent went smooth; tips from Larry of canned ham helped a ton so make sure to watch his videos on the subject before you start. One of the top supports was cracked pretty bad, see the pix, I had to scab in a 1x2 and some gorilla glue to fix it. We decided to not use the canvas and pole hammock in the rear over the bed, and instead opted to put in a cabinet to match the front one, only with out the doors. It came out really nice and looks like it was original. Back wall is on, and after I get the curbing done… I can finally move to the front. Feel like I am really moving now.
 |
 |
 |
 |
 |
 |
 |
 |
 |
 |
 |
 |
 |
 |
 |
 |
 |
 |
 |
 |
 |
 |
 |
 |
 |
 |
 |
 |
 |
 |
 |
 |
 |
 |
 |
 |
 |
 |
 |
 |
 |
 |
 |
 |
 |
|
 |
 |
 |
Making some progress, I think...
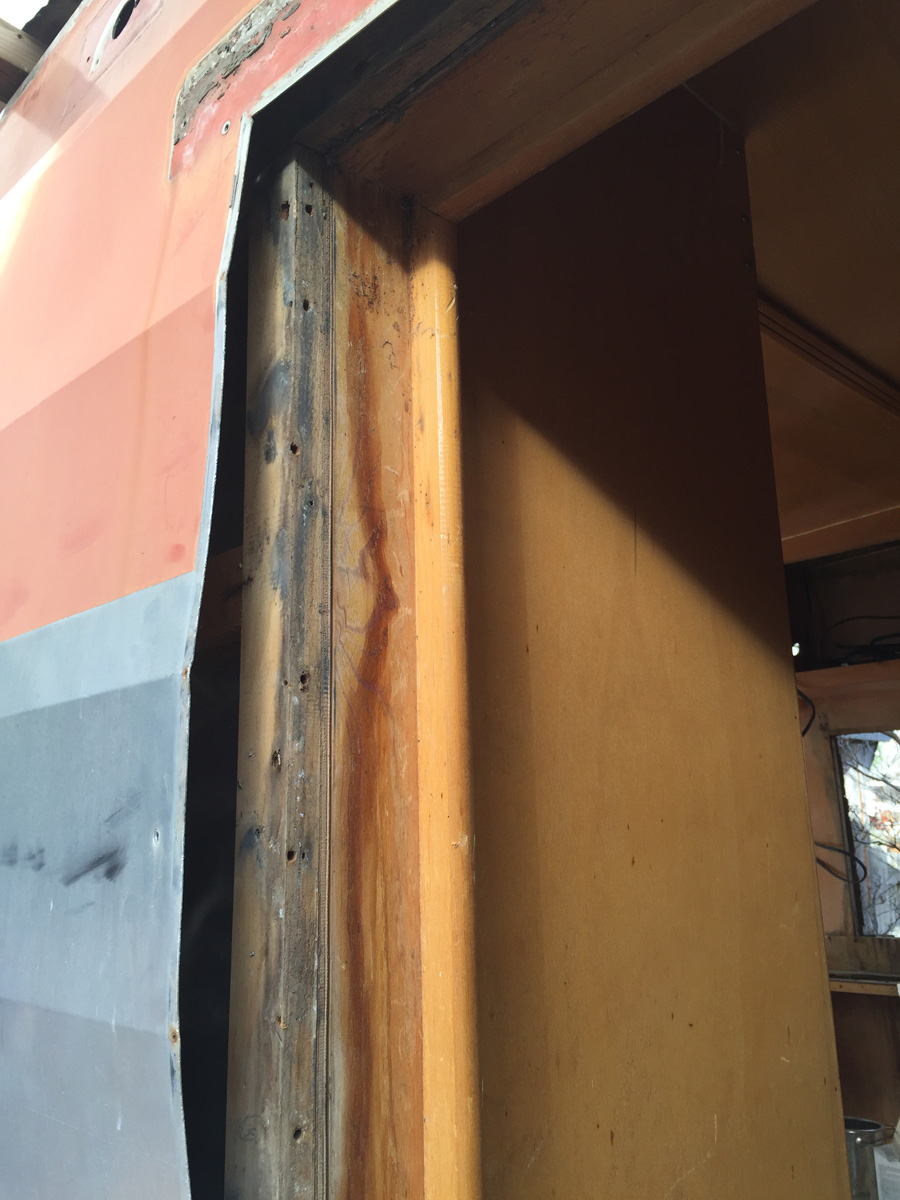
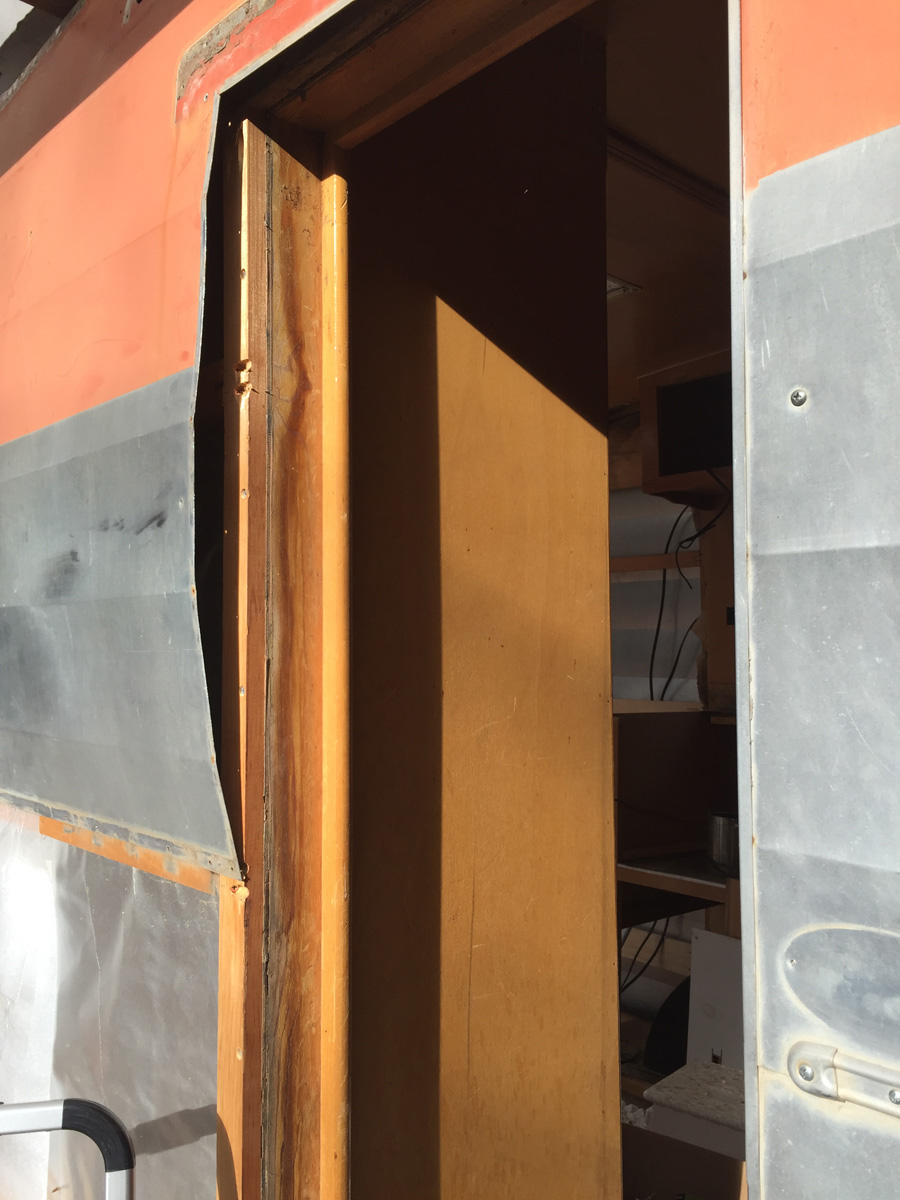
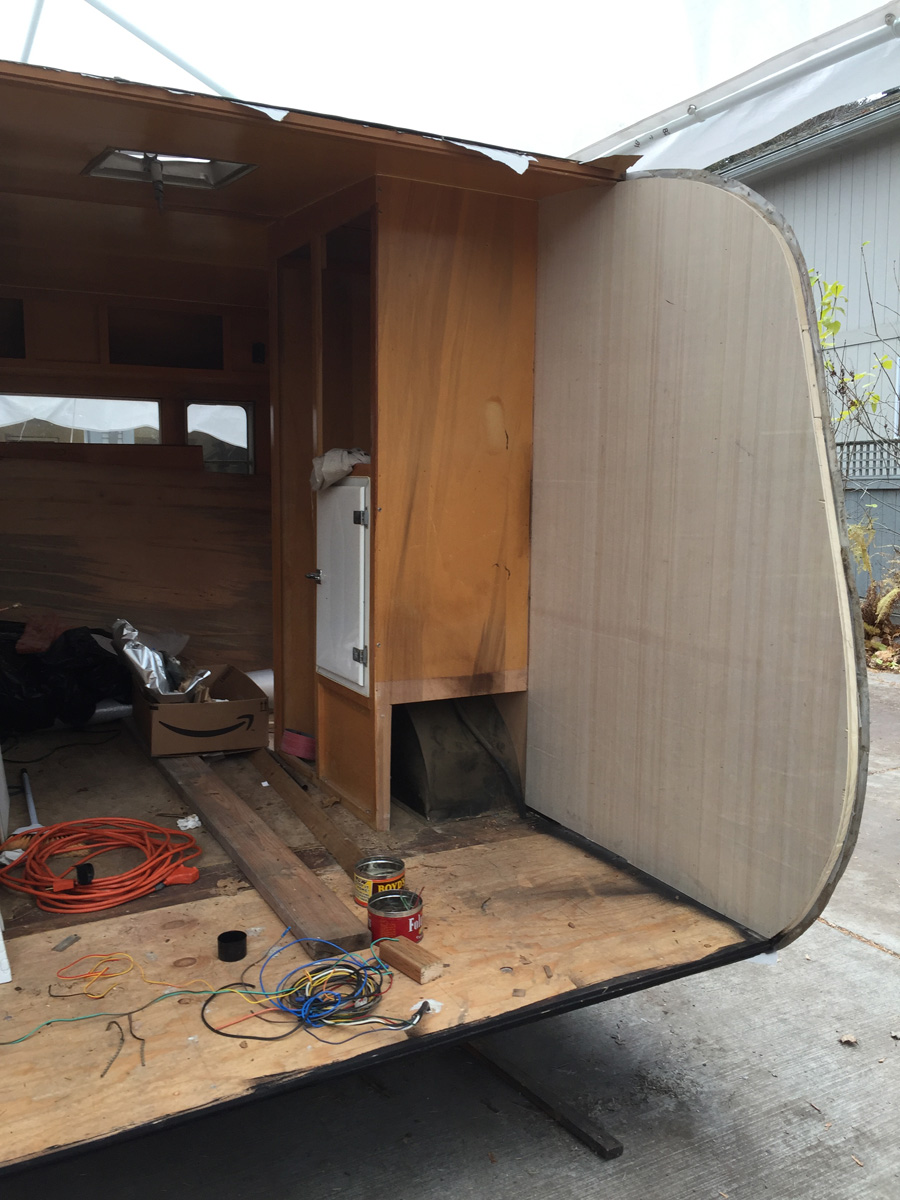
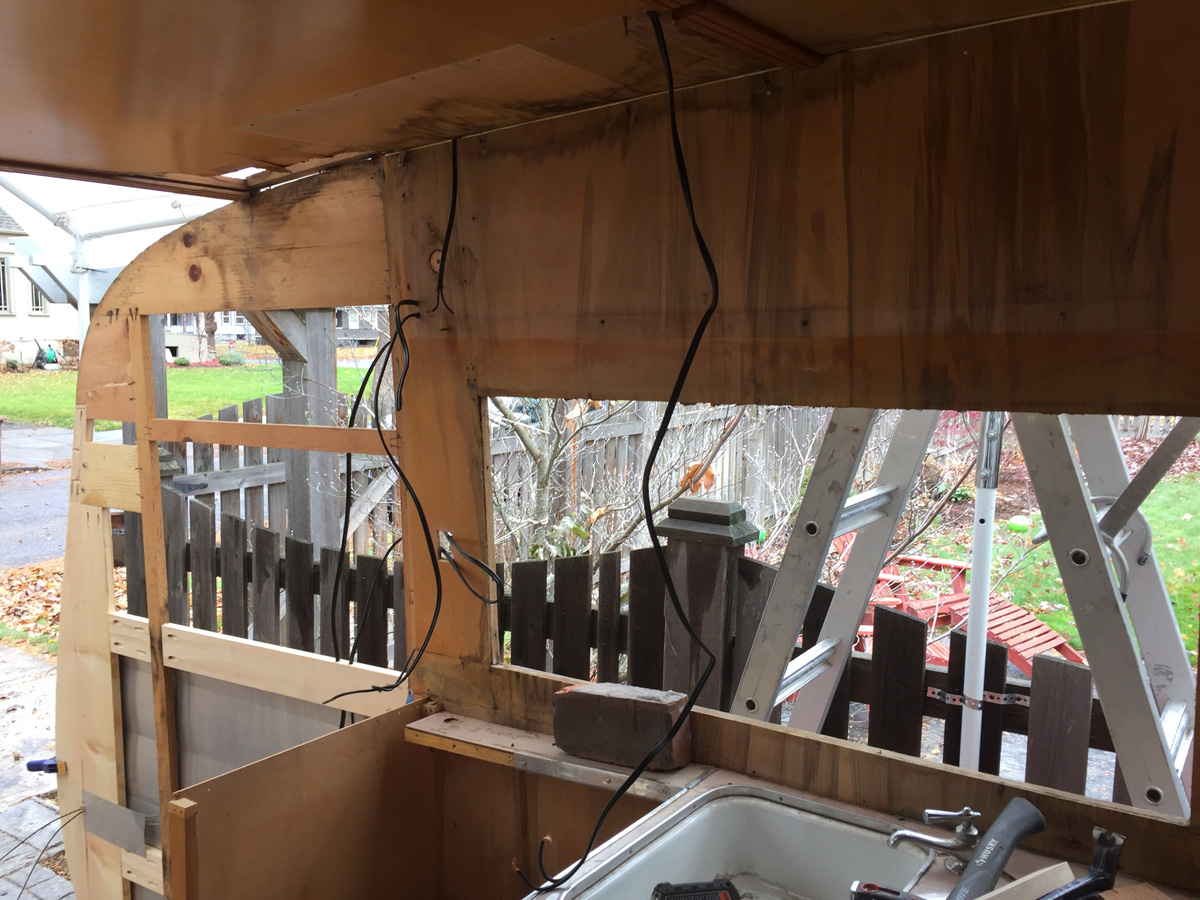
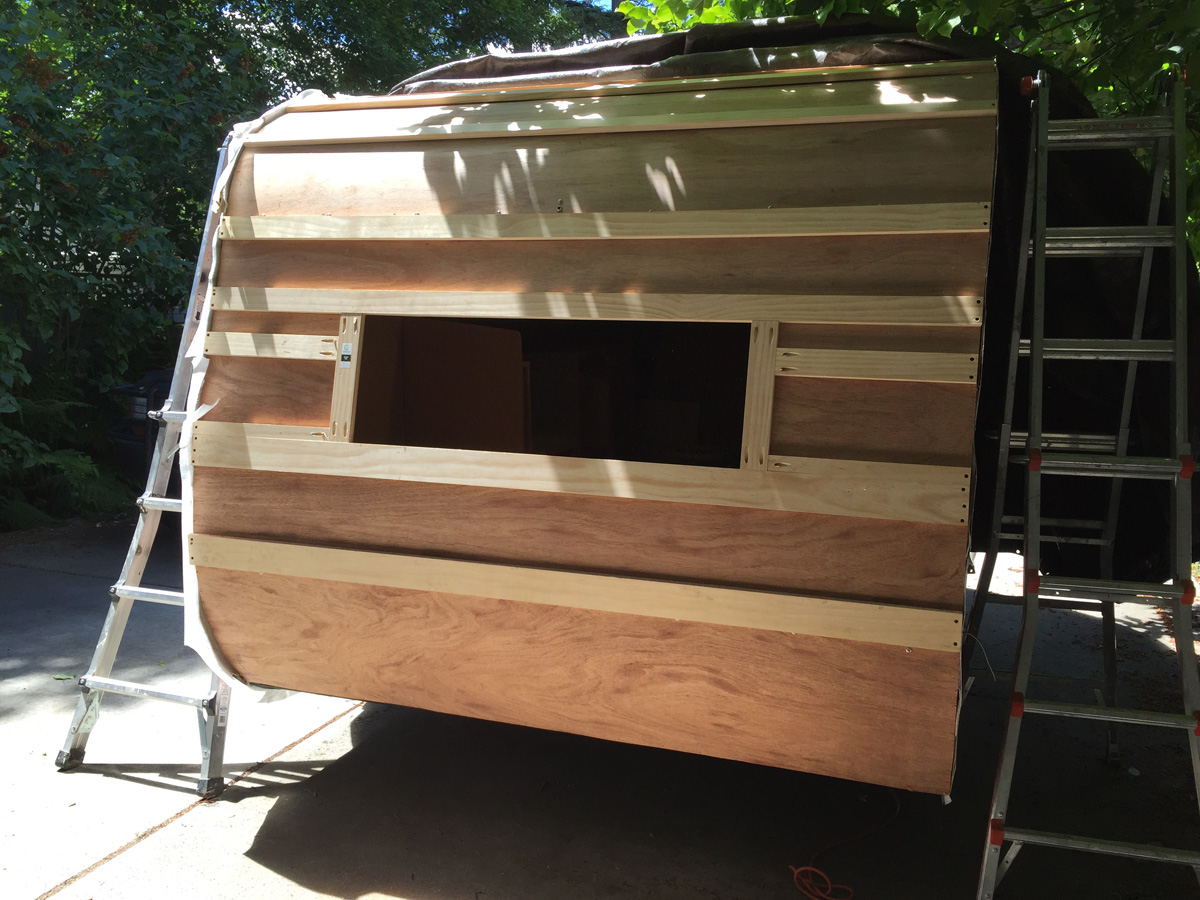
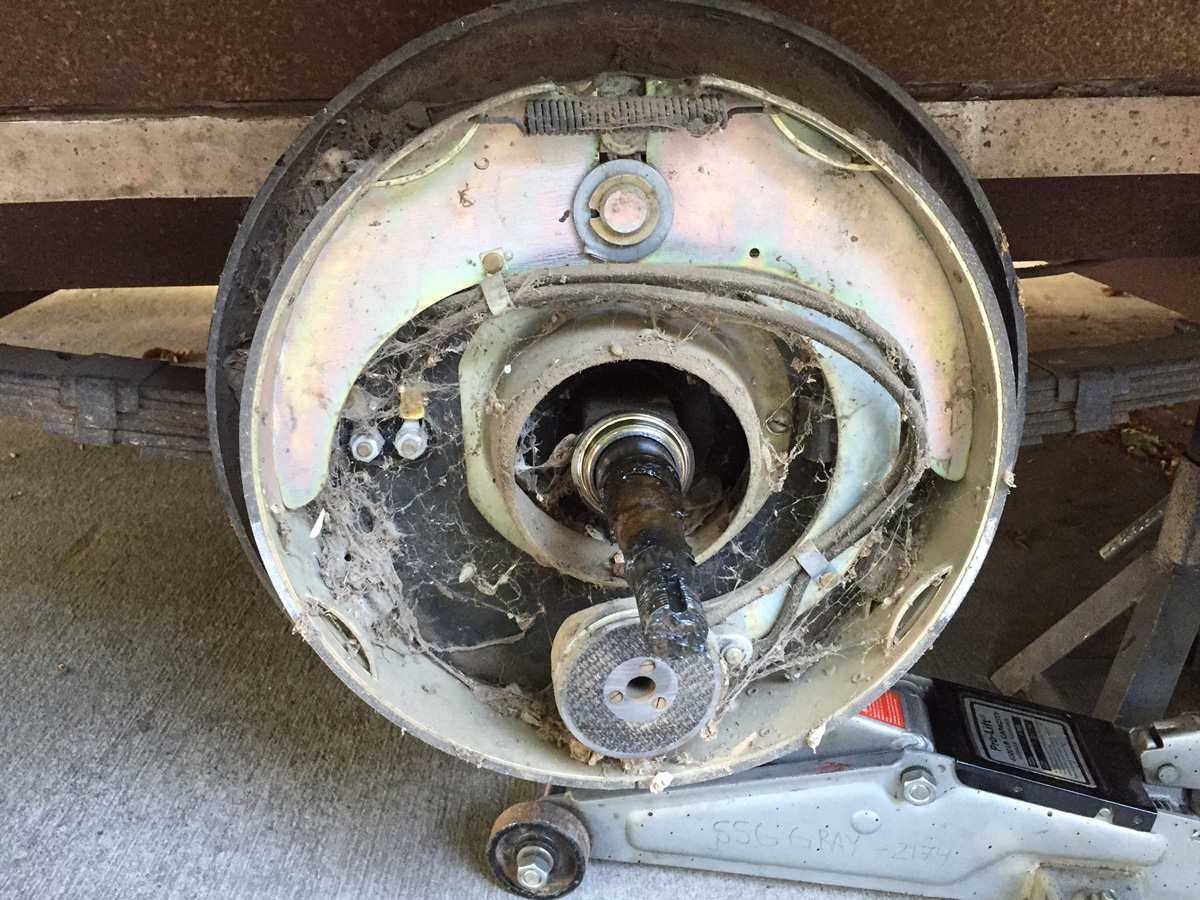
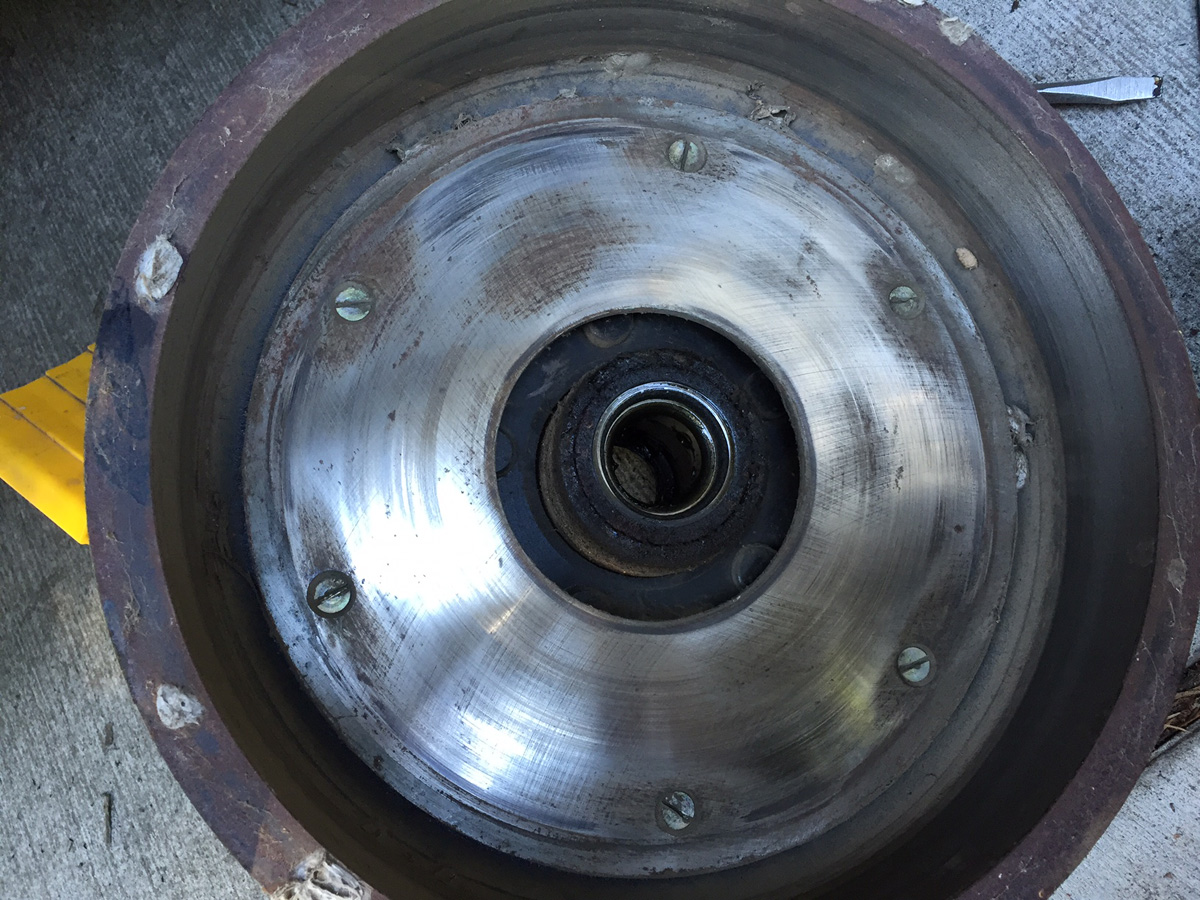
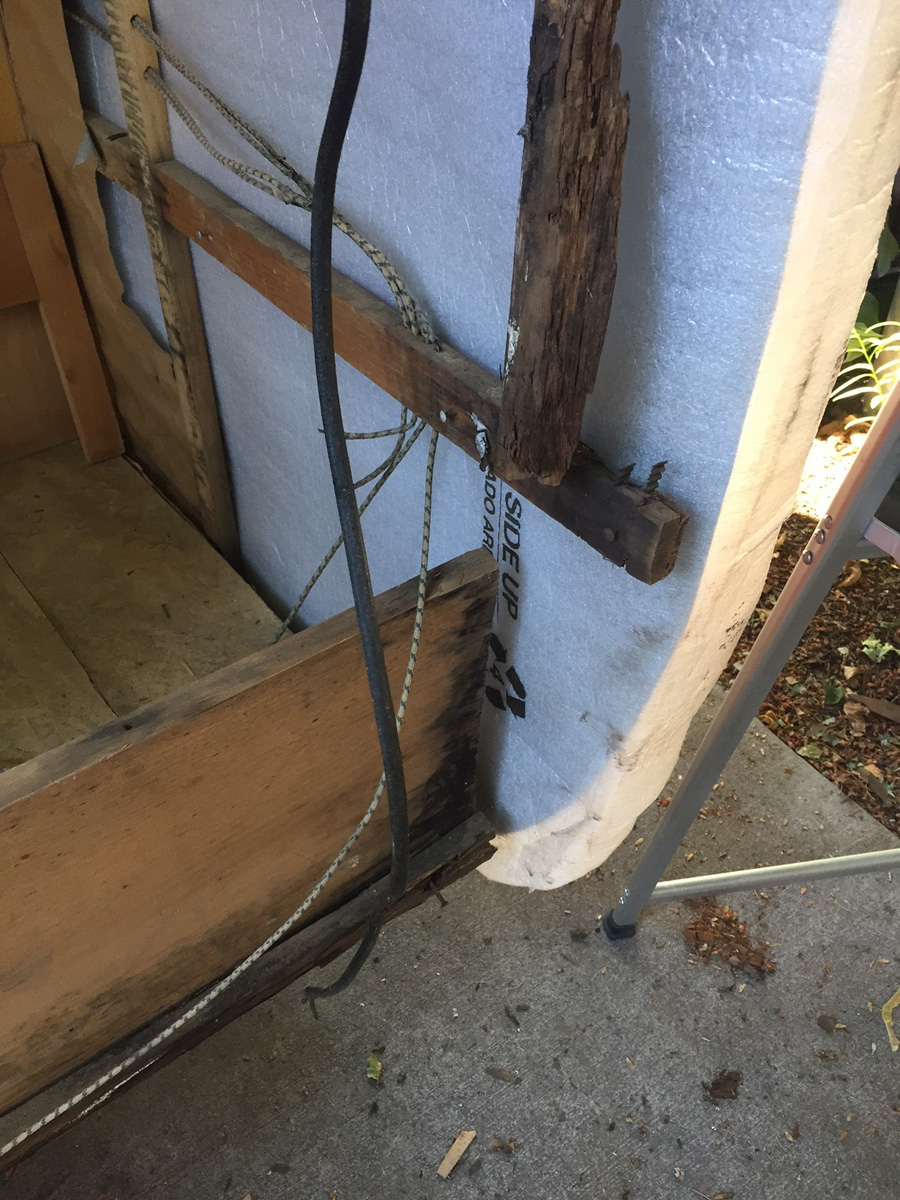
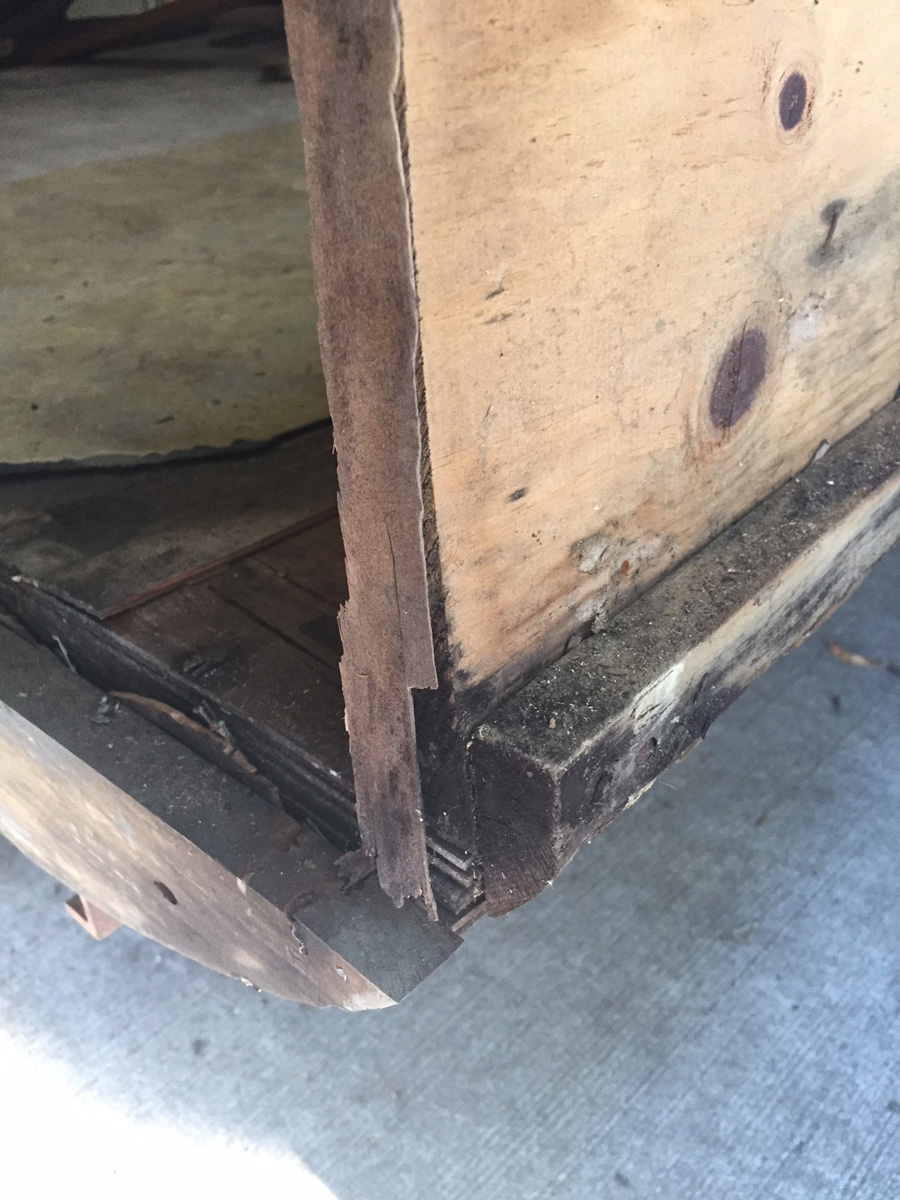
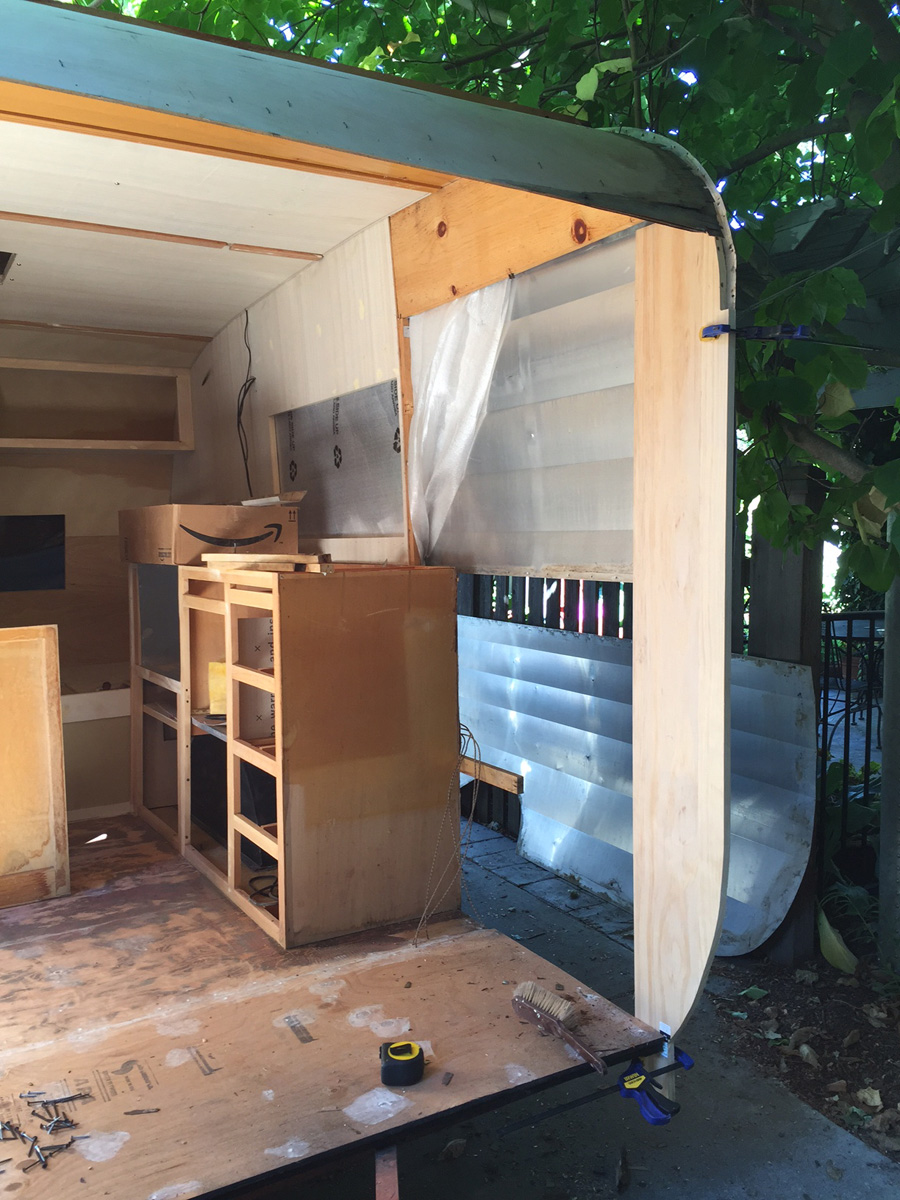
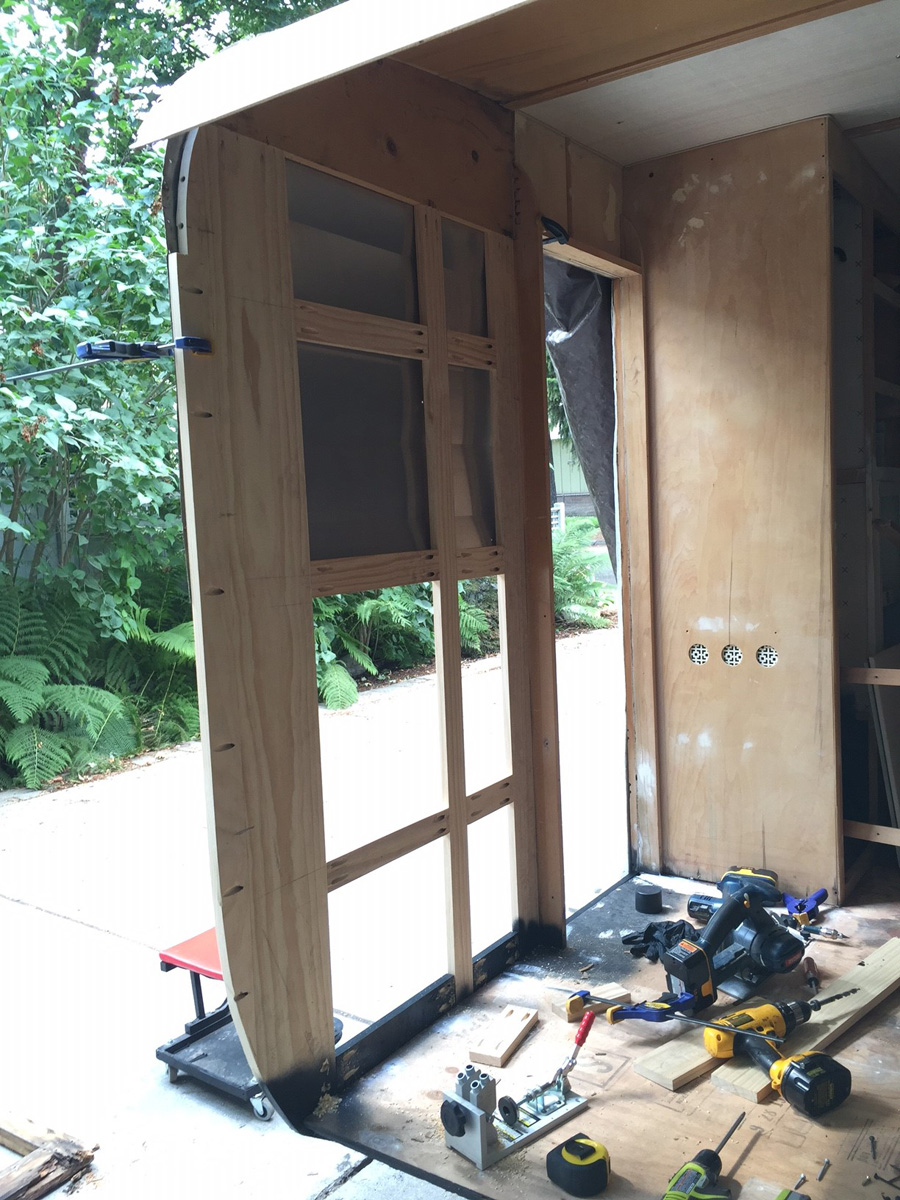
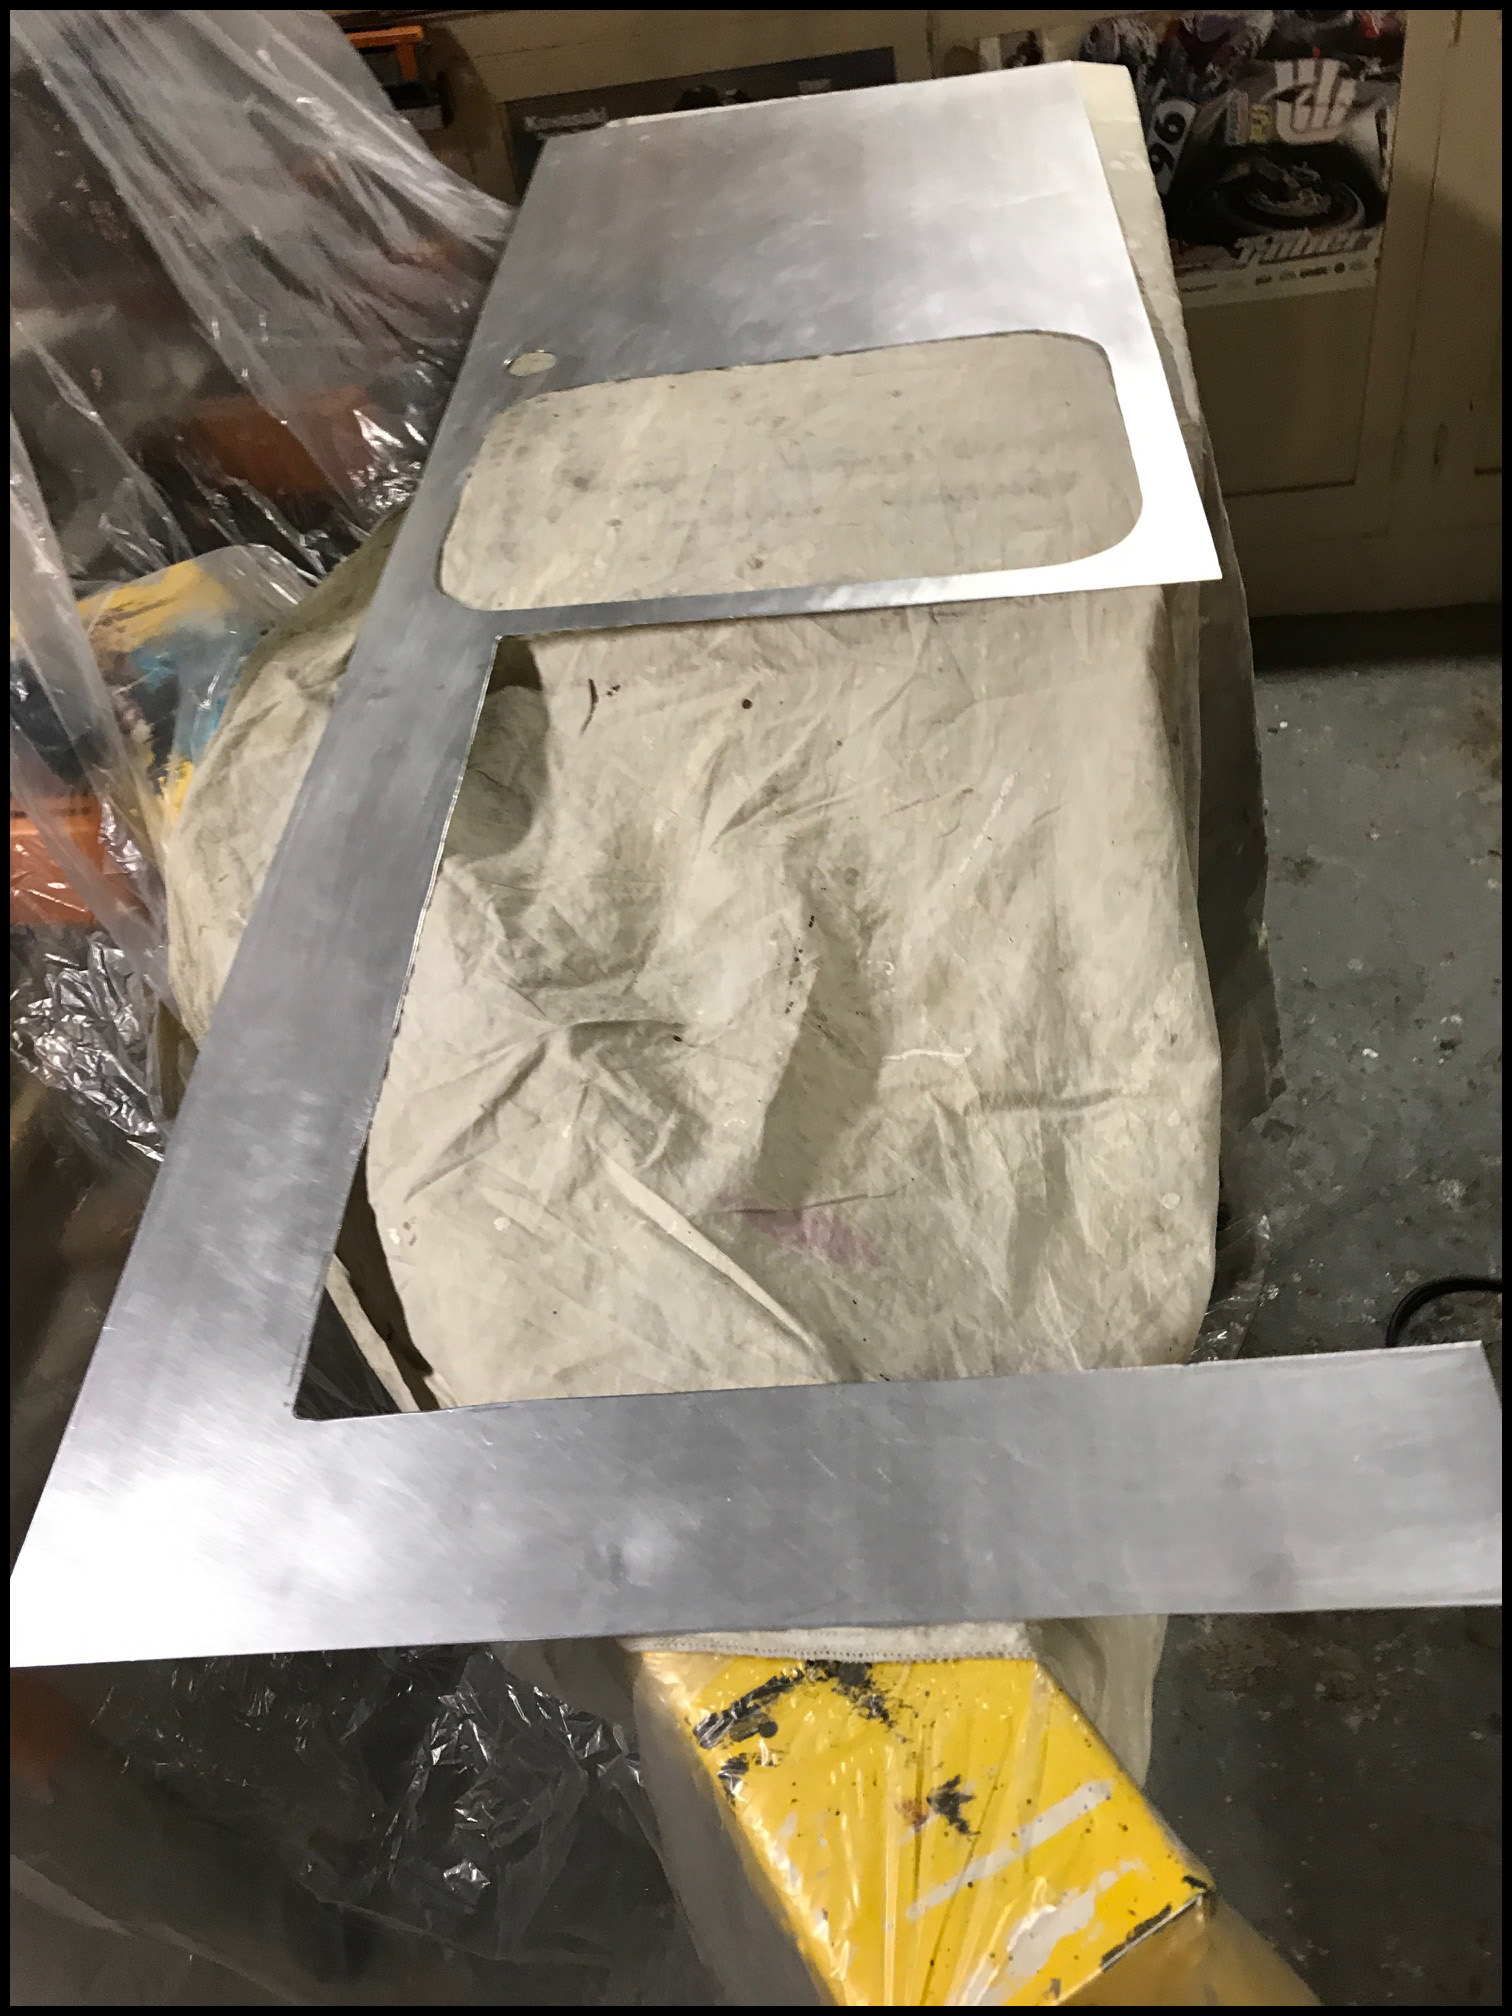
So after wrapping up the rear I have moved to the front, wow... Total rot. This thing is so far gone. I wish I had known more before I started looking for a trailer to fixup. I looked at least a half dozen trailers before deciding on this one. And all of them had dings dents and bend everywhere, this one was so straight I couldn’t pass it up, but when I tore into it... it was so rotted that a few dings and dents would have been easier to deal with. But like the wife says, it will be way better built and exactly as we want it. I ended up taking out the emergency breakaway brakes, they looked like they were dragging and didn't function anymore. So off they came no problem. |
 |
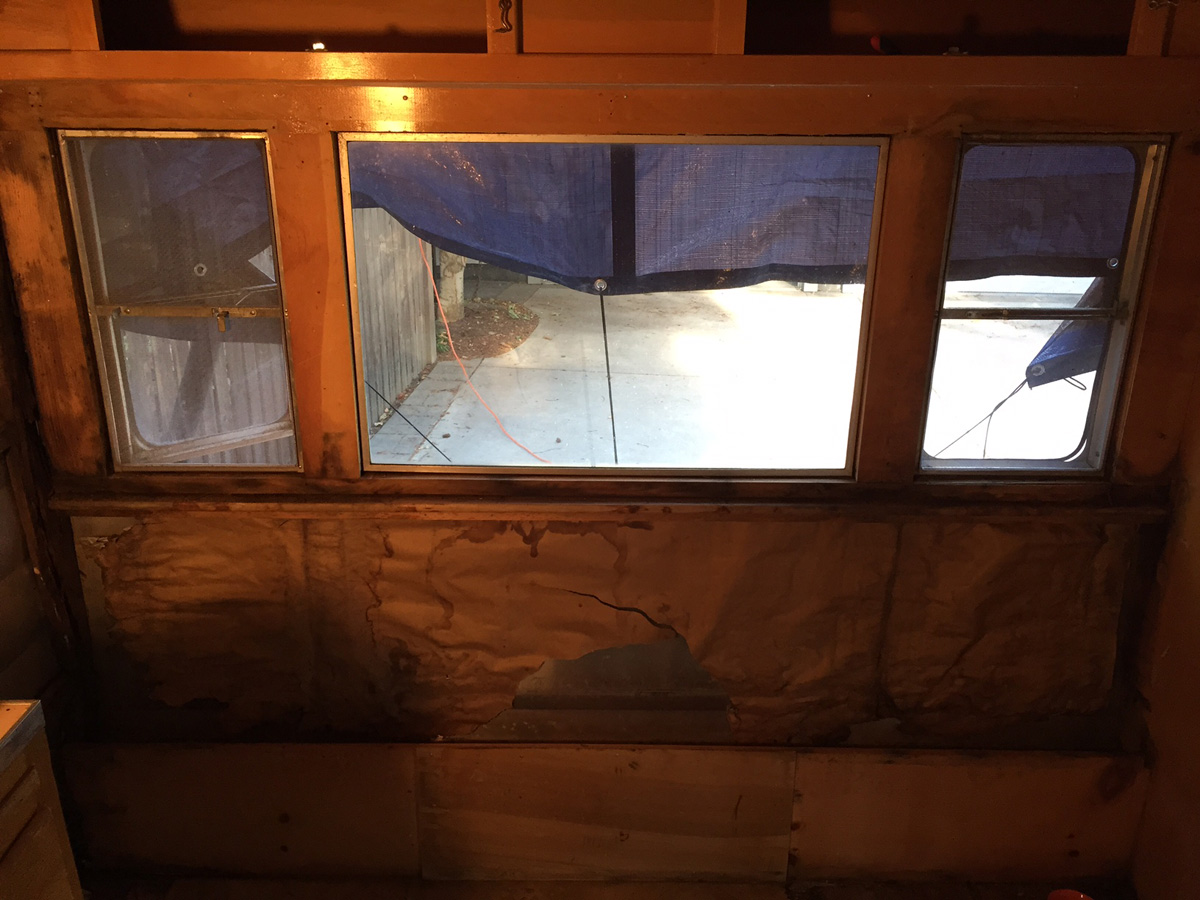
The front window area and floor was totally rotted, I pulled it all out and replaced it with a new over engineered version. The floor sagged on both outer sides, and the wall, photo right, was bowed out. I noticed way too late to fix it so it will have to be bowed. Wife says it gives us 2 more inches of space on the inside...LOL.
I also had a cracked main side support, last picture in the 3rd row, that made it so I had to rebuild the entire front support system. Fun, fun, fun.
 |
 |
 |
 |
 |
 |
 |
 |
 |
 |
 |
 |
 |
 |
 |
 |
 |
 |
 |
 |
 |
 |
 |
 |
 |
 |
 |
 |
 |
Aug - Nov. Getting there.
So I seem to be slacking on the picture taking part, I got a ton done and have no pictures to show the progress. Sorry about that, but you get on a roll and then your done. What I got done: — Base painting done, off white roof and cabinets, tan side walls. We knew we didn’t want the wood look going into the rebuild. |
 |
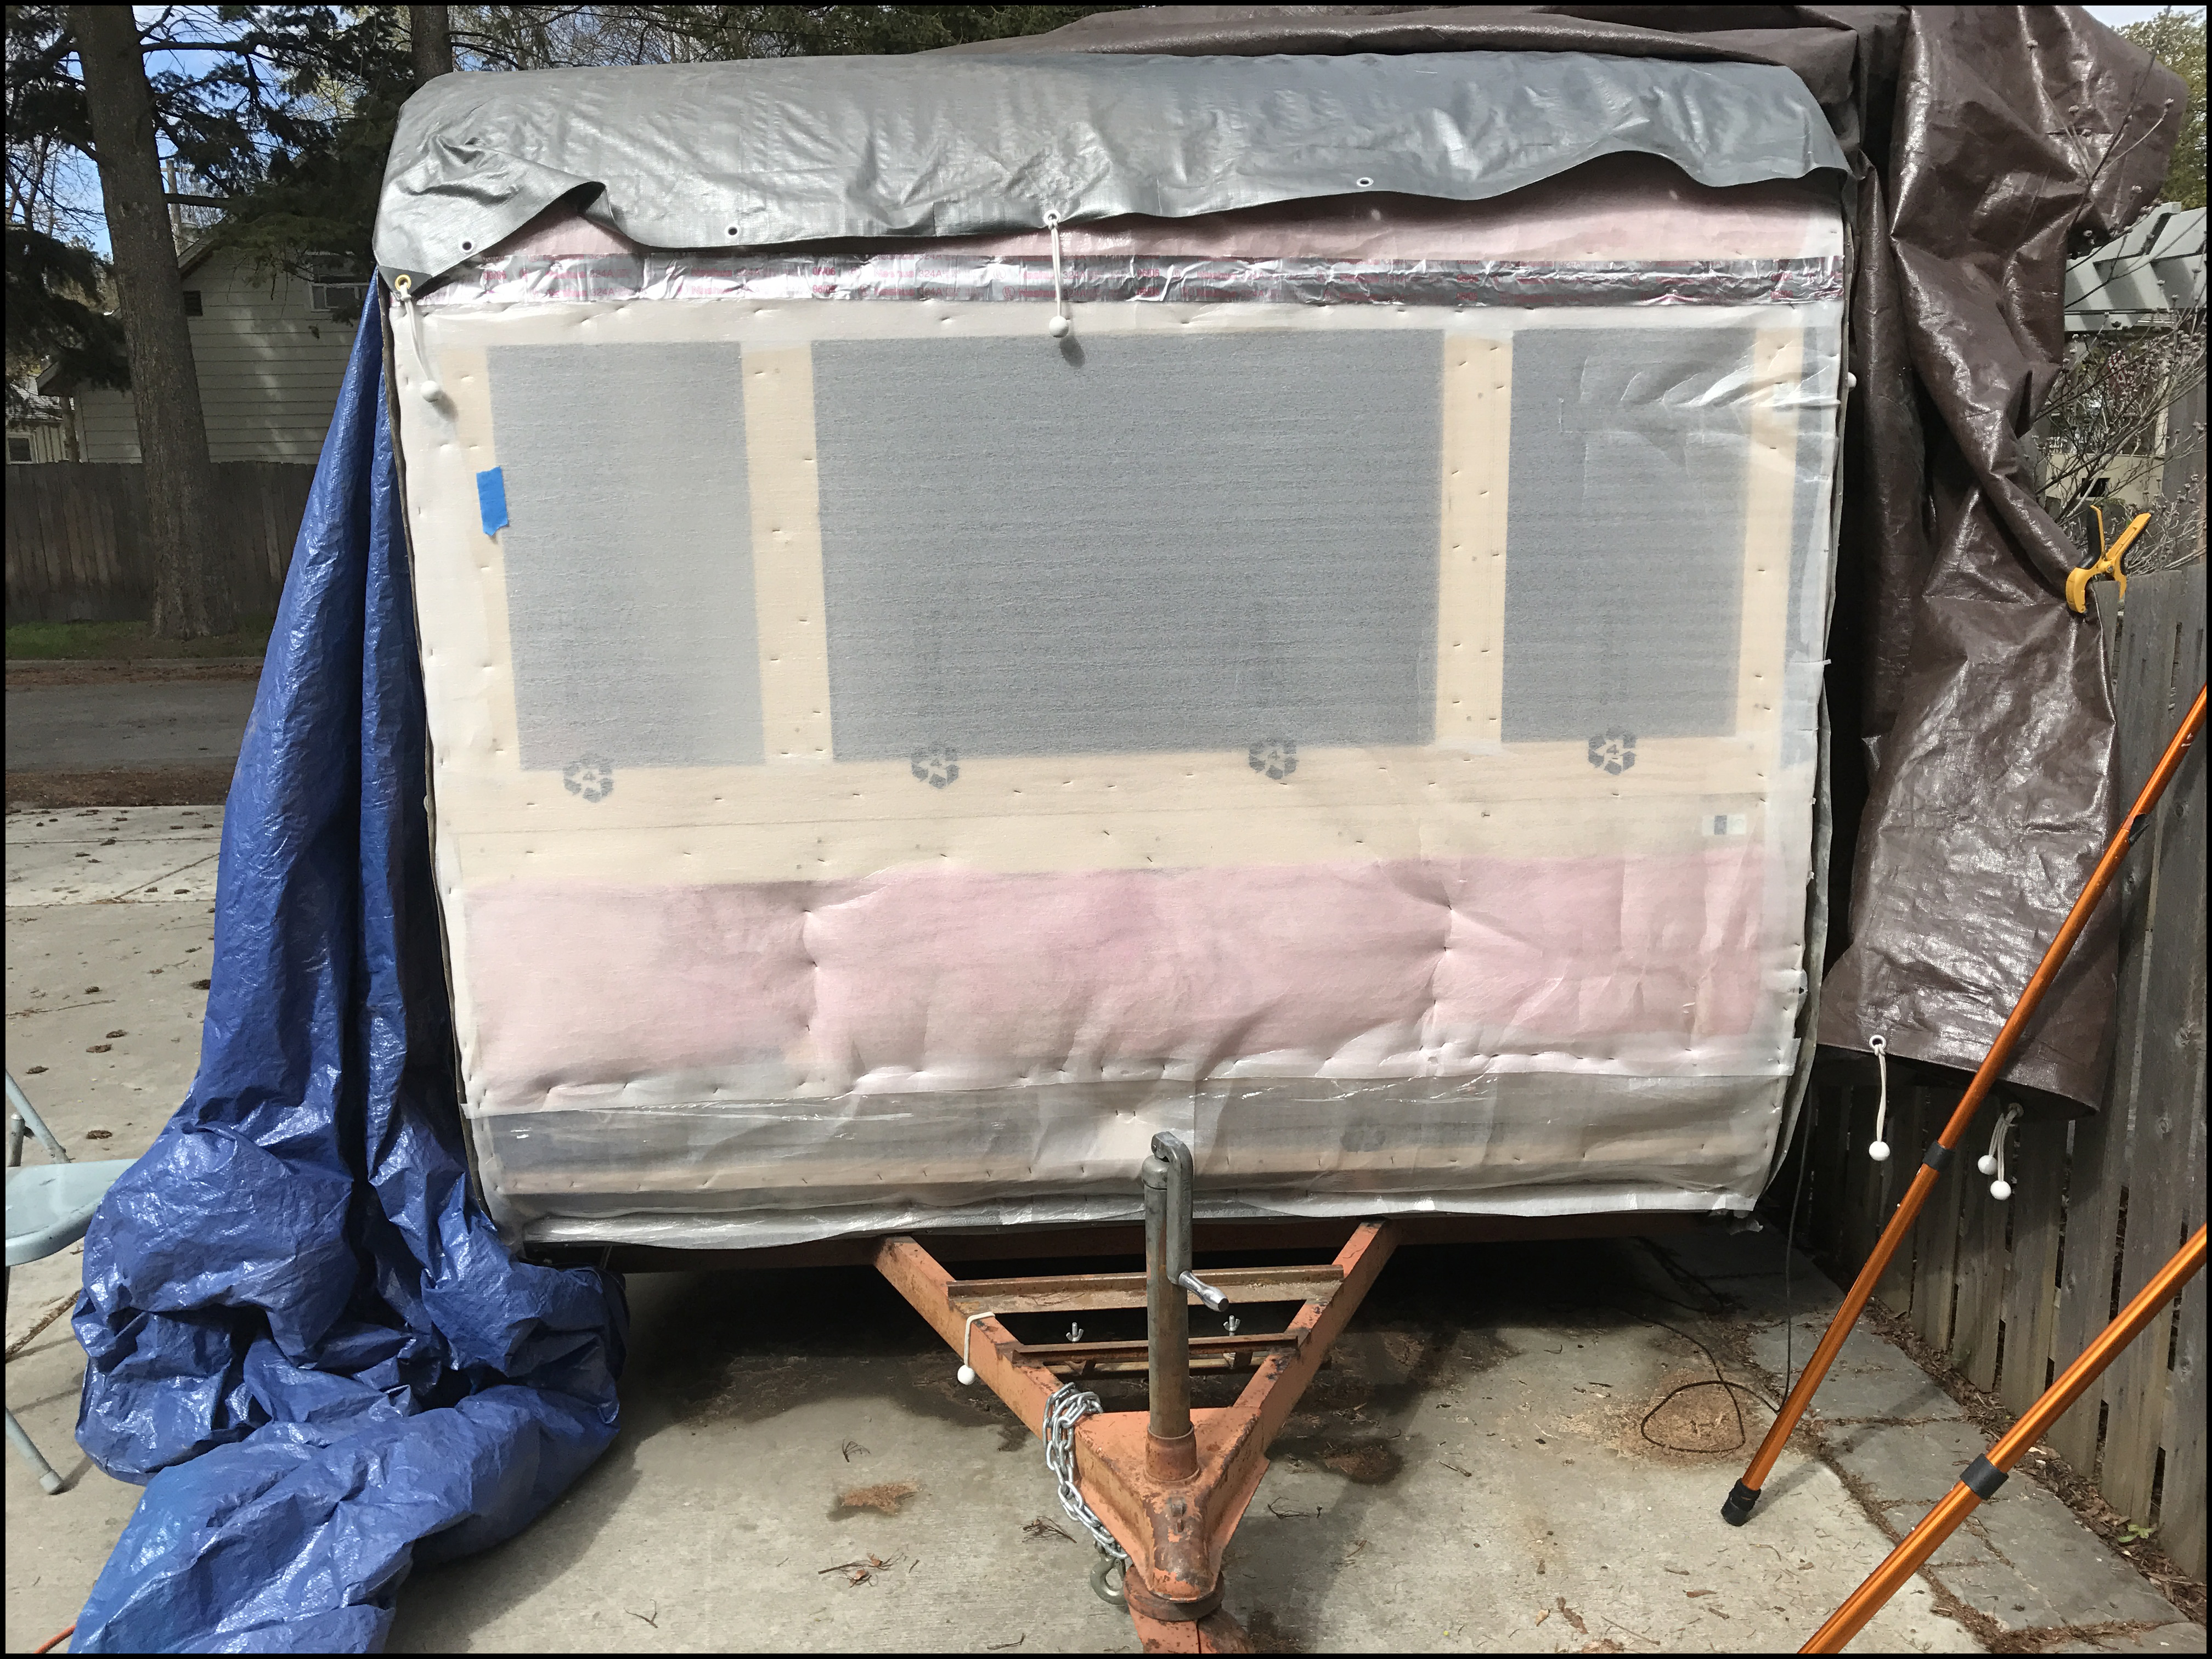
I winterized it for the next few months as the snow started to fly this morning. I will move inside to work the windows, finish the front door, and other odds and ends over the winter.
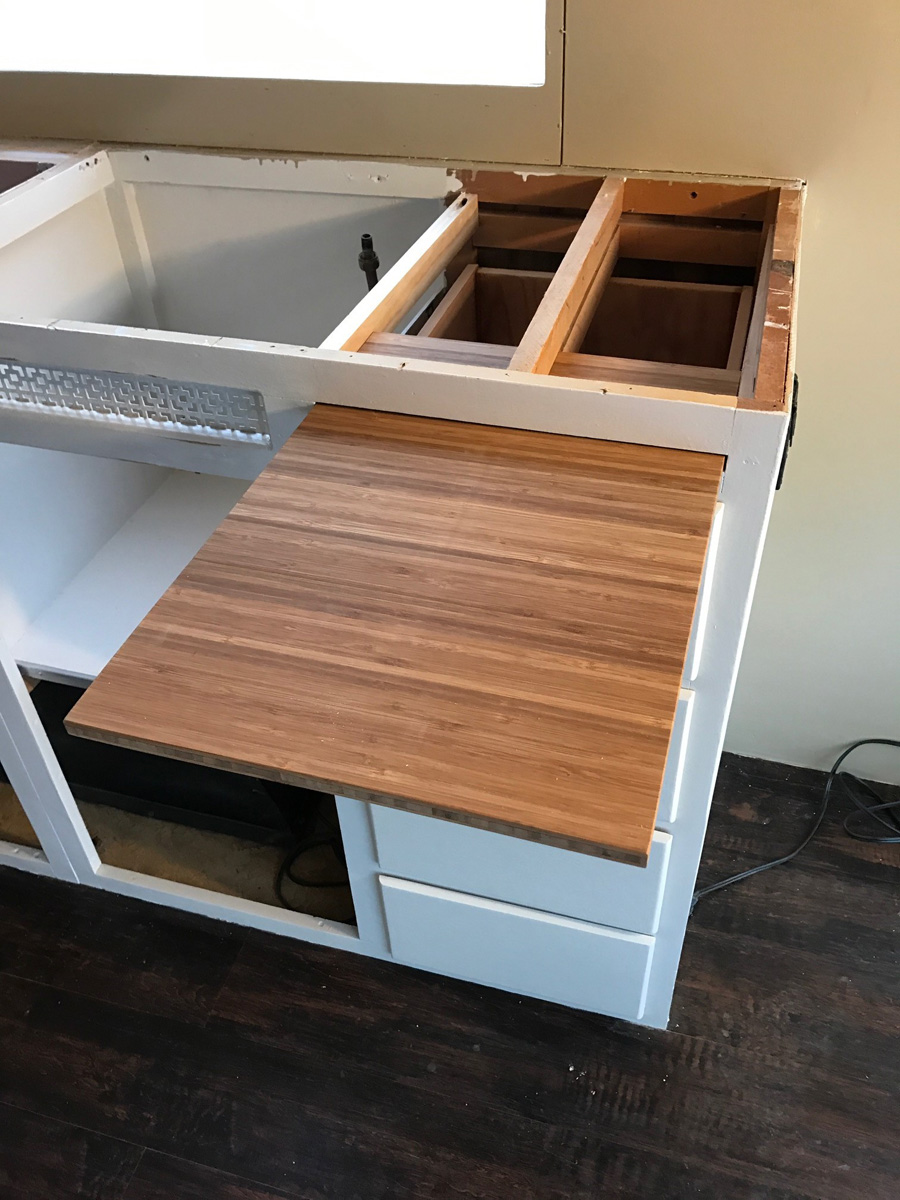
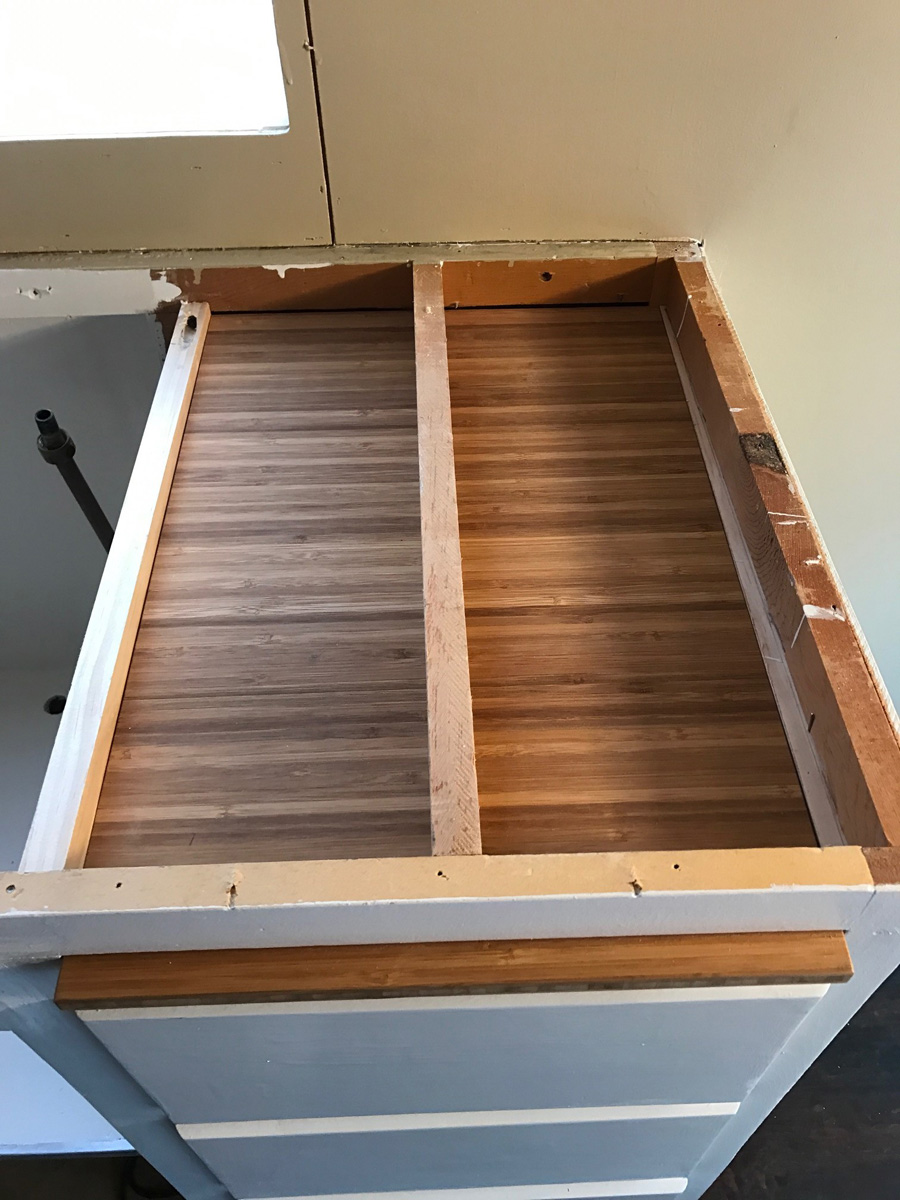
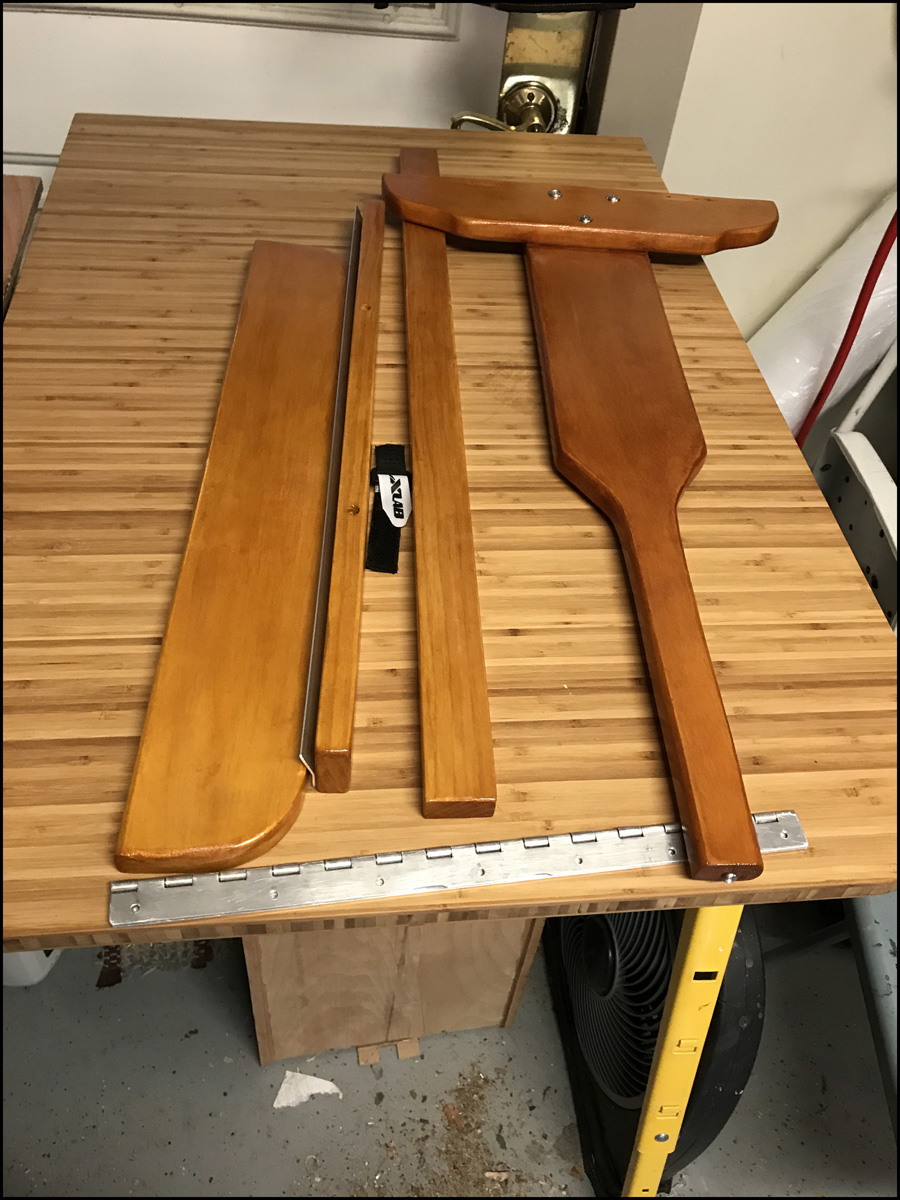
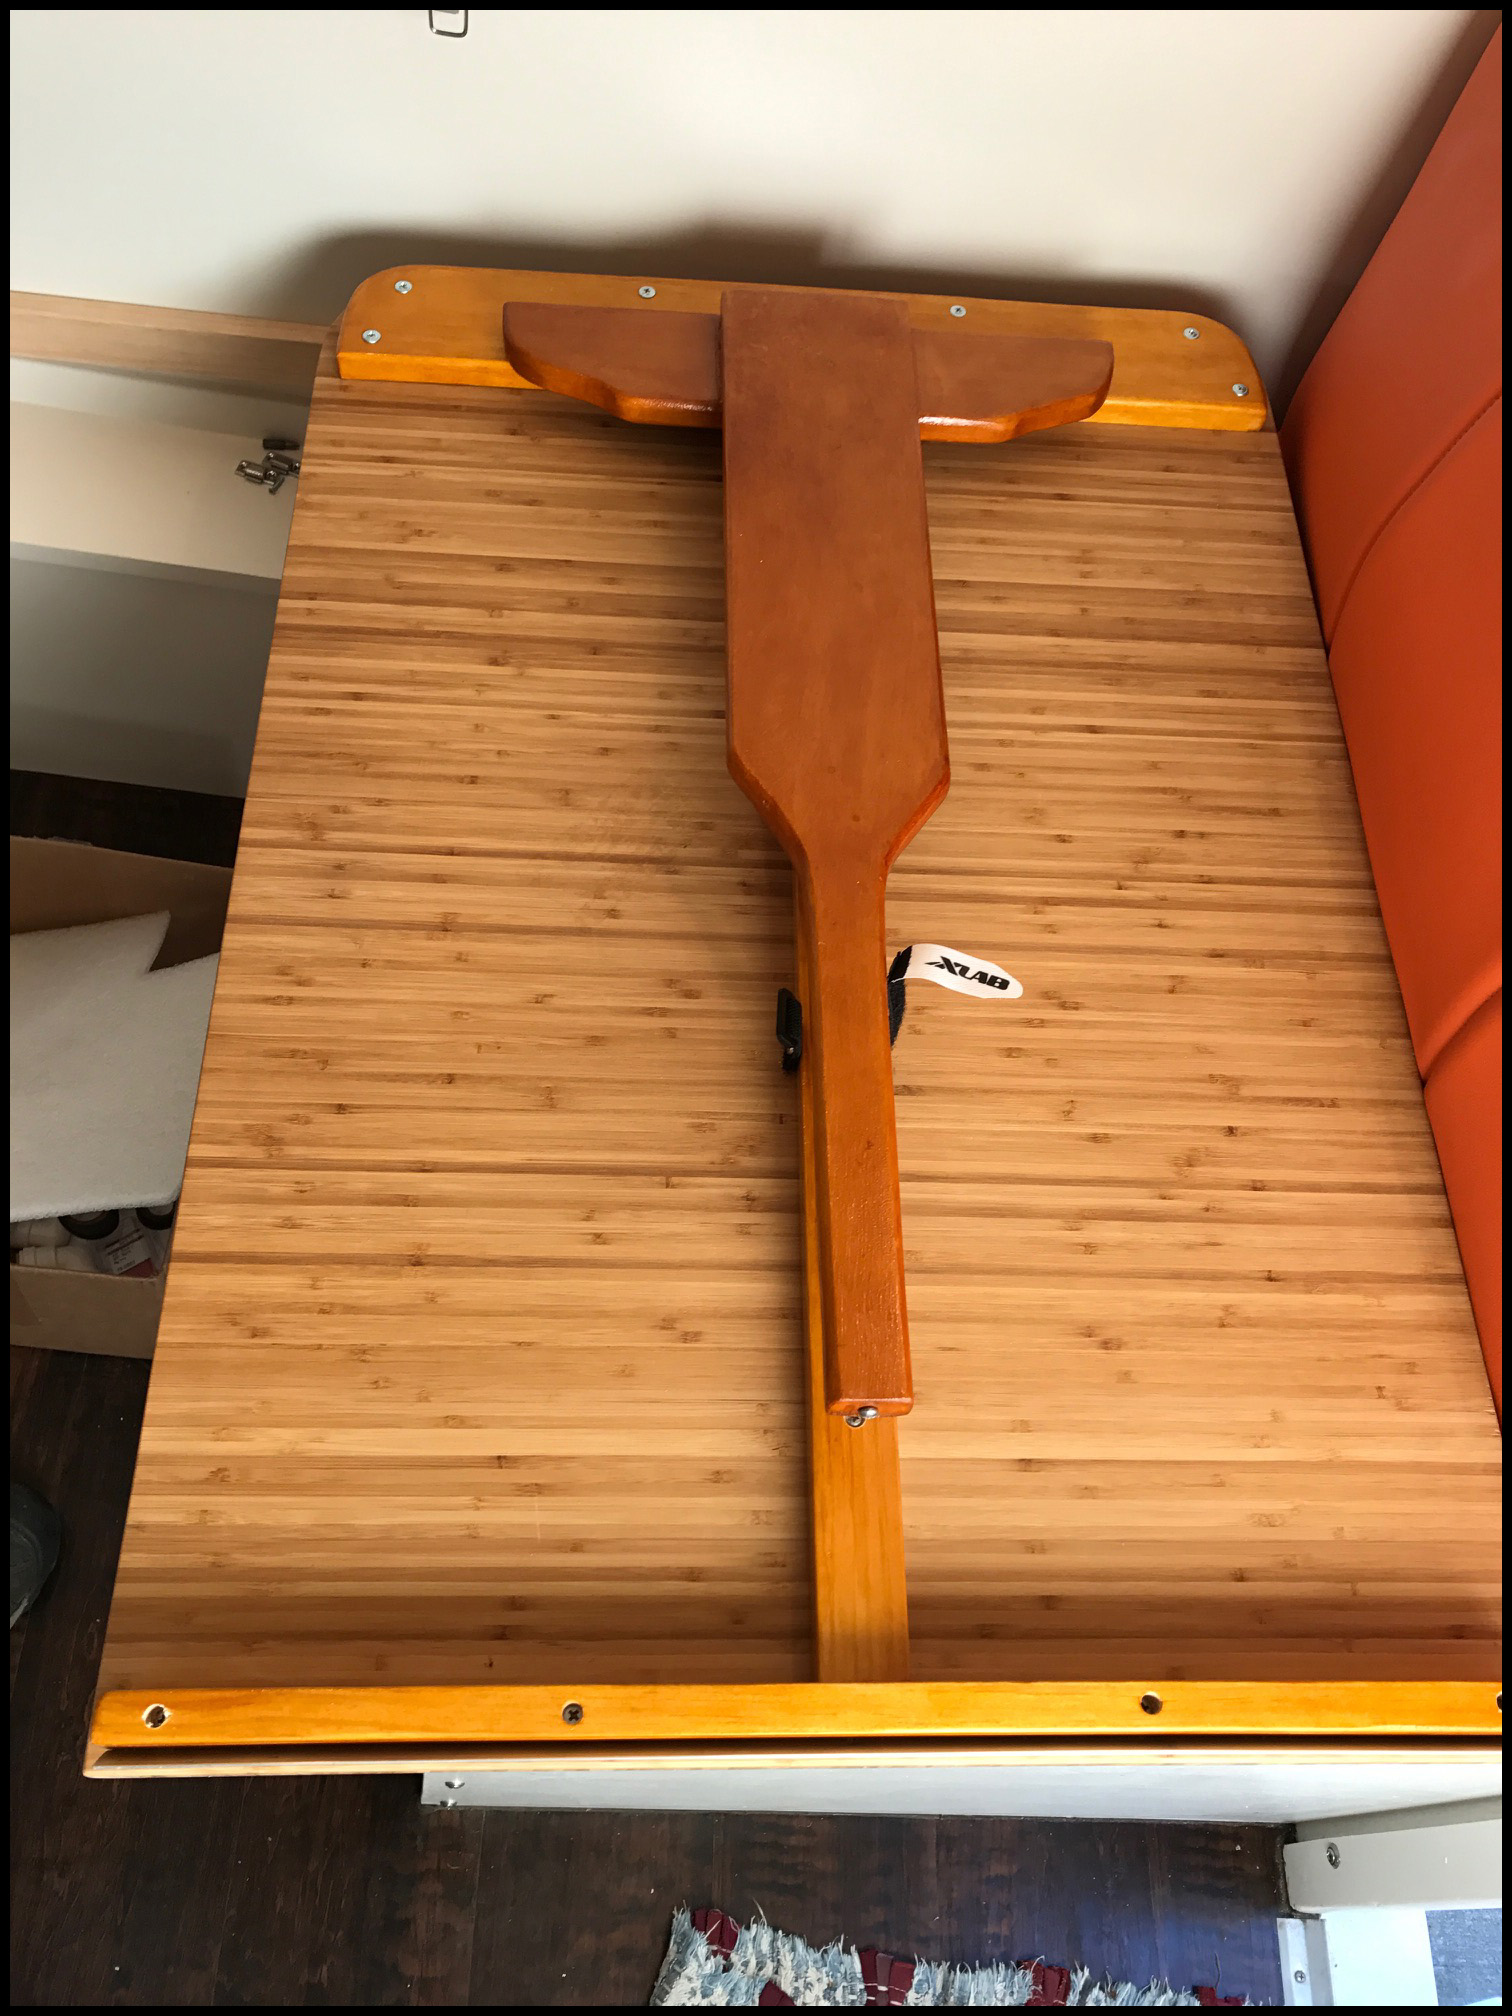
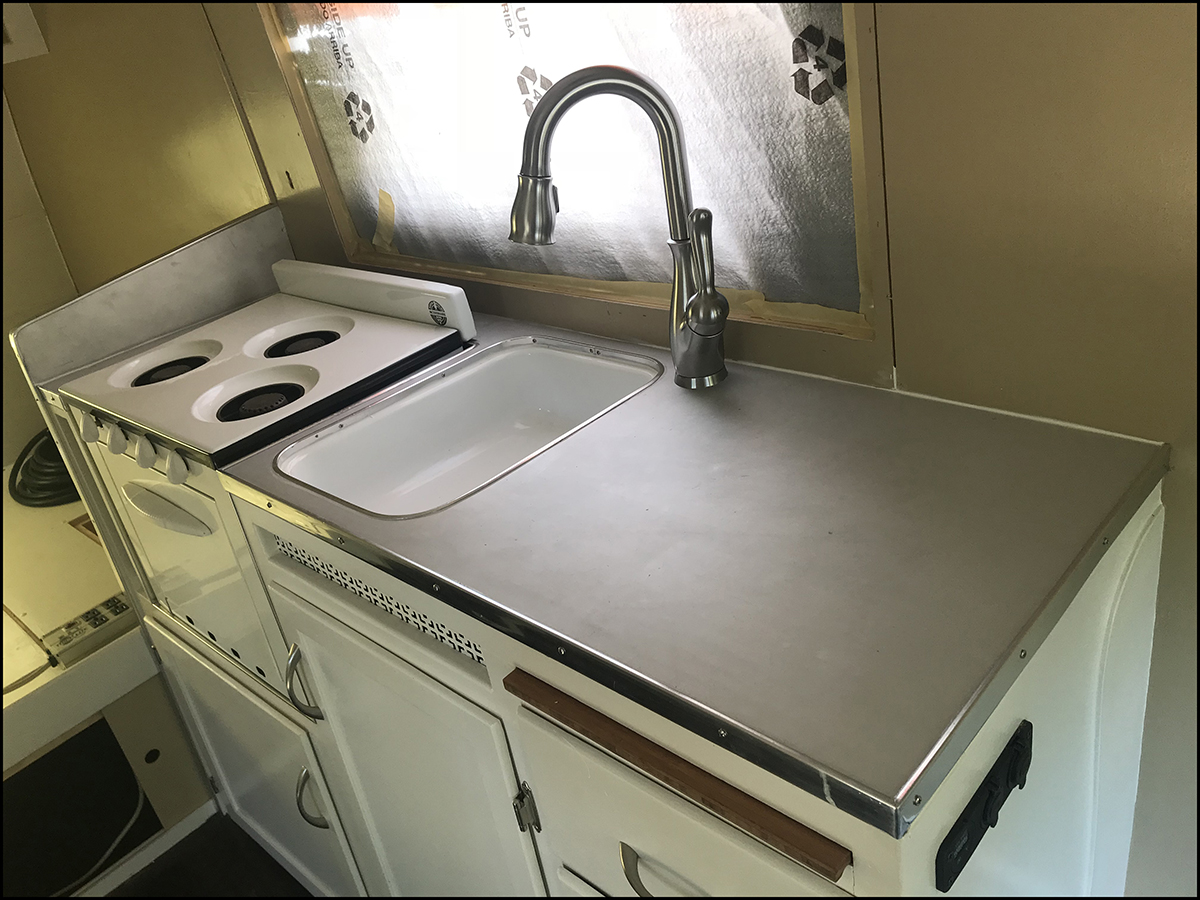
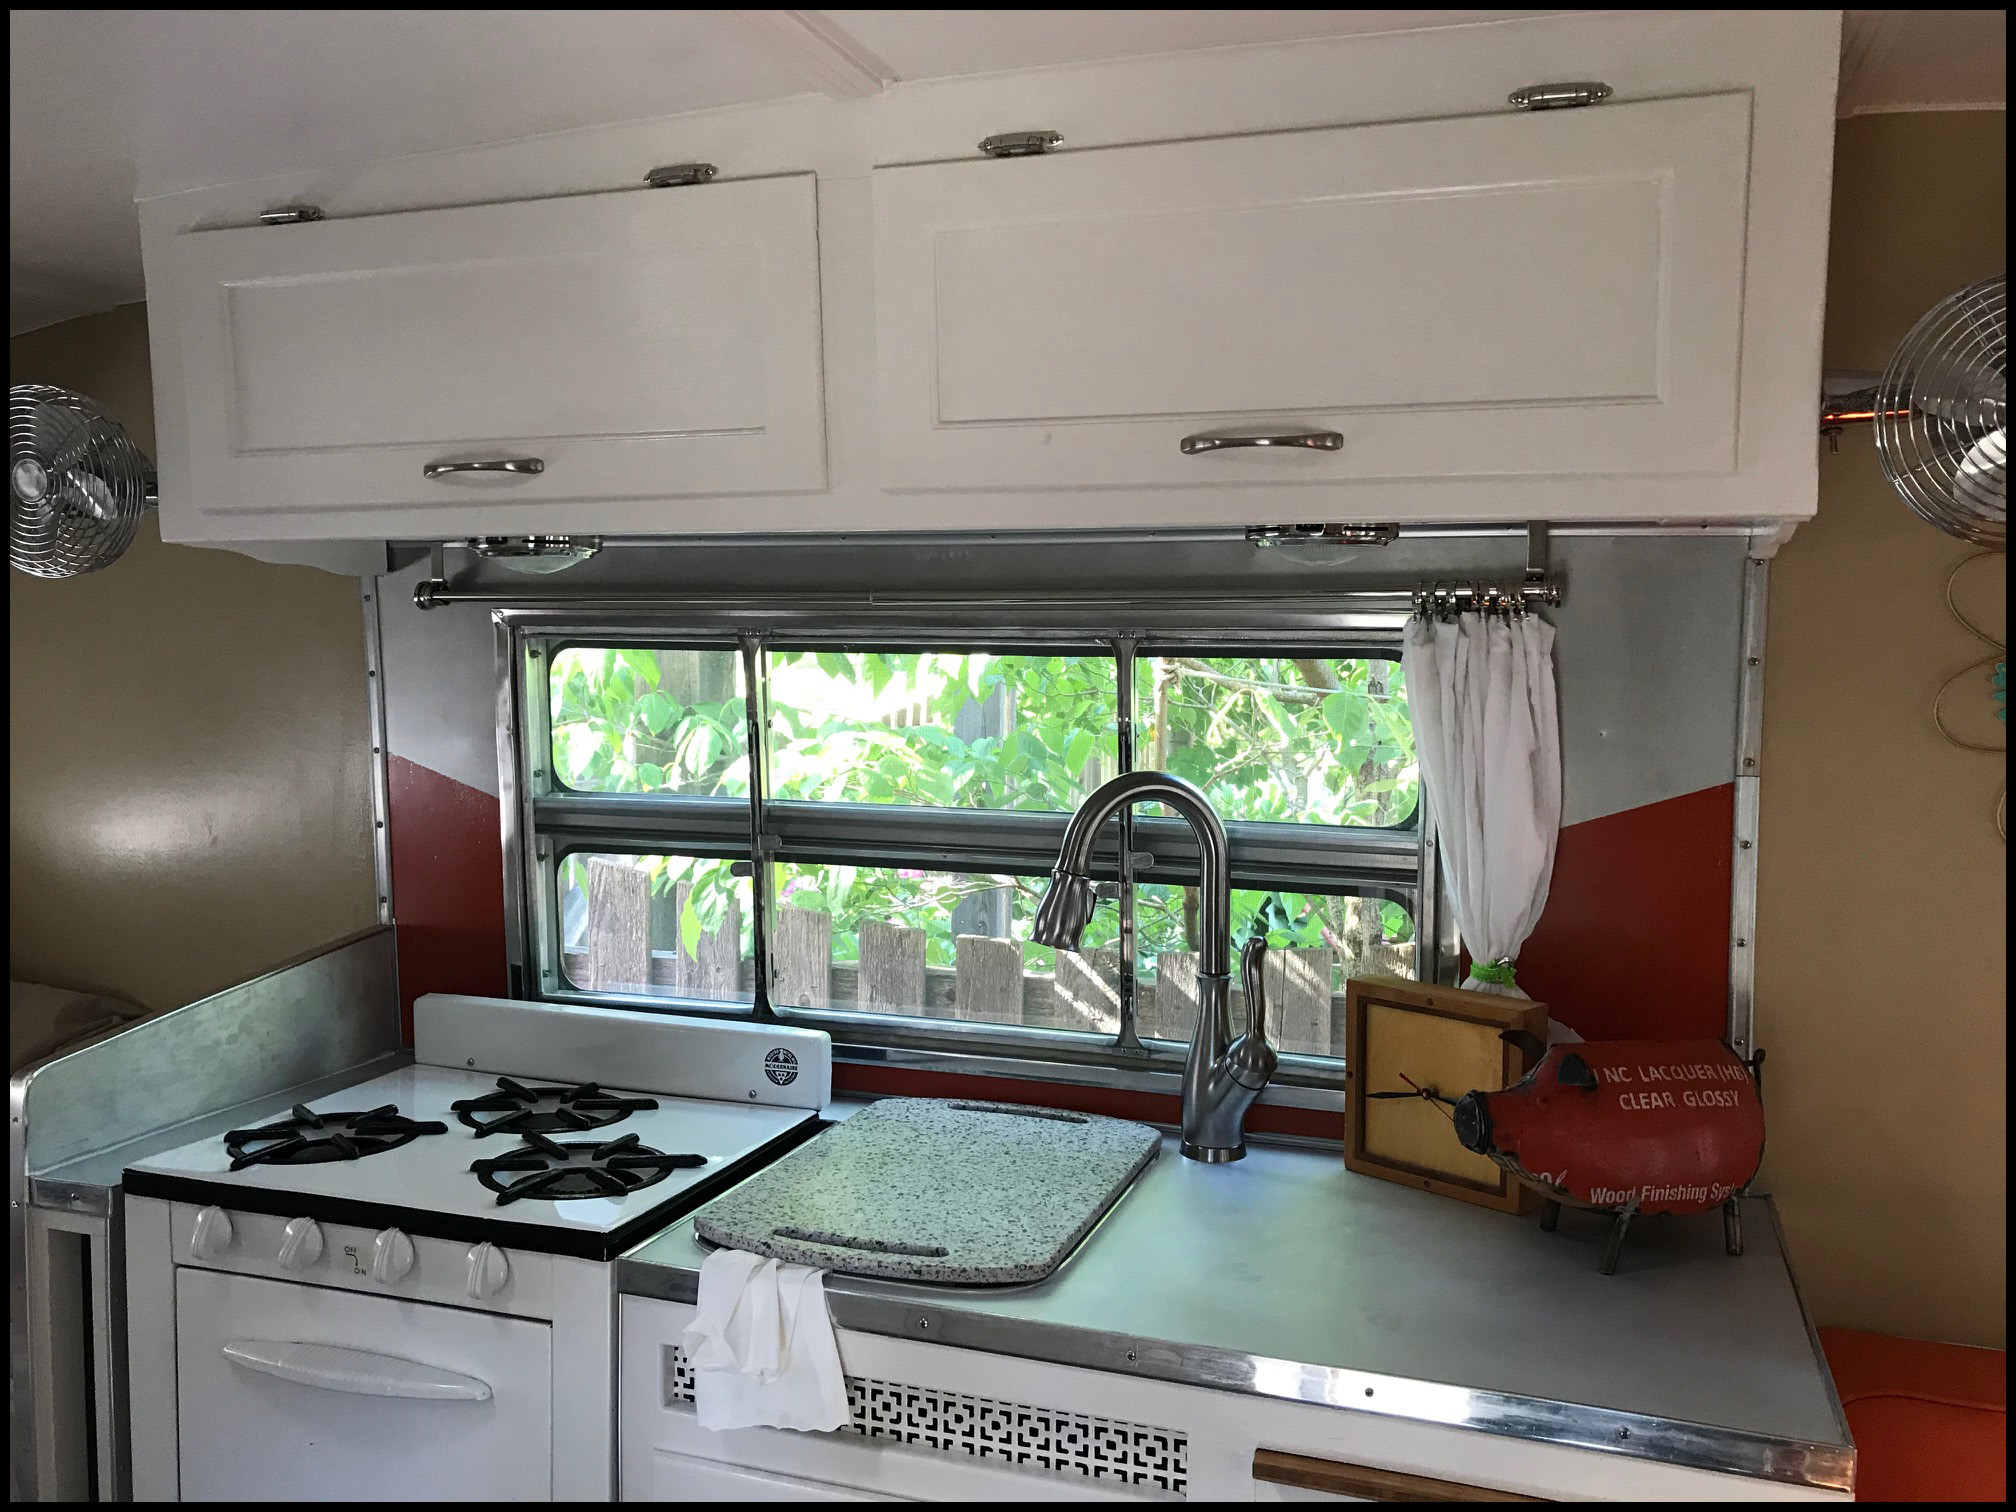
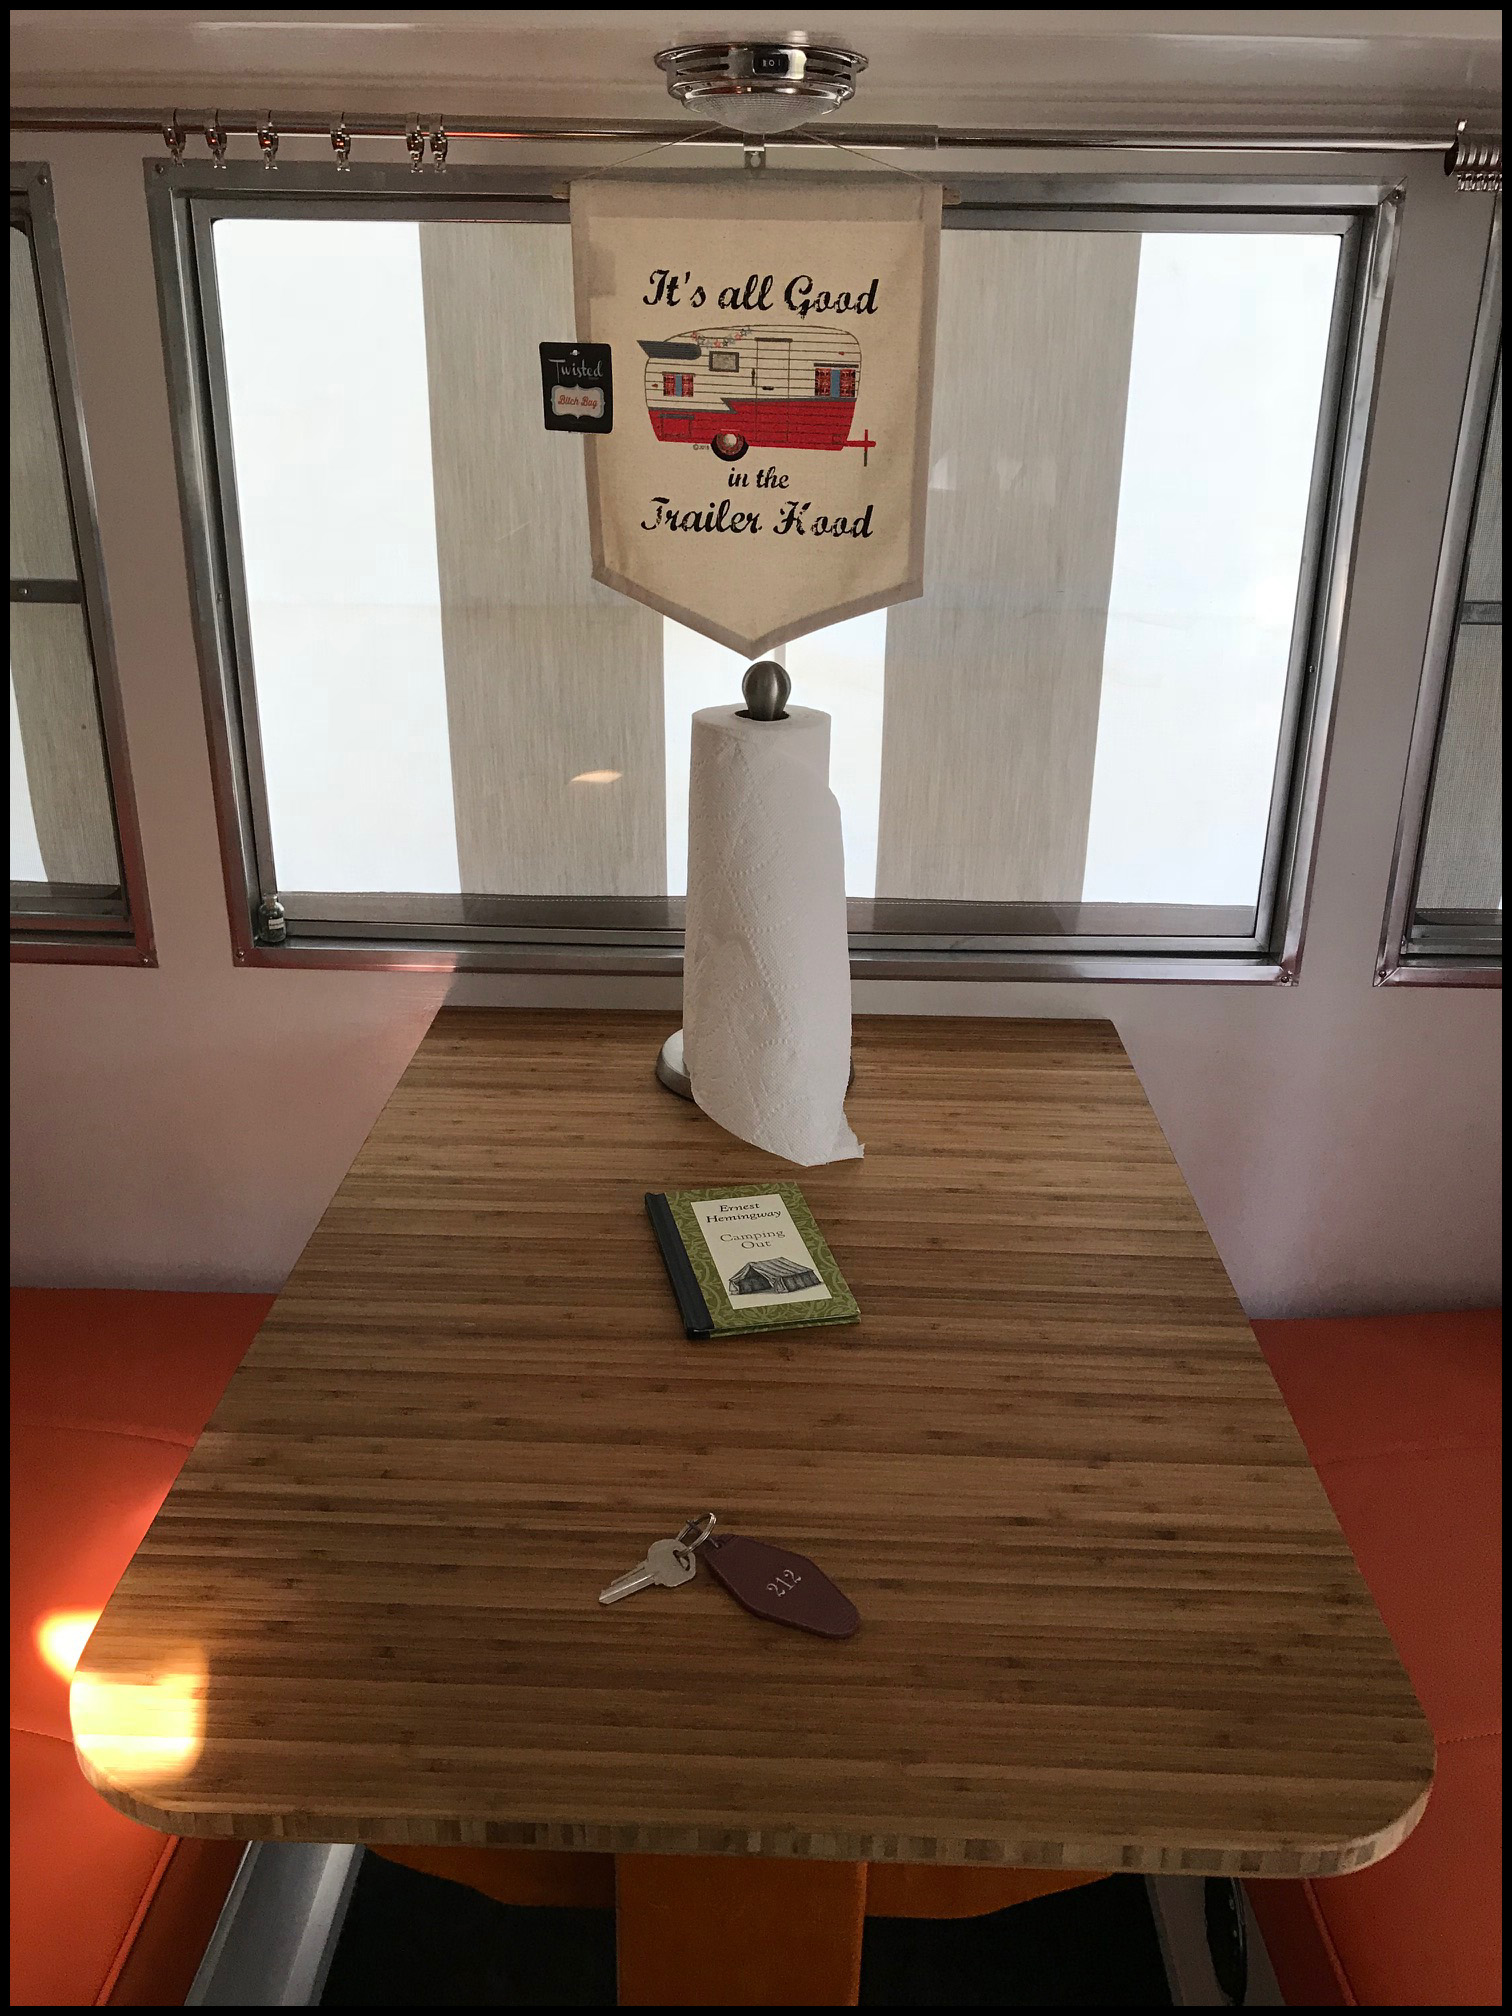
So as for the cutting board, I got this from the Cutting Board Company, www.cuttingboardcompany.com, and could not be happier, custom made to my specifications. Made of high end Bamboo and they even cut a pull lip on the end to make it easier to pull out, I just mentioned in the notes of the order page that it would be a counter mounted board and if they could cut a grove for me.
 |
|
 |
 |
 |
 |
 |
 |
 |
 |
 |
 |
 |
 |
 |
 |
 |
 |
Dec - Jun. Getting a lot done.
I was just pluggin away, head down and working. Got a ton done over these months... Sorry it took so long for me to update the site. — The front framed in, Kitchen cabinets finished up. Polished almost all of the windows, frames, and brows. |
 |
I just chugged away all winter, got most of the windows done, I didn’t take pictures of the process… but will when I do the last one so you can see what I did. They came out nice. Just polished enough, not too shiny. I did the screens and rubber seal as well, they look almost new.
The front framing went as expected. A ton of fabrication and engineering.
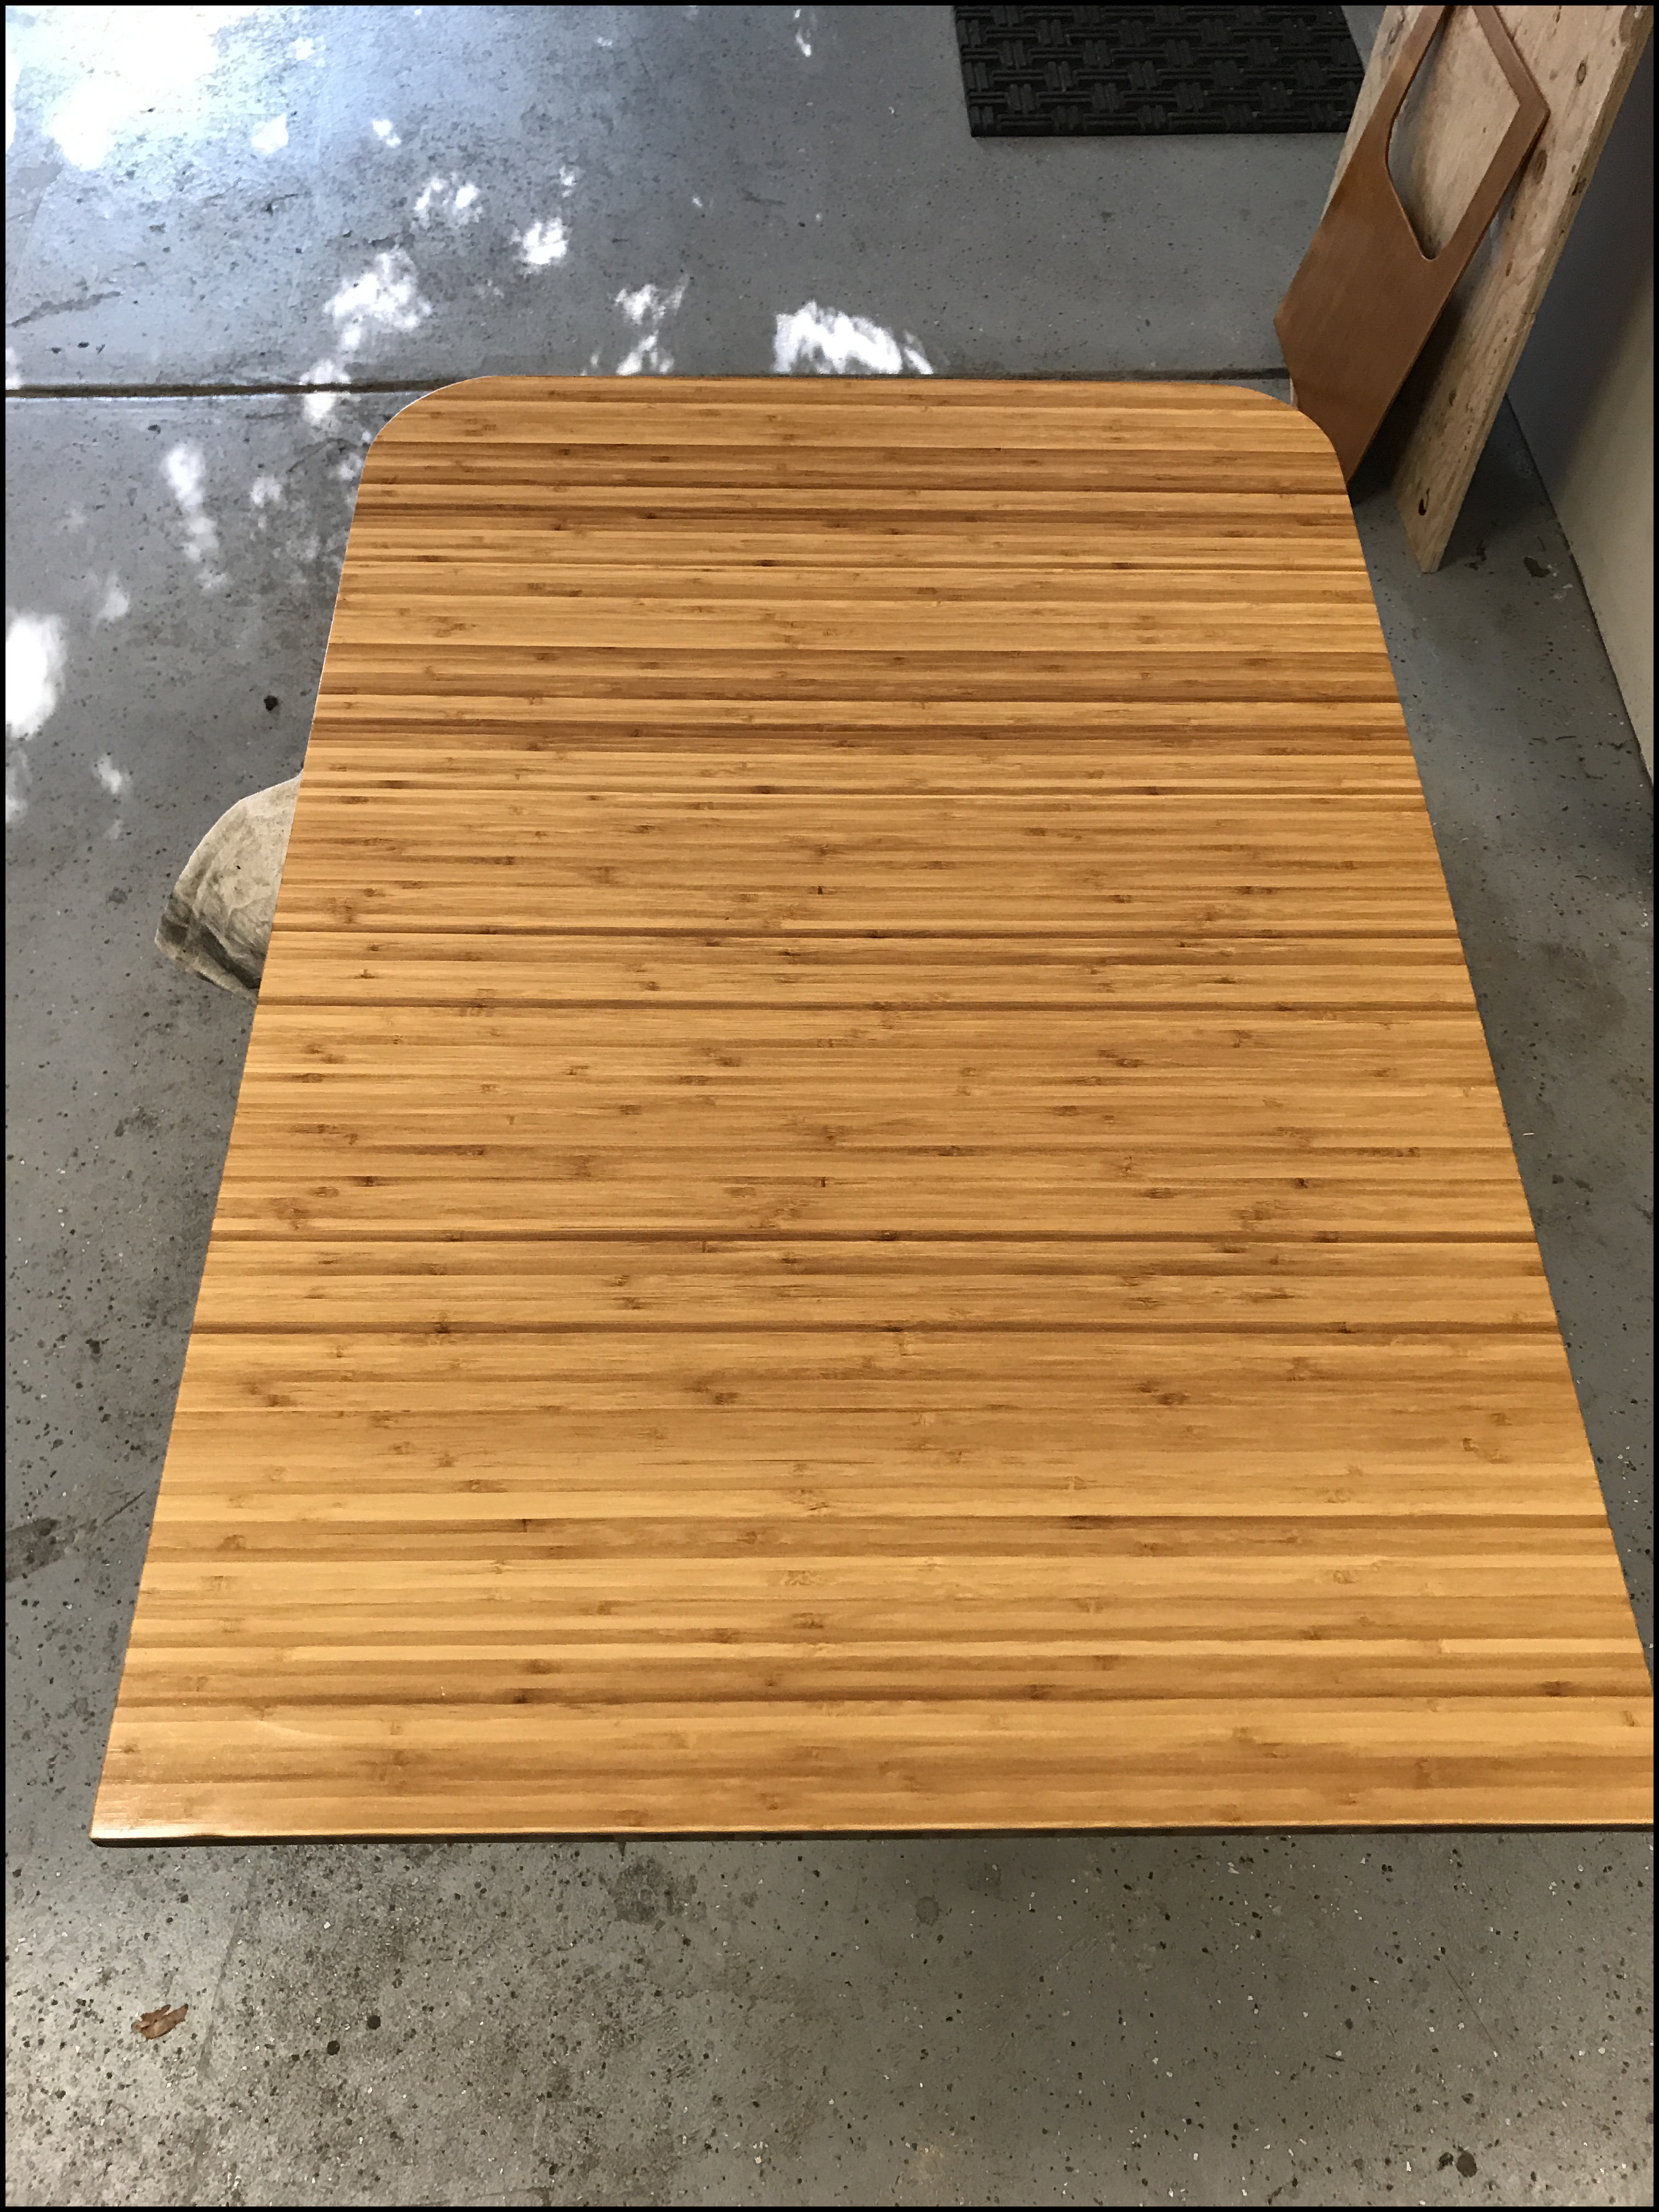
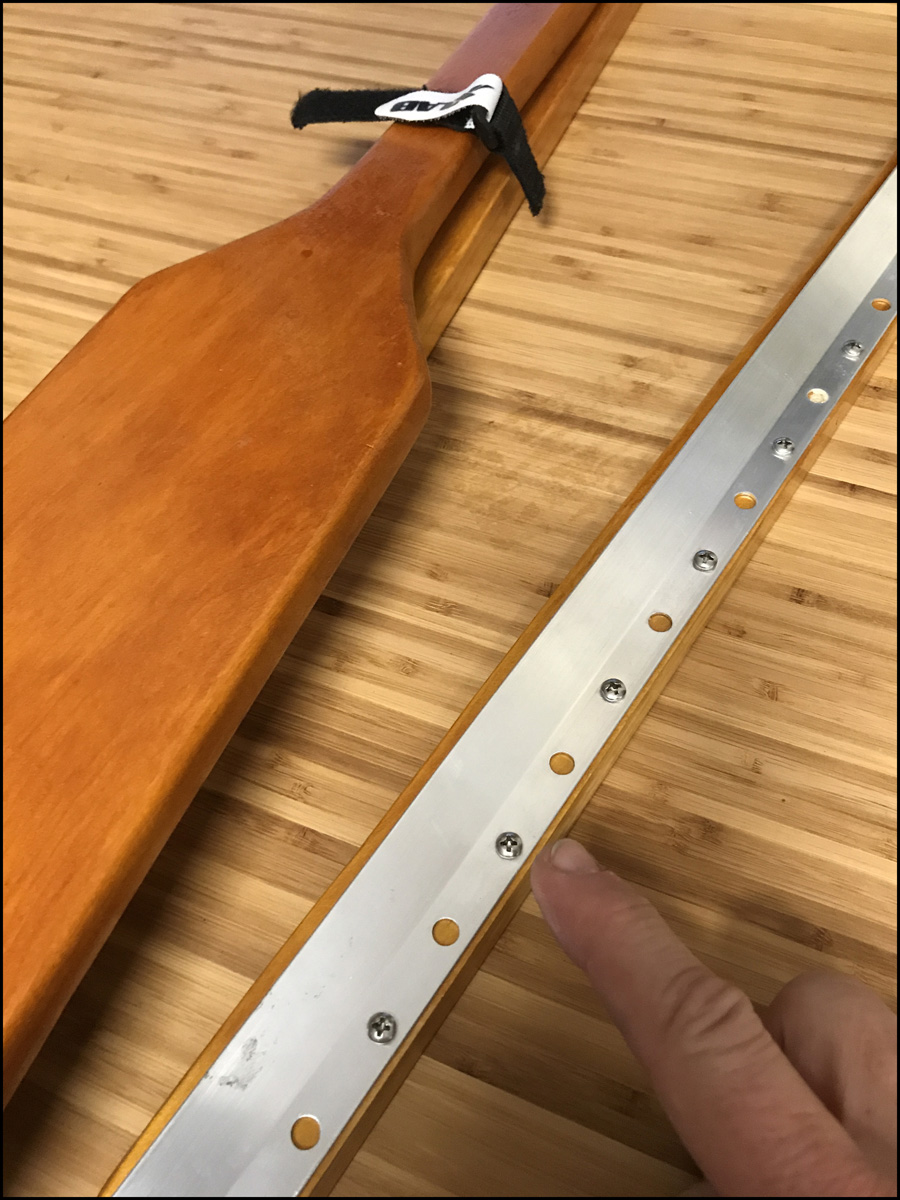
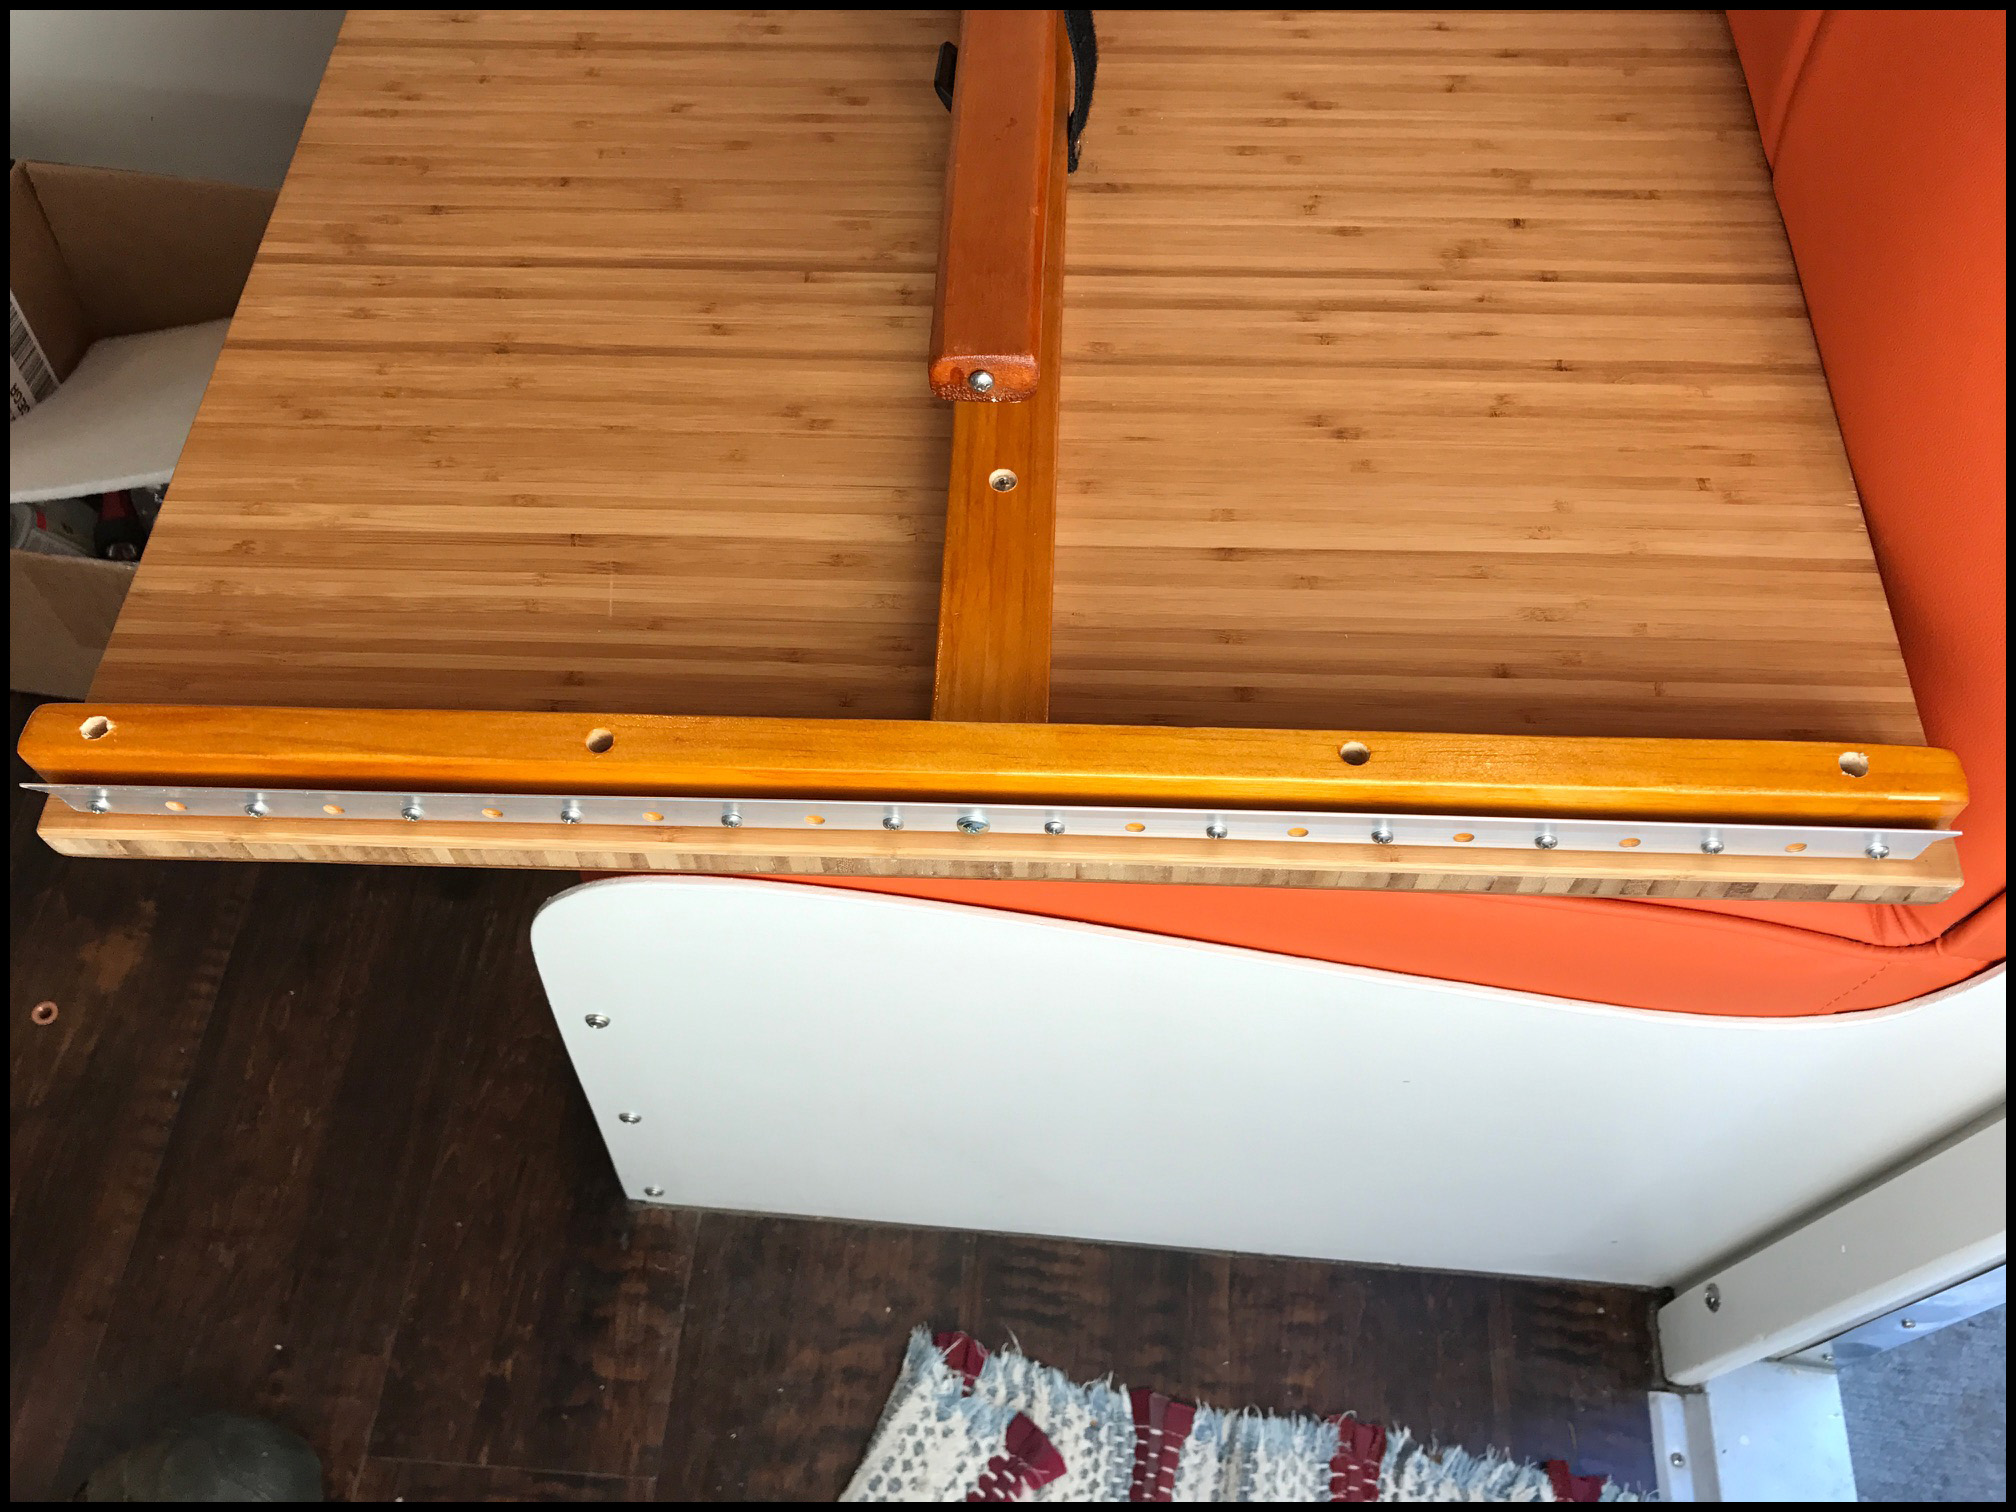
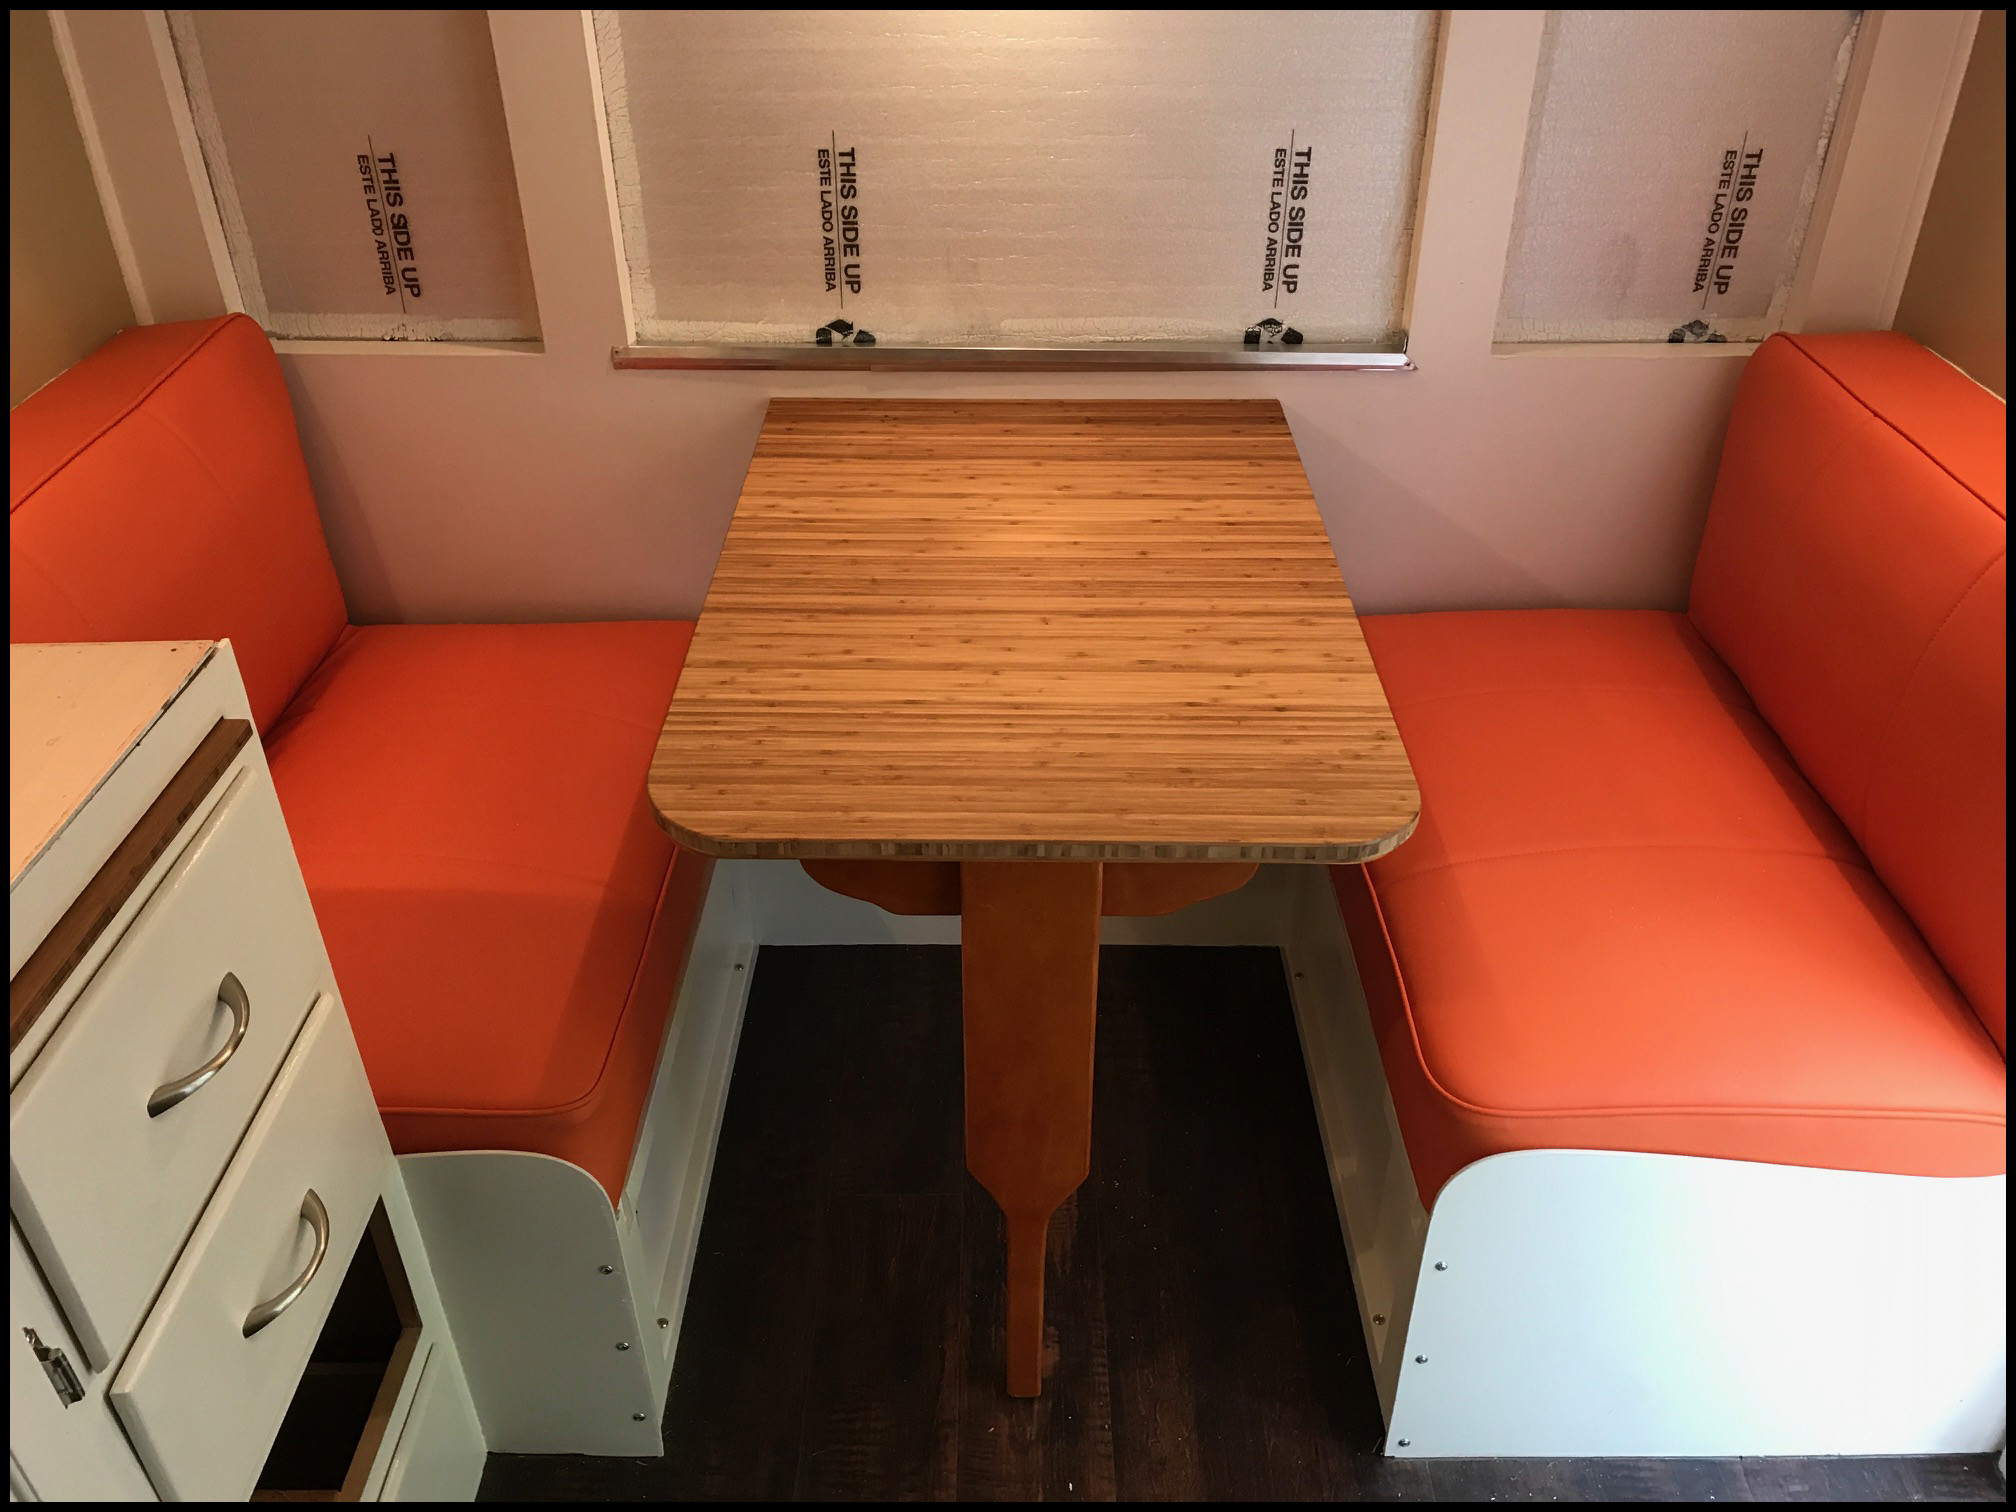
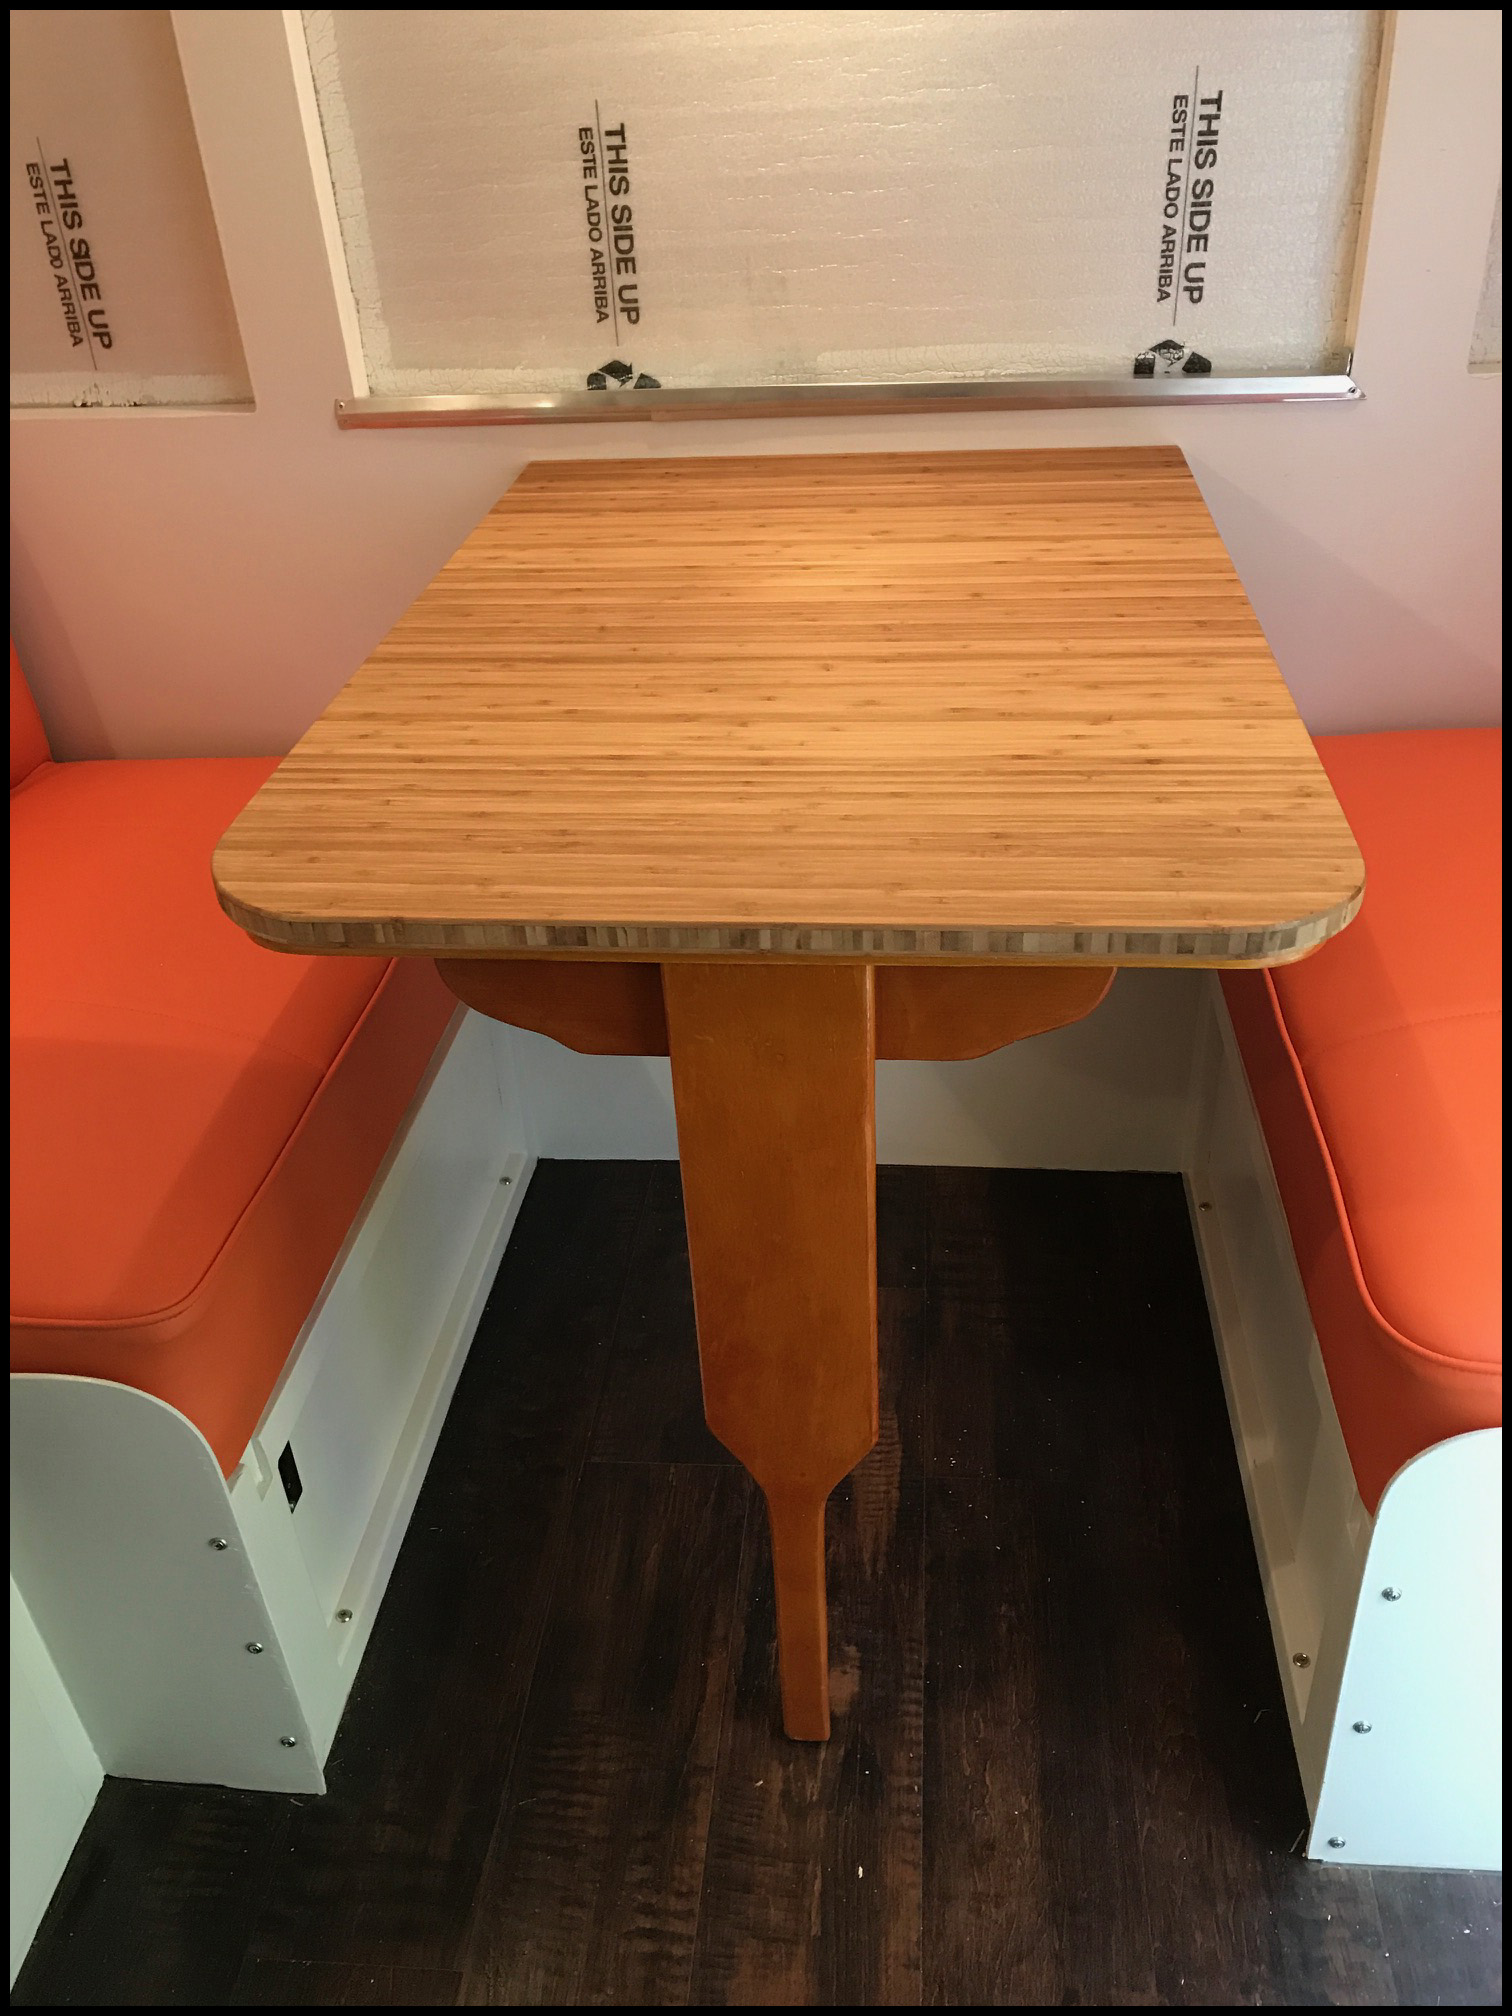
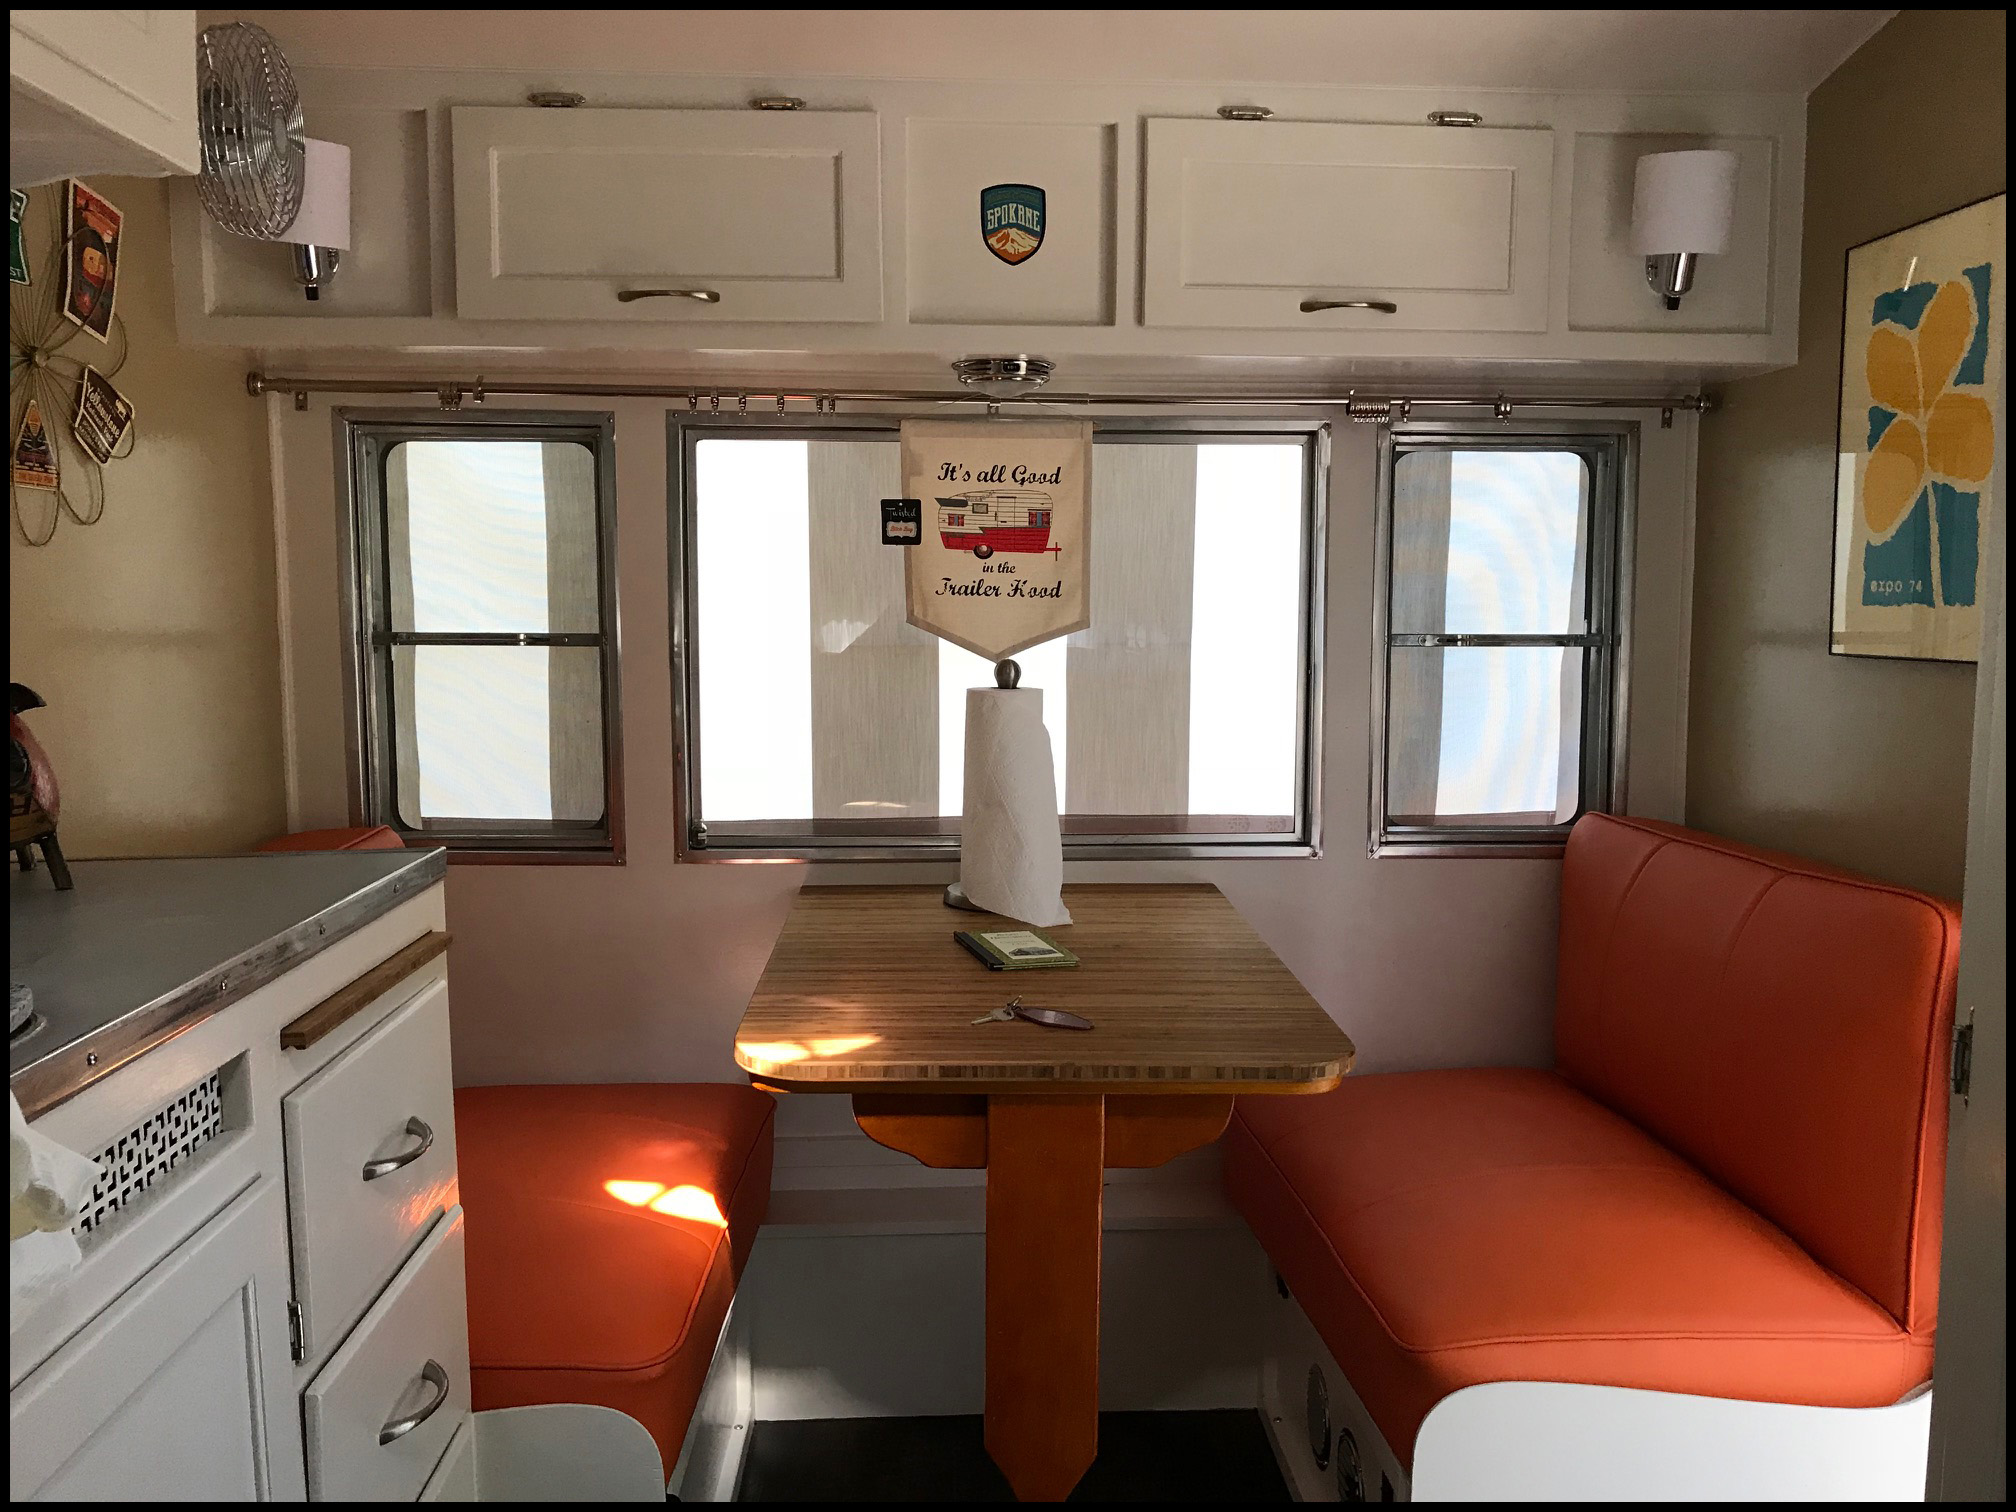
We liked the cutting board so much we opted to make the table out of the same bamboo, the Cutting Board Company, www.cuttingboardcompany.com made one that looks awesome! Make sure to get the mineral oil treatment and wax protectant for it as well, mounted right up to the old table’s supports and mounts. I also decided to use French cleat to mount the table (in the last table pic), I’ll show more of this when I get to the mounting of the table itself.
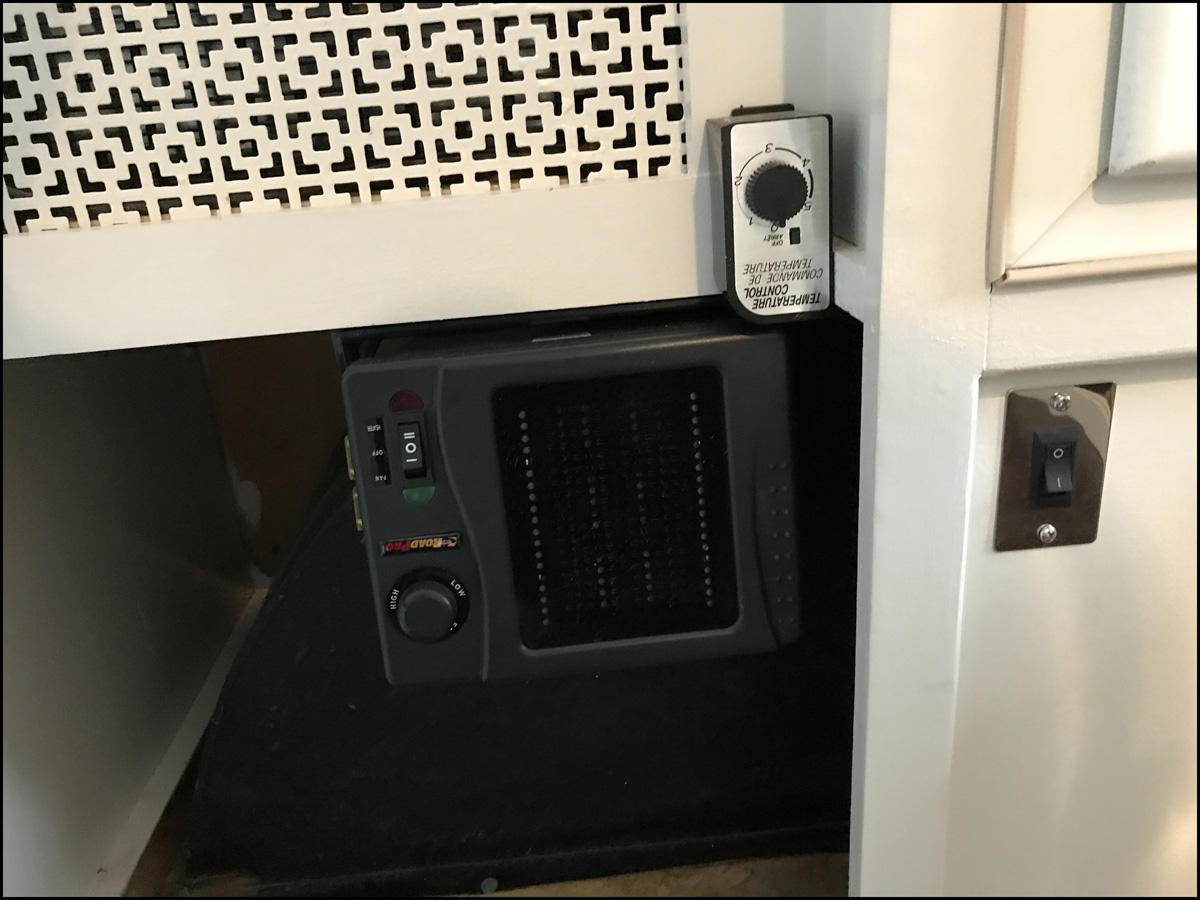
Installed the wiring and finished most the connections, grounded to the body (outside skin) and frame. Fitted a truck 12v heater inside the big cabinet for those colder mornings.
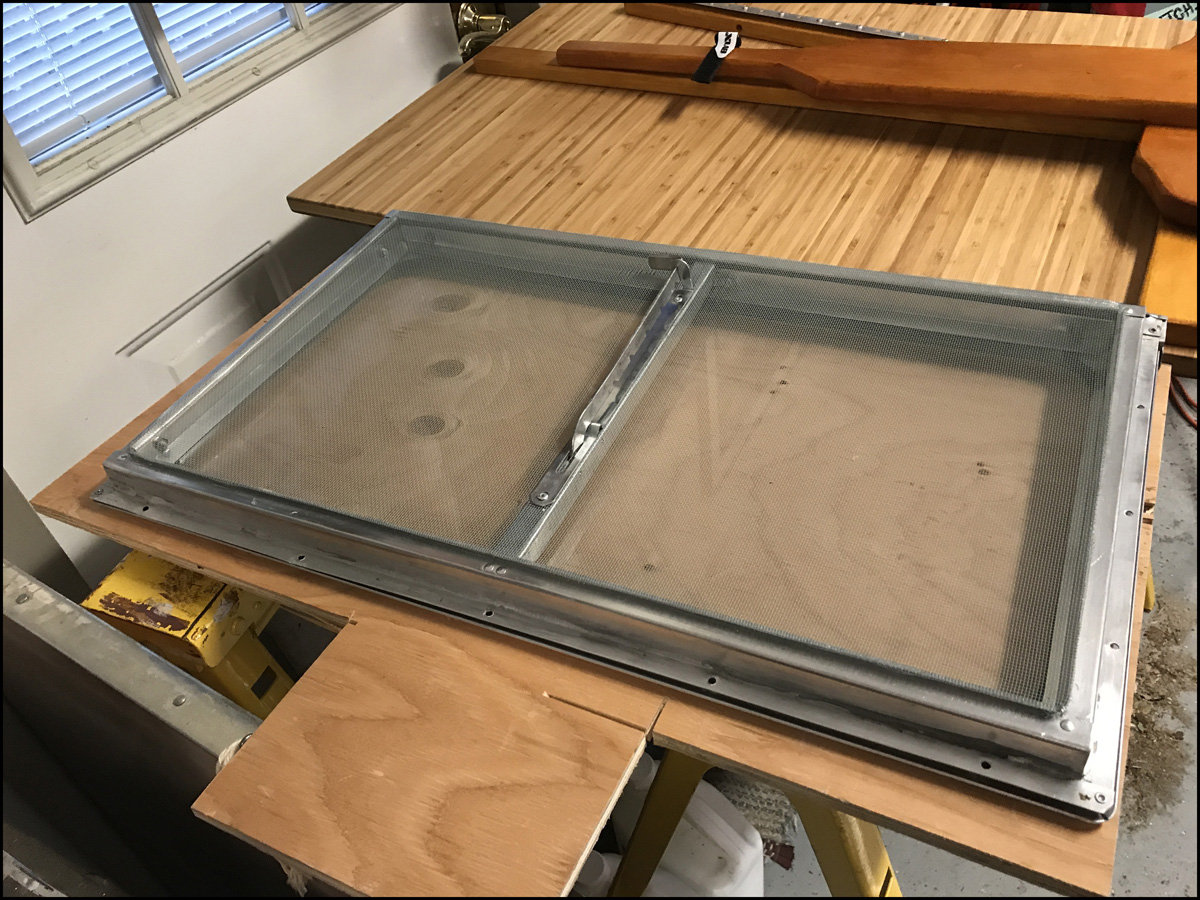
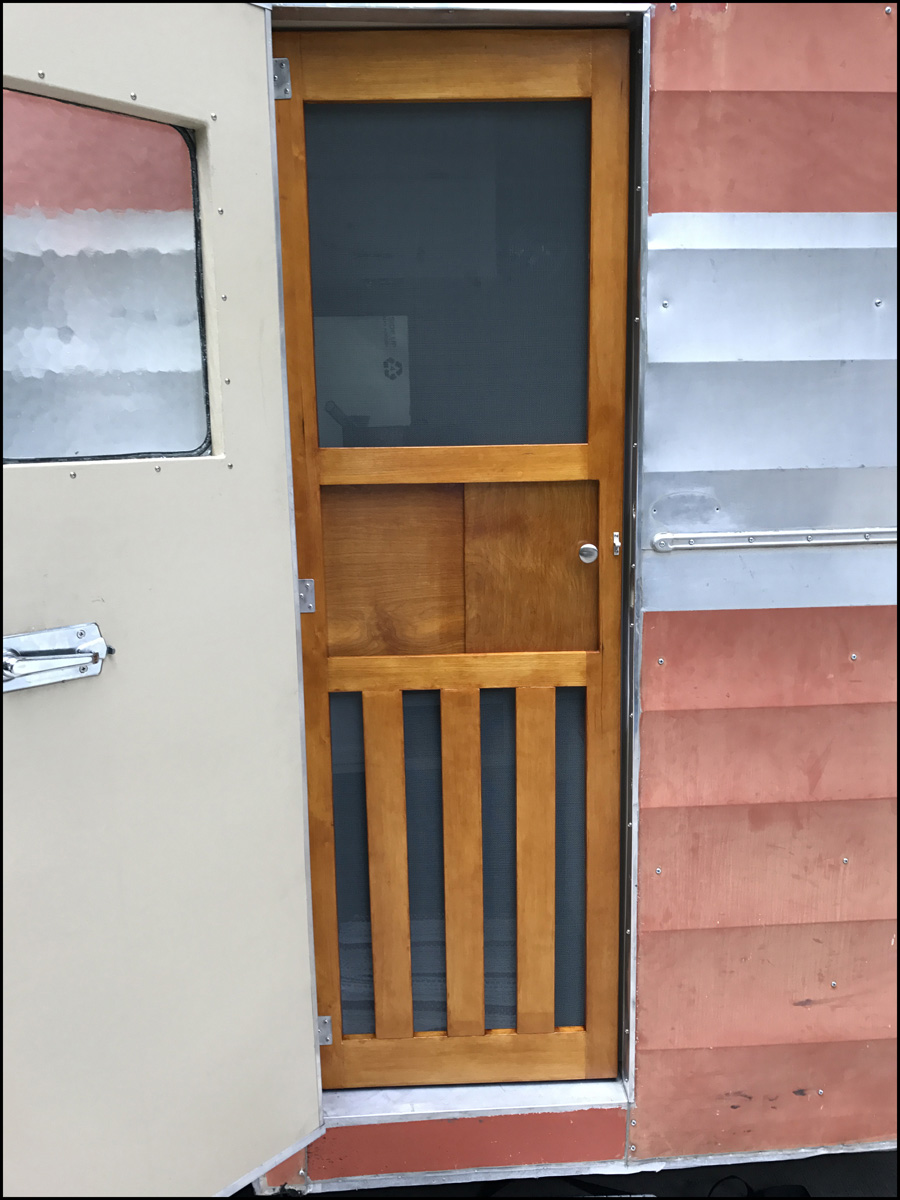
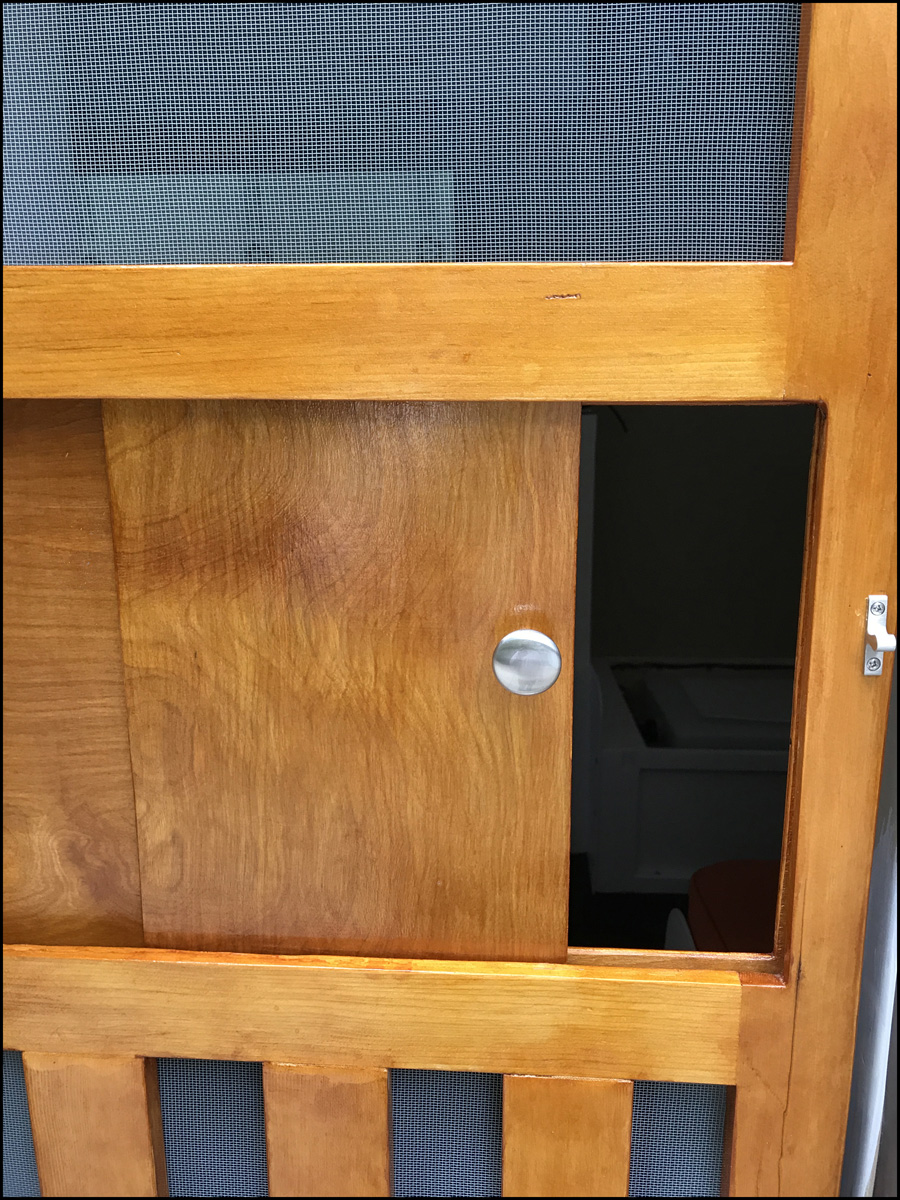
Rebuilt the screen door and installed it, added the bottom slats to make it a bit more old school and protect the screen a bit more. Got some really nice hidden type ball latches from Decor Glamor, link here: Ball Latch.
Using the POR-15 on the underbody and bumper… Dang, when they say “no solvent will remove POR once it dries”… they mean it. I had on a respirator, long sleeves, rubber gloves and still got covered in the stuff... It was an arduous job to degrease, and then treat the rust, then paint the frame with that stuff… but the finished product is amazing and tough… the pictures do not do it any justice it looks great and will last for decades. I’ll post some pictures of the bumper I had fabricated. It is really an awesome fabrication, a local welder made it for me and he did a phenomenal job on it, I can get you his contact if you’re interested. Worth every penny.
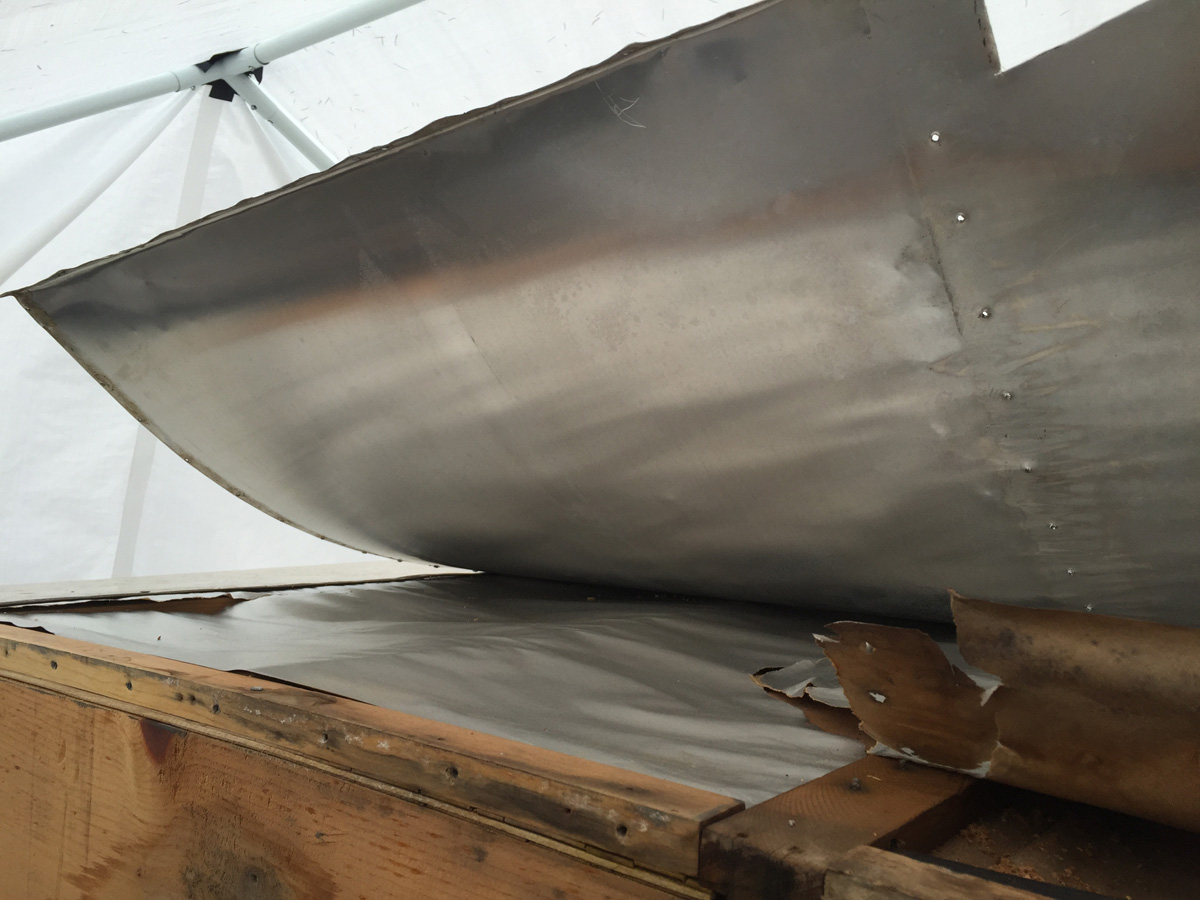
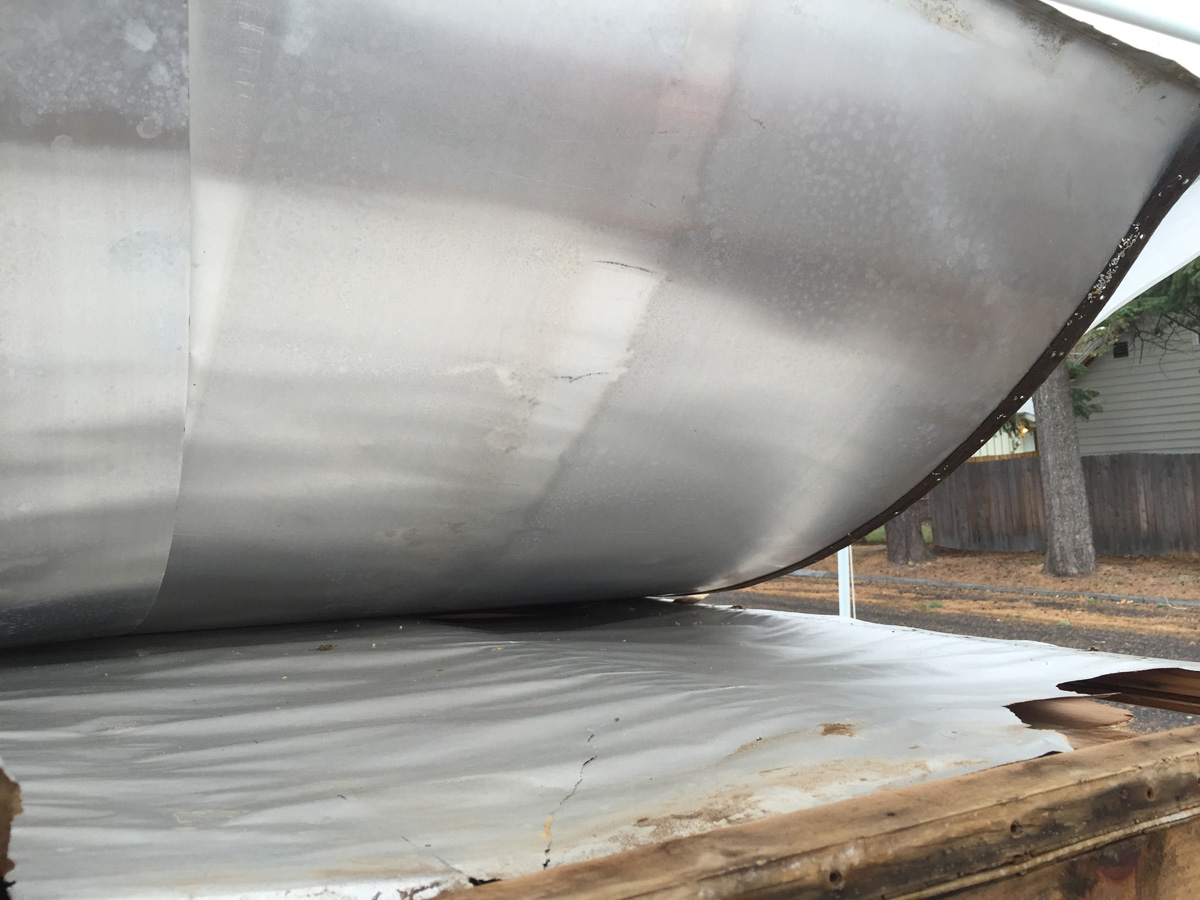
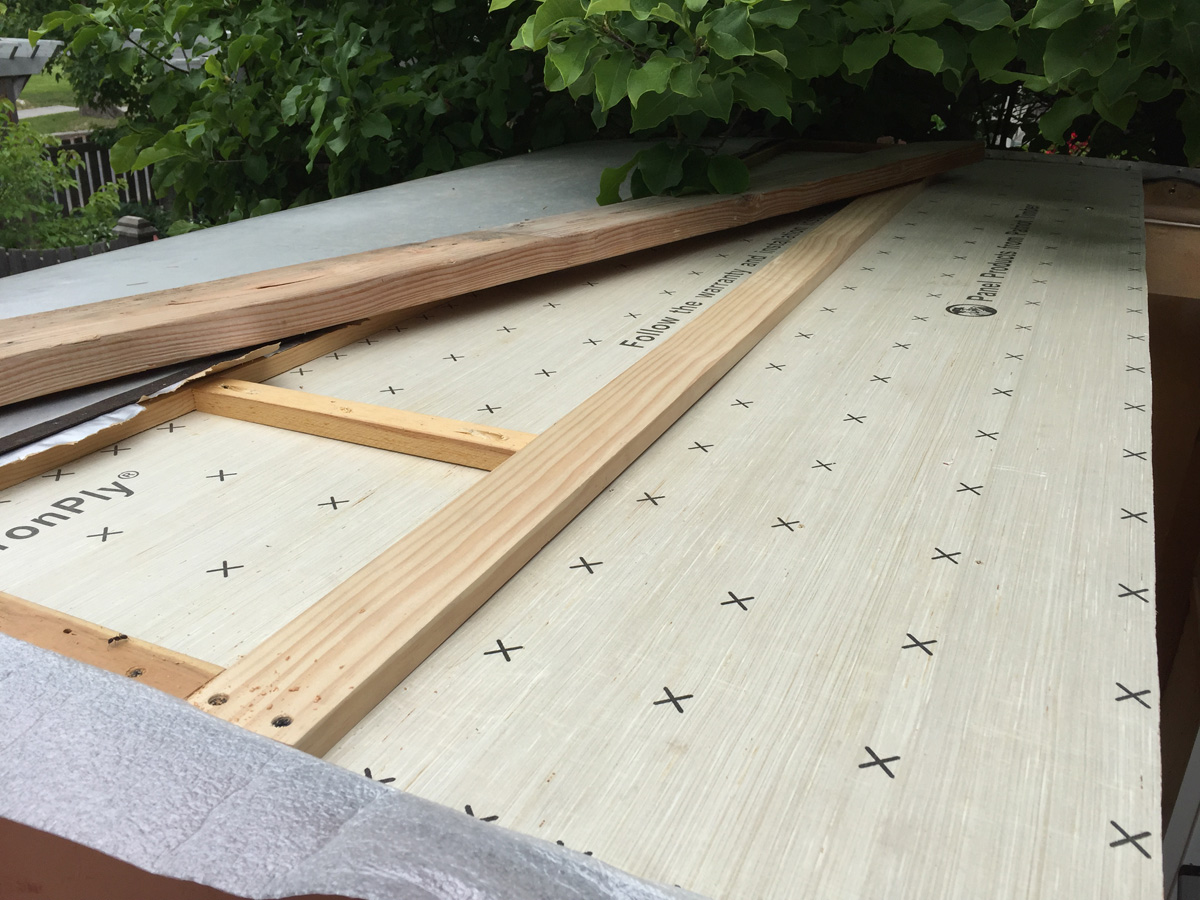
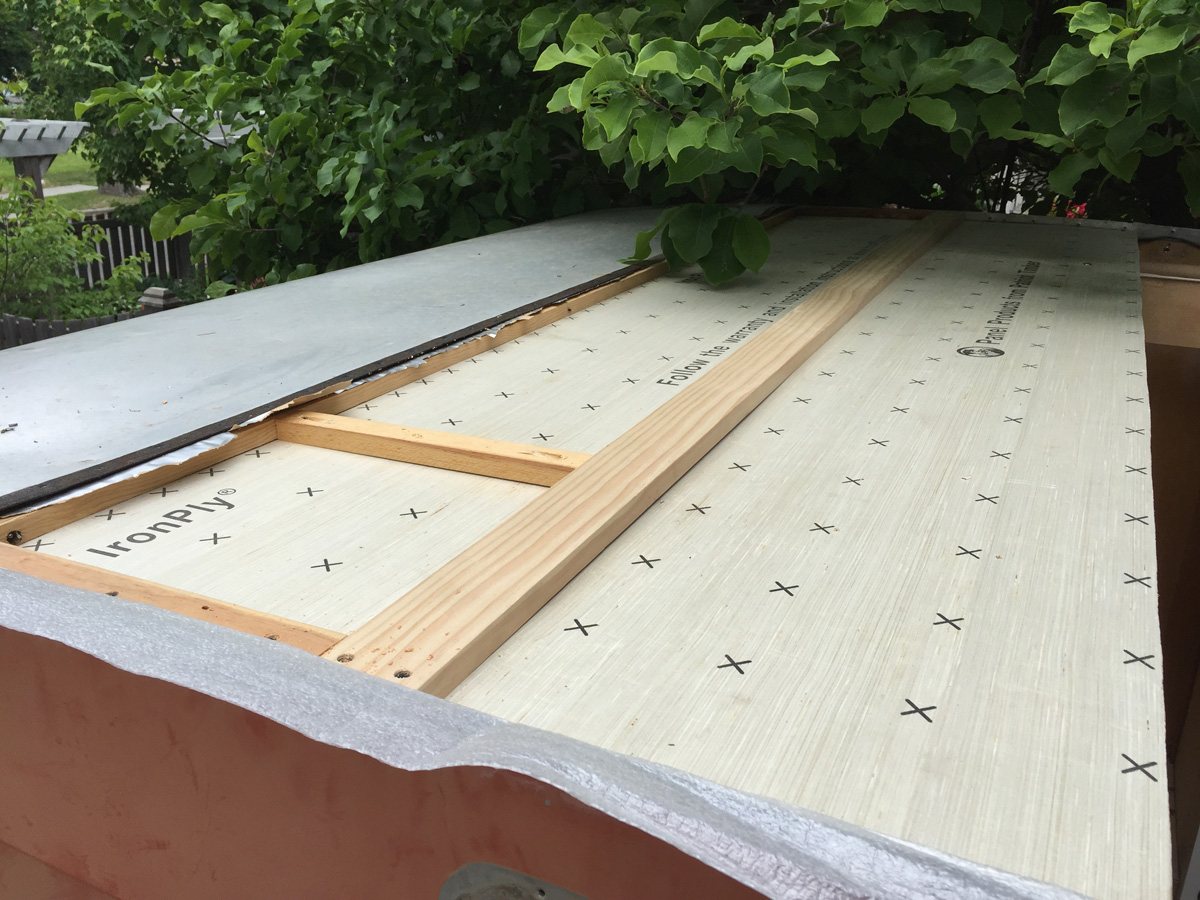
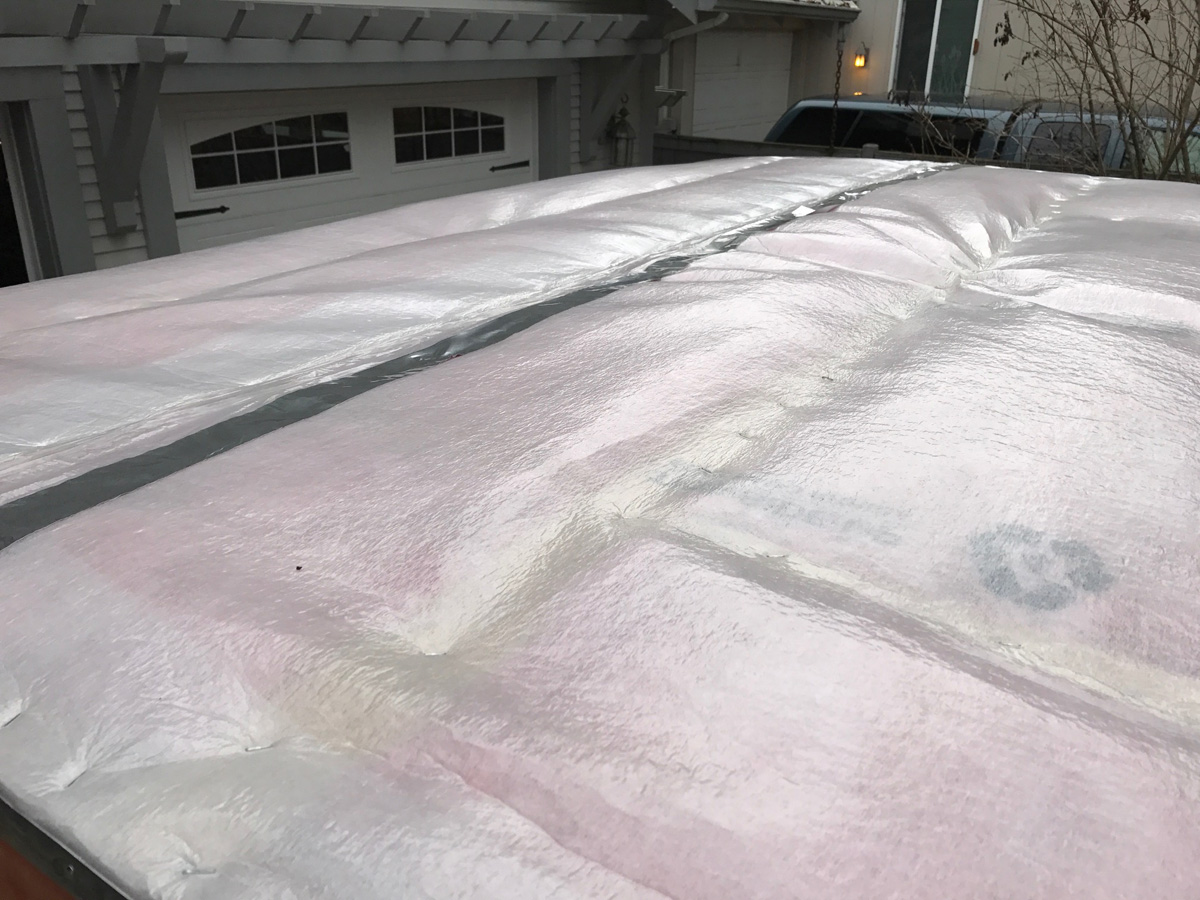
So on the roof, make sure to watch Larry at canned ham trailer’s video series on the Westerner, here: Westerner, and the Tid Bits on the roof install, here: Tid Bits, Larry has really helped me avoid what could have been expensive mistakes… and with the metal… you get one shot, if you screw up… you have to replace it, no undo’s, no mulligans or take backs. You have to get it right the first time.
Tip: You can see in the last picture a rip or split on the v-notches for helping the metal round the corners. I found that if I started the bend at those points, at the top of the v-notch, that they tended not to tear as easily if at all. You gotta watch it… they tear really easy and quick. Pay attention and you’ll be fine.
 |
 |
 |
 |
 |
 |
 |
 |
 |
 |
 |
 |
 |
 |
 |
 |
 |
 |
 |
 |
 |
 |
 |
 |
|
 |
 |
 |
 |
 |
 |
 |
 |
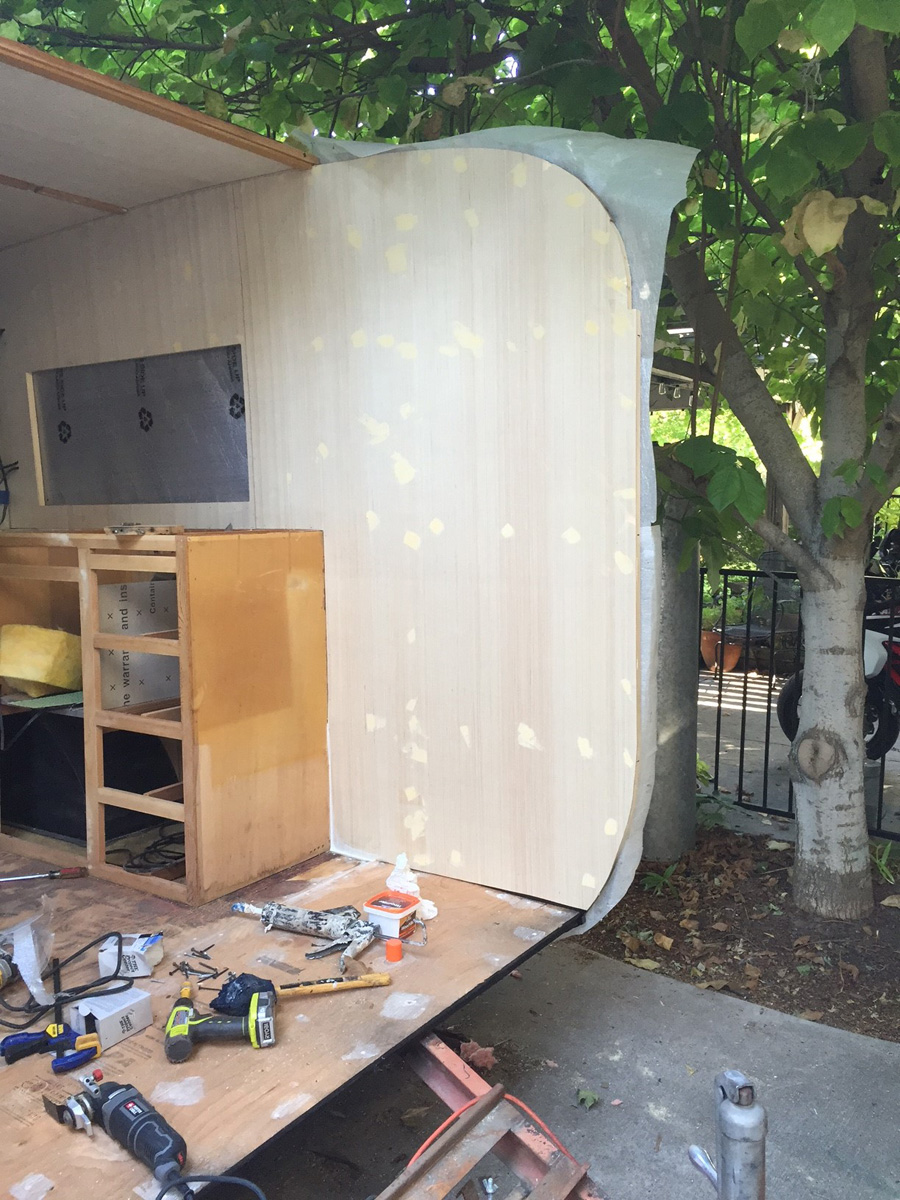
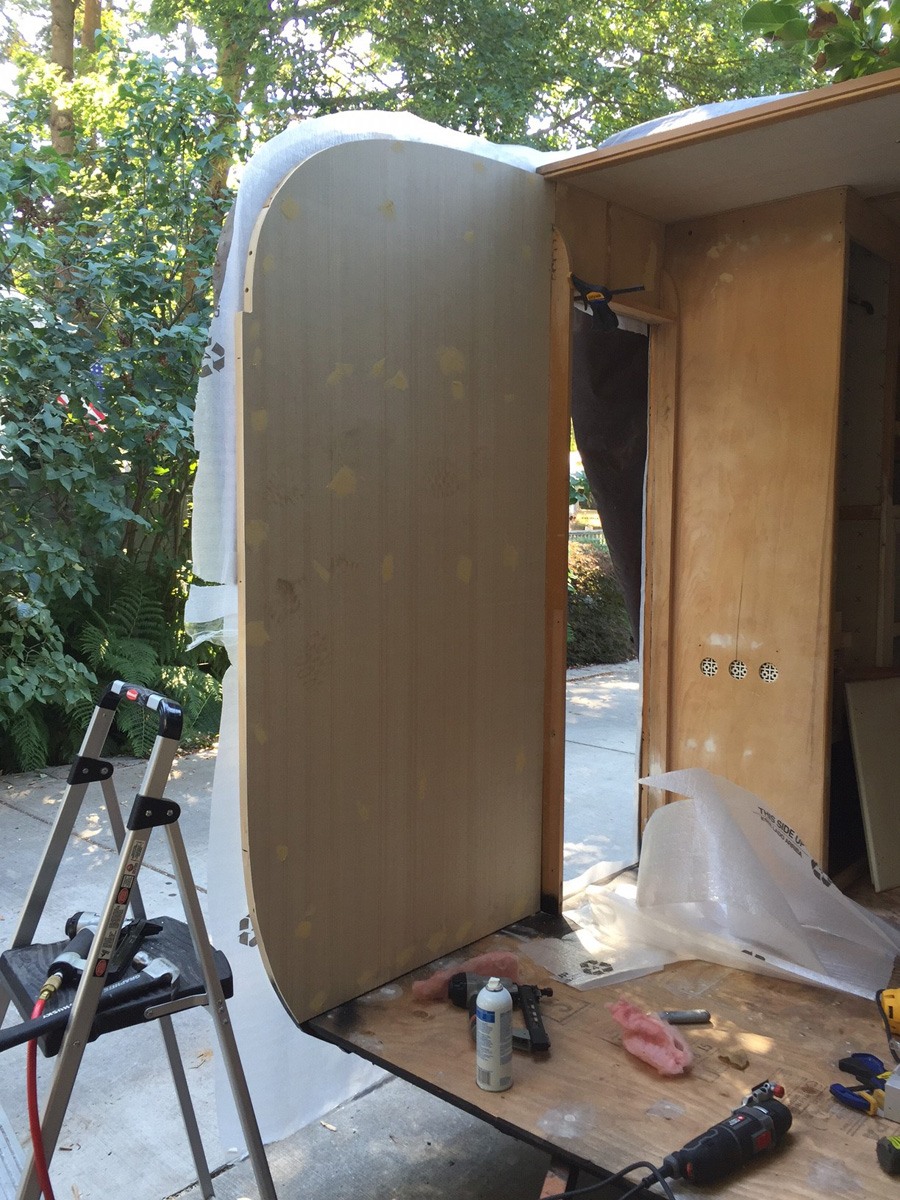
Jul - Mar. More worken then blogging...
Yet again… head down and workin away with no blogging and very little in the way of before pictures. My bad. I just worked when I had time and took pictures when I remember, and never seemed to remember... lol. But the labor of love is almost at an end! — I did get all the windows done and didn’t do a step by step, but have some tips… read more below. |
 |
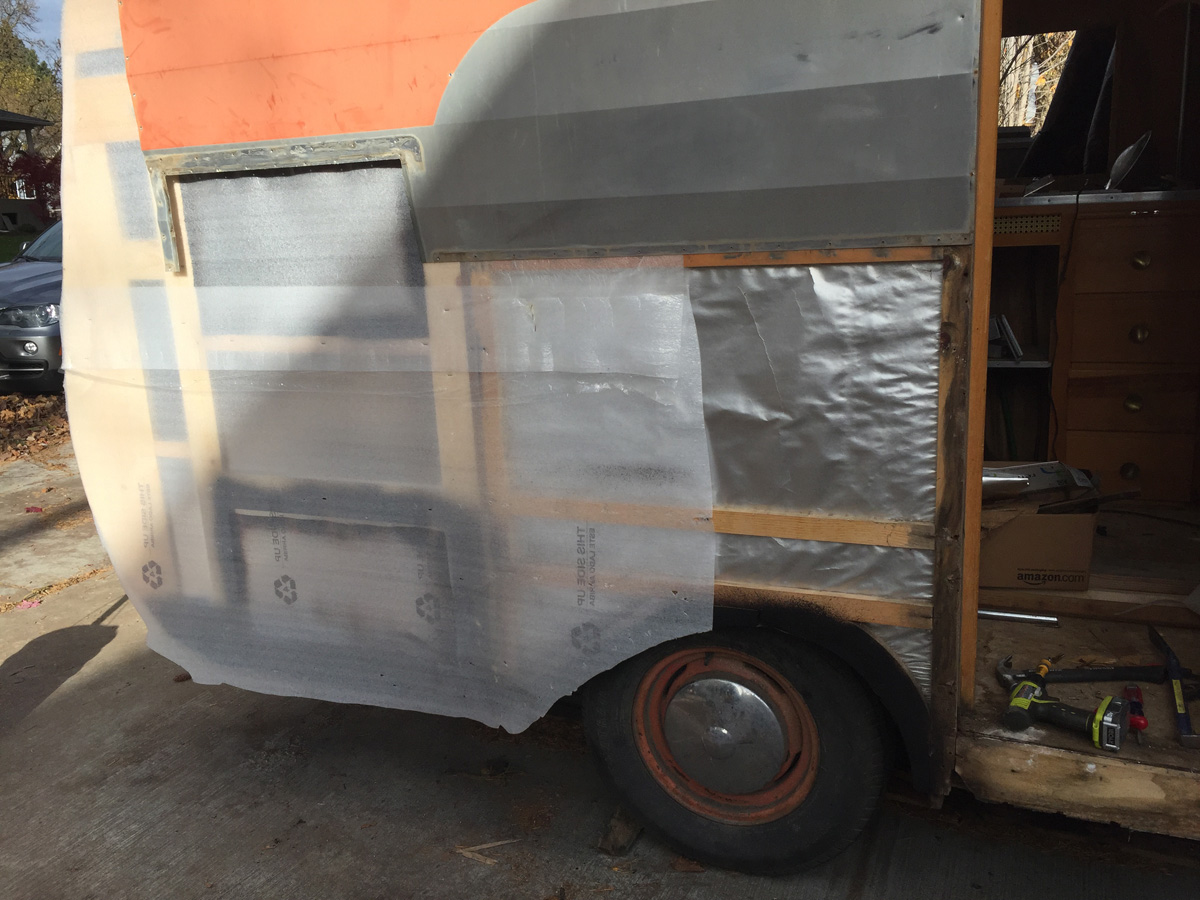
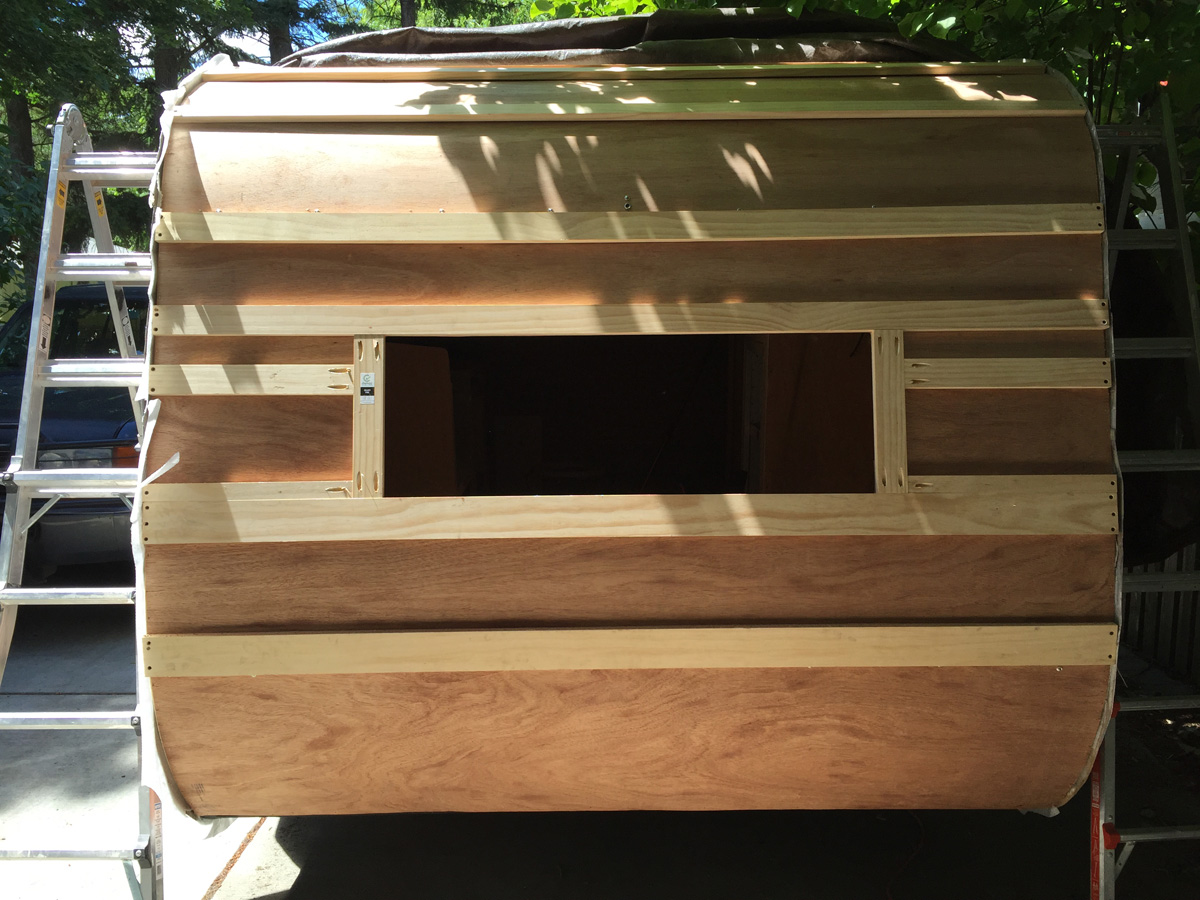
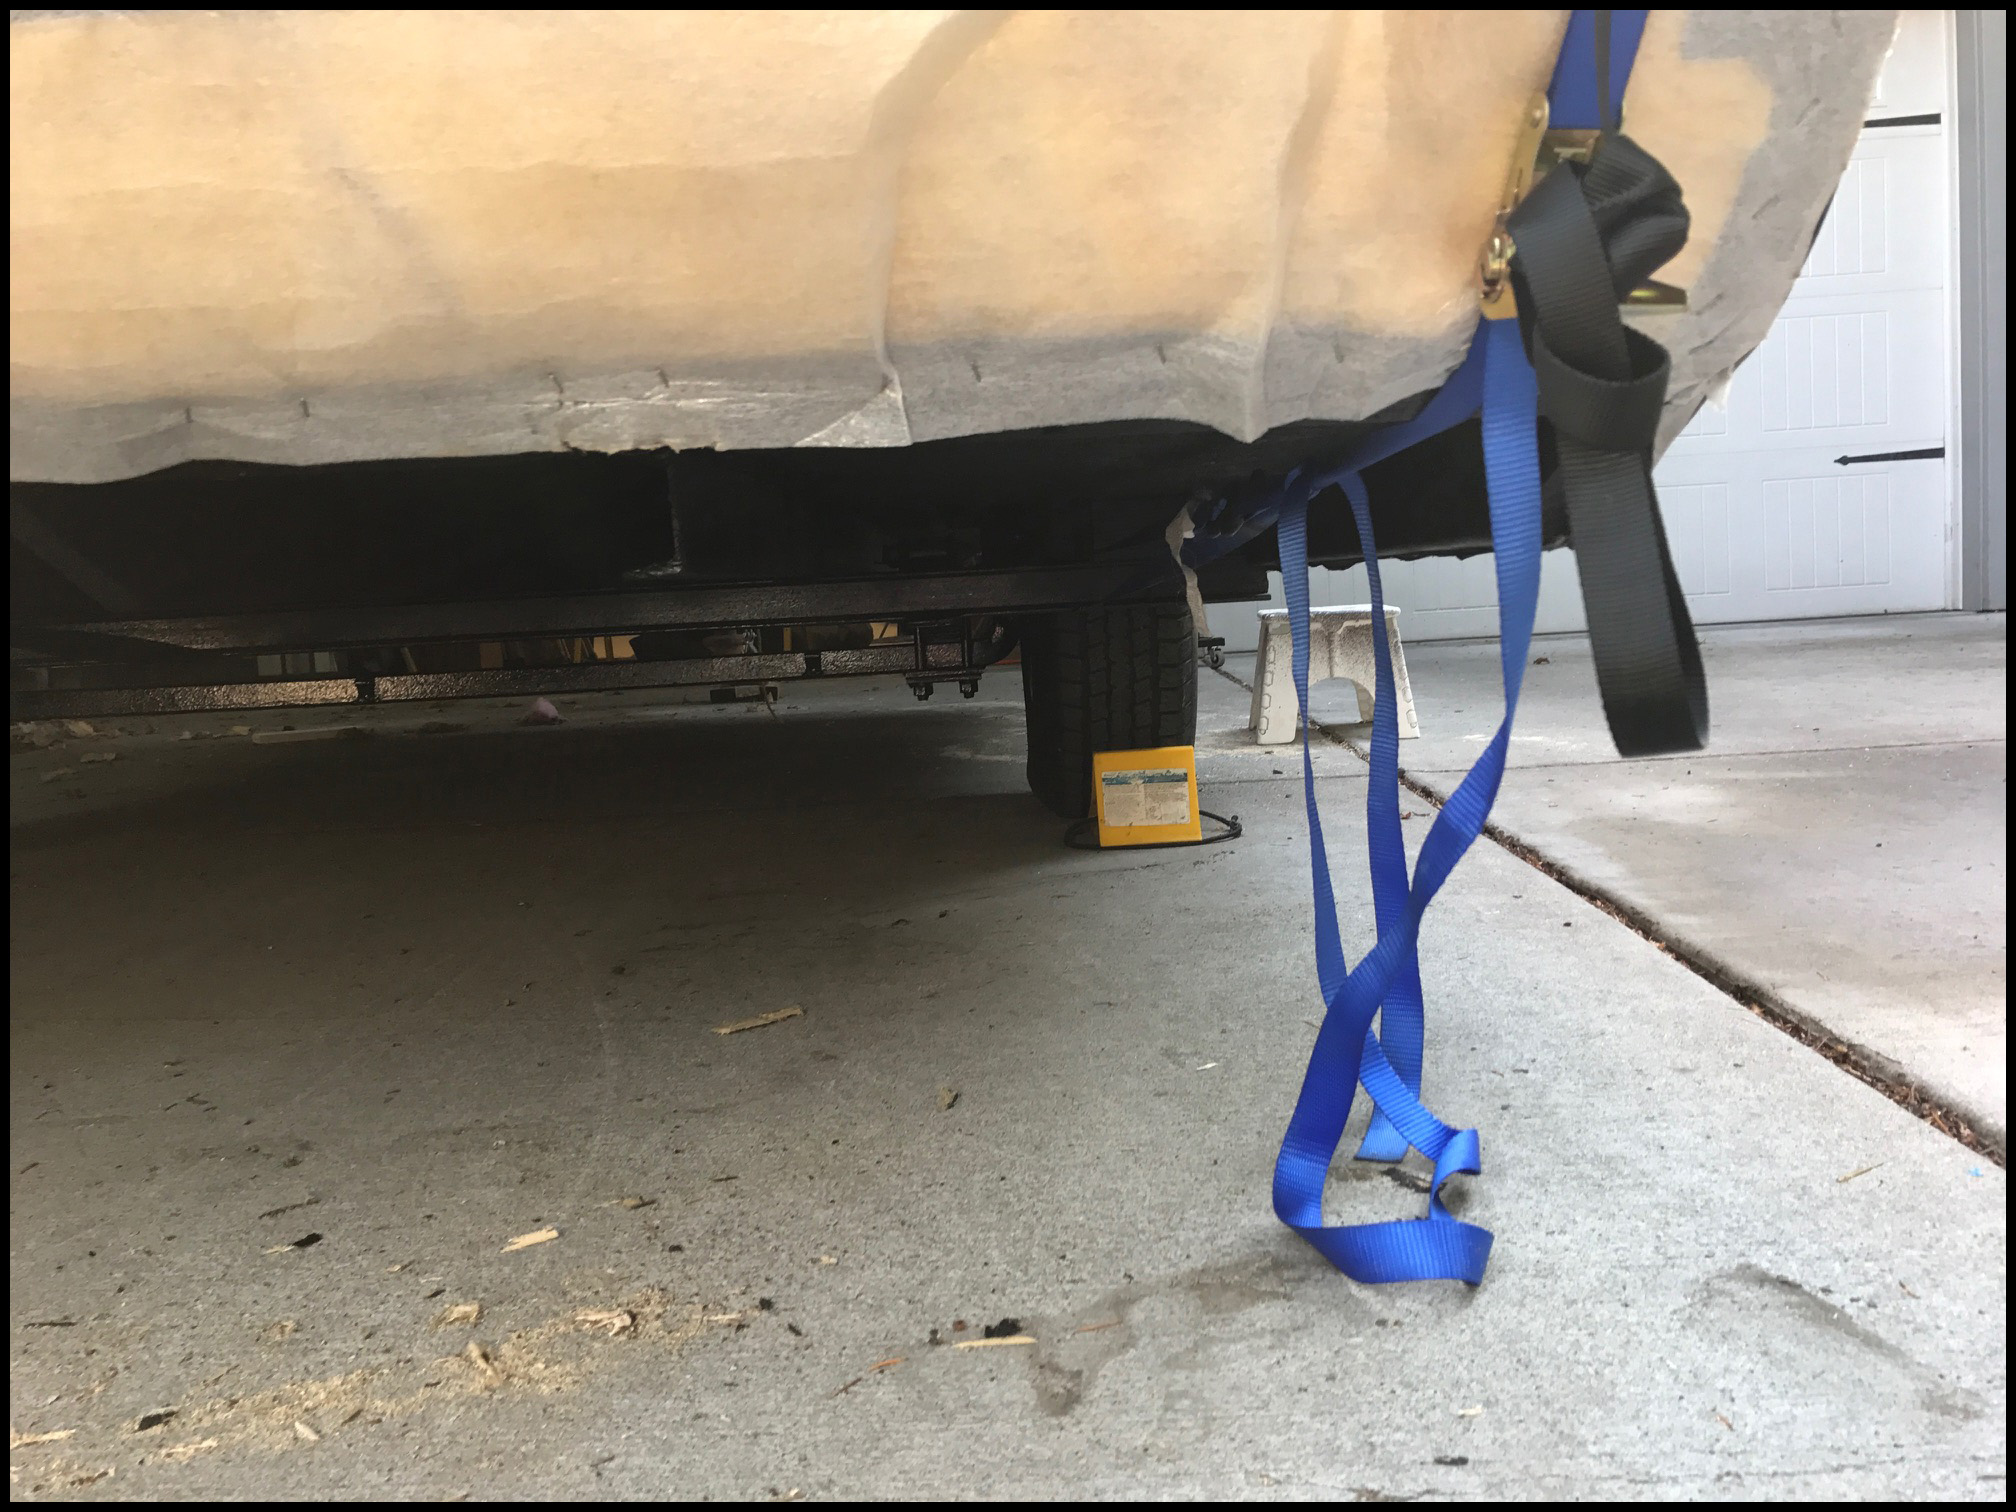
Again, Larry at cannedhamtrailers.com is the man, his video series made putting on the skin a piece of cake. Watch the series, you can thank me later. The straps over the top held it tight, he recommended a 2x4 method, and I used ratchet straps on the axle. They worked awesome and allowed me to loosen and tighten whenever I needed to. The one foo-pa I had was when the front skin didn’t line up with a beam, I had to retro fit one so as to have something to staple too, but it all worked out. In the pictures you’ll see a little jig I made to mark the edge for cutting, worked great and always gave me the overage I needed.
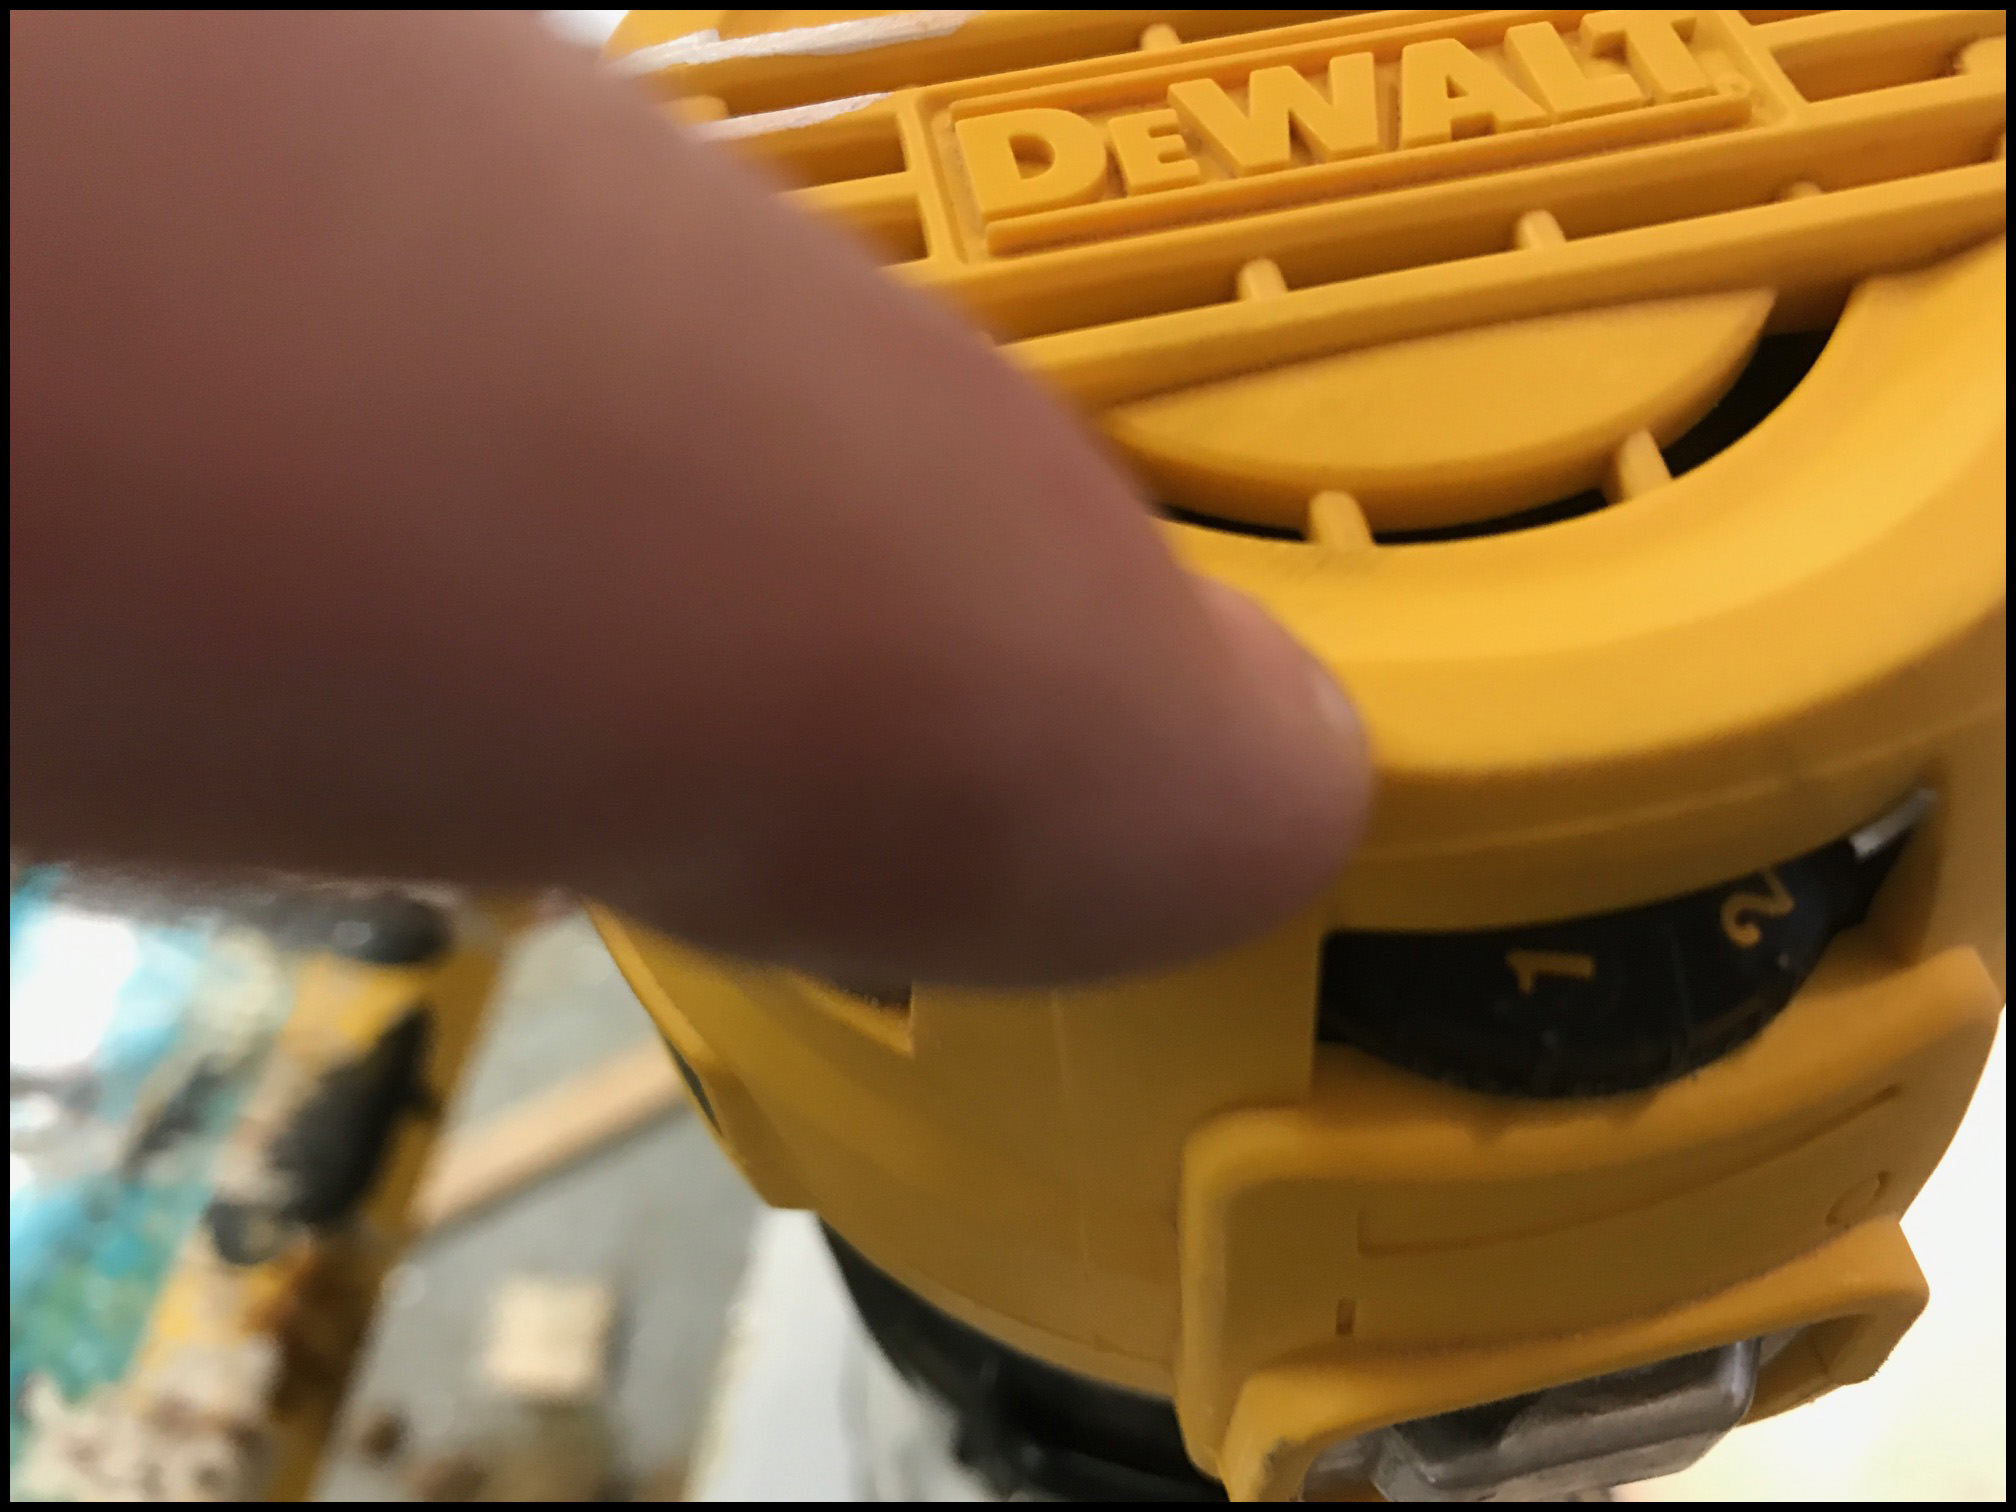
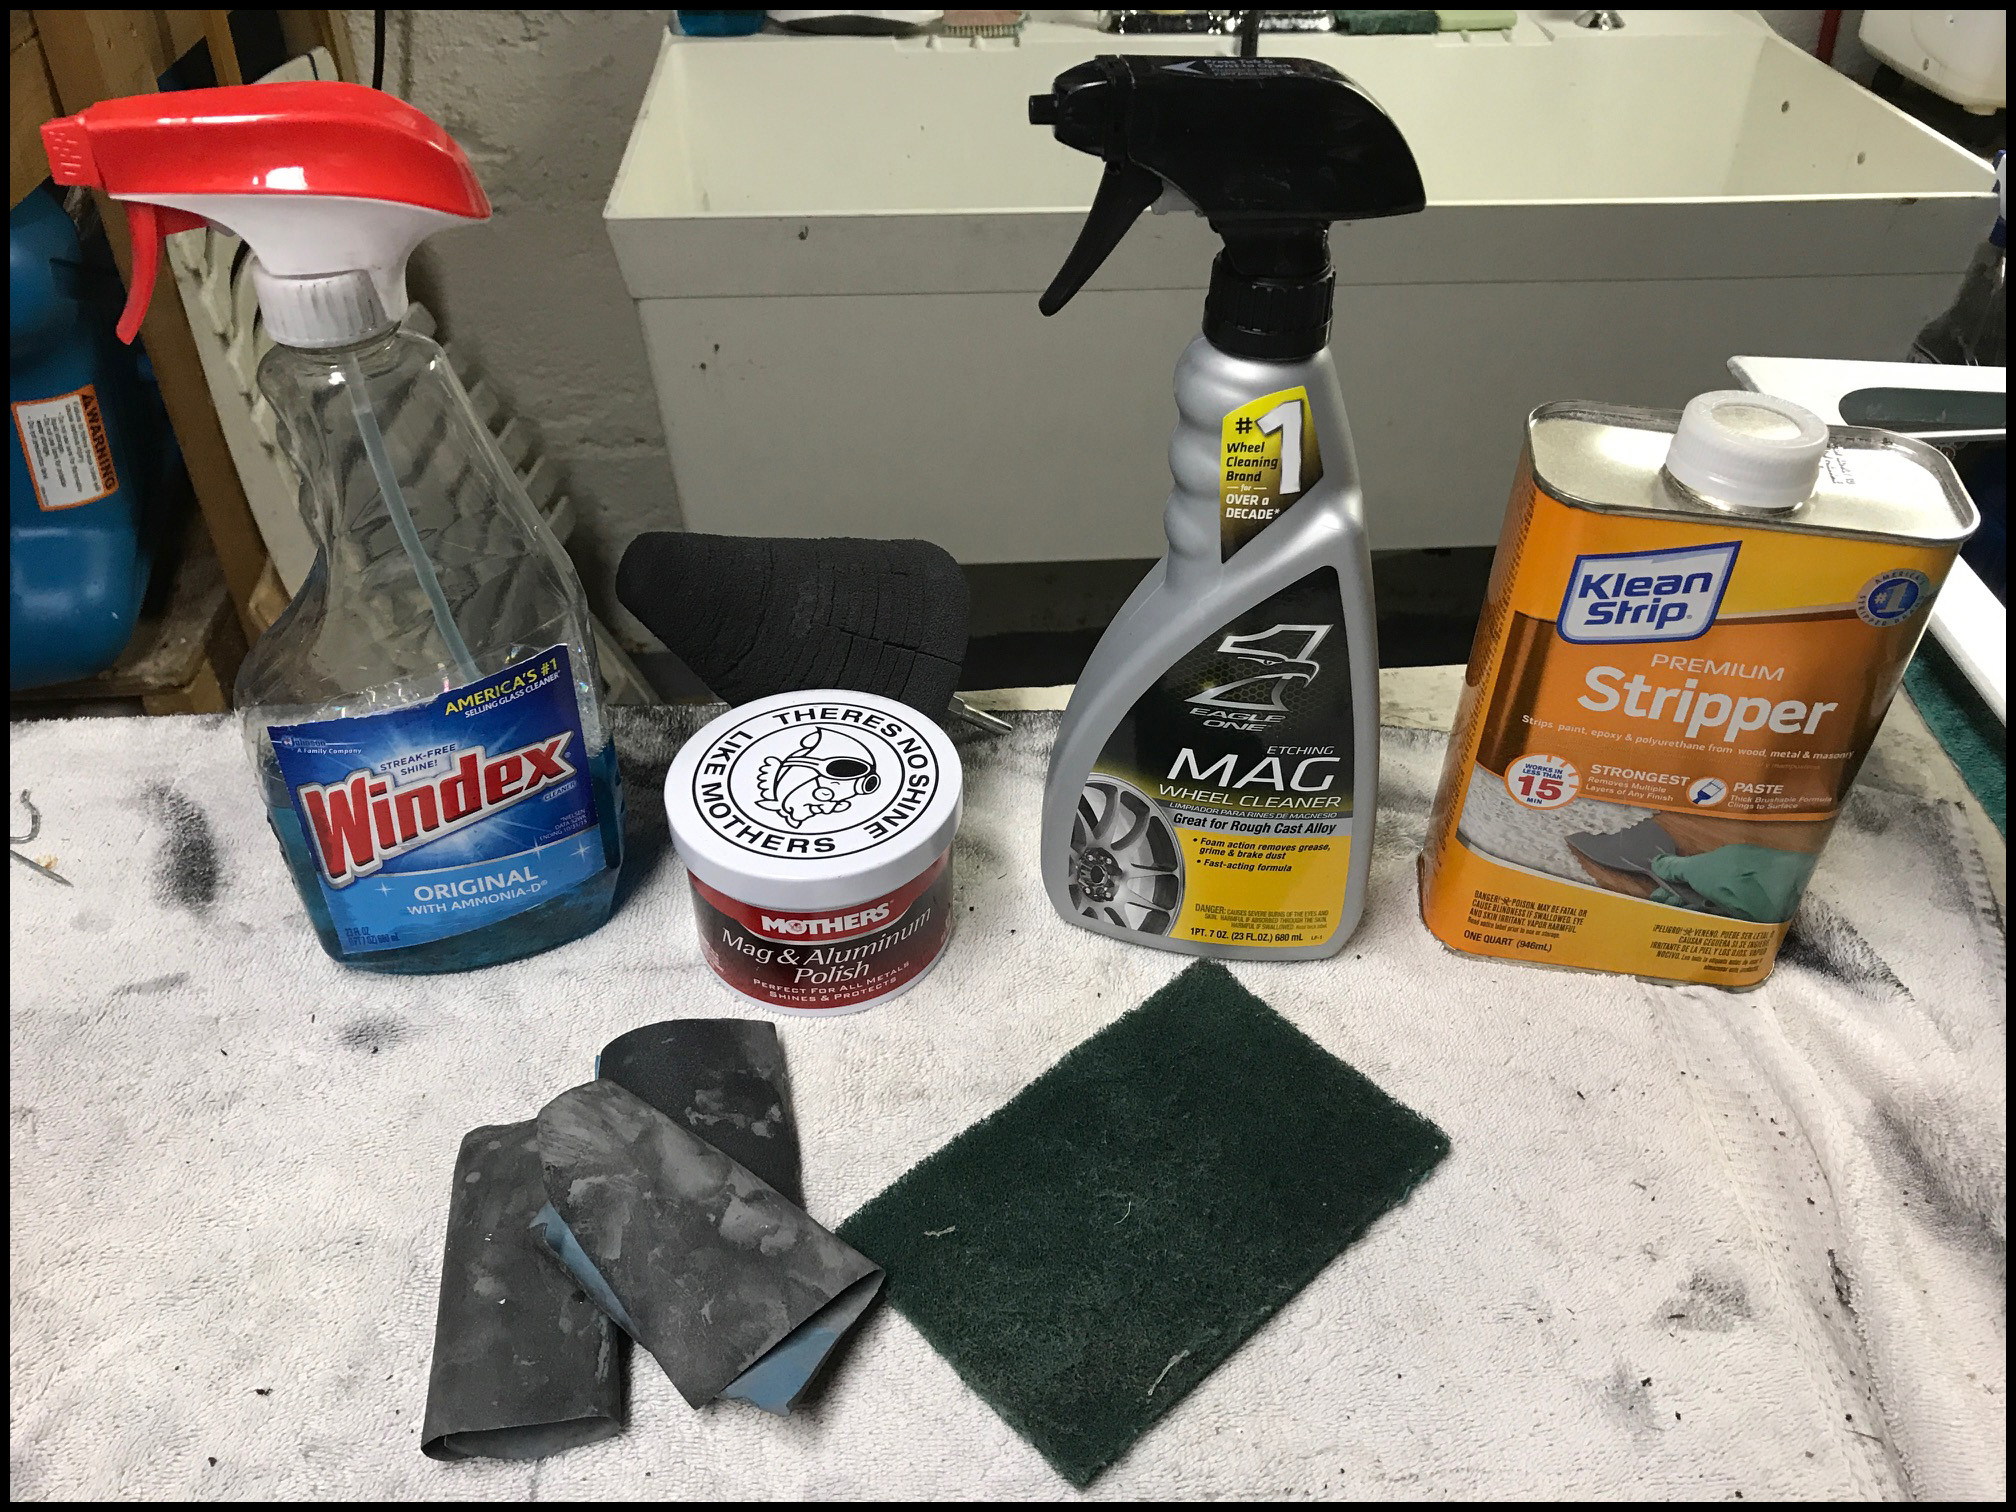
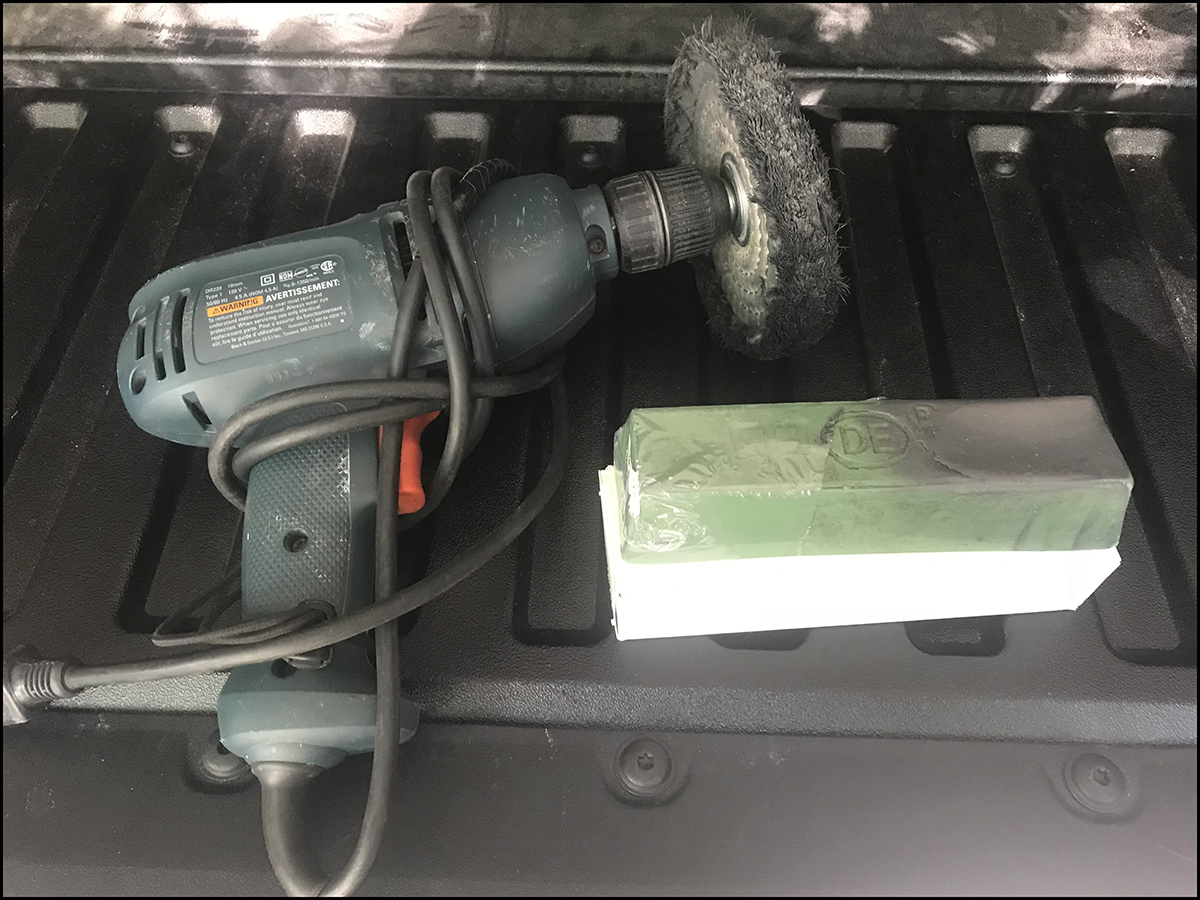
The windows… I tried just about everything on the market on these… and let me say, smaller is better. I purchased one of those big ass buffer grinders, floor mount jobber, big… And with it tore up so many of the frames. I would always catch an edge and flip the frame out of my hands and into a pile on the floor… All that money only to find out that a small drill mounted buffing wheel worked way better. See the picture of it below. There is also a picture of the stuff I used from start to finish on the windows. Here is kind of a step by step I found to work well and go faster than anything else I tried.
- 1. If there is any glue, putty or tape on the frame that won’t come off, a quick soak with brushed on stripper usually made short work of it.
- 2. After that I used etching aluminum wheel cleaner, make sure it is the etching type as it has a slight acidic nature that will clean off the hardest of aging.
- 3. Next rub on some of the Mother’s aluminum wheel polish, very light coat. Then take the 400-600 grit wet sand paper with the lightest bit of water, yes you heard right, mothers then sand it. It took off what was talking me hours, in a matter of minutes. Try it you’ll see. You want it to make a paste, if it is slick and has a sheen you’ve used too much water.
- 4. After that, use the polishing wheel on a drill and either the Mother’s or the buffing compound in a stick.
- 5. Regular Windex did an awesome job of eating thru the polishing compound and cleaning it all up in a snap.
- 6. Lastly, this is a time consuming and seriously messy job. Schedule it over the winter. You can only take it so much at a time, your hands will cramp before long so pace yourself.
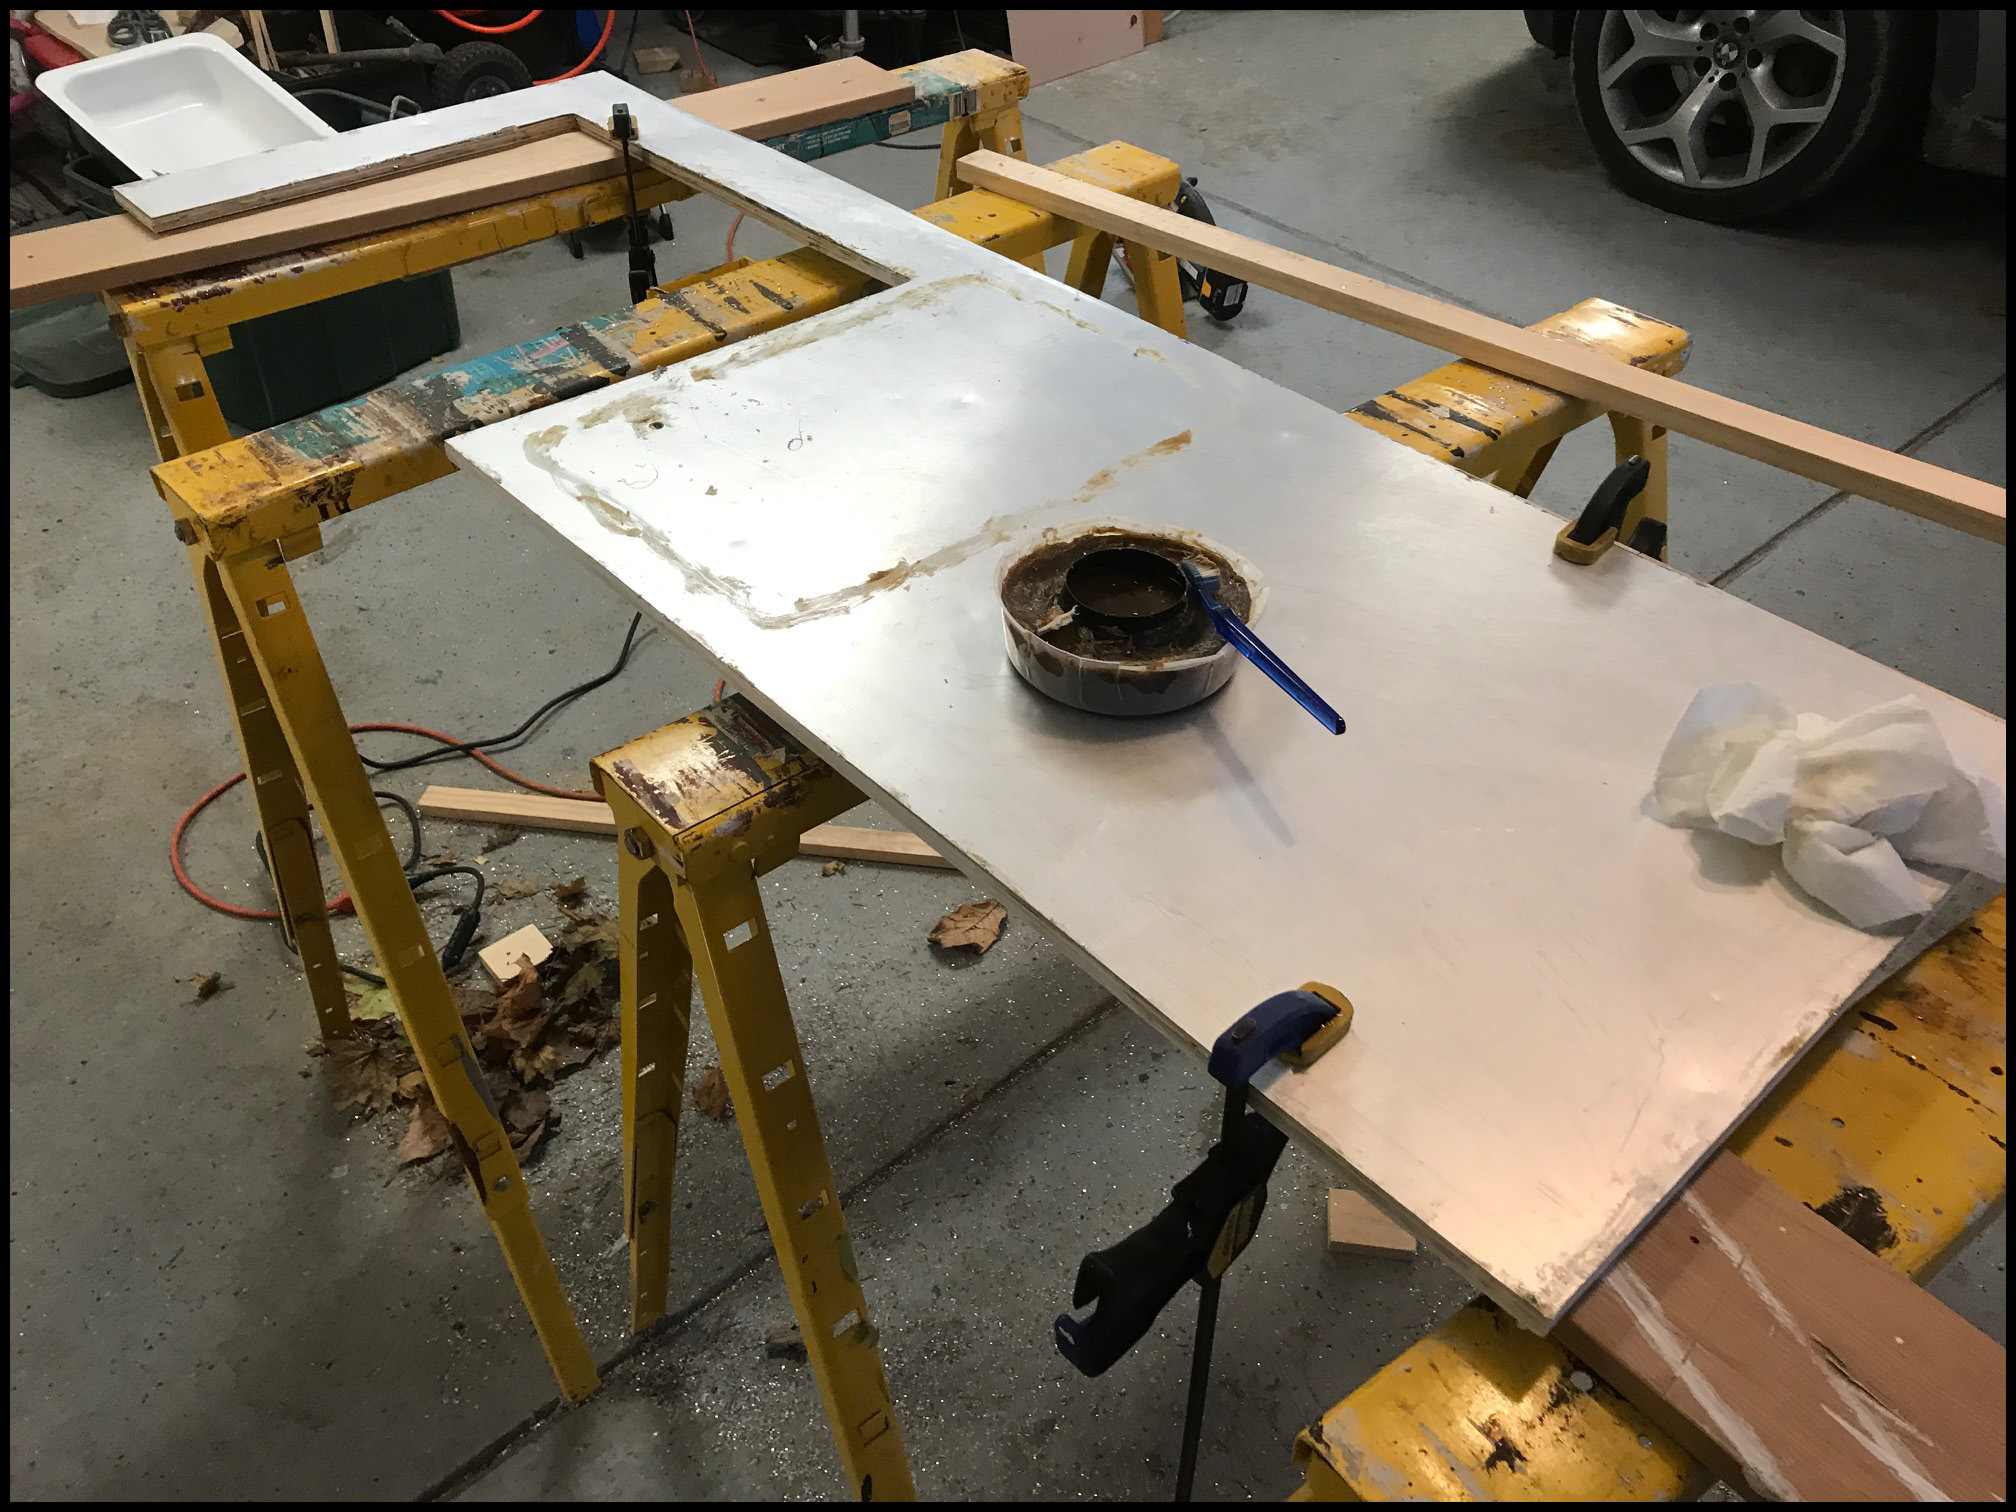
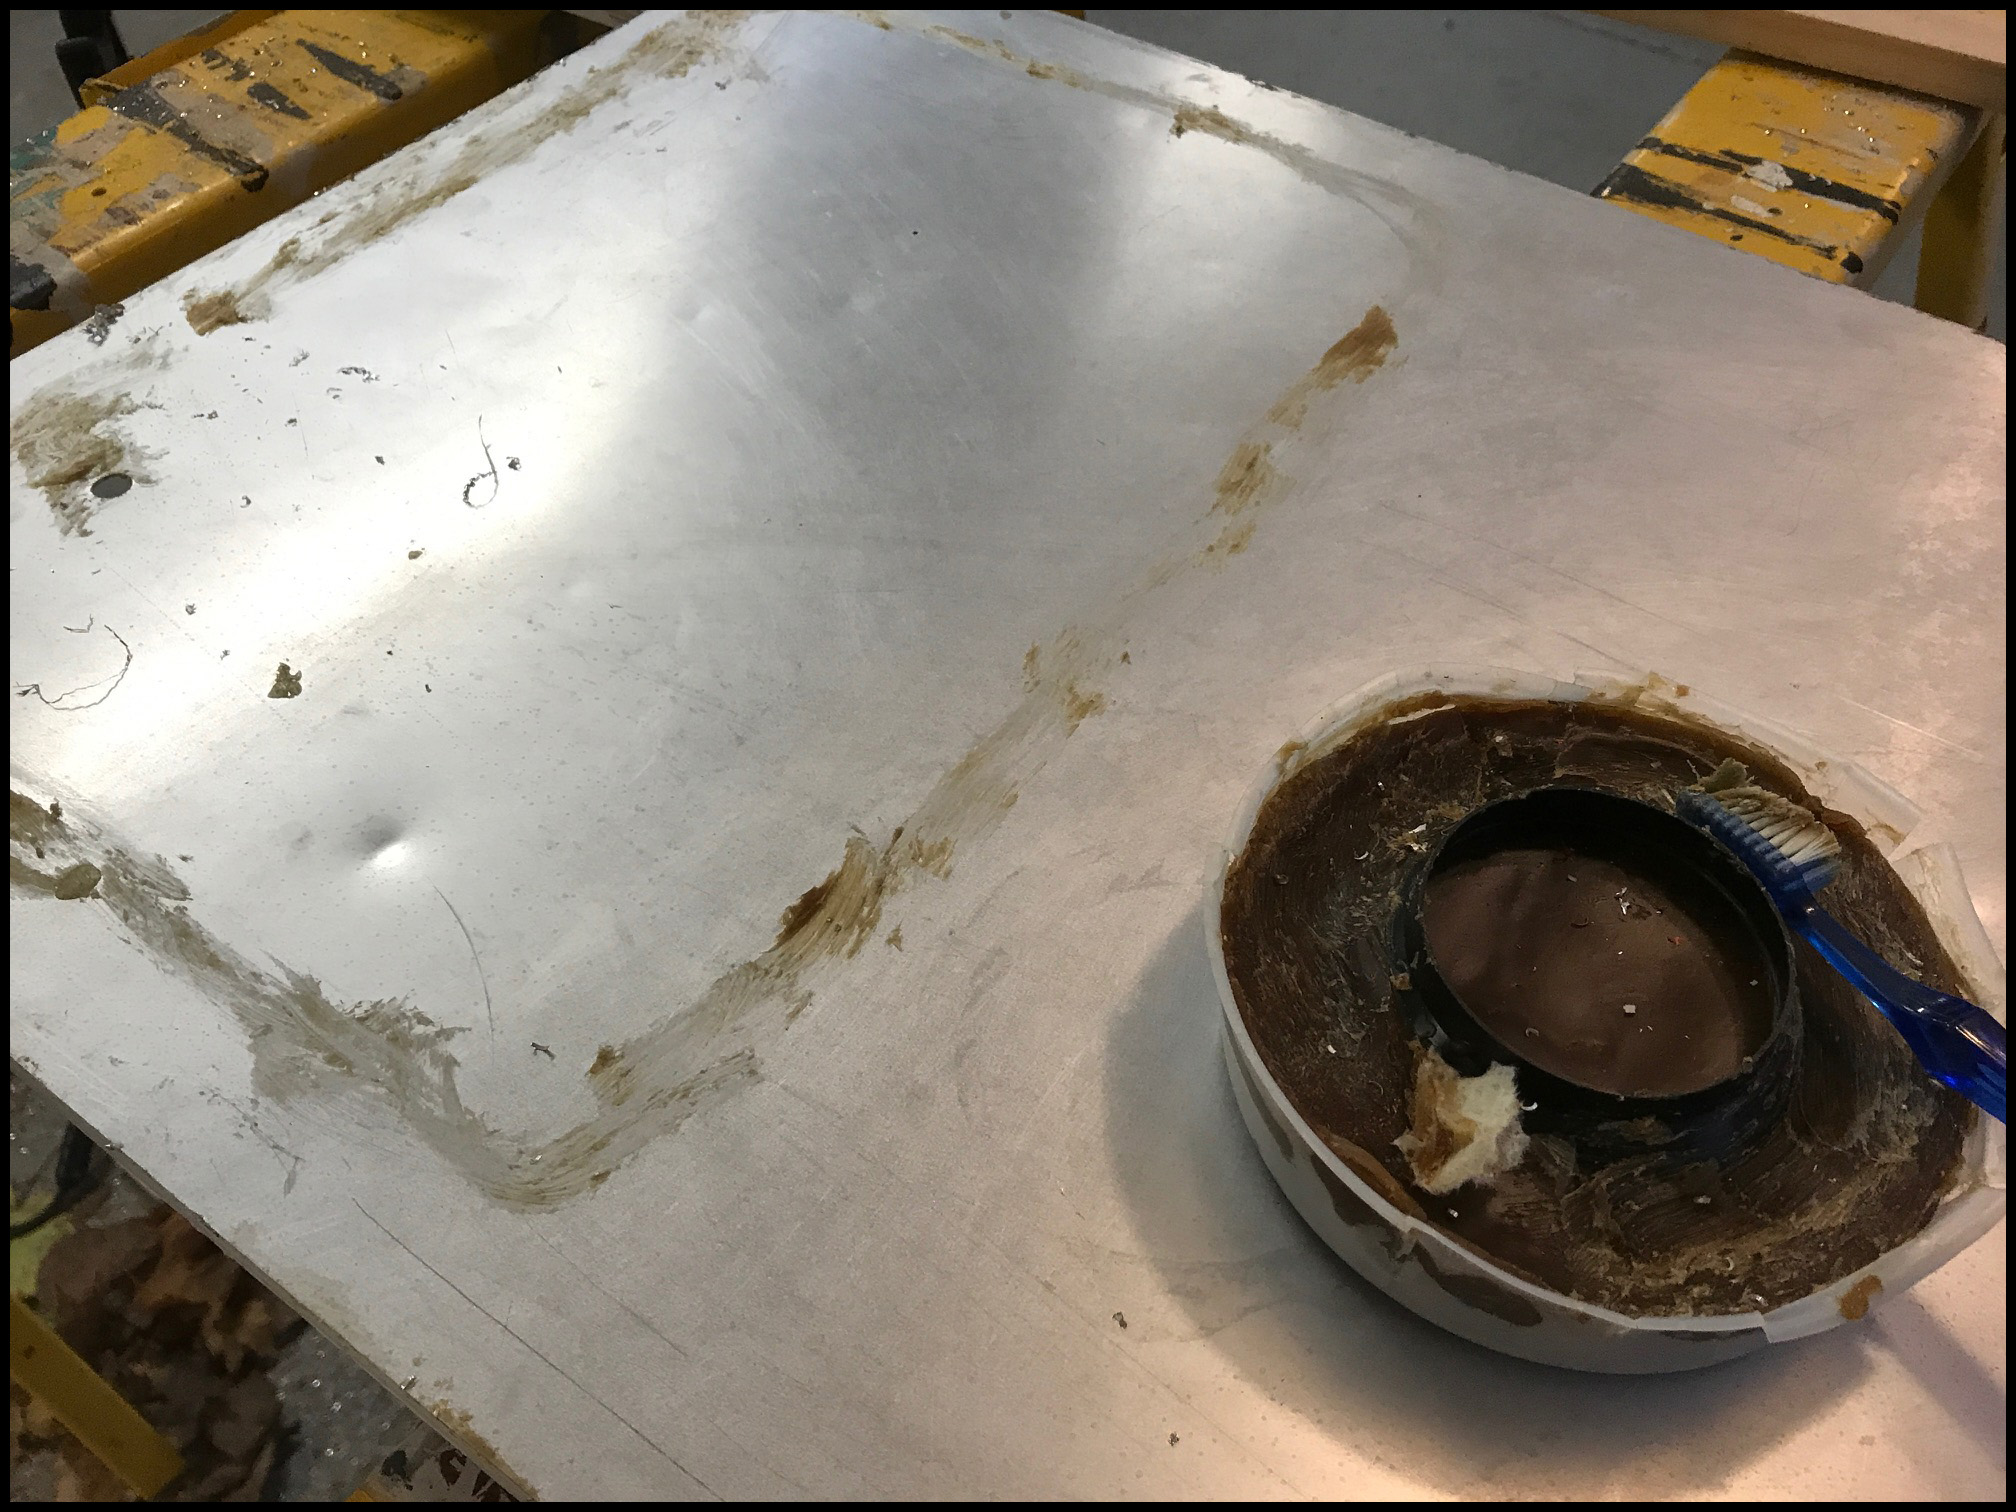
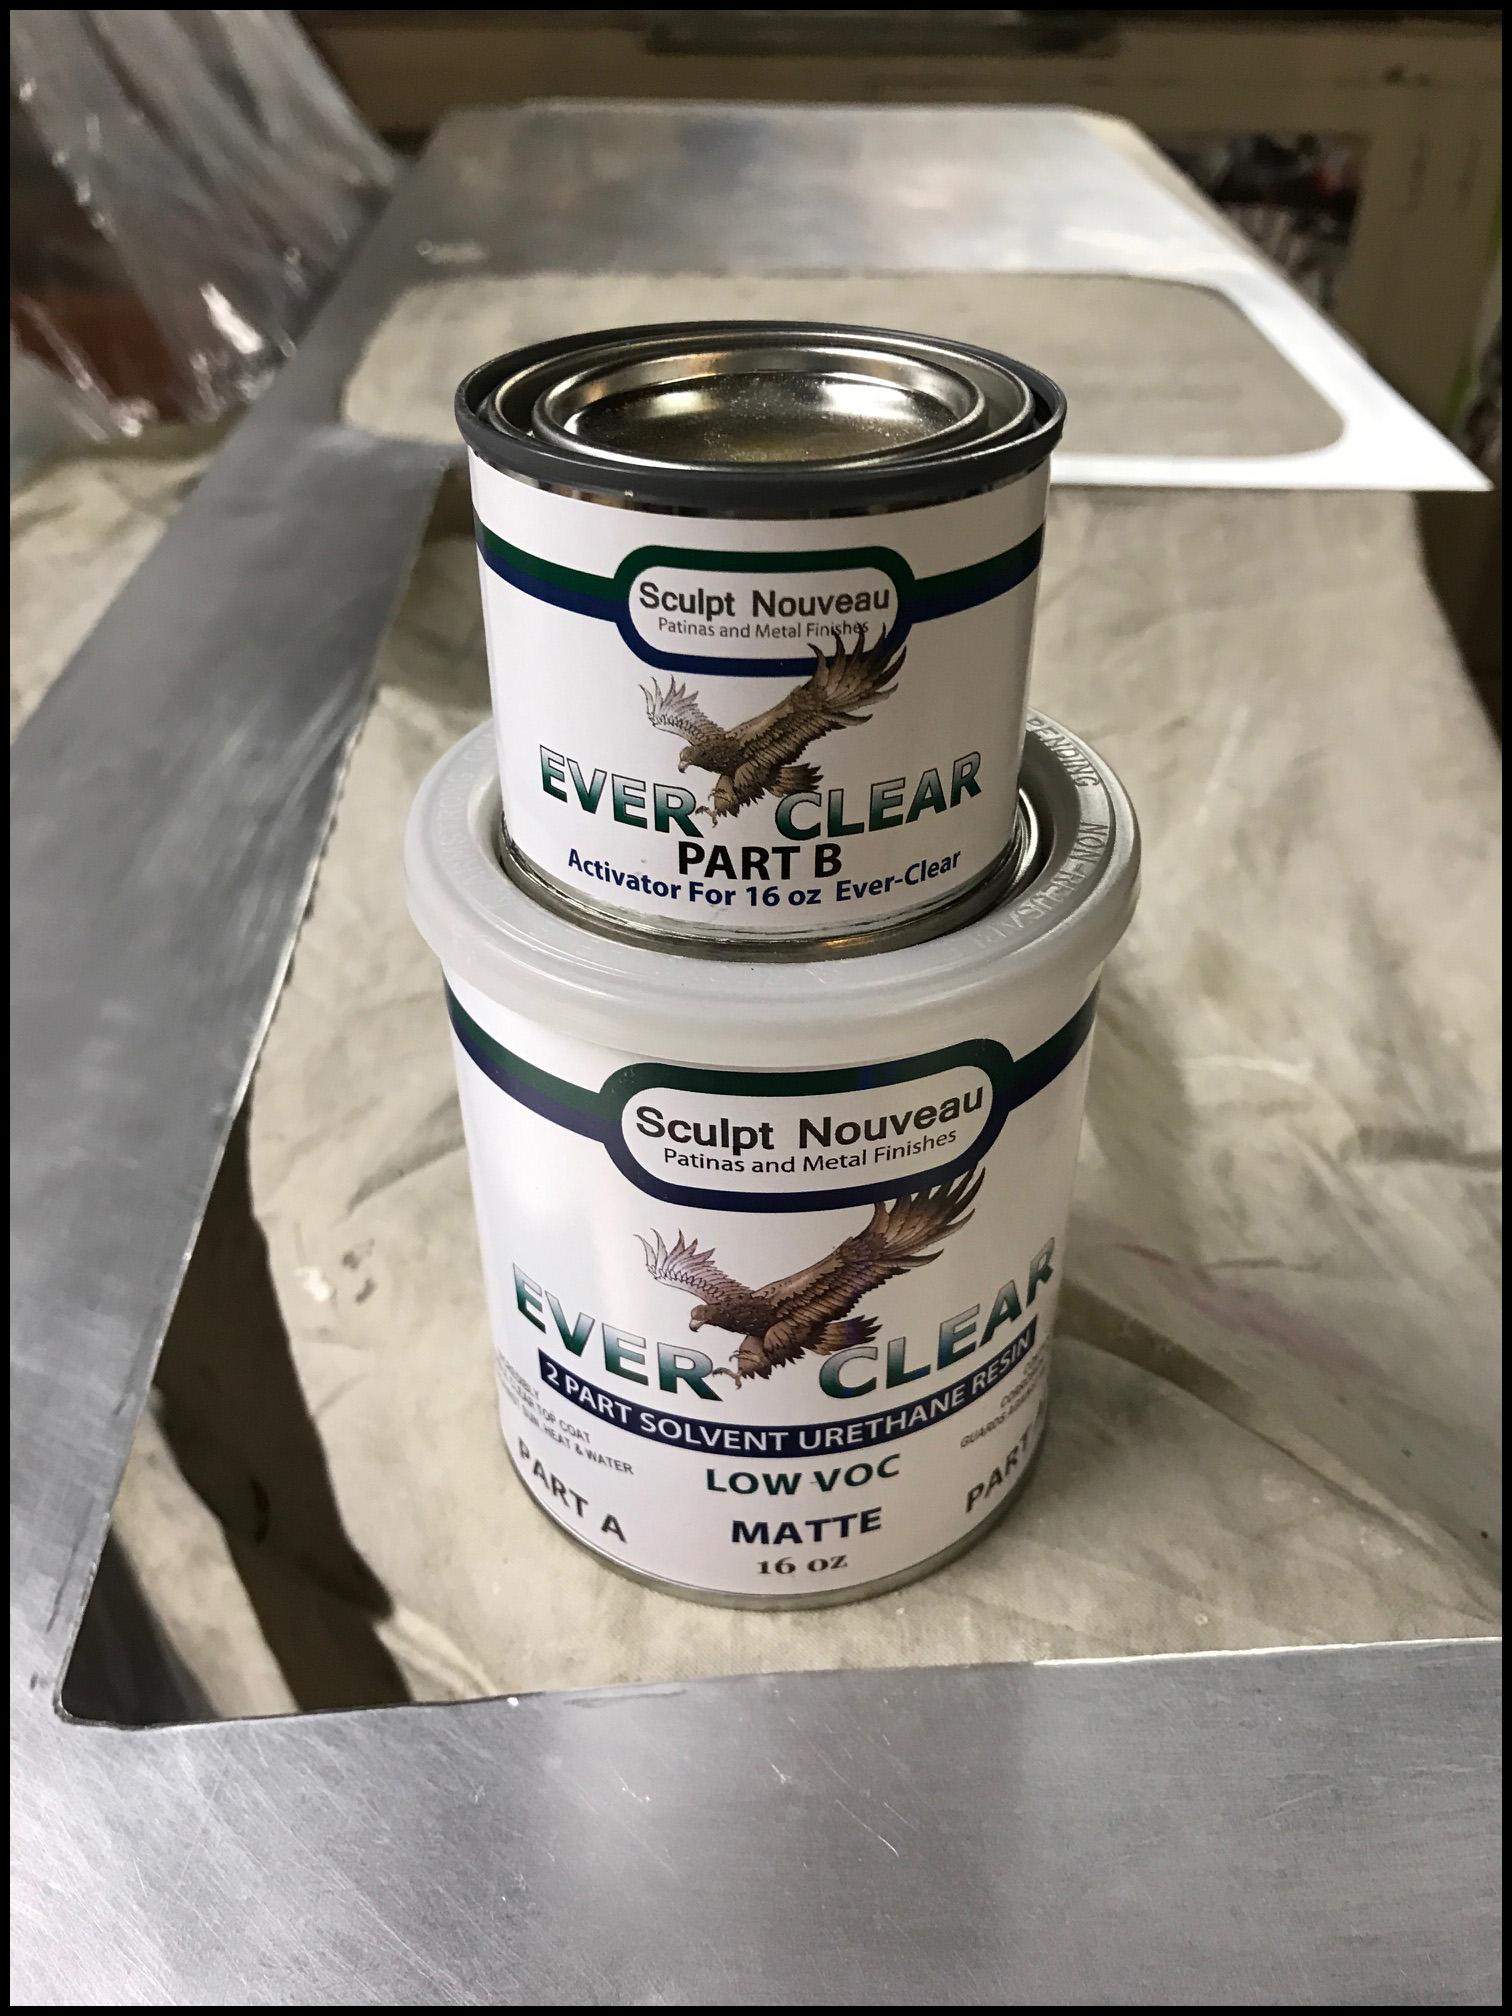
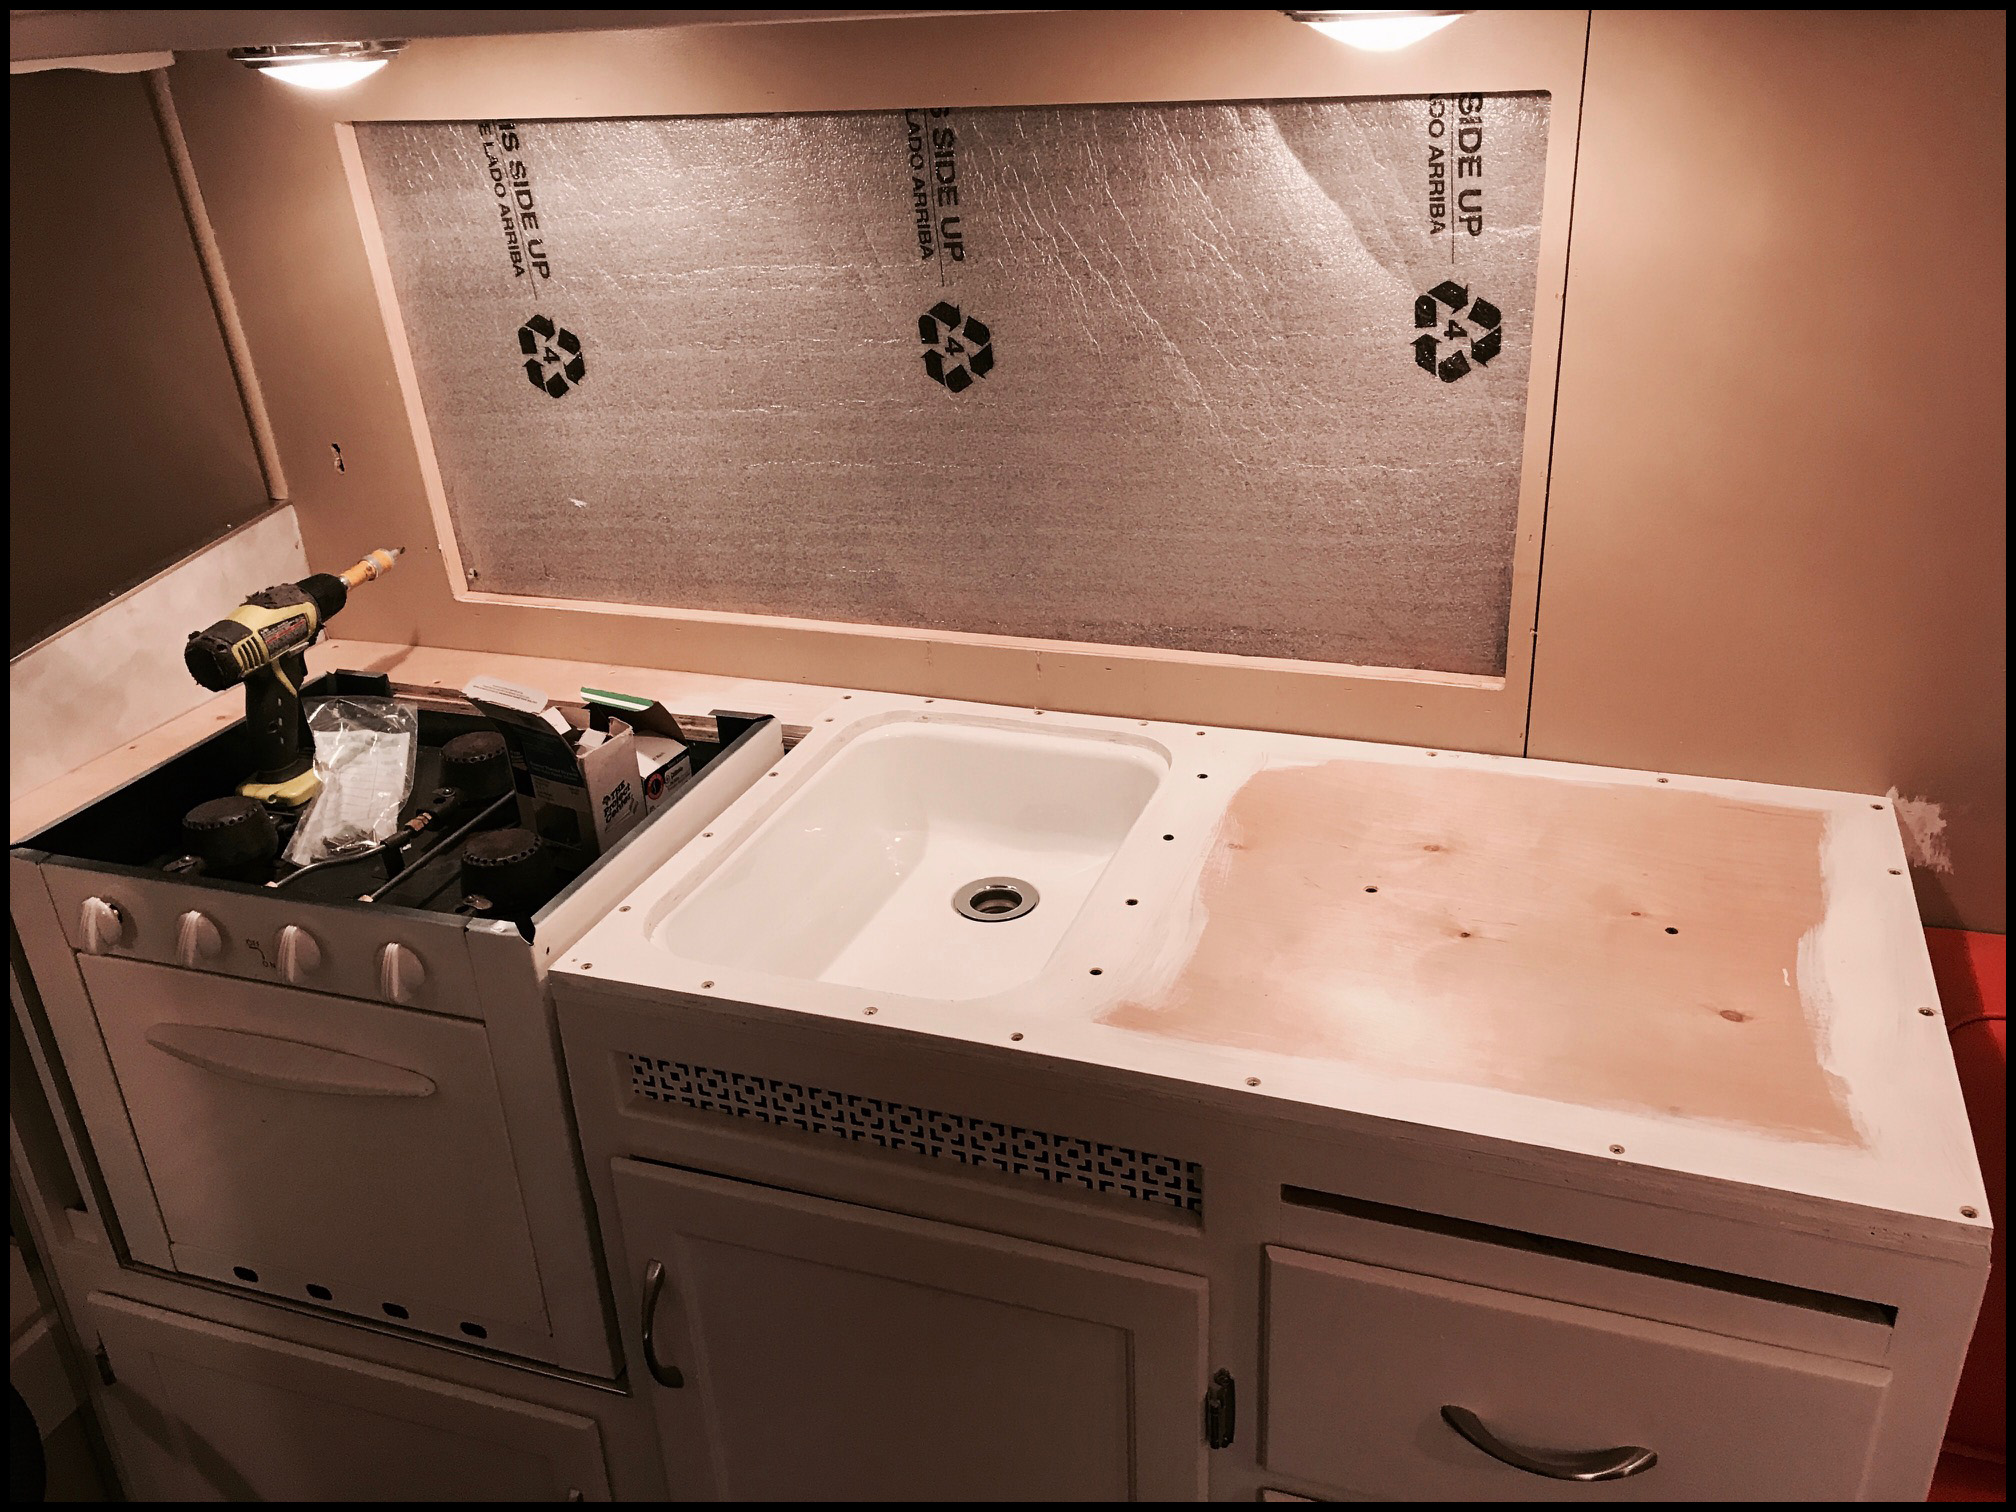
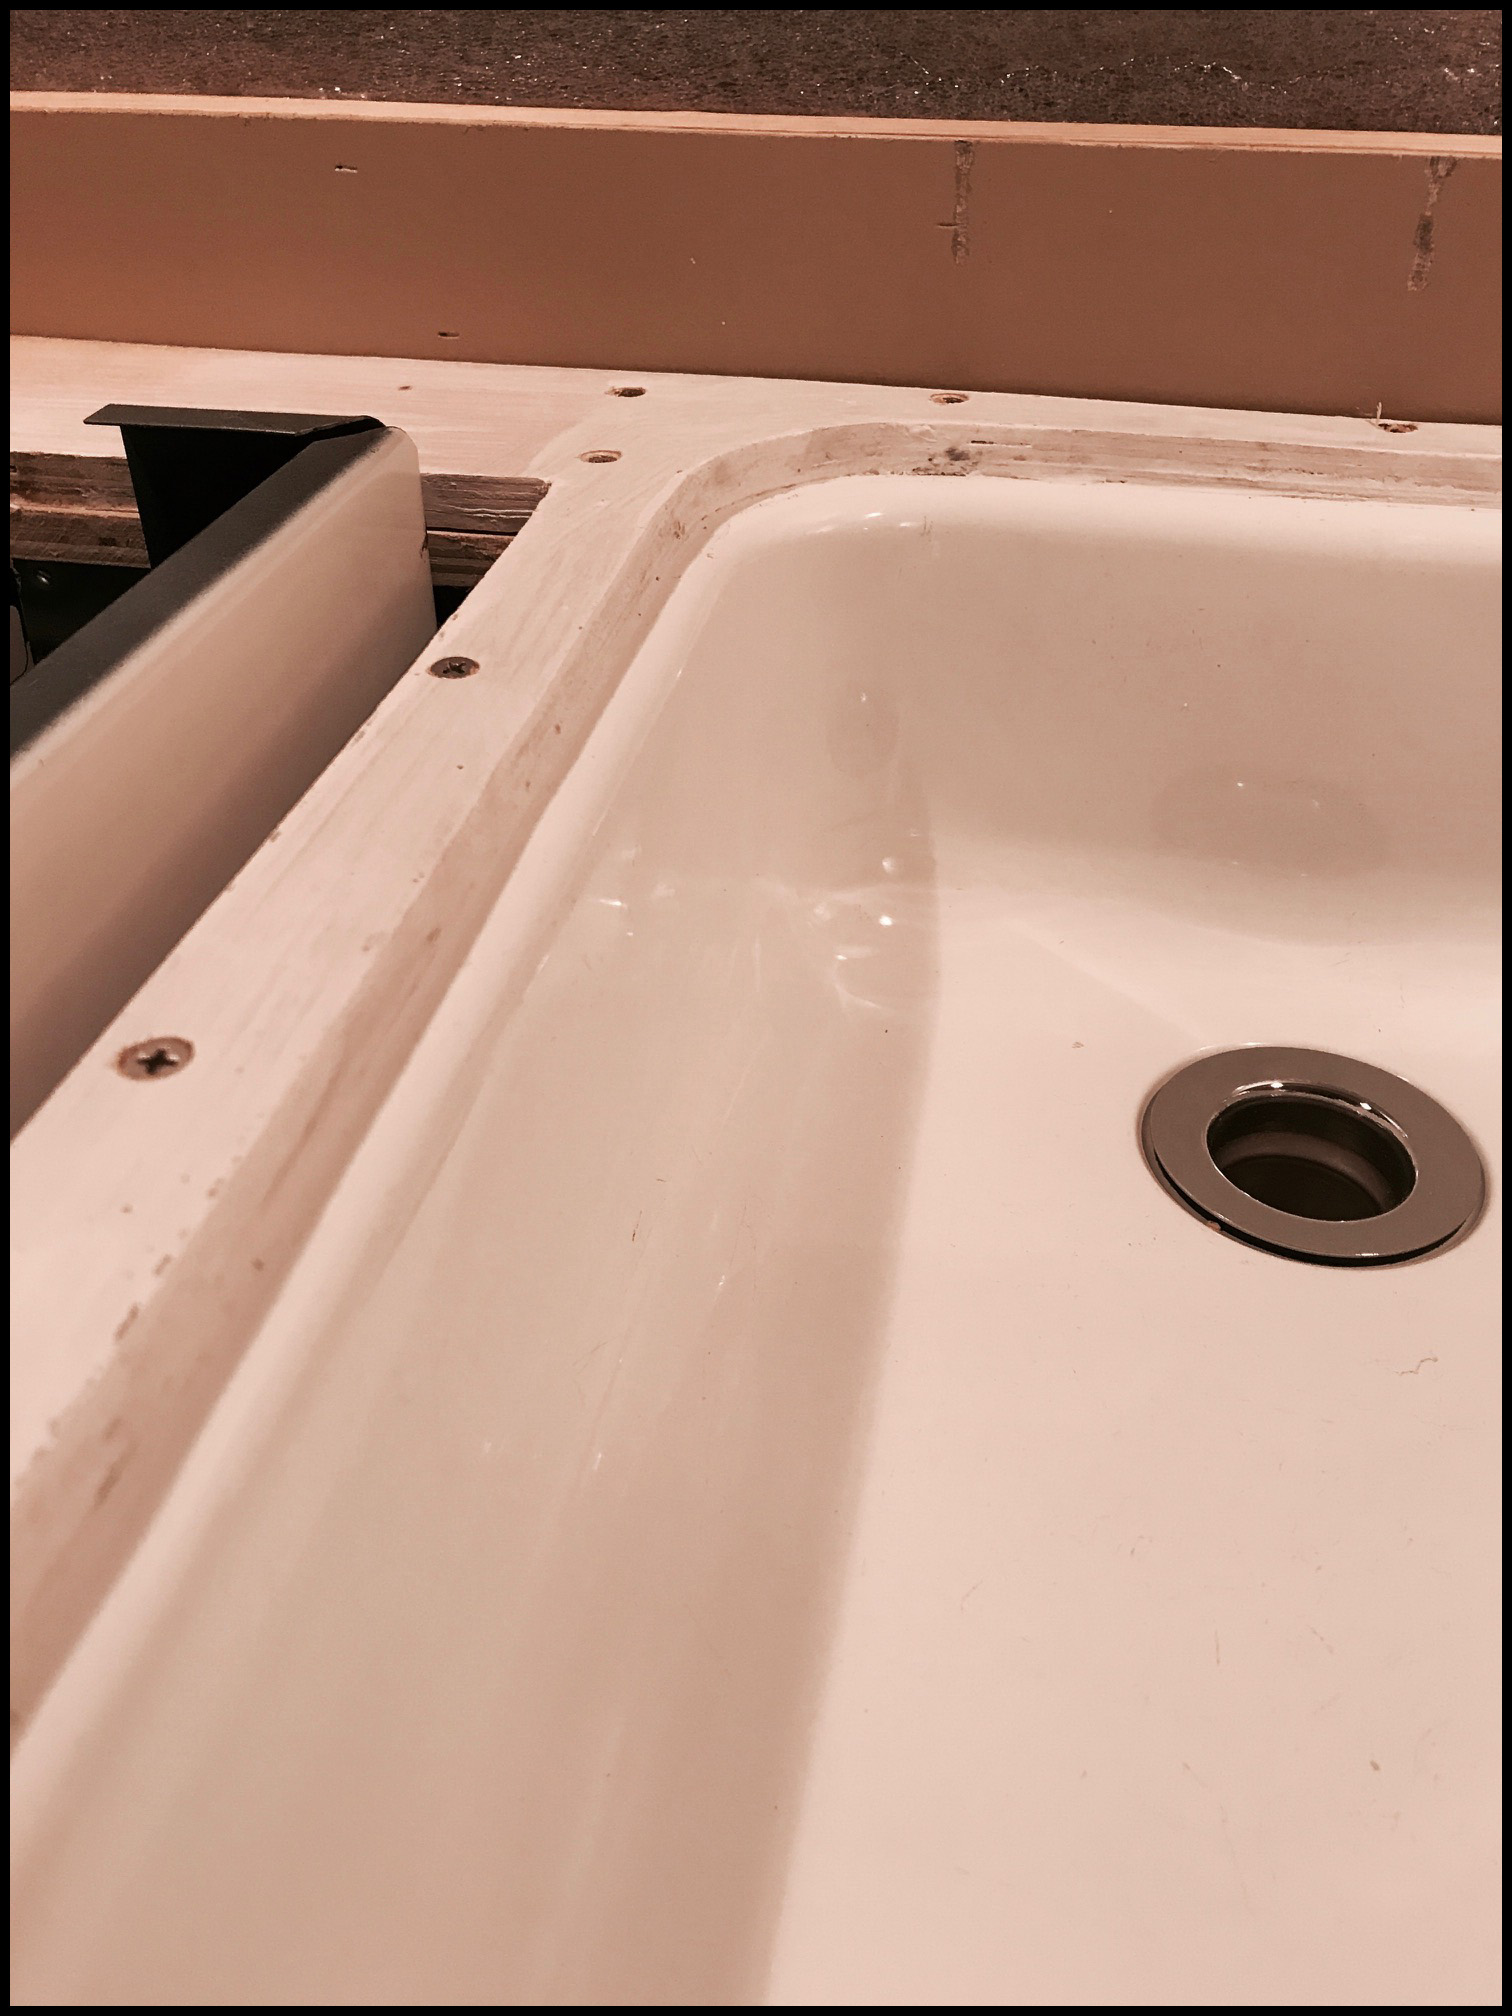
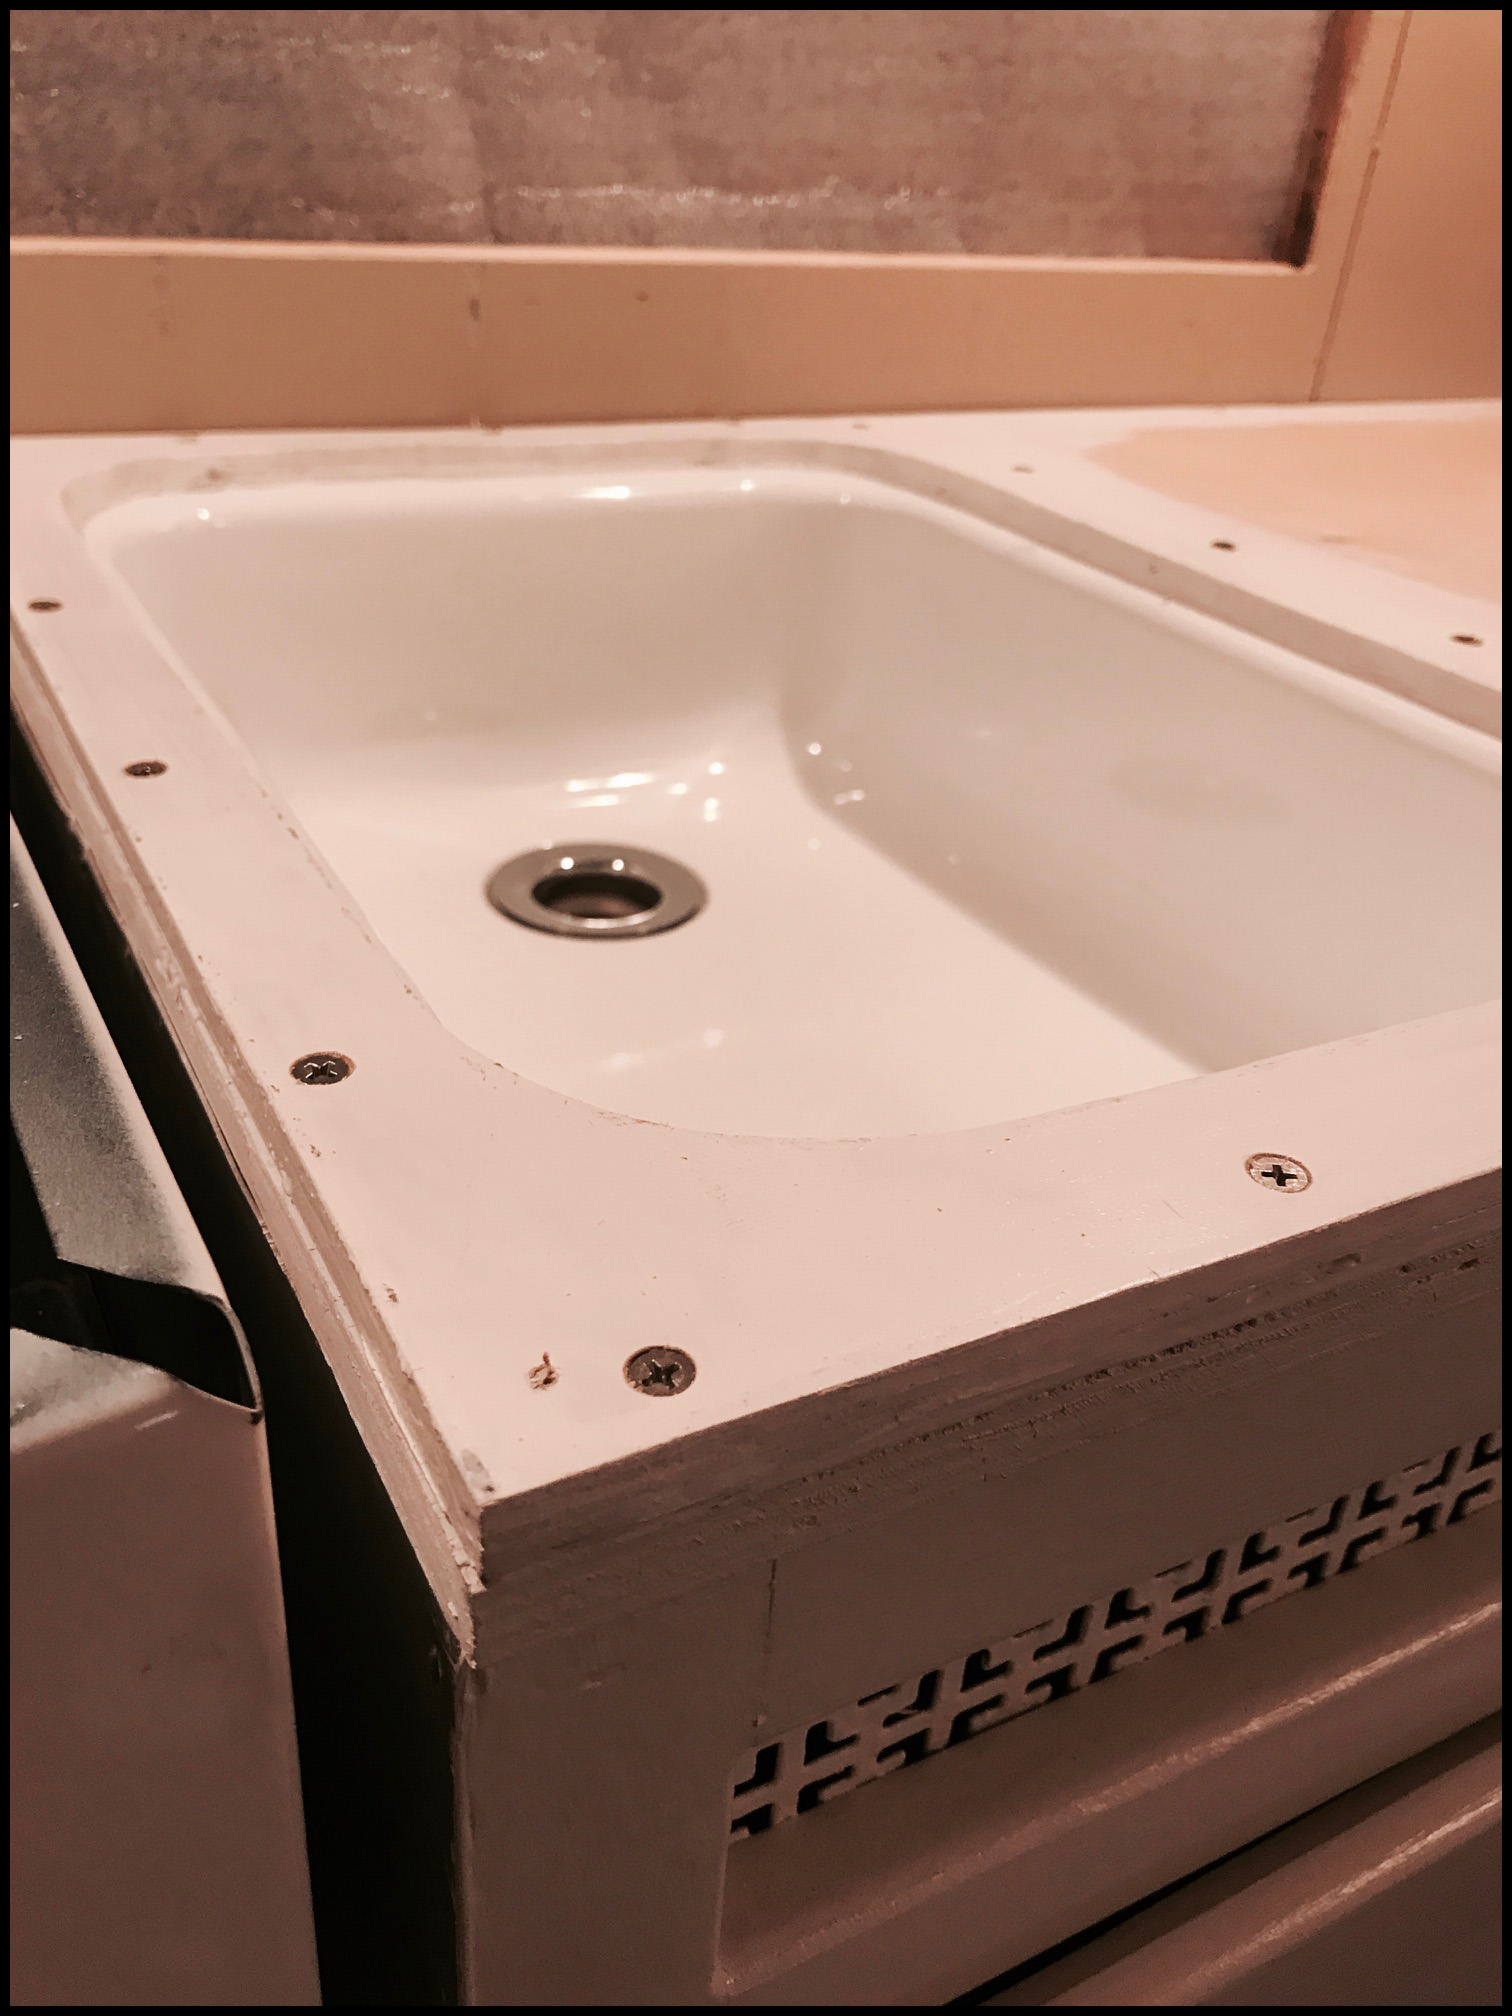
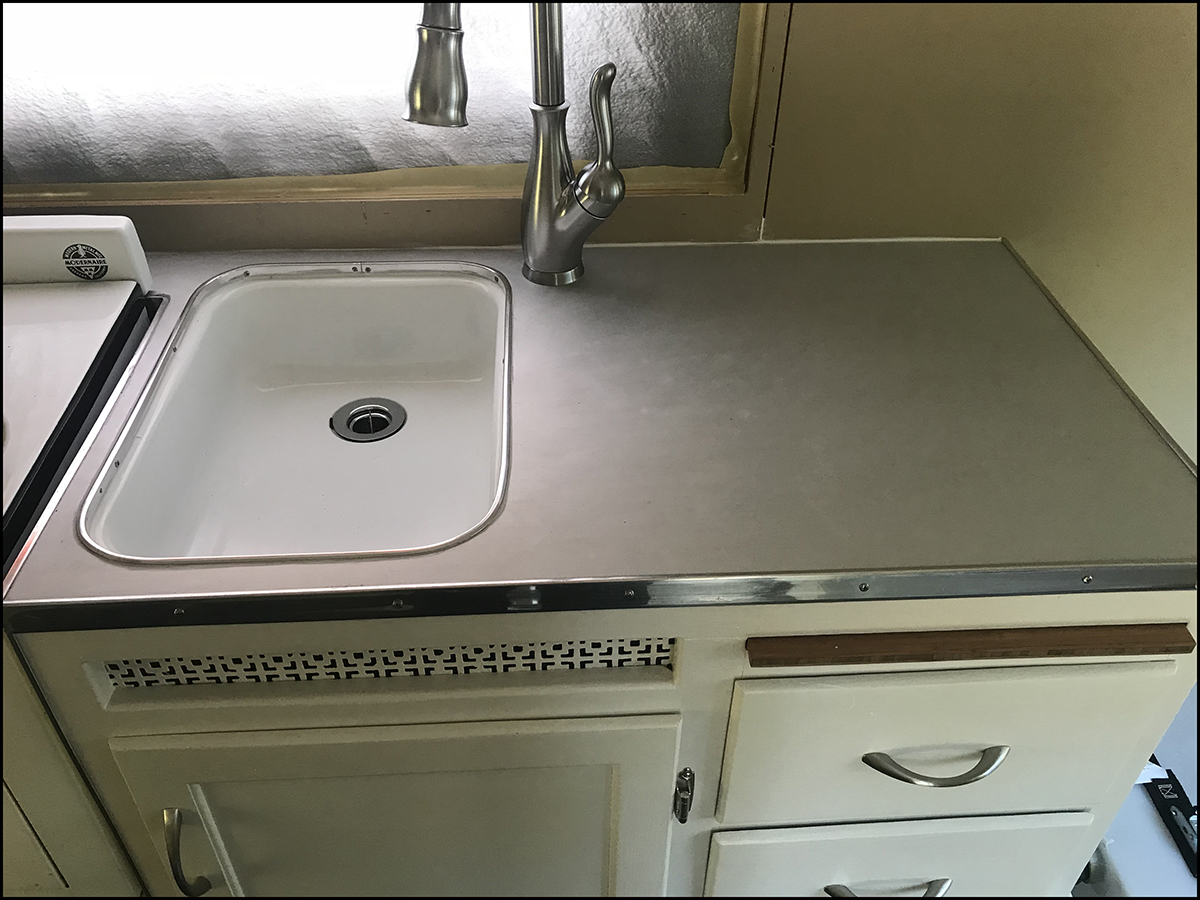
We decided to use some of the old skin for the countertop and it was recommended that the Sculpt Nouveau Ever Clear Marine Grade clear coat was the best product for the job. I am super impressed with the application and durability of it so far. We were so impressed that we decided to make the backsplash out of the same siding, I’ll post pictures when it is done in the next few weeks.
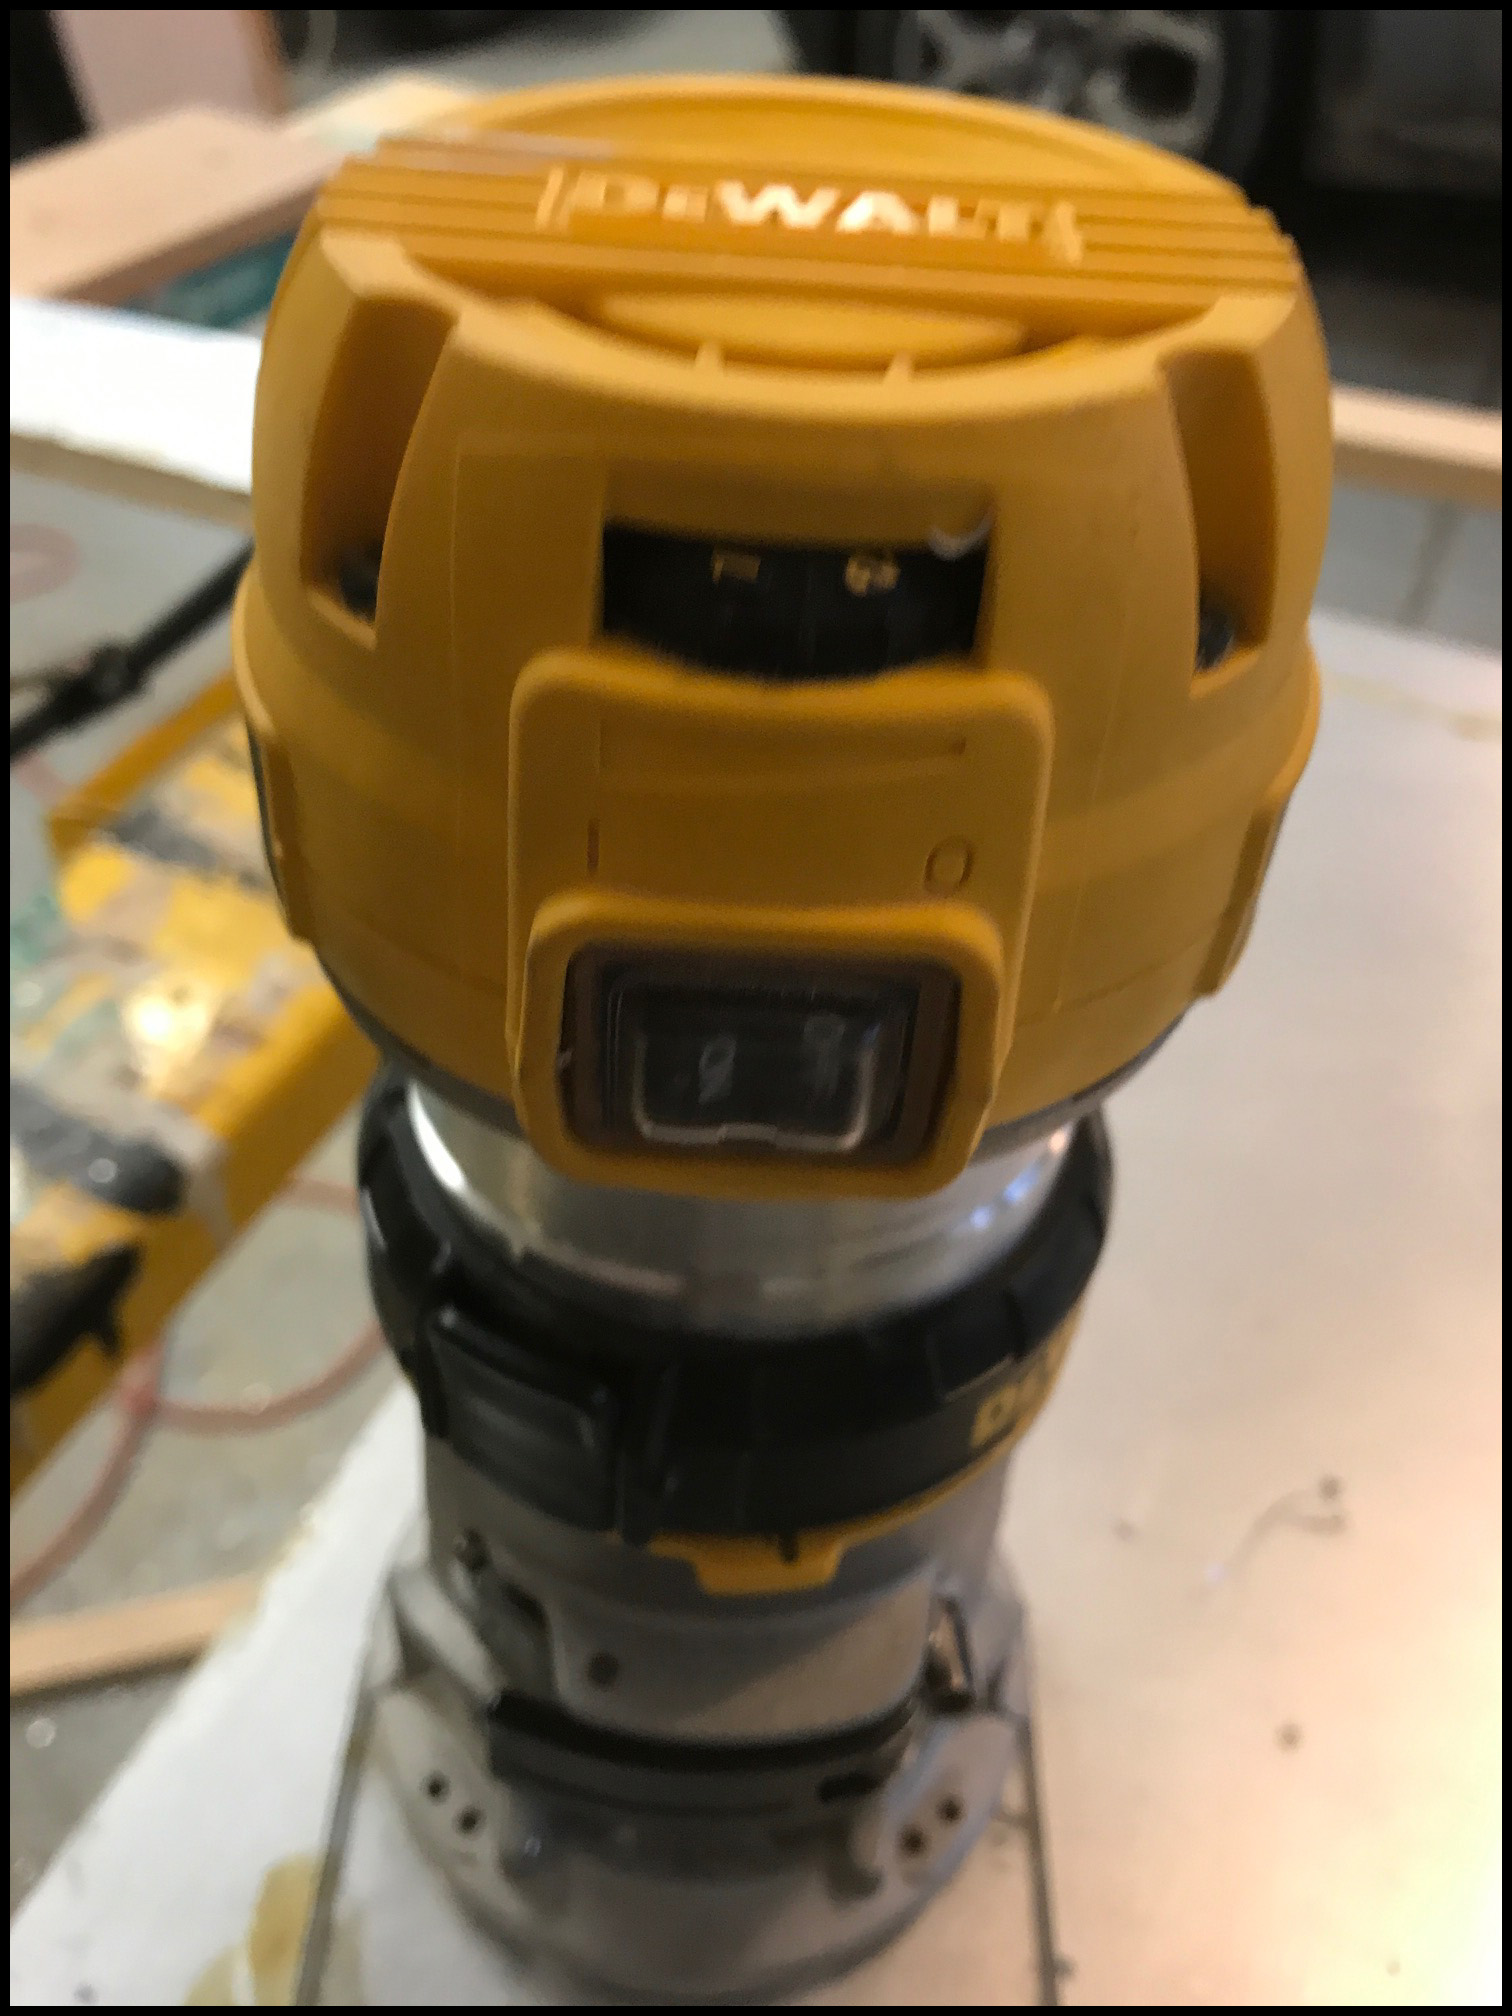
Cutting out the window holes and the countertop was pretty simple and I found that the best method was a variable speed router, on the lowest speed, and bees wax. So here is what I did; drilled holes bigger that the router bit in each corner, got a toilet ring, like Larry recommended, yup a toilet ring, use a tooth brush and spread it in between the holes and then just routed at a slow steady pace. Cut like a charm. It is messy, be prepared for that. I taped up paper on the inside of the windows to stop the shavings from getting everywhere inside the trailer.
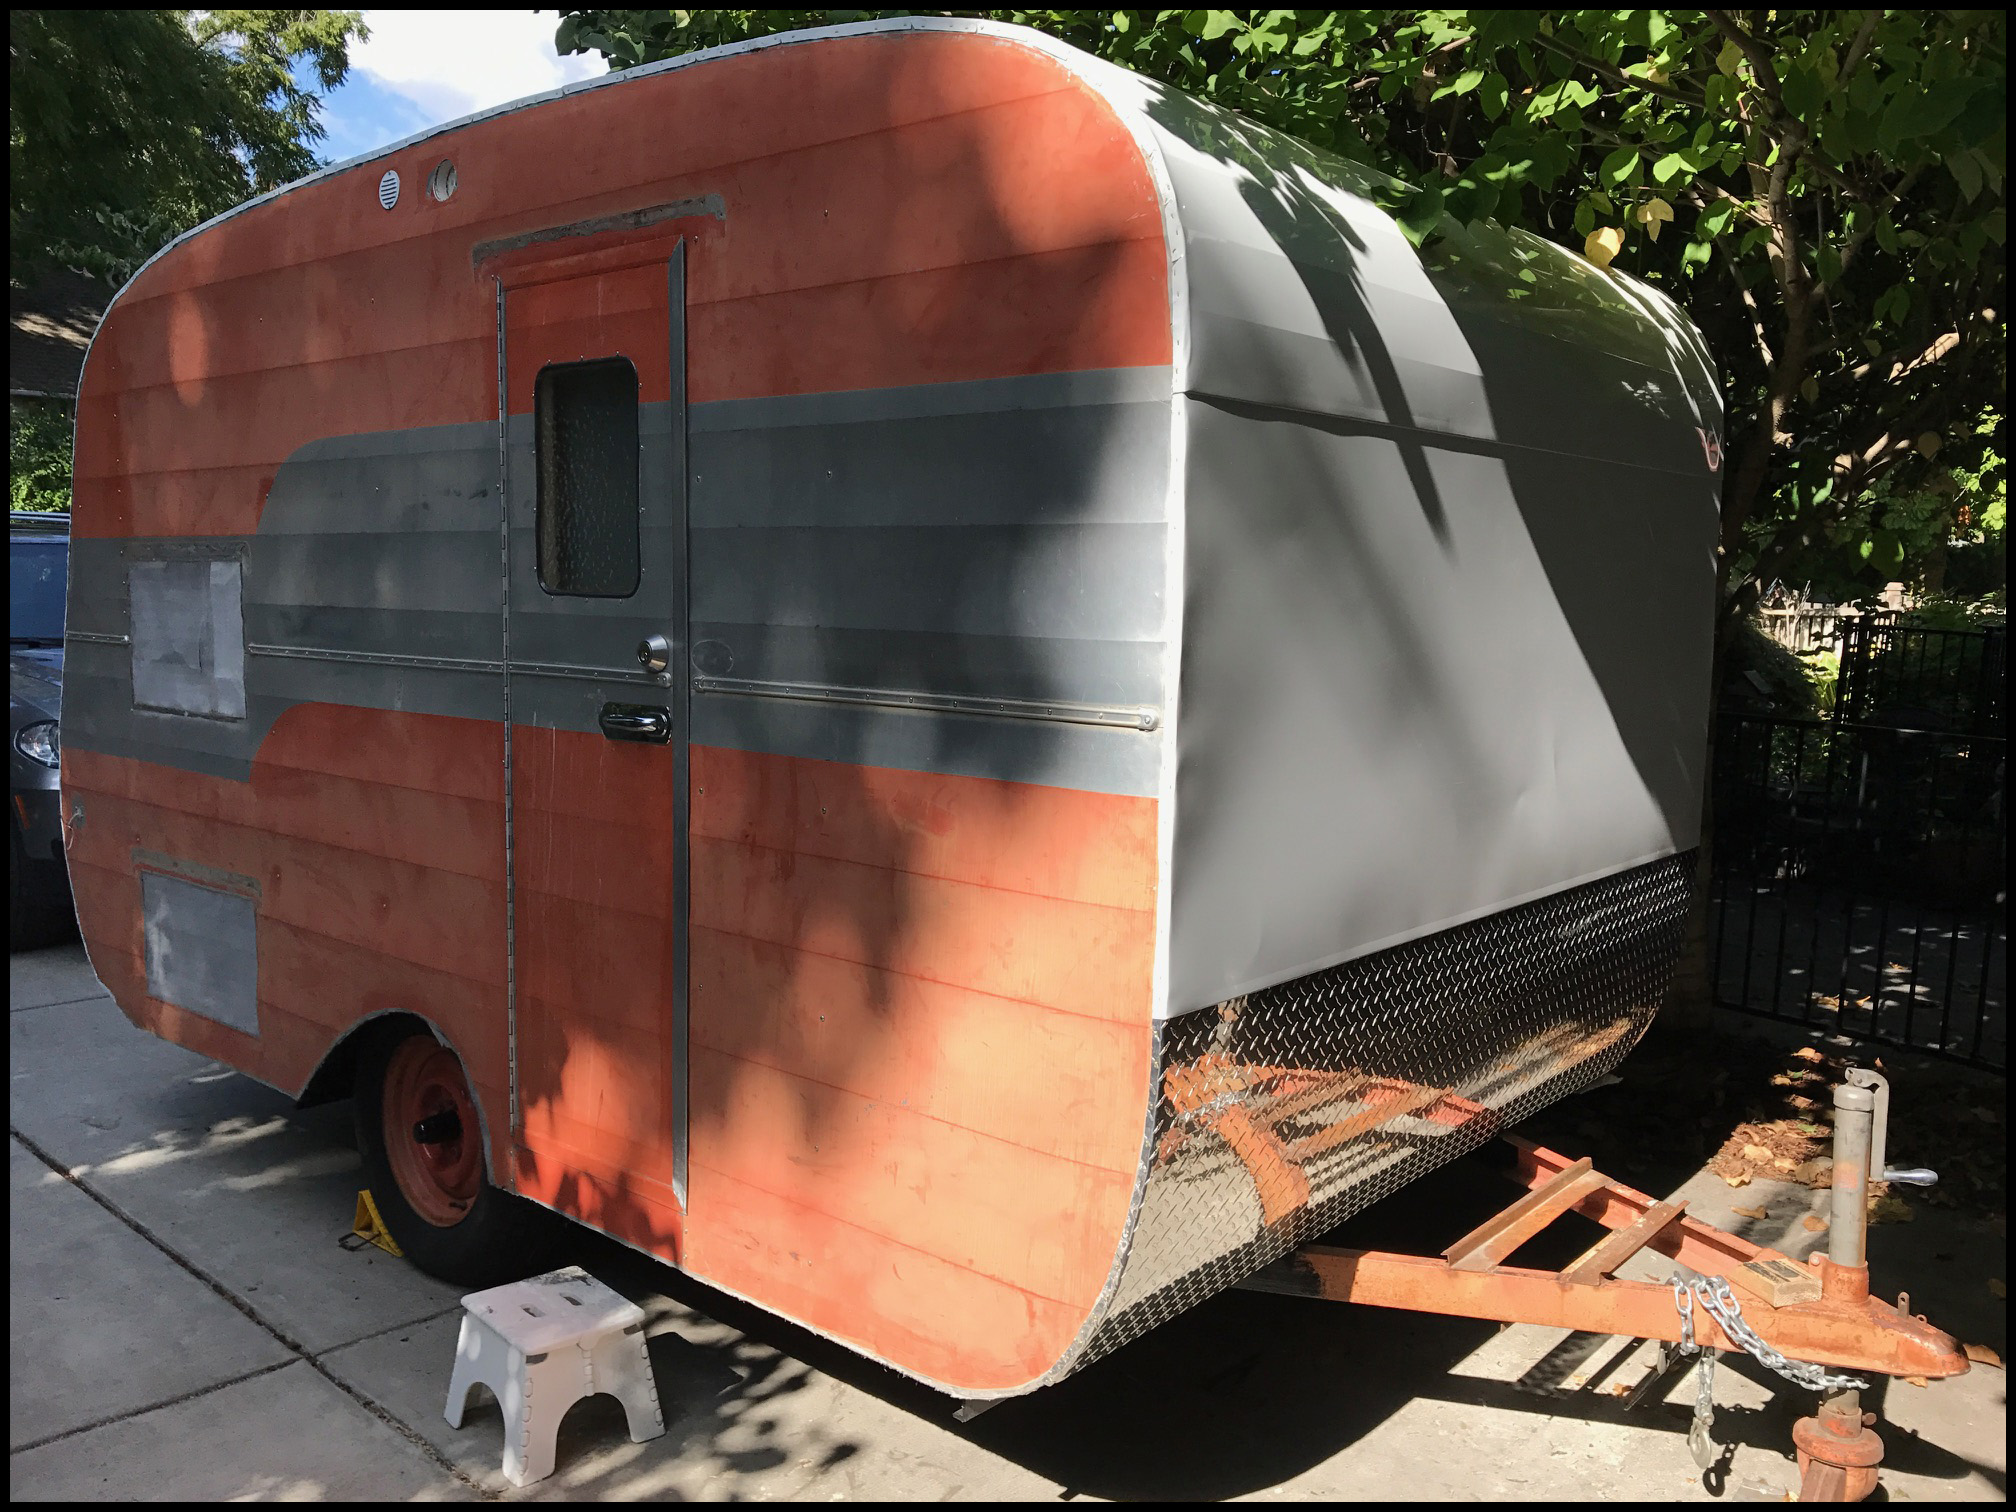
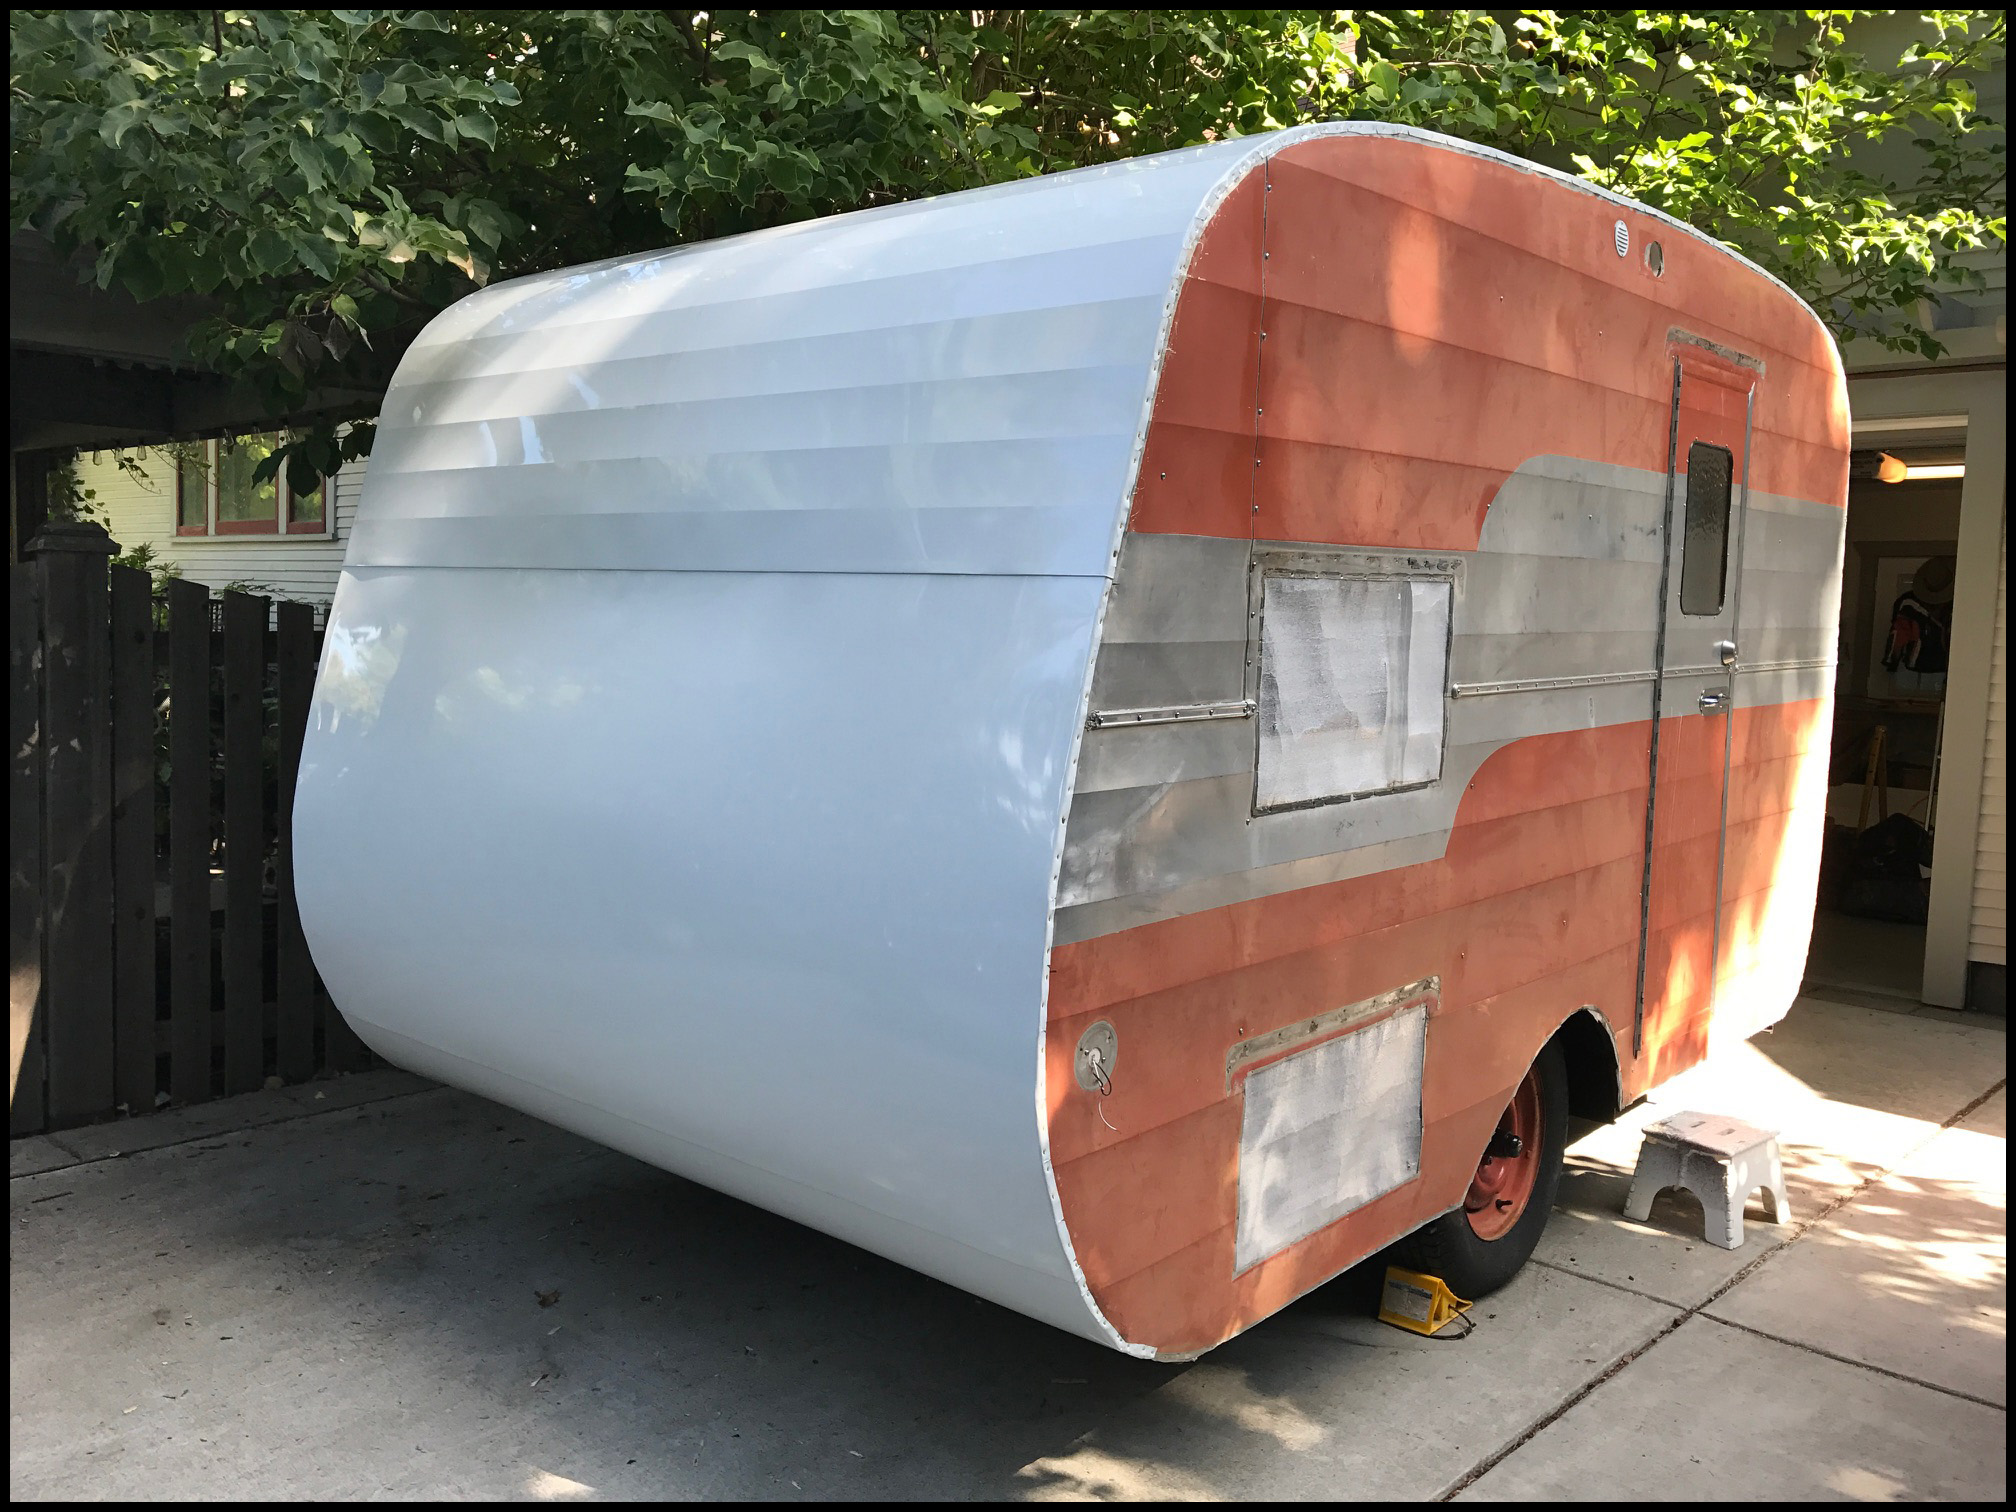
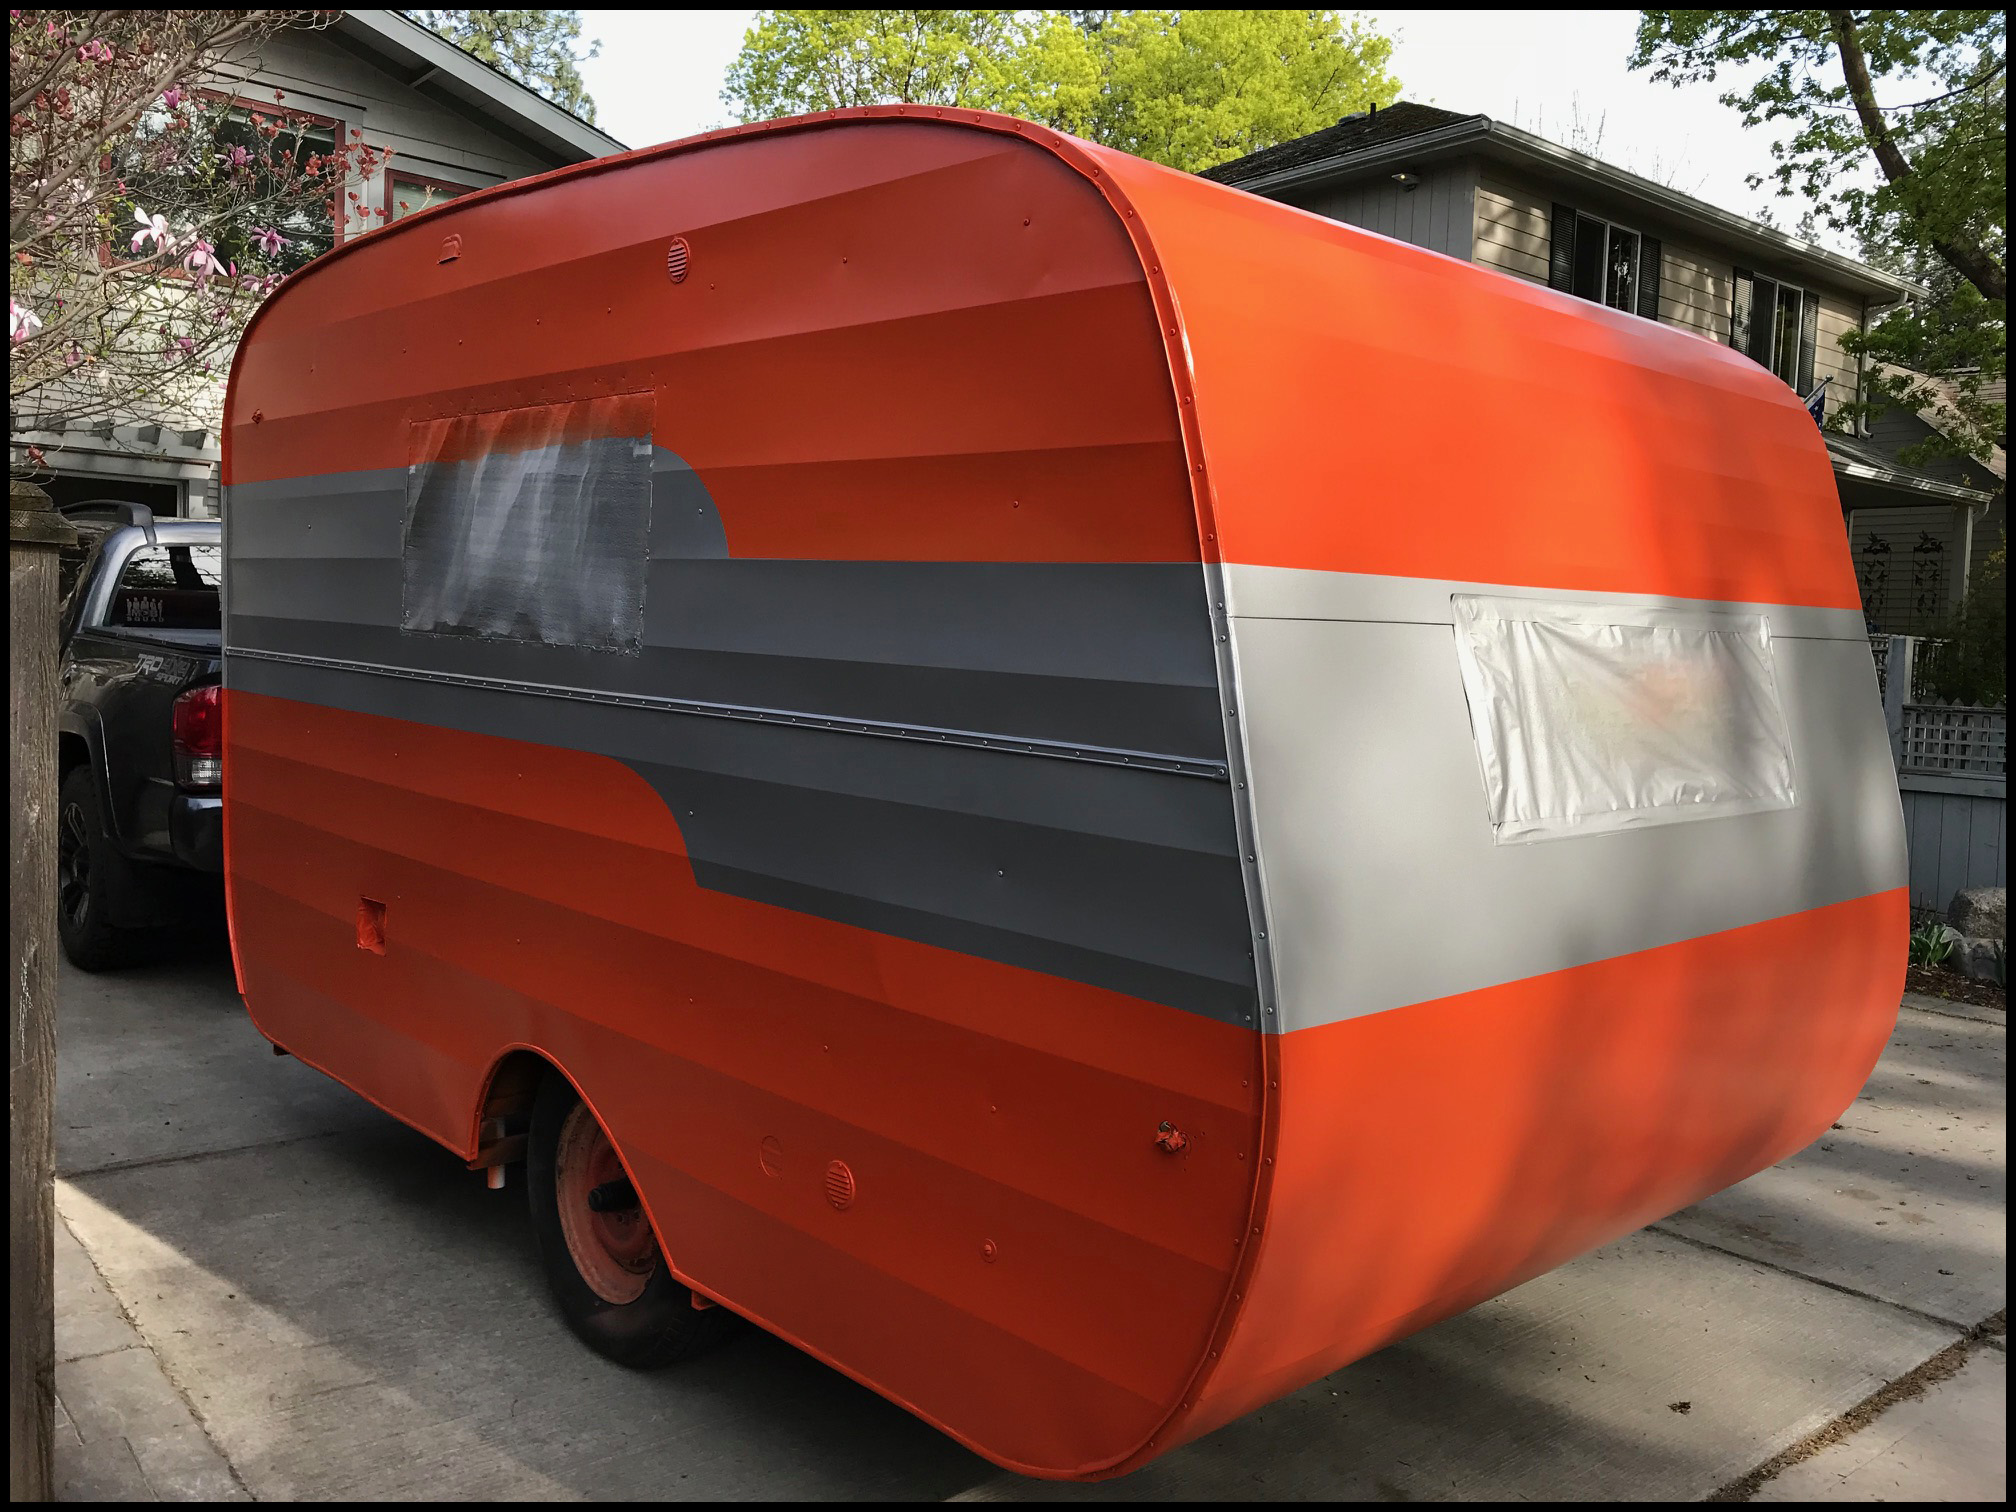
And of course… the paint. At a recommendation of a friend I had it painted at a local shop, Maaco. I am not sure if I would go that route again. Might of shopped it more? Had a buddy paint it? Not really sure… too late now anyway… hope the paint lasts? For the money I paid I expected more? Better job? More attention to detail? So I totally recommend that you shop around. Trust your gut when you think it’s a bad idea to leave it there… or if you feel good and trust them to do a great job.
On mine there was a ton of overspray on other painted surfaces, paint on the rubber, they had to reshoot the back; they didn’t continue the silver stripe all the way around the back? The stripe was on the sides and front? But not the back? Odd choice? No call to ask me what I preferred, the wife had to get upset before they would repaint it… And I am not sure if they used etching primer under it all? Can’t tell? Choose your paint shop wisely.
 |
 |
 |
 |
 |
 |
 |
 |
 |
 |
 |
 |
 |
 |
 |
 |
 |
 |
 |
 |
 |
 |
 |
 |
 |
 |
 |
 |
 |
 |
 |
 |
 |
 |
|
 |
 |
 |
 |
 |
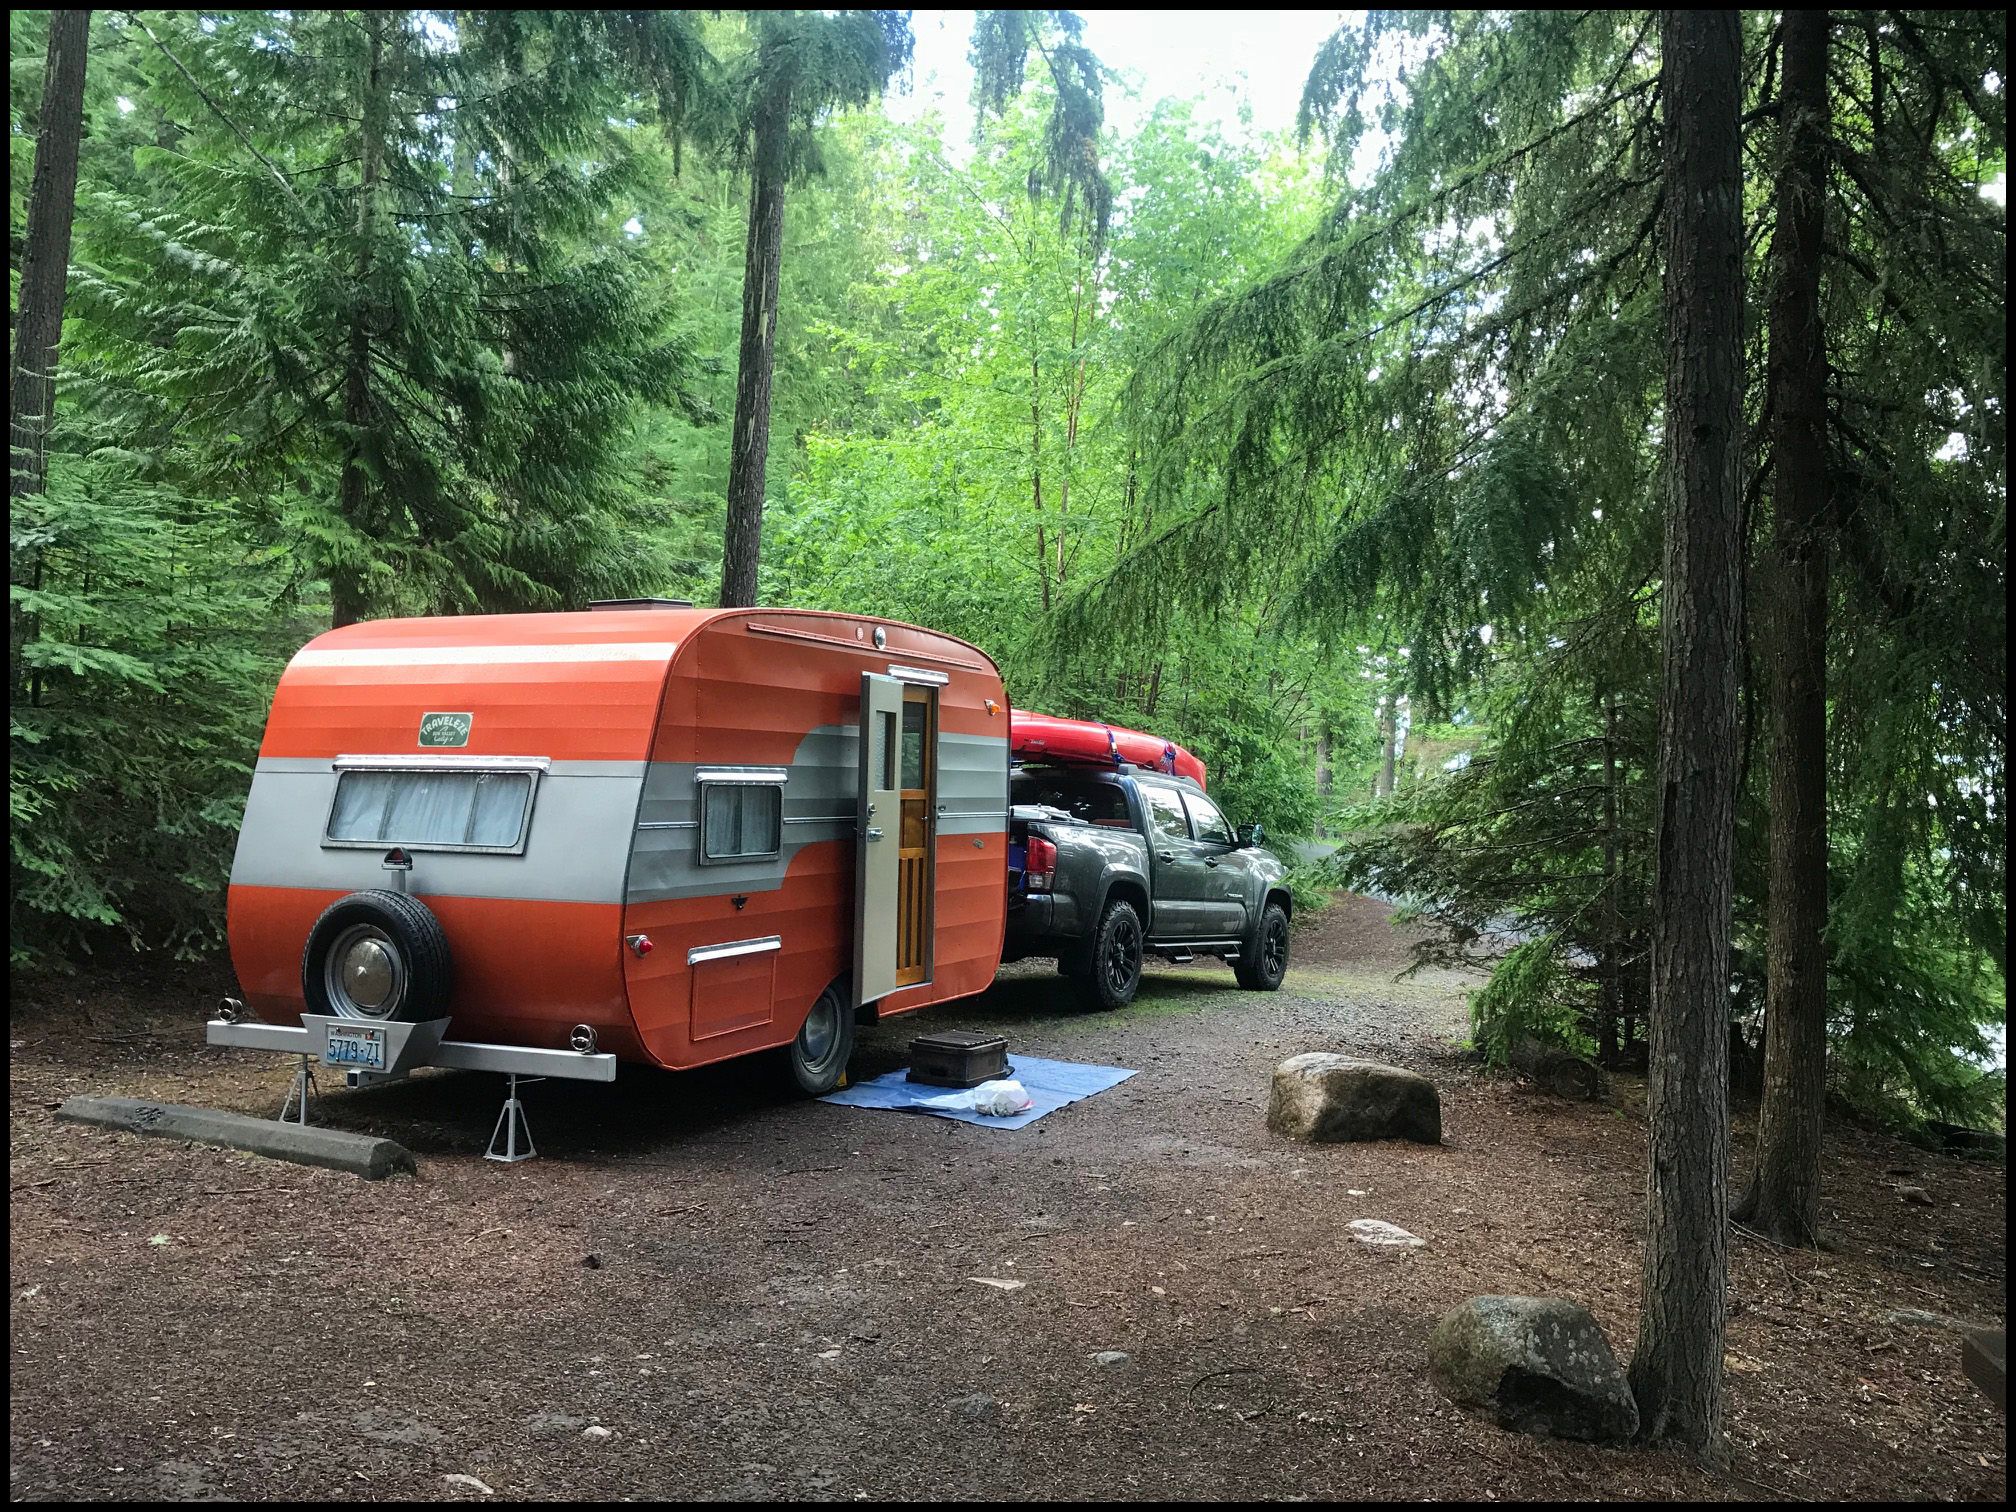
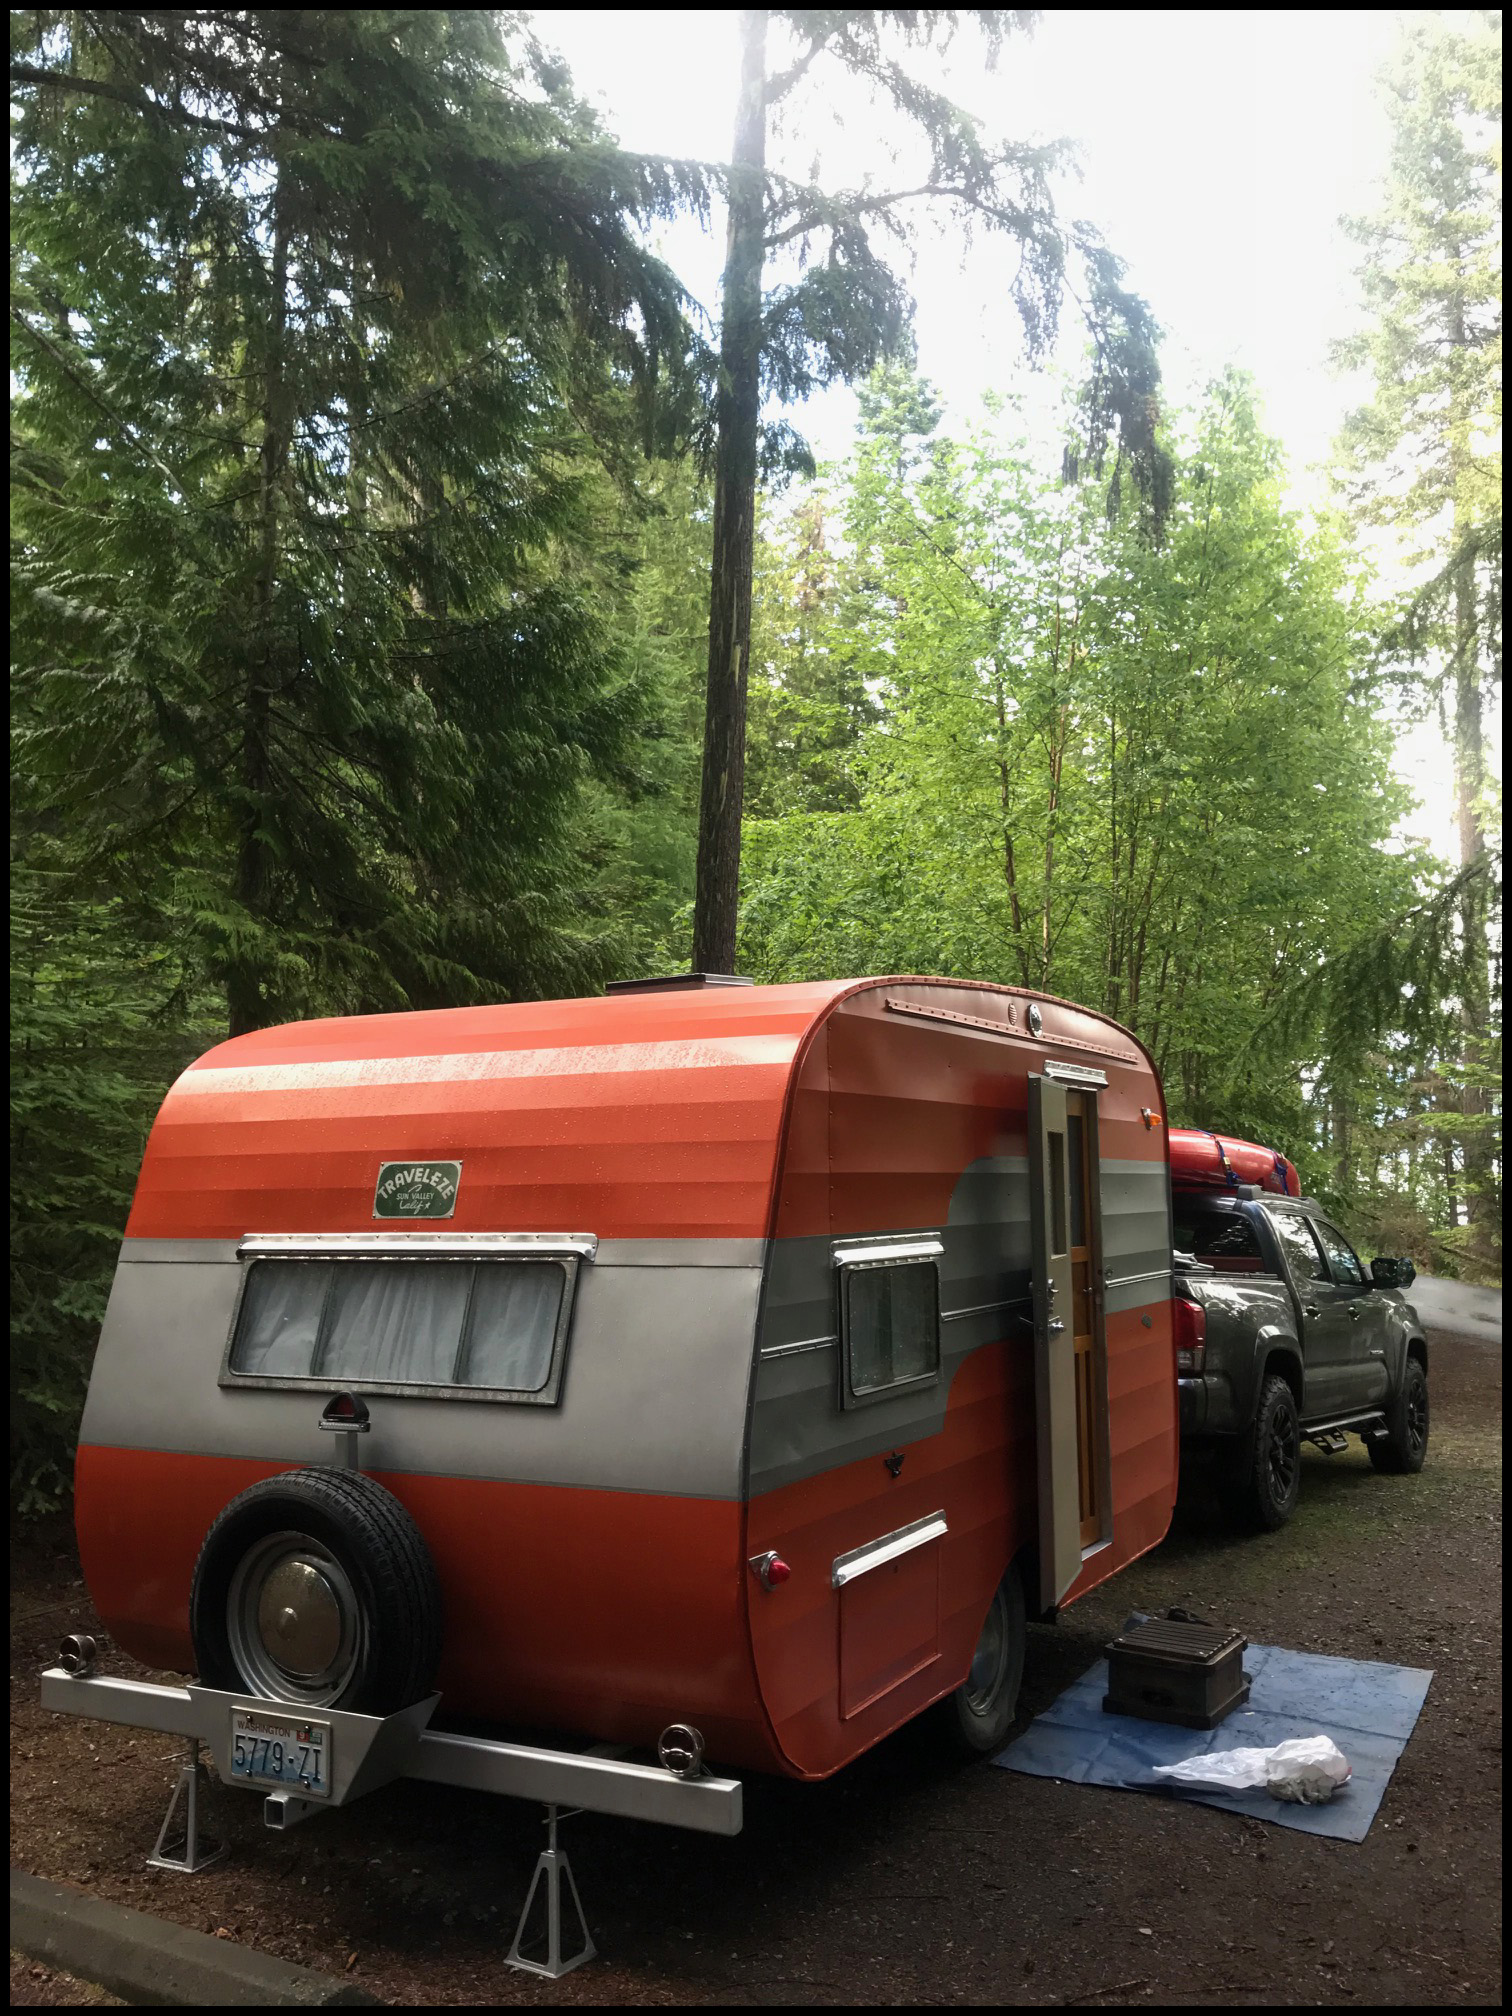
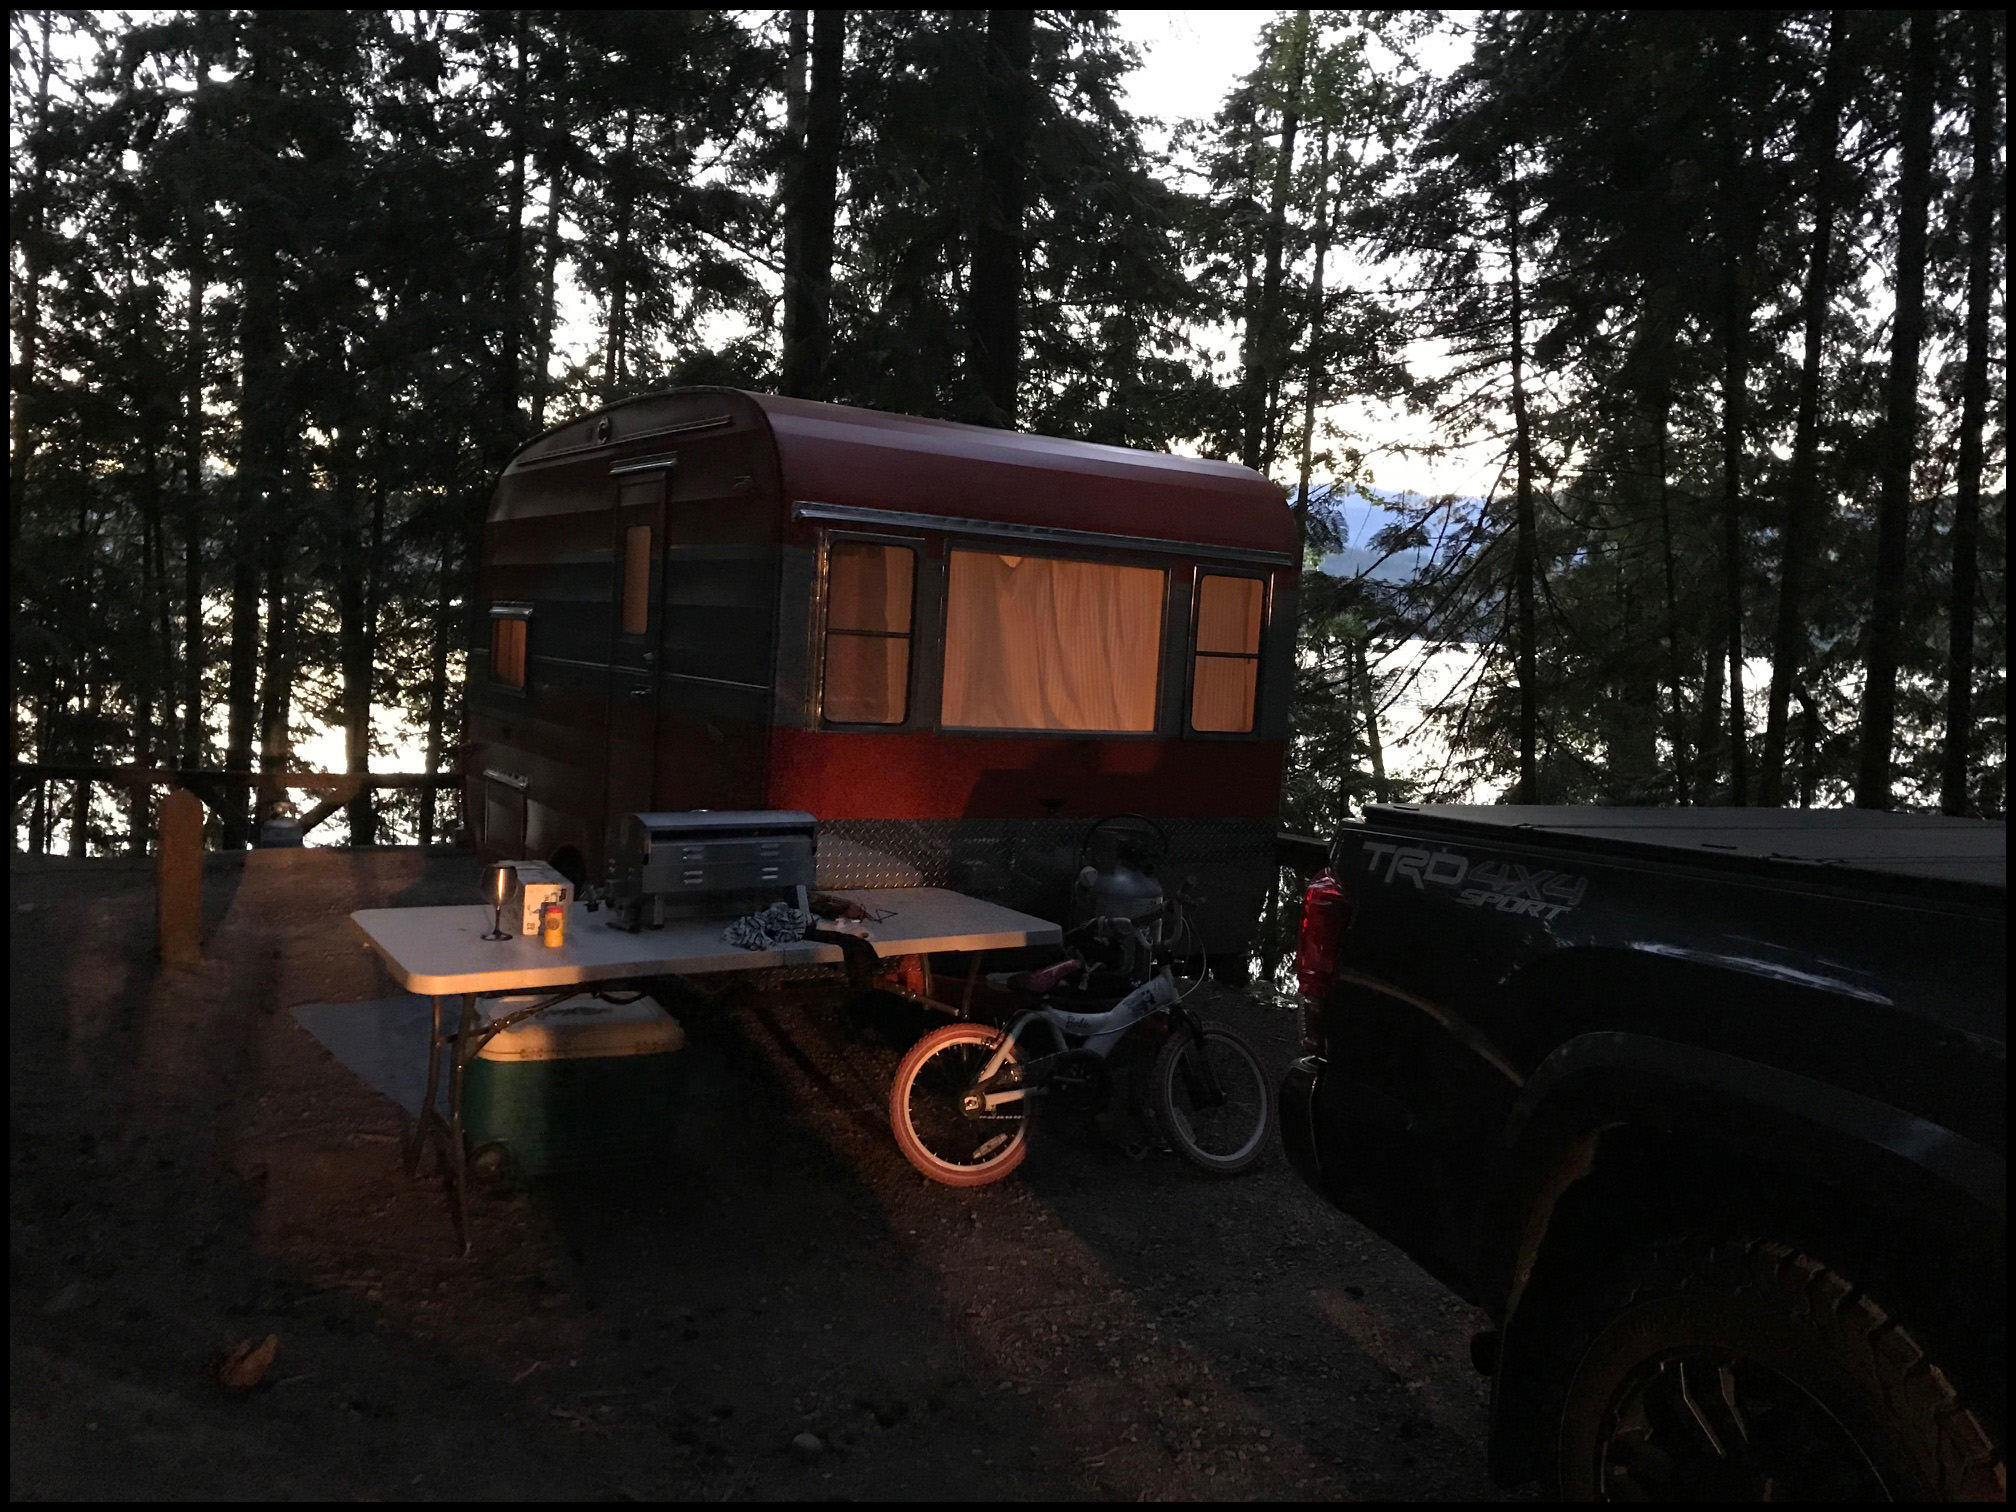
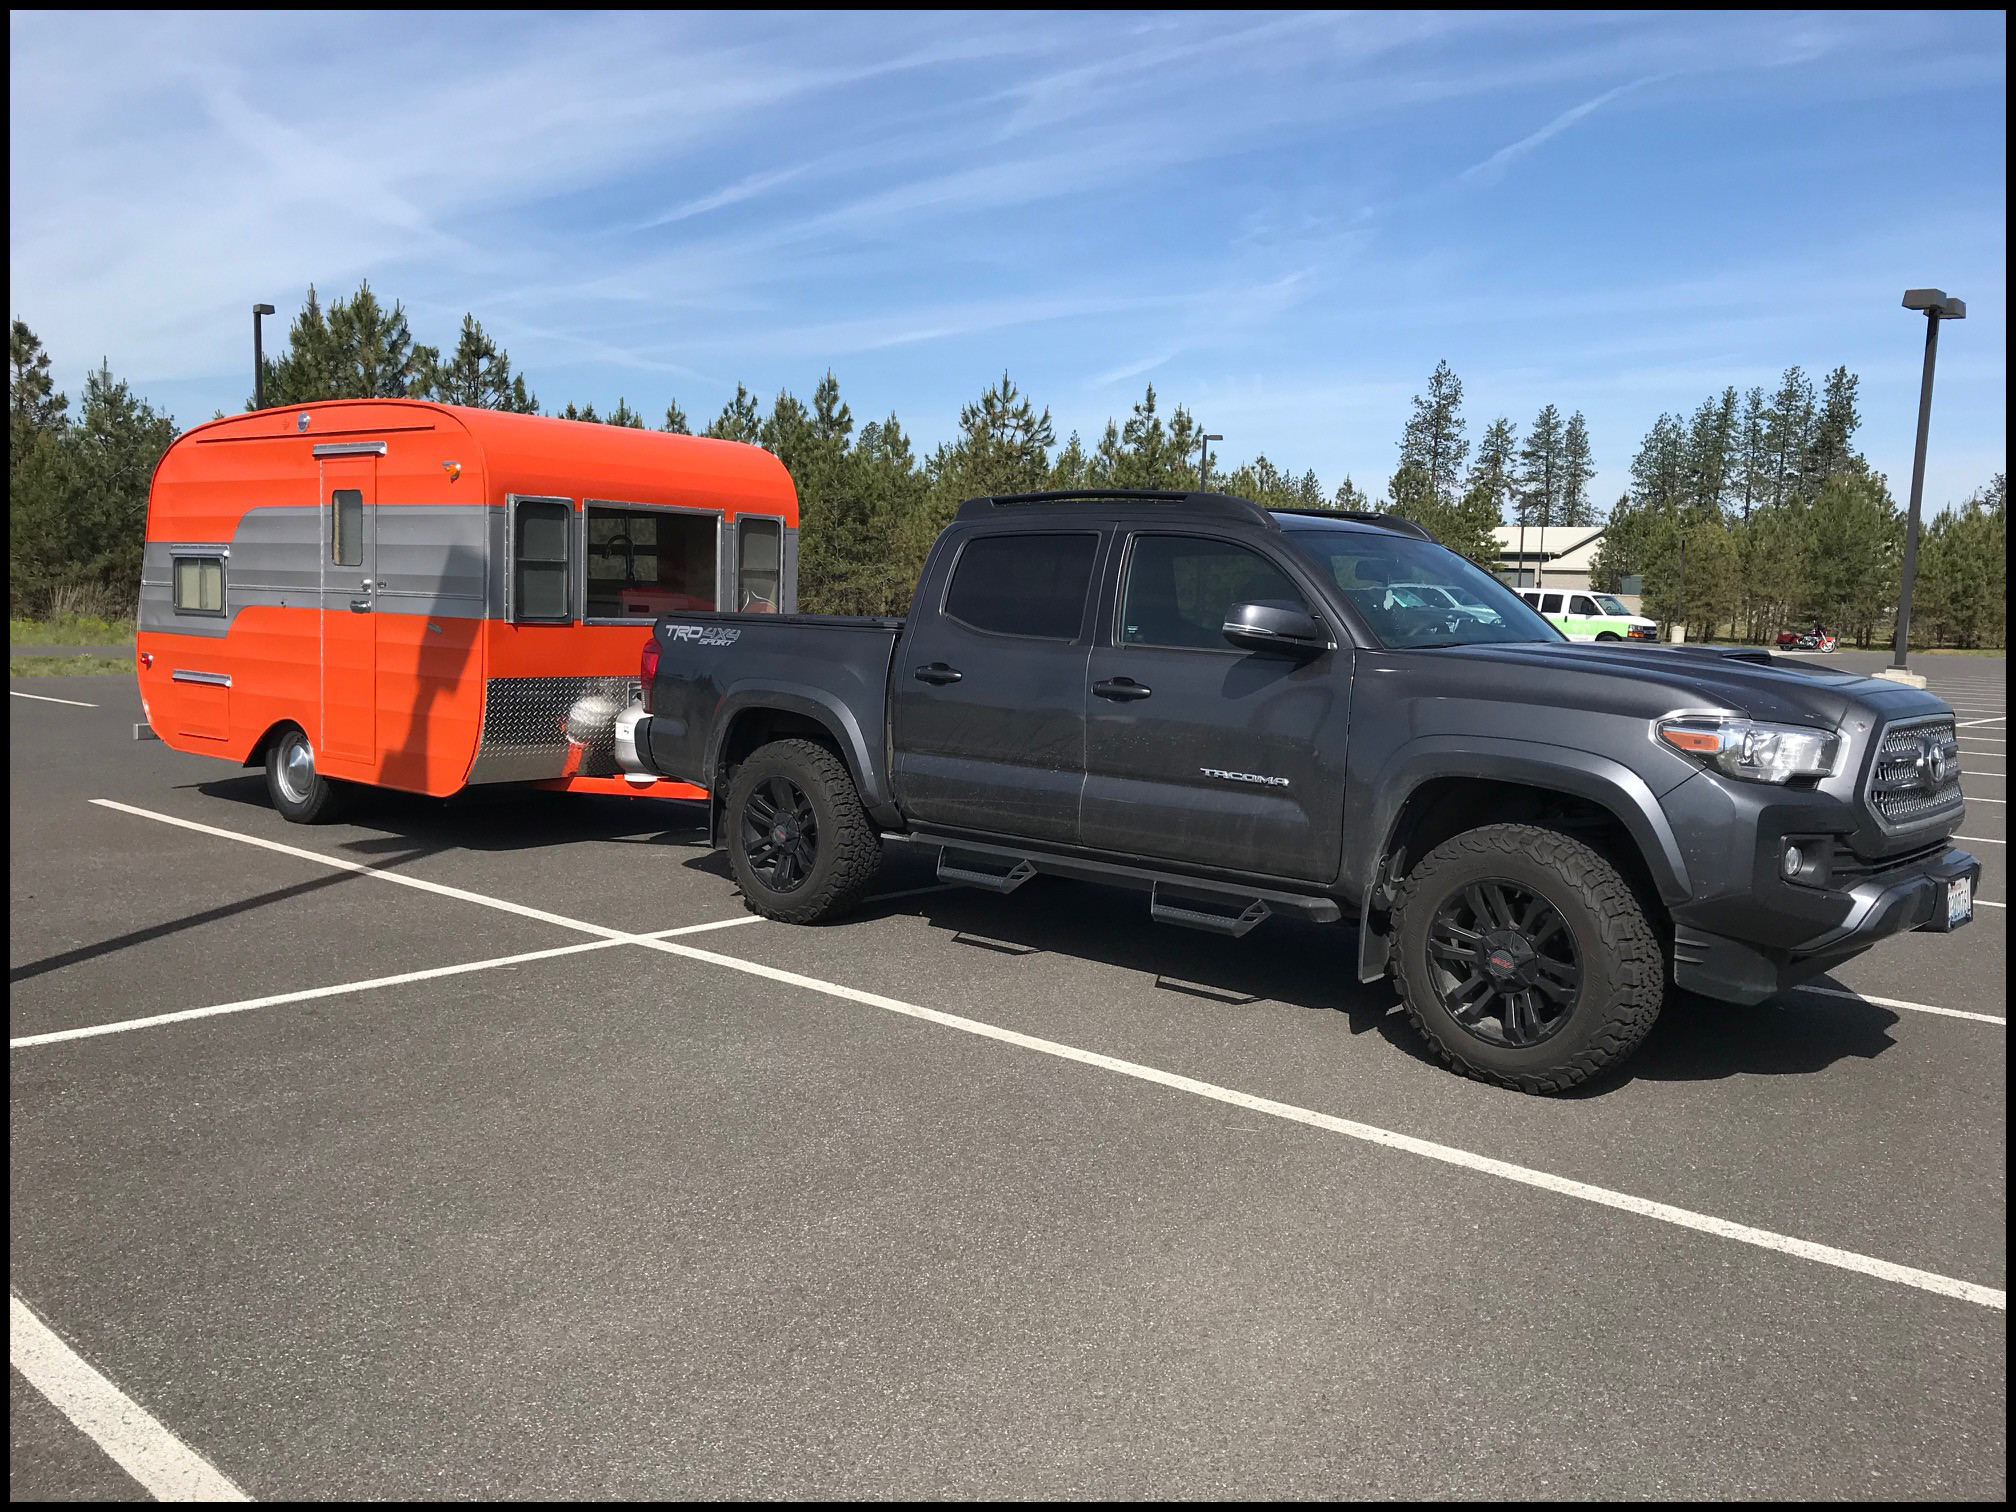
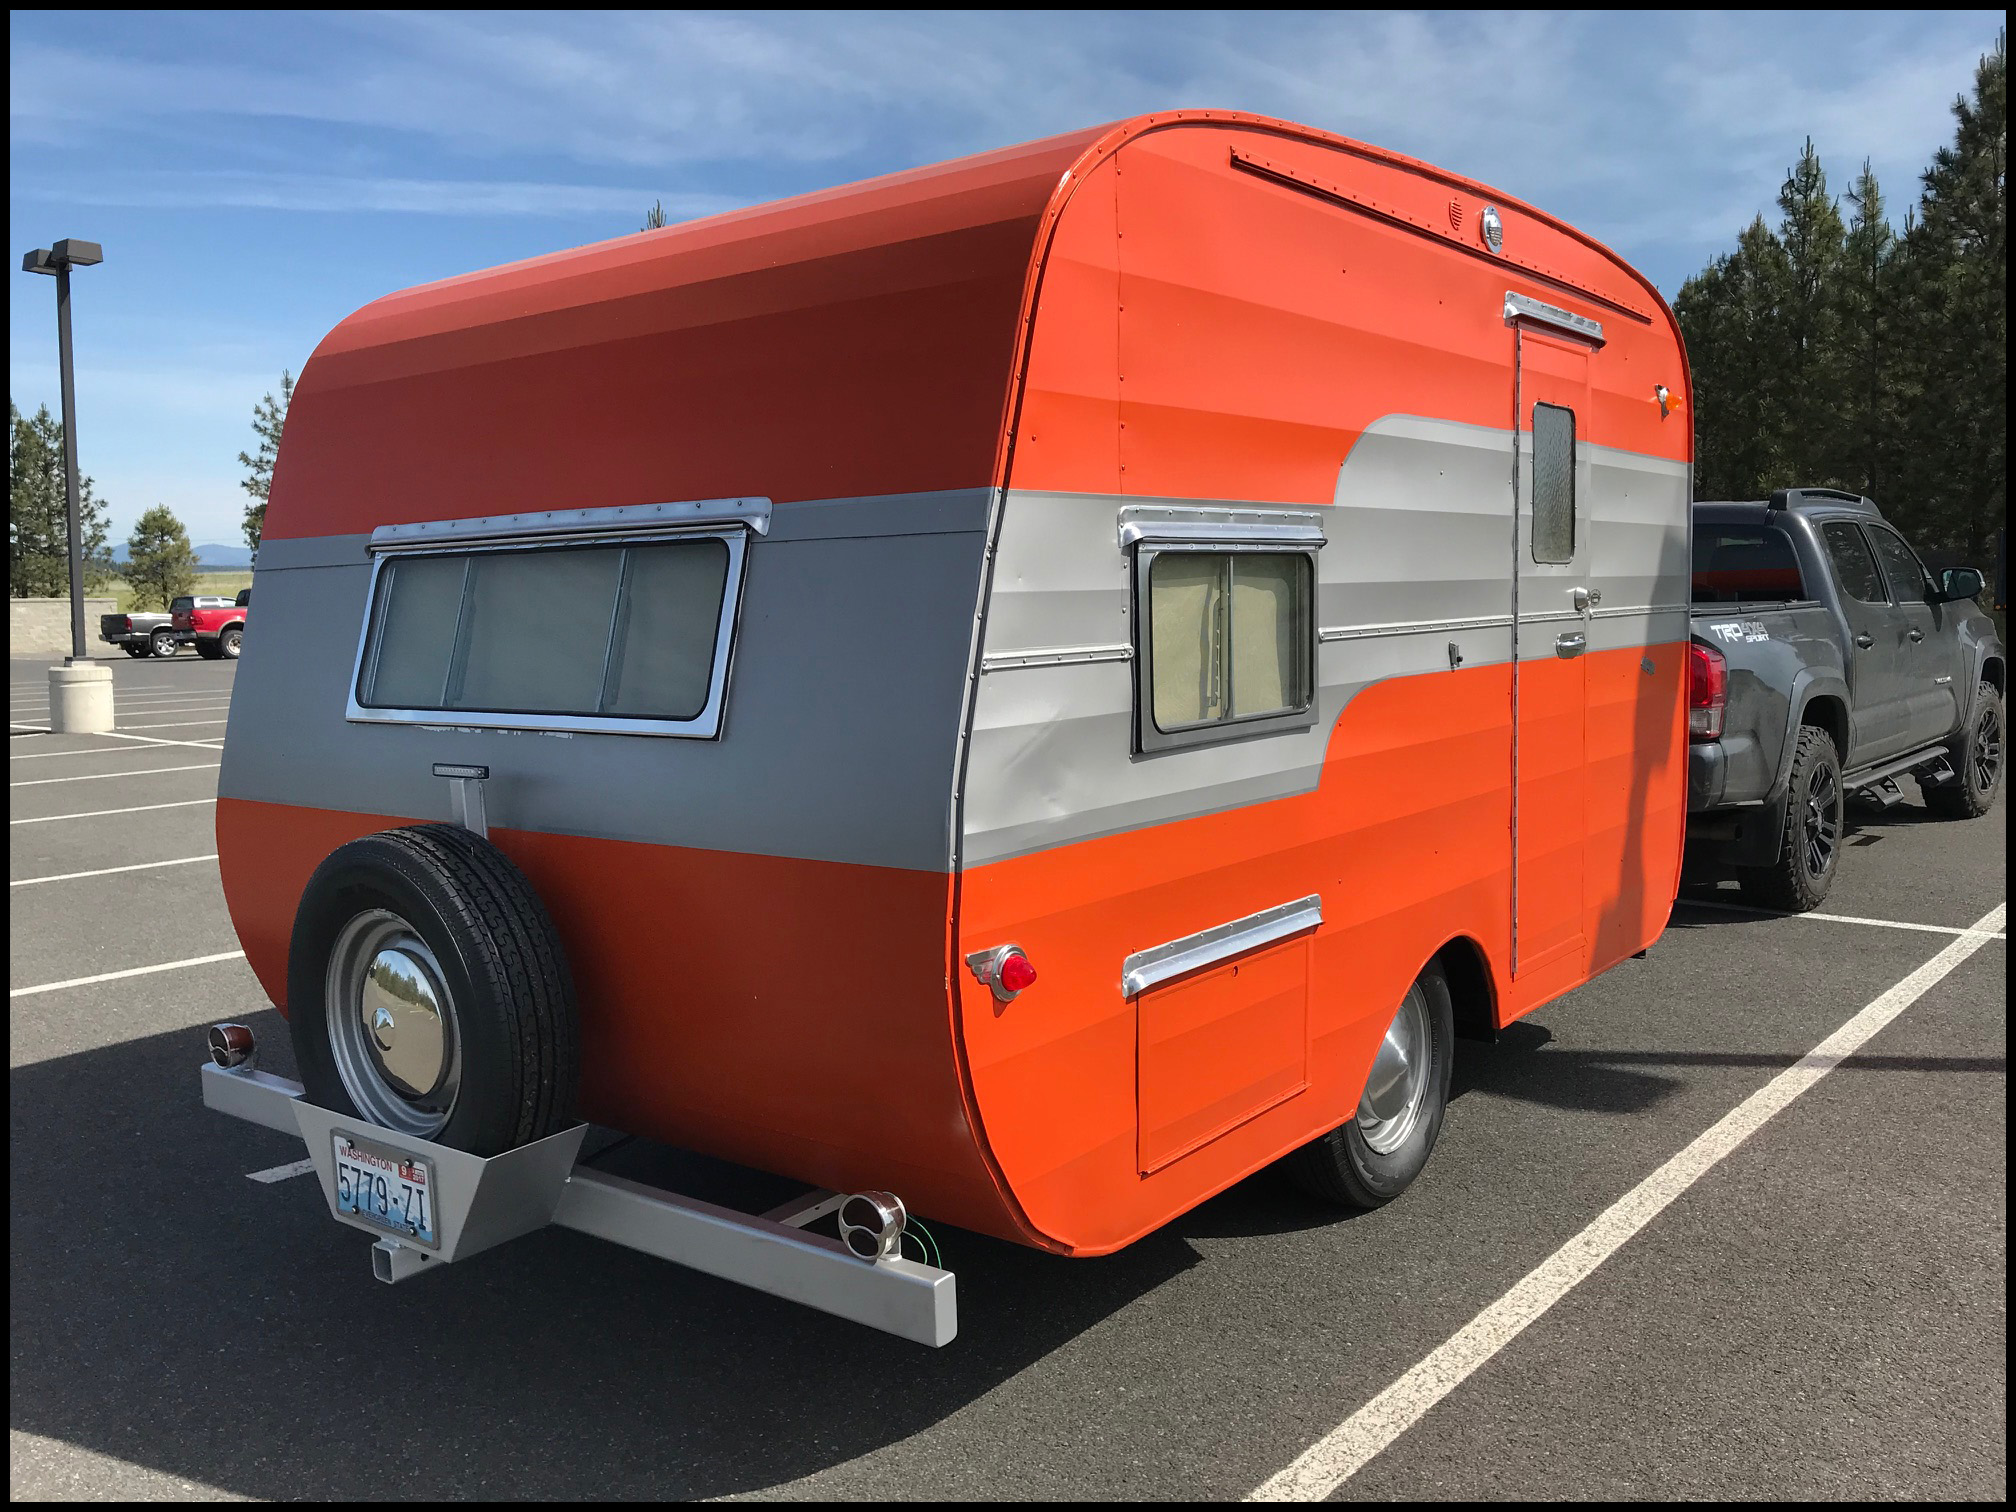
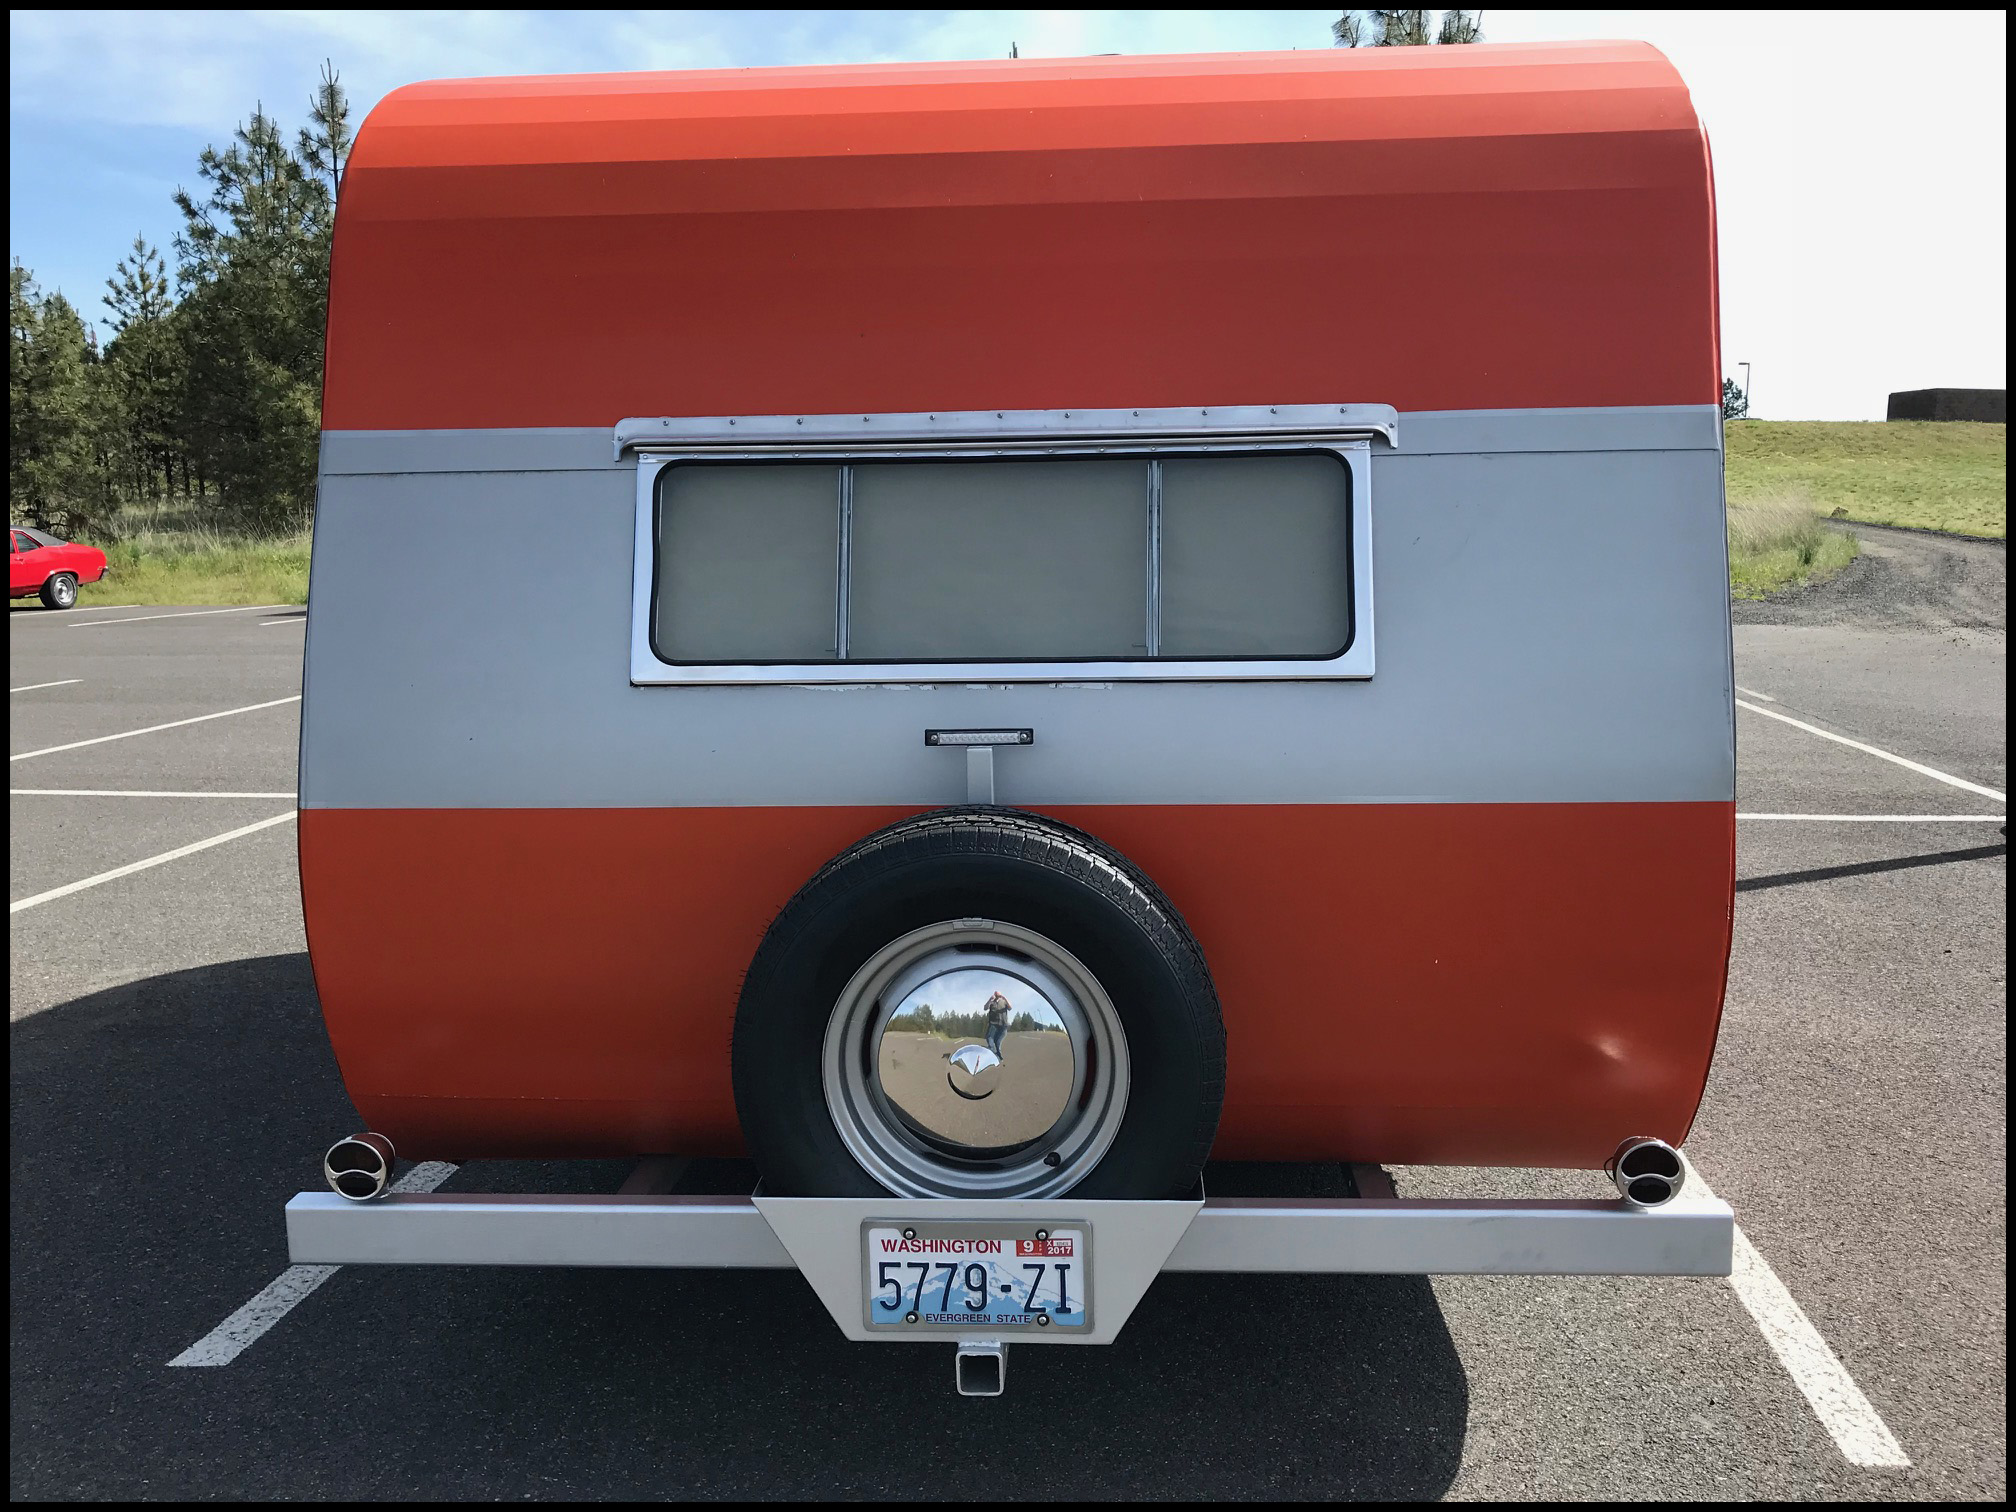
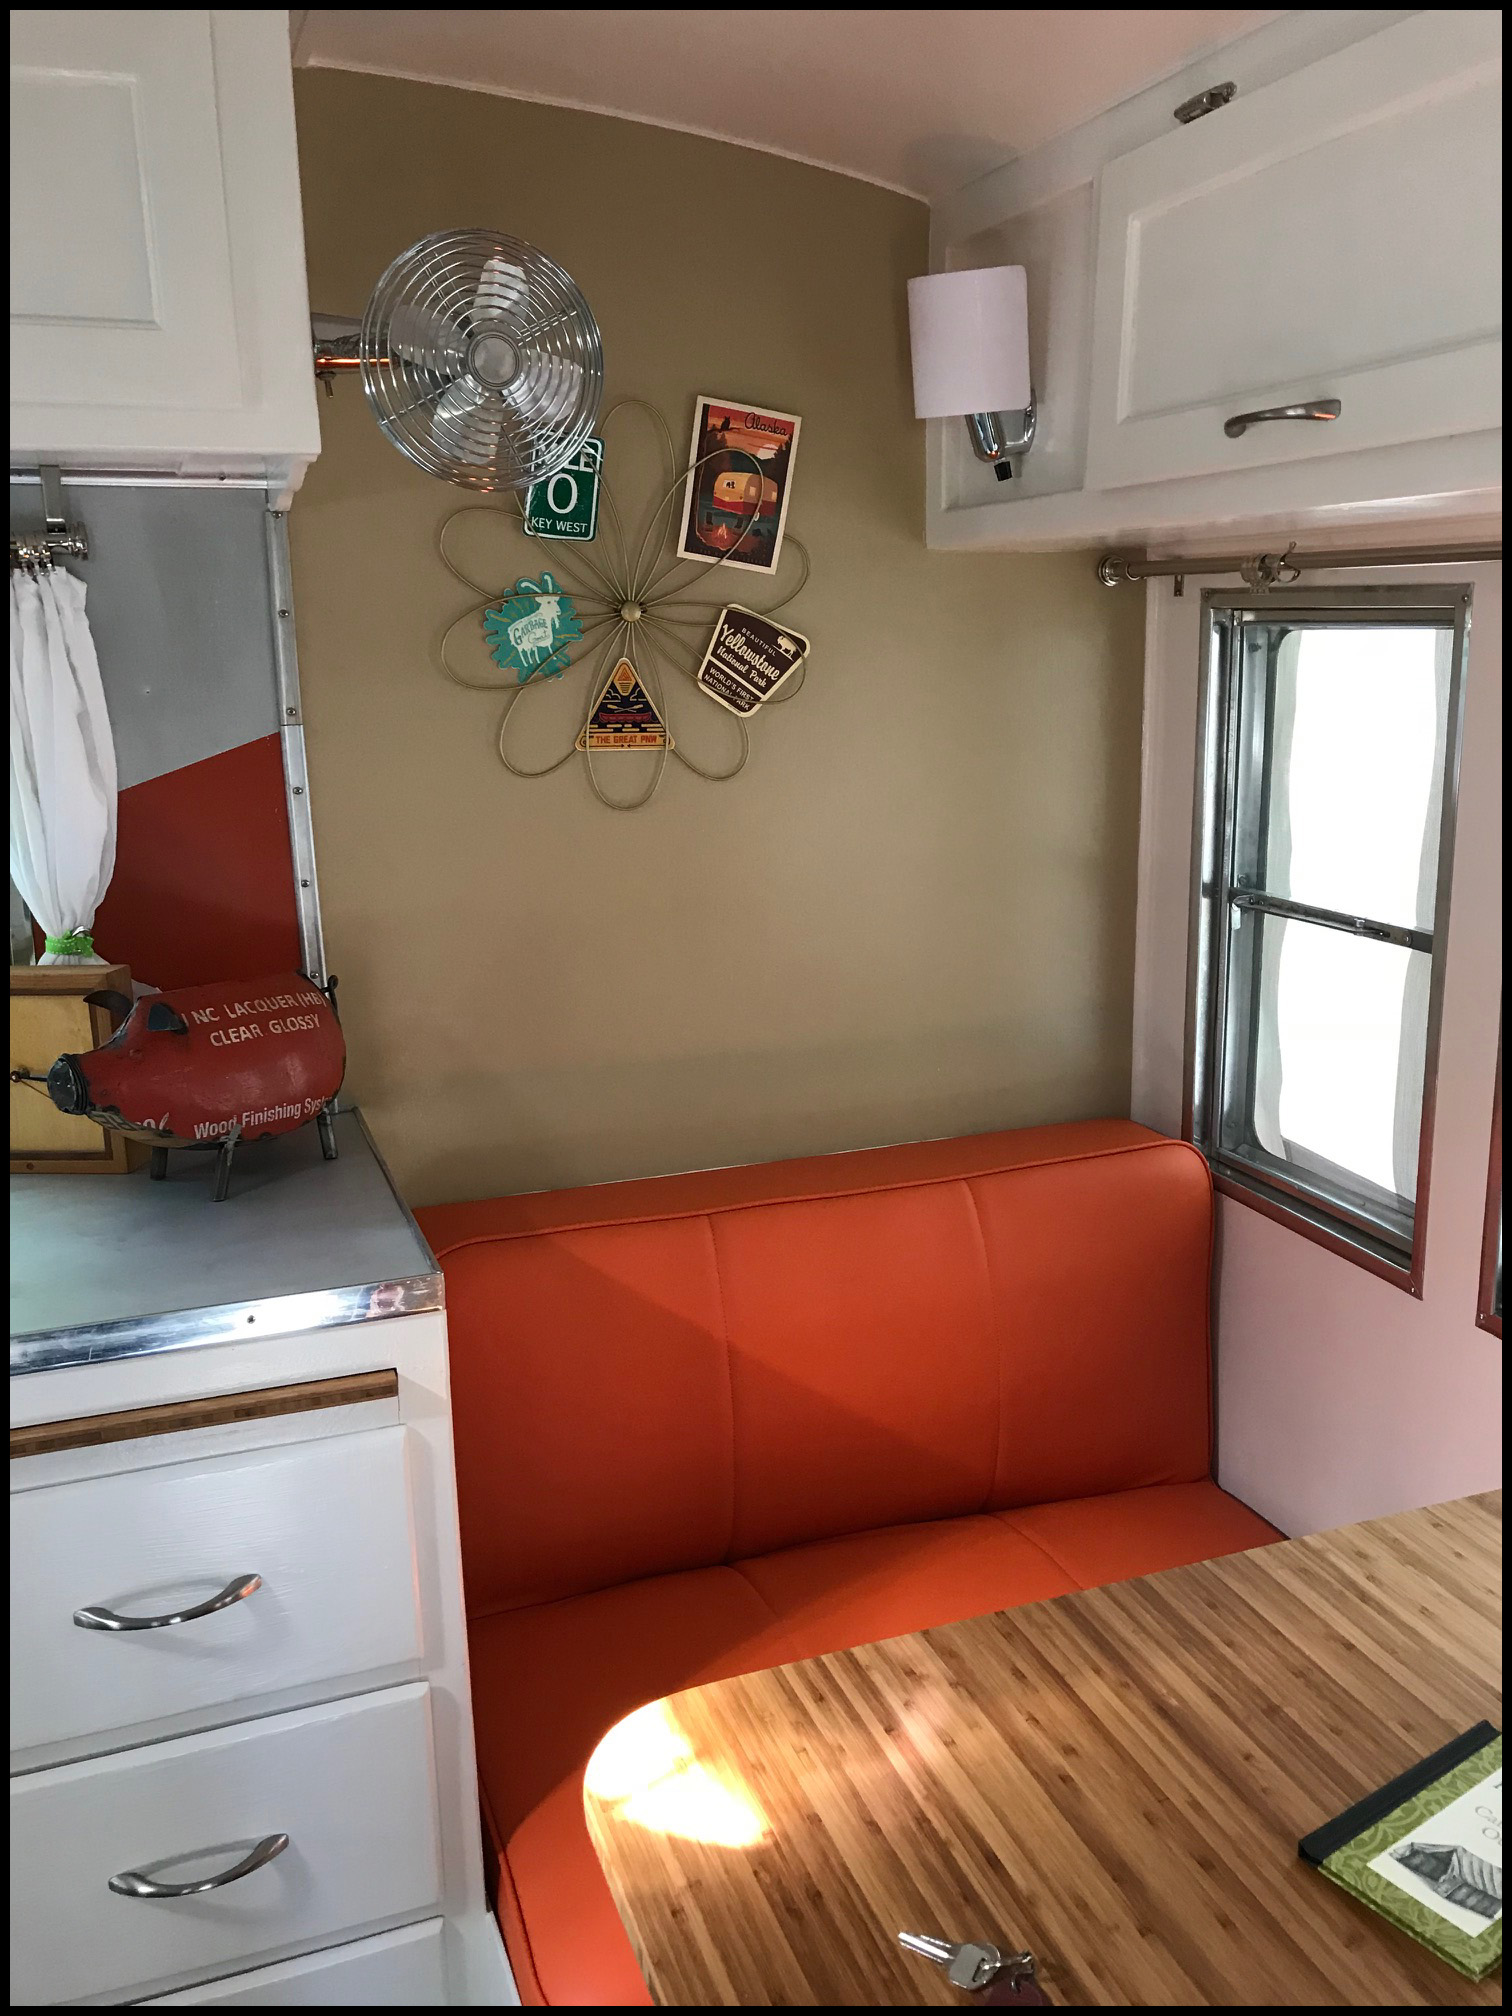
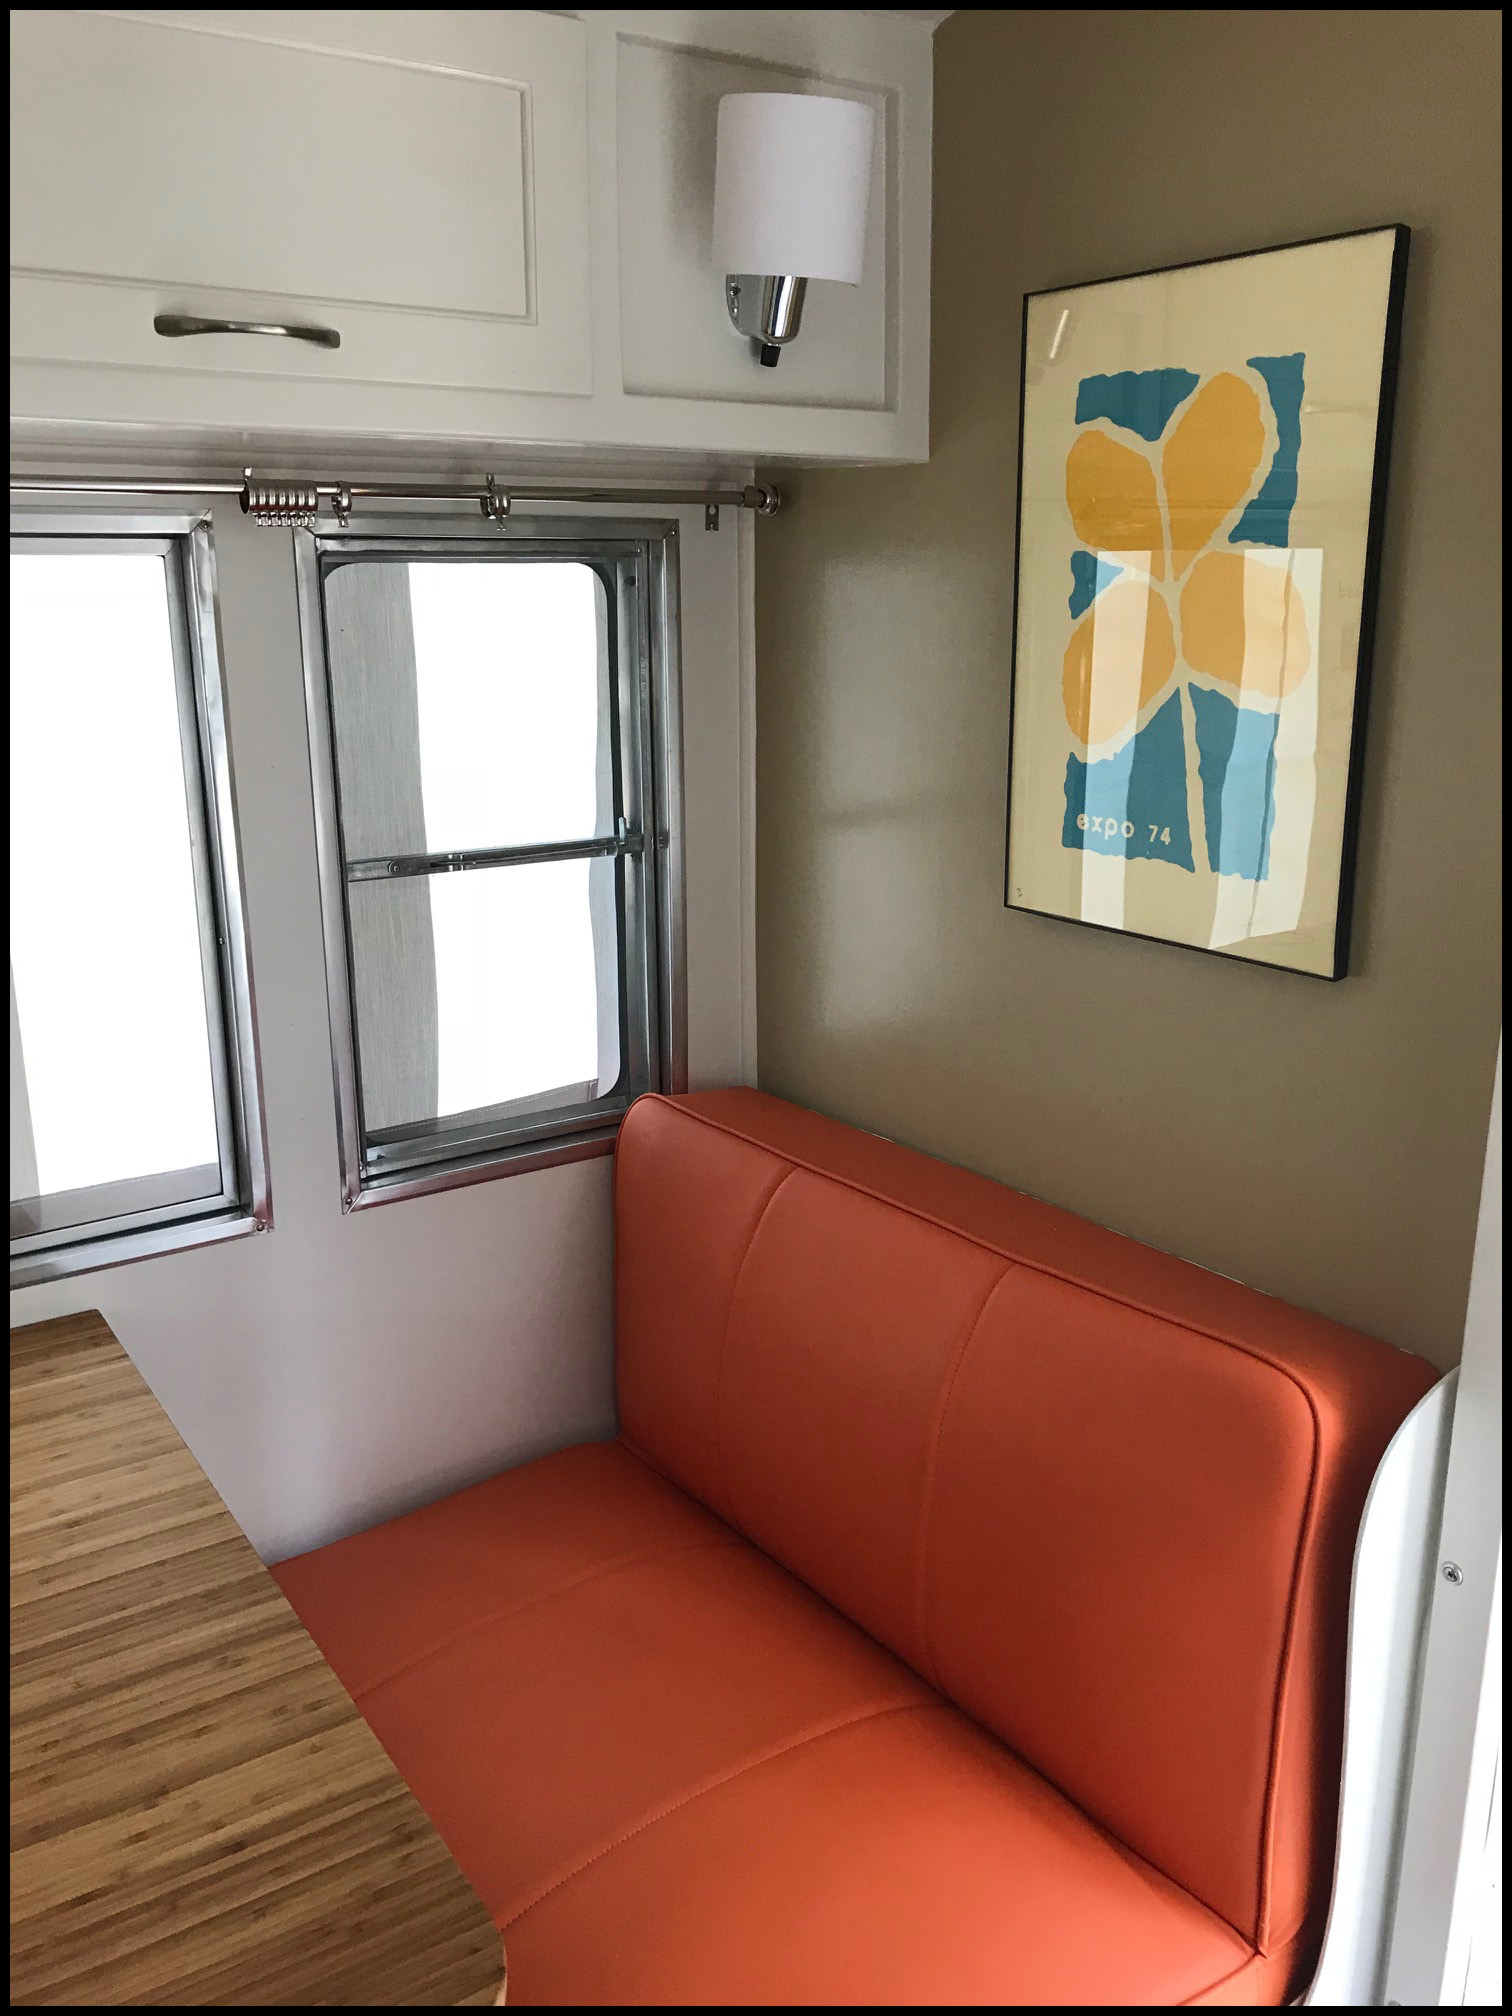
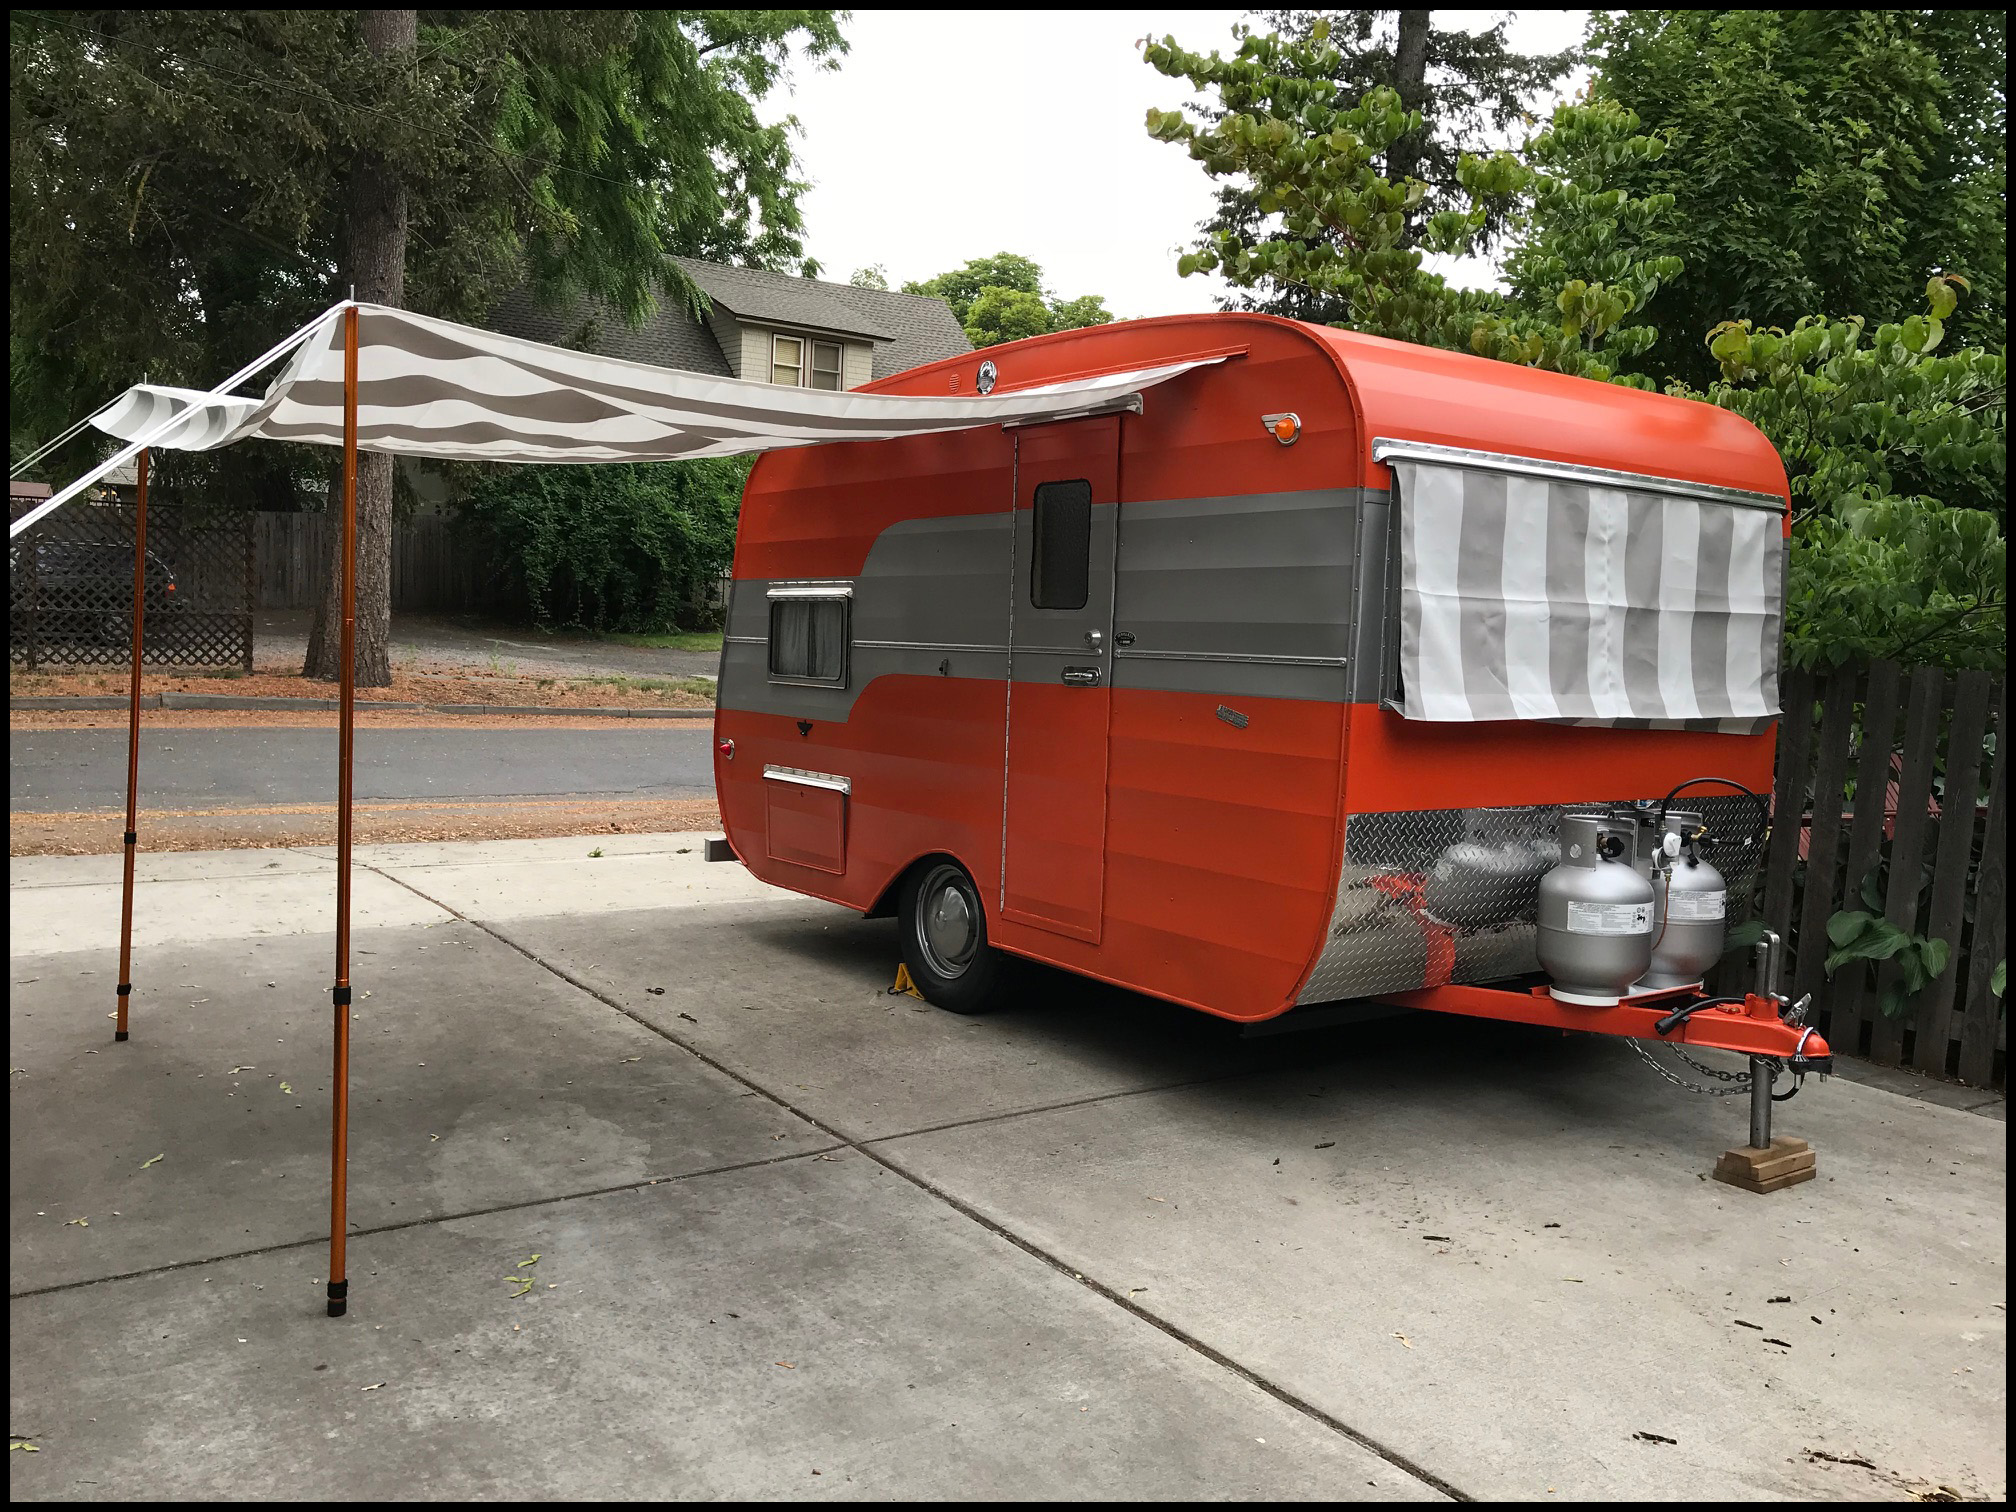
The end is near!
After what seemed like an eternity, Nampa Jack is almost complete. This will be my final post… But I will add pix after the final touches like curtains and anything else of note are done and ready for primetime. — 2 years of laborious learning is complete. |
 |
Let's dive right in...
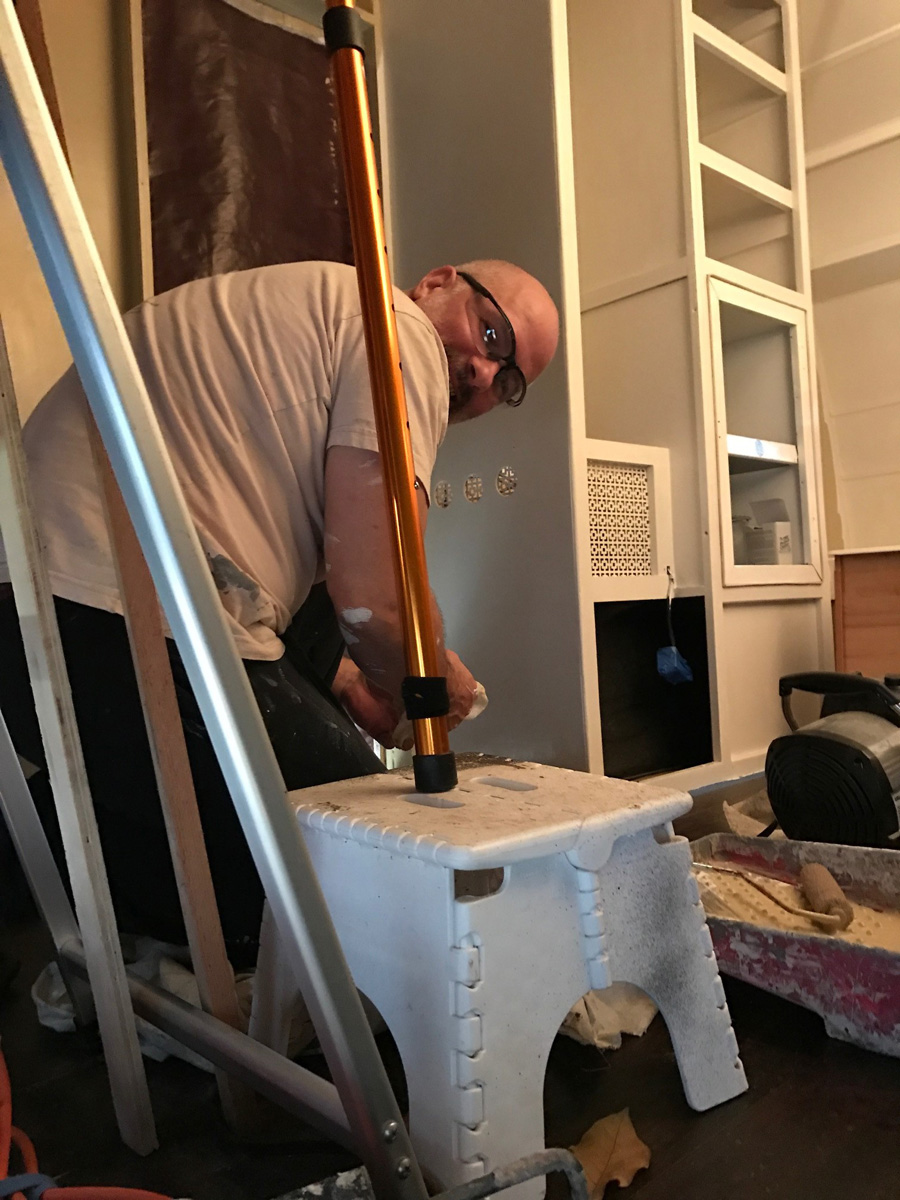
So putty tape… Let me just say not all tapes are equal… I had some ¾ in, some 1 in, light grey (almost white) and dark grey. Of all of them, I liked the 1 in dark grey from Vintage Trailer Supply. The others, specifically the lighter ones, were super sticky and hard to trim of the excess putty. Get the 1 inch for sure, the ¾ was just a bit too narrow for most applications and found myself cutting a lot of tape to make the gap that the 1 inch covered the first time. But make sure to get the 1 inch in dark grey. As for trimming, morning cool air and use a plastic knife like trimmer, see the pic below, curtesy of Doug Johnson, this, instead of a metal edge, worked great left a smooth edge and didn’t scratch the new paint. Also, I found it best to mount the window, then wait a day or two for all the extra tape to ooze out before the trim. That or you’ll find yourself doing it twice.
The bumper… Ugh. You know when you’re in the throes of the restore your mind is more focused on looks than the reality of the situation. I wanted a specific look, and though the fabricator voiced his concerns about weight, I had him make it the way I wanted and that is what he did… all 100 pounds of it… Or so it feels. That bumper and the fact I put the battery under the bed (seemed like a good idea at the time) put sooo much weight on the back end that I am finding myself packing the front with a bunch of gear to stop sway… I thought about moving the battery (almost 70 lbs) to the front, but with voltage drop and the 15+ foot cable run, I am not sure what to do. The way I have packed it and the 20 gal water tank up front, she pulls good at 65, but I wish I had stopped and thought about these things before making decisions… so I’m passing it on to you to think about.
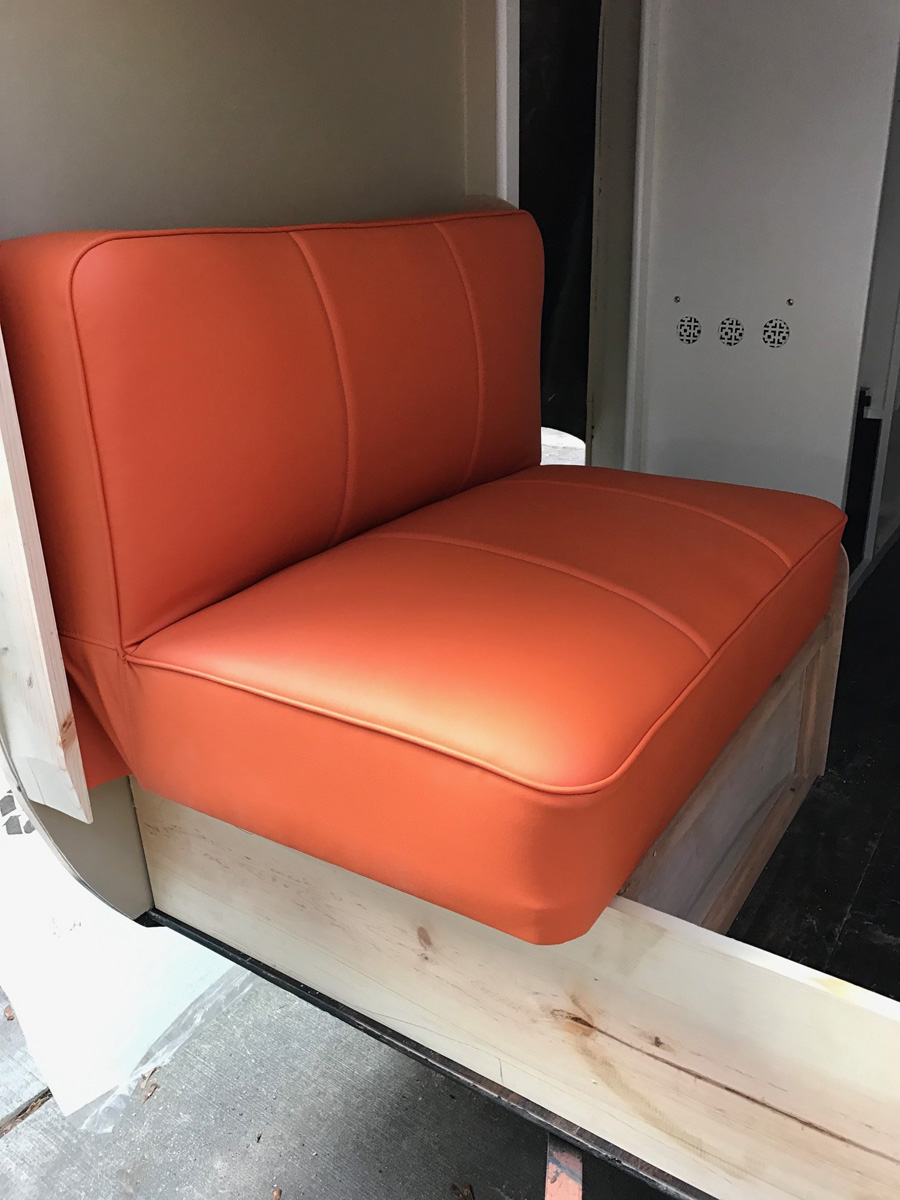
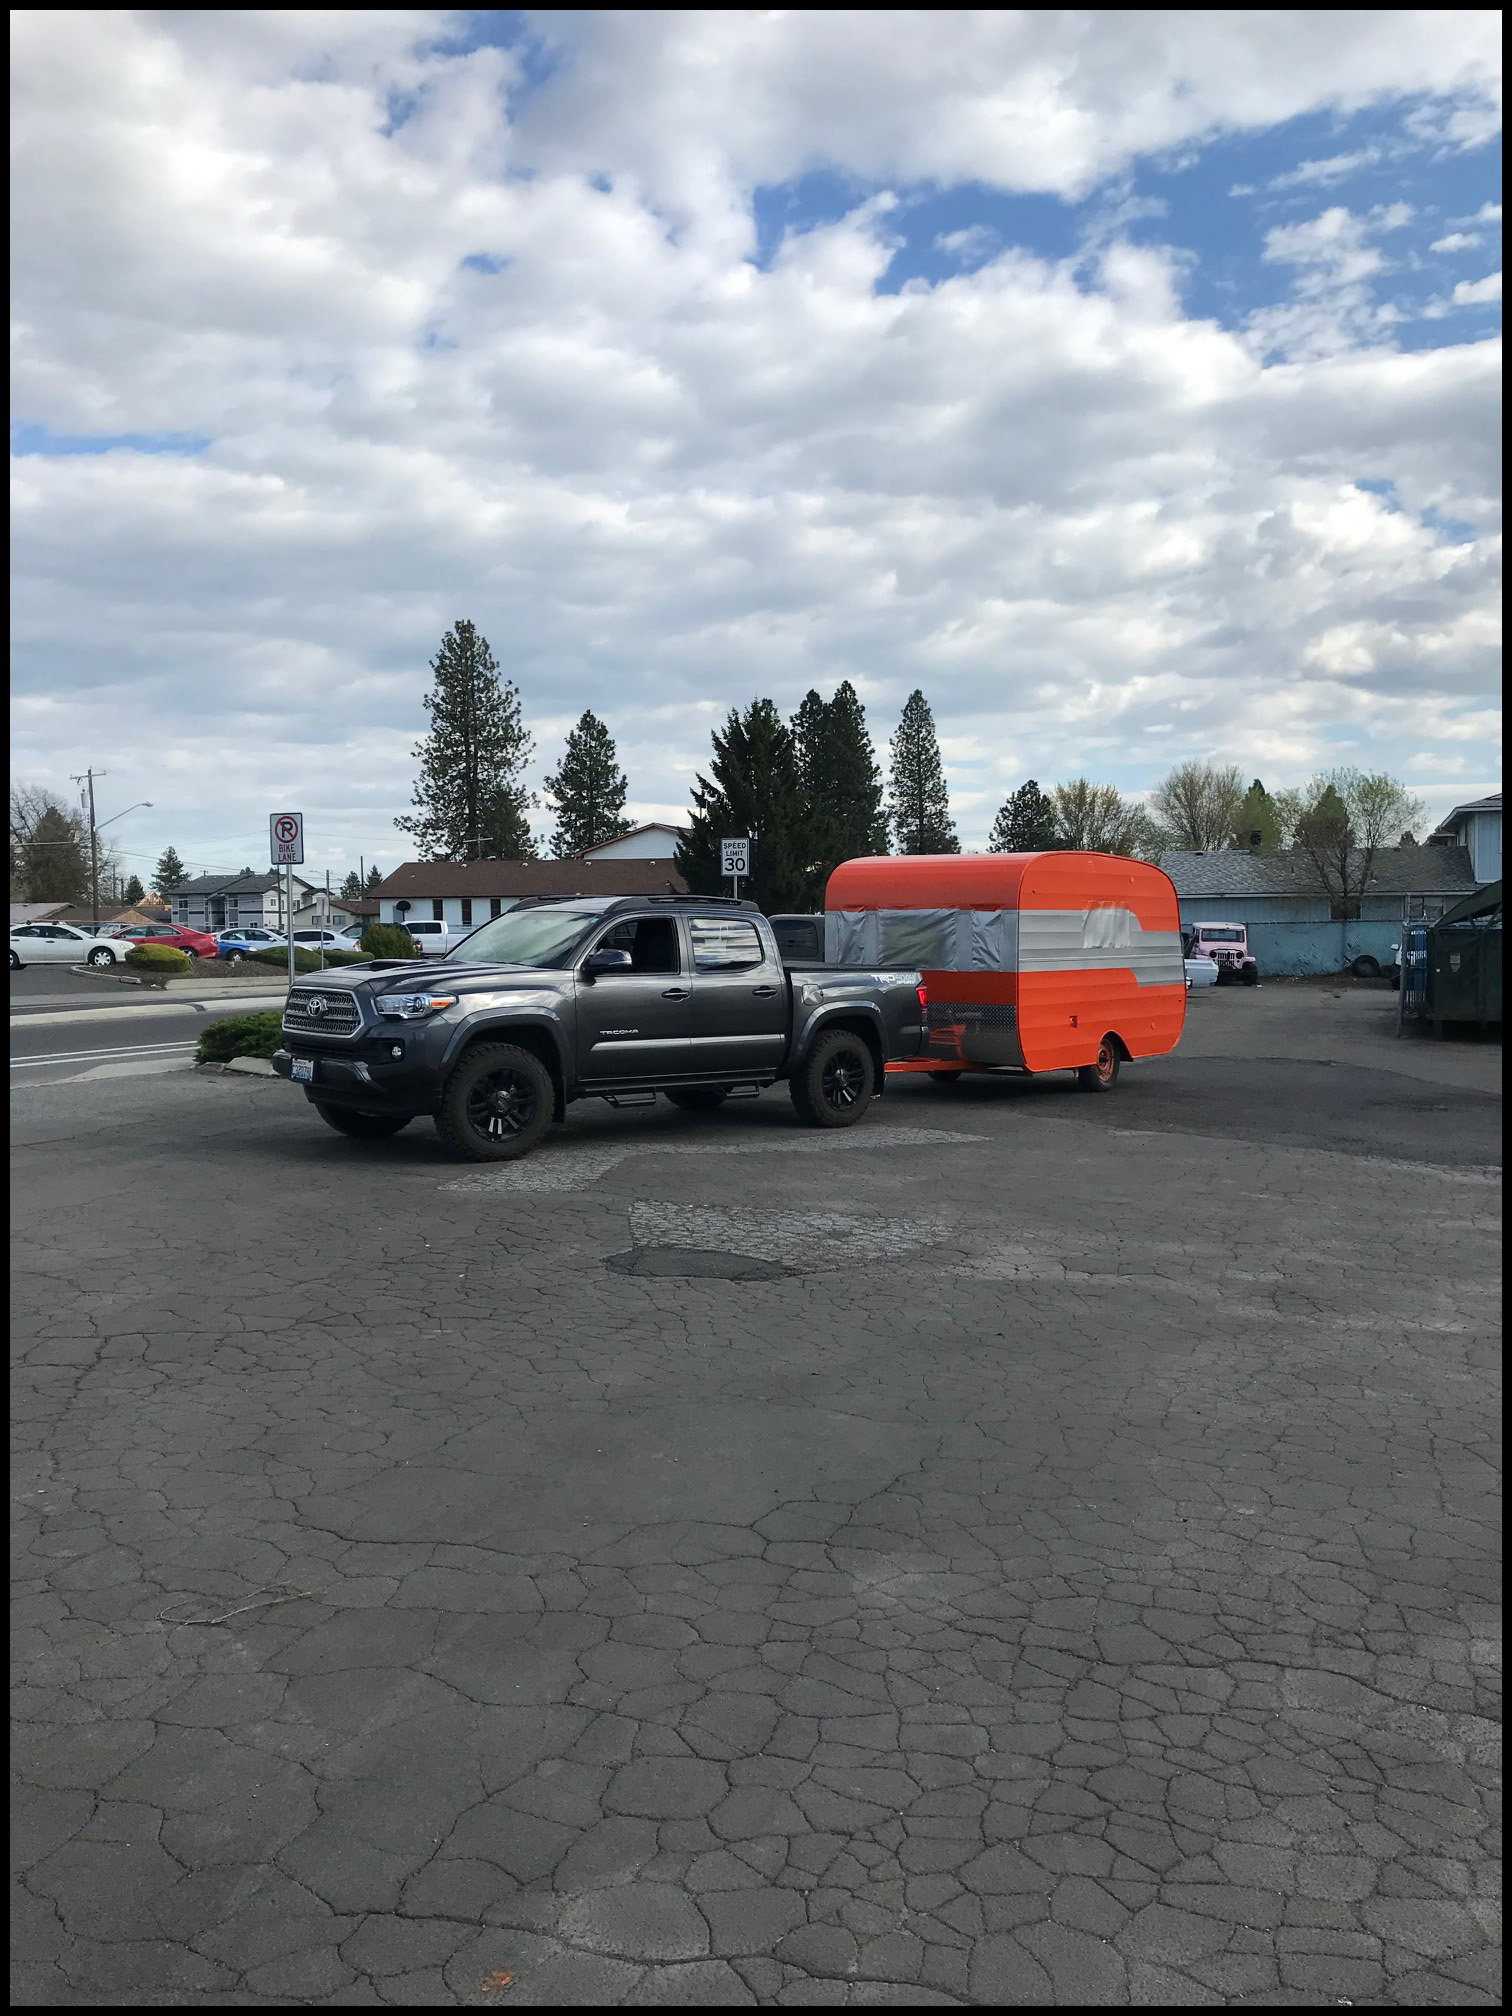
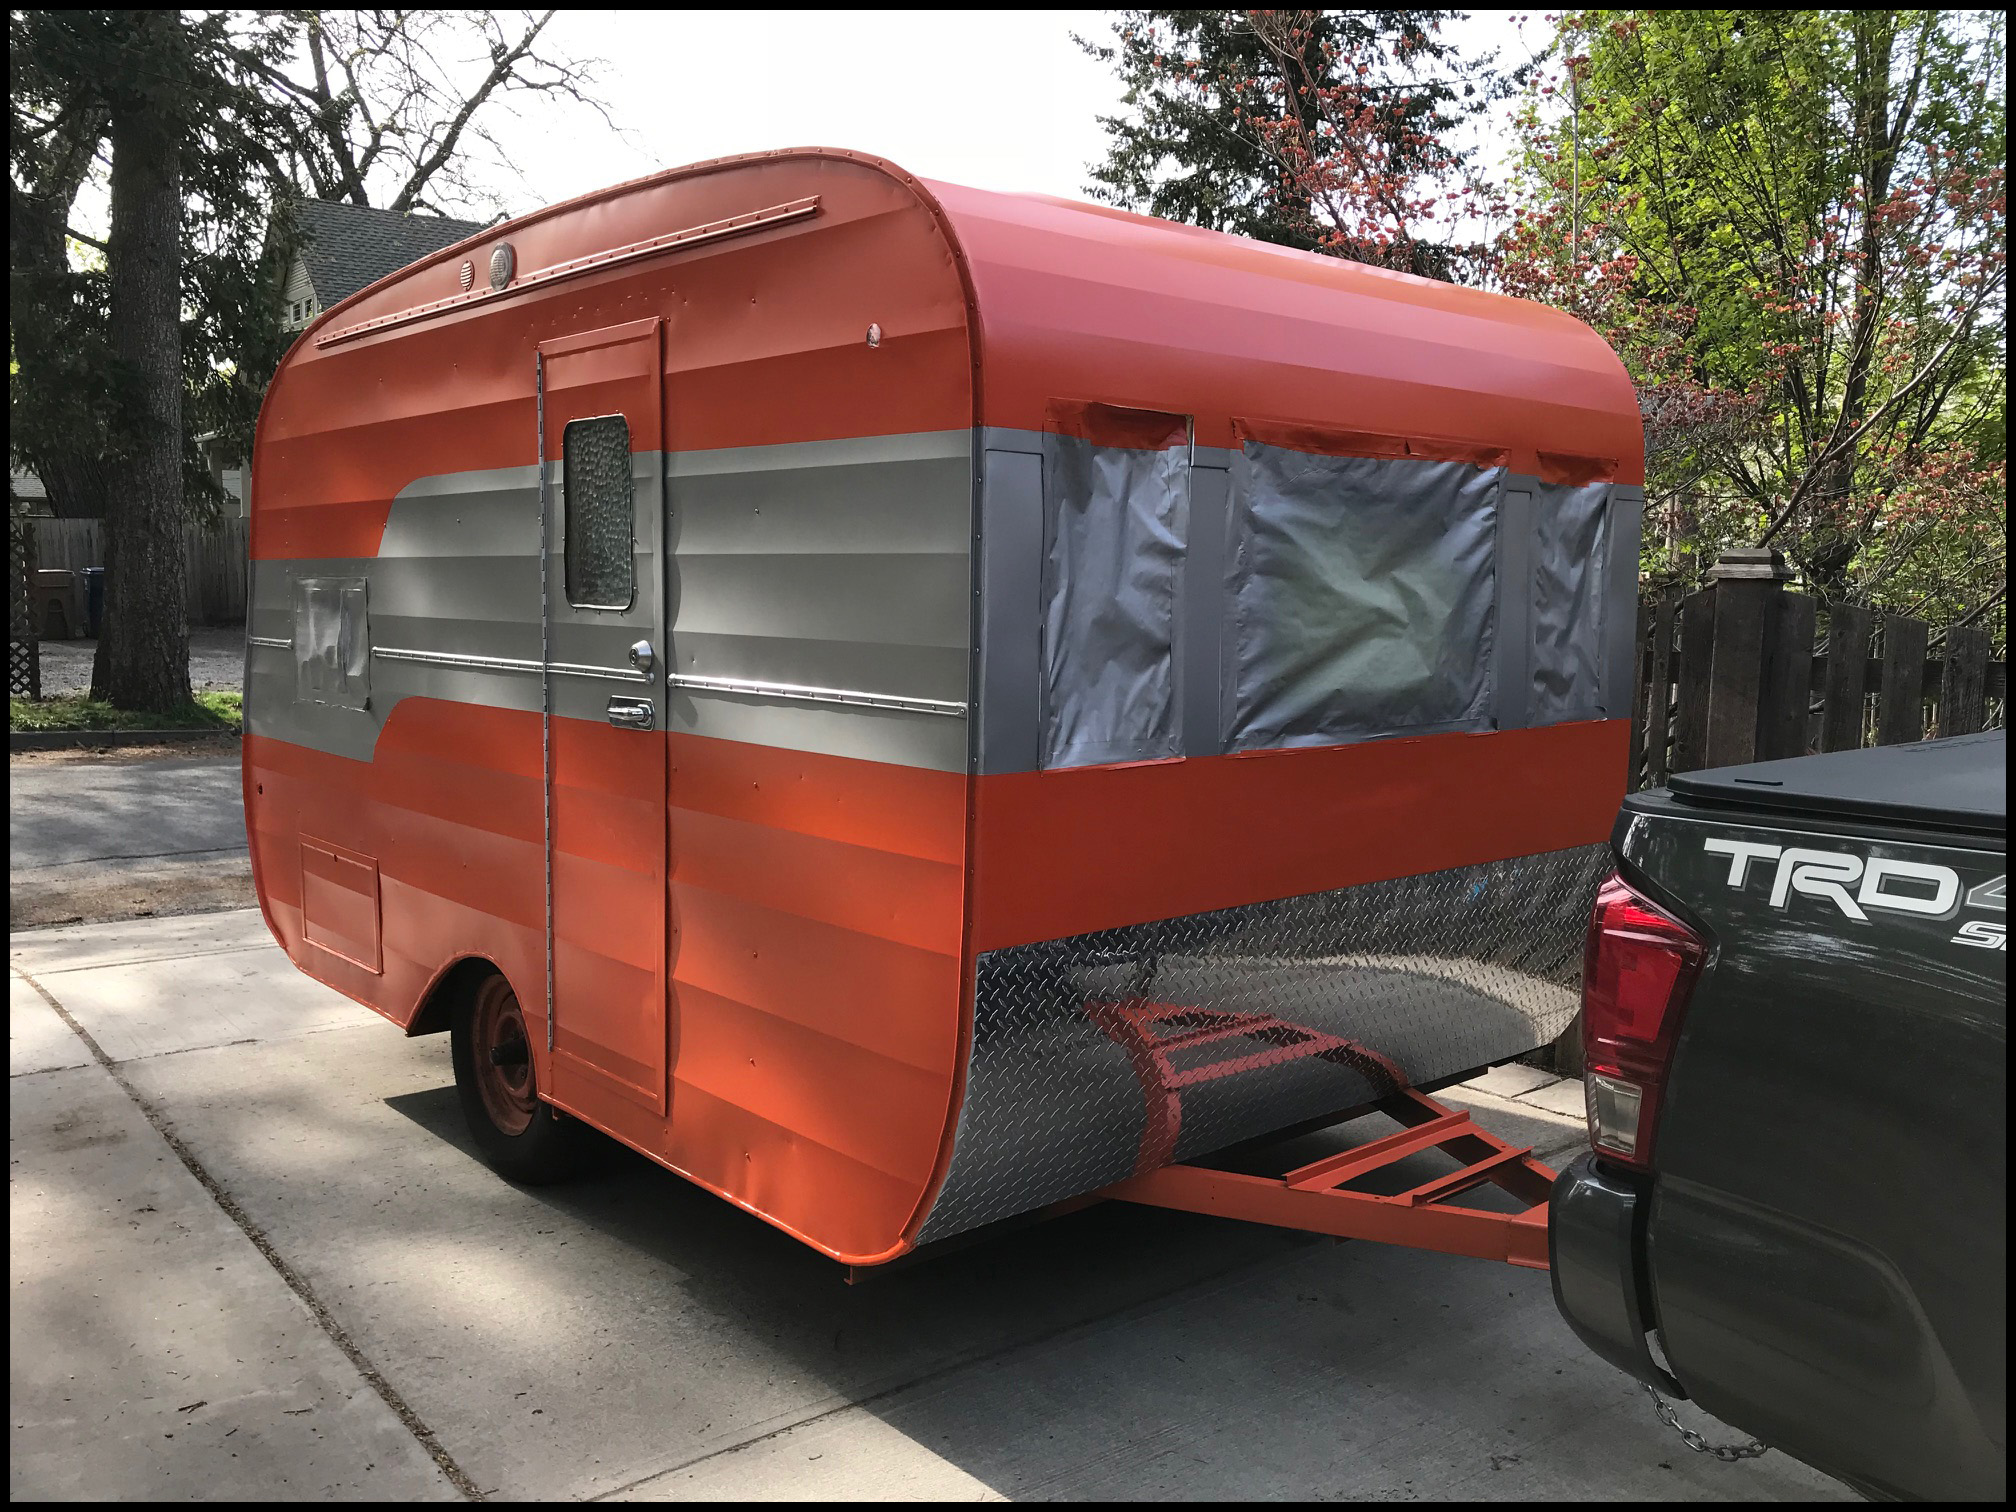
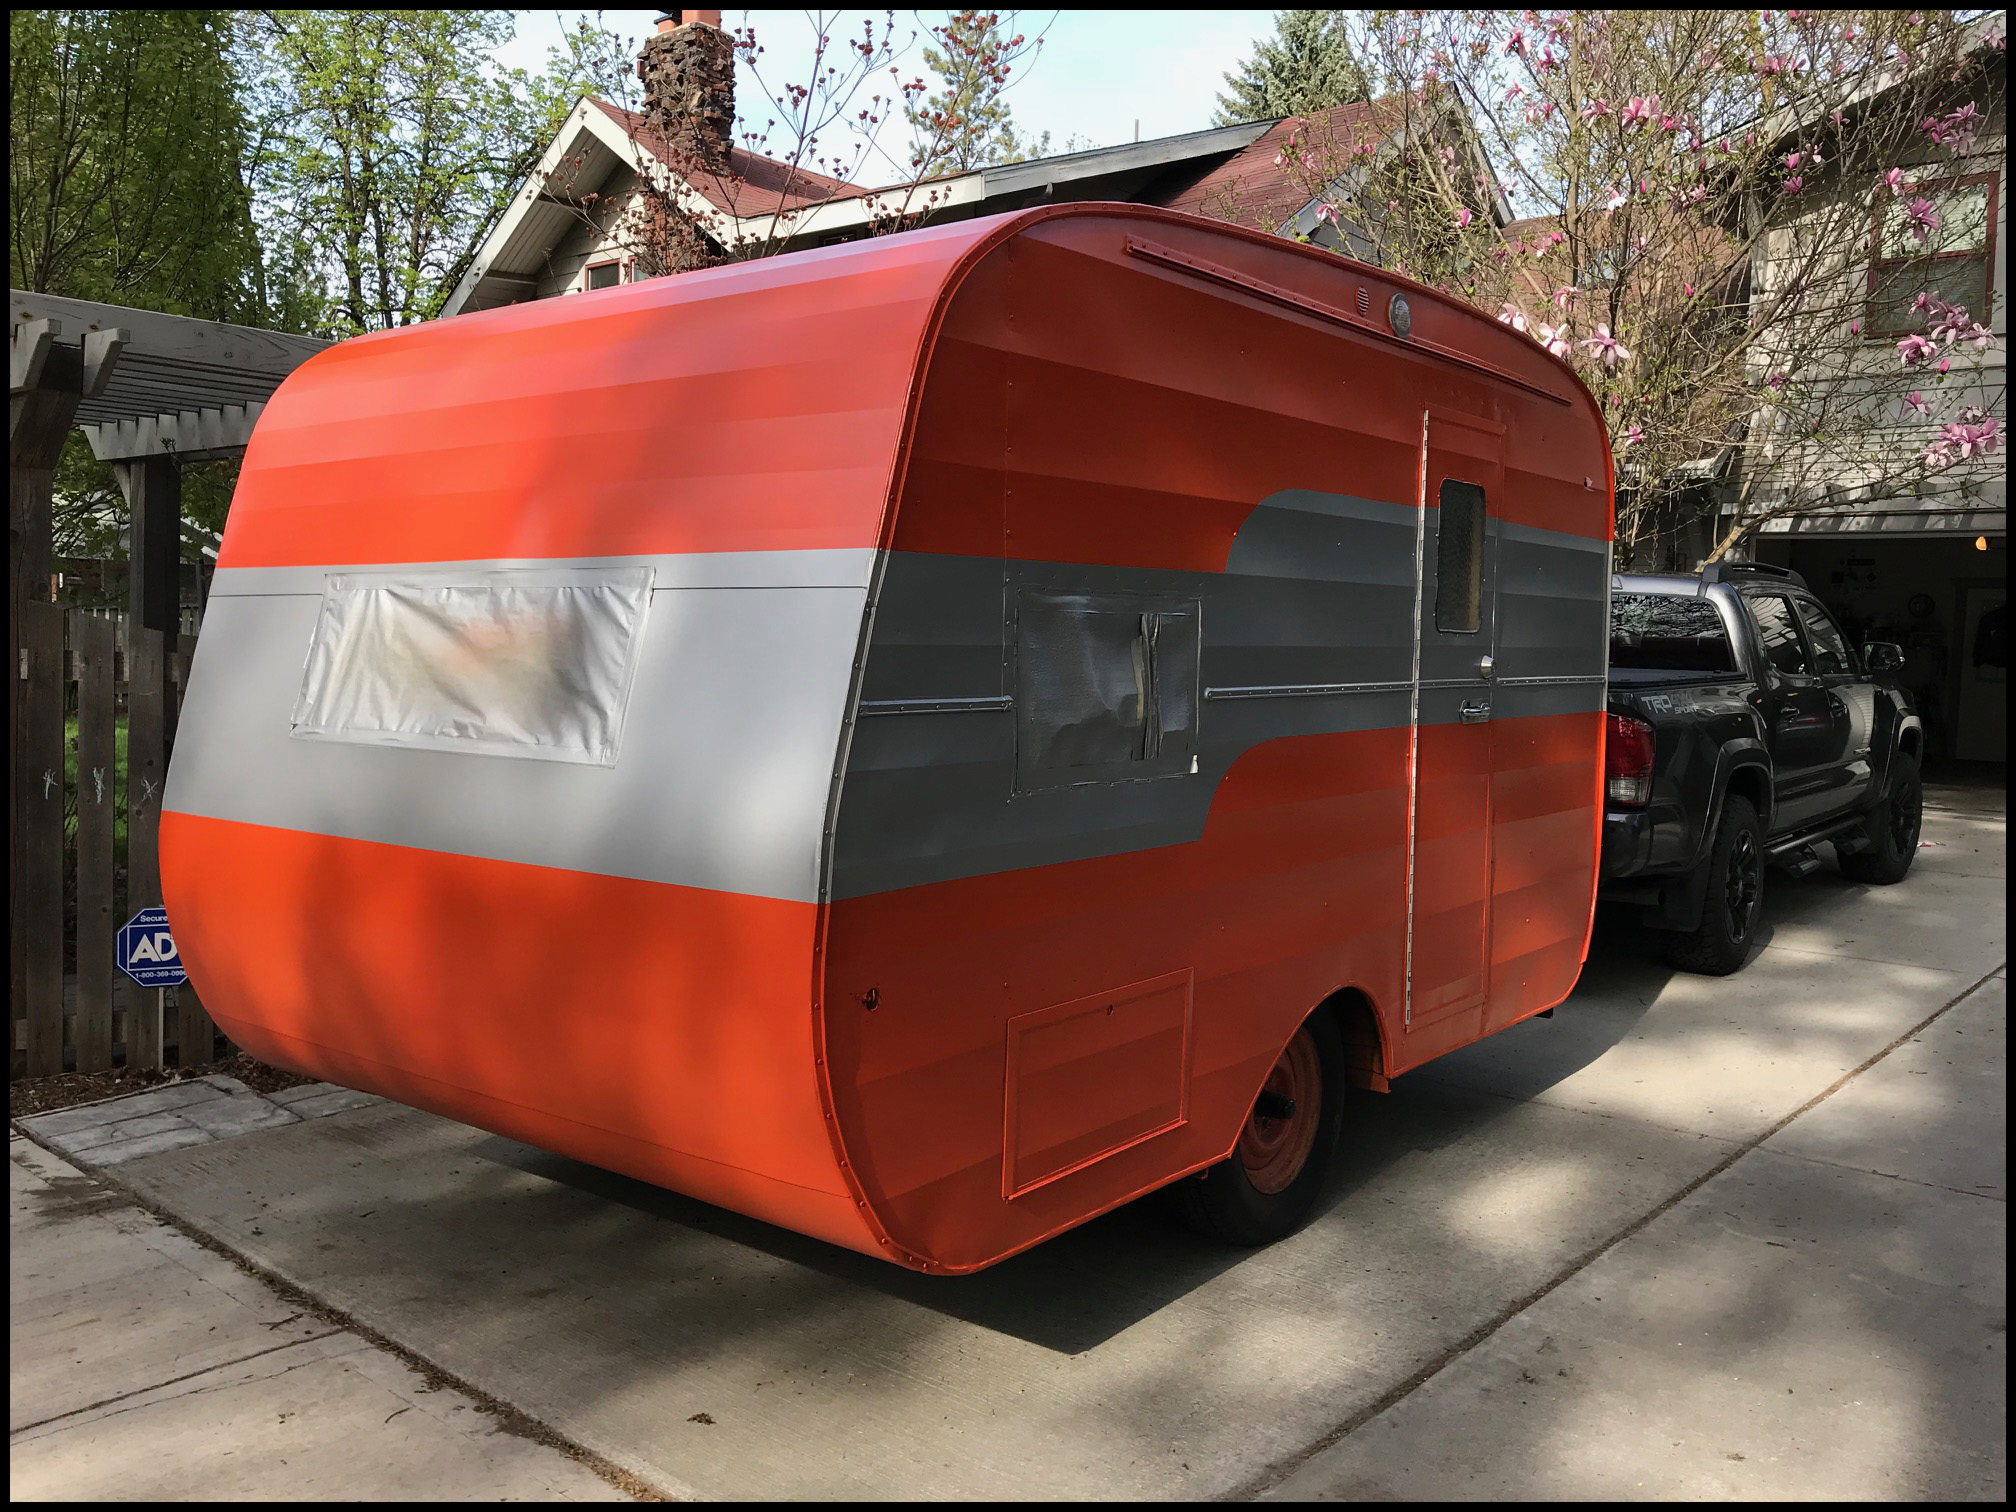
Once we got the trailer back from paint, it just didn’t feel done, so me and the wife decided an accent stripe was in order, see the pix for the slightly darker grey stripe between the orange and lighter grey. Oh a funny on the orange… we both were rushed to pick the colors, after work one day… hangry and tired, wife had a headache… so we were kinda like “yeah whatever… that one”. So now when we are asked about the color we call it headache orange… lol. Either that or visibility in case of a heli rescue?… So we could be seen from space?… You pick.
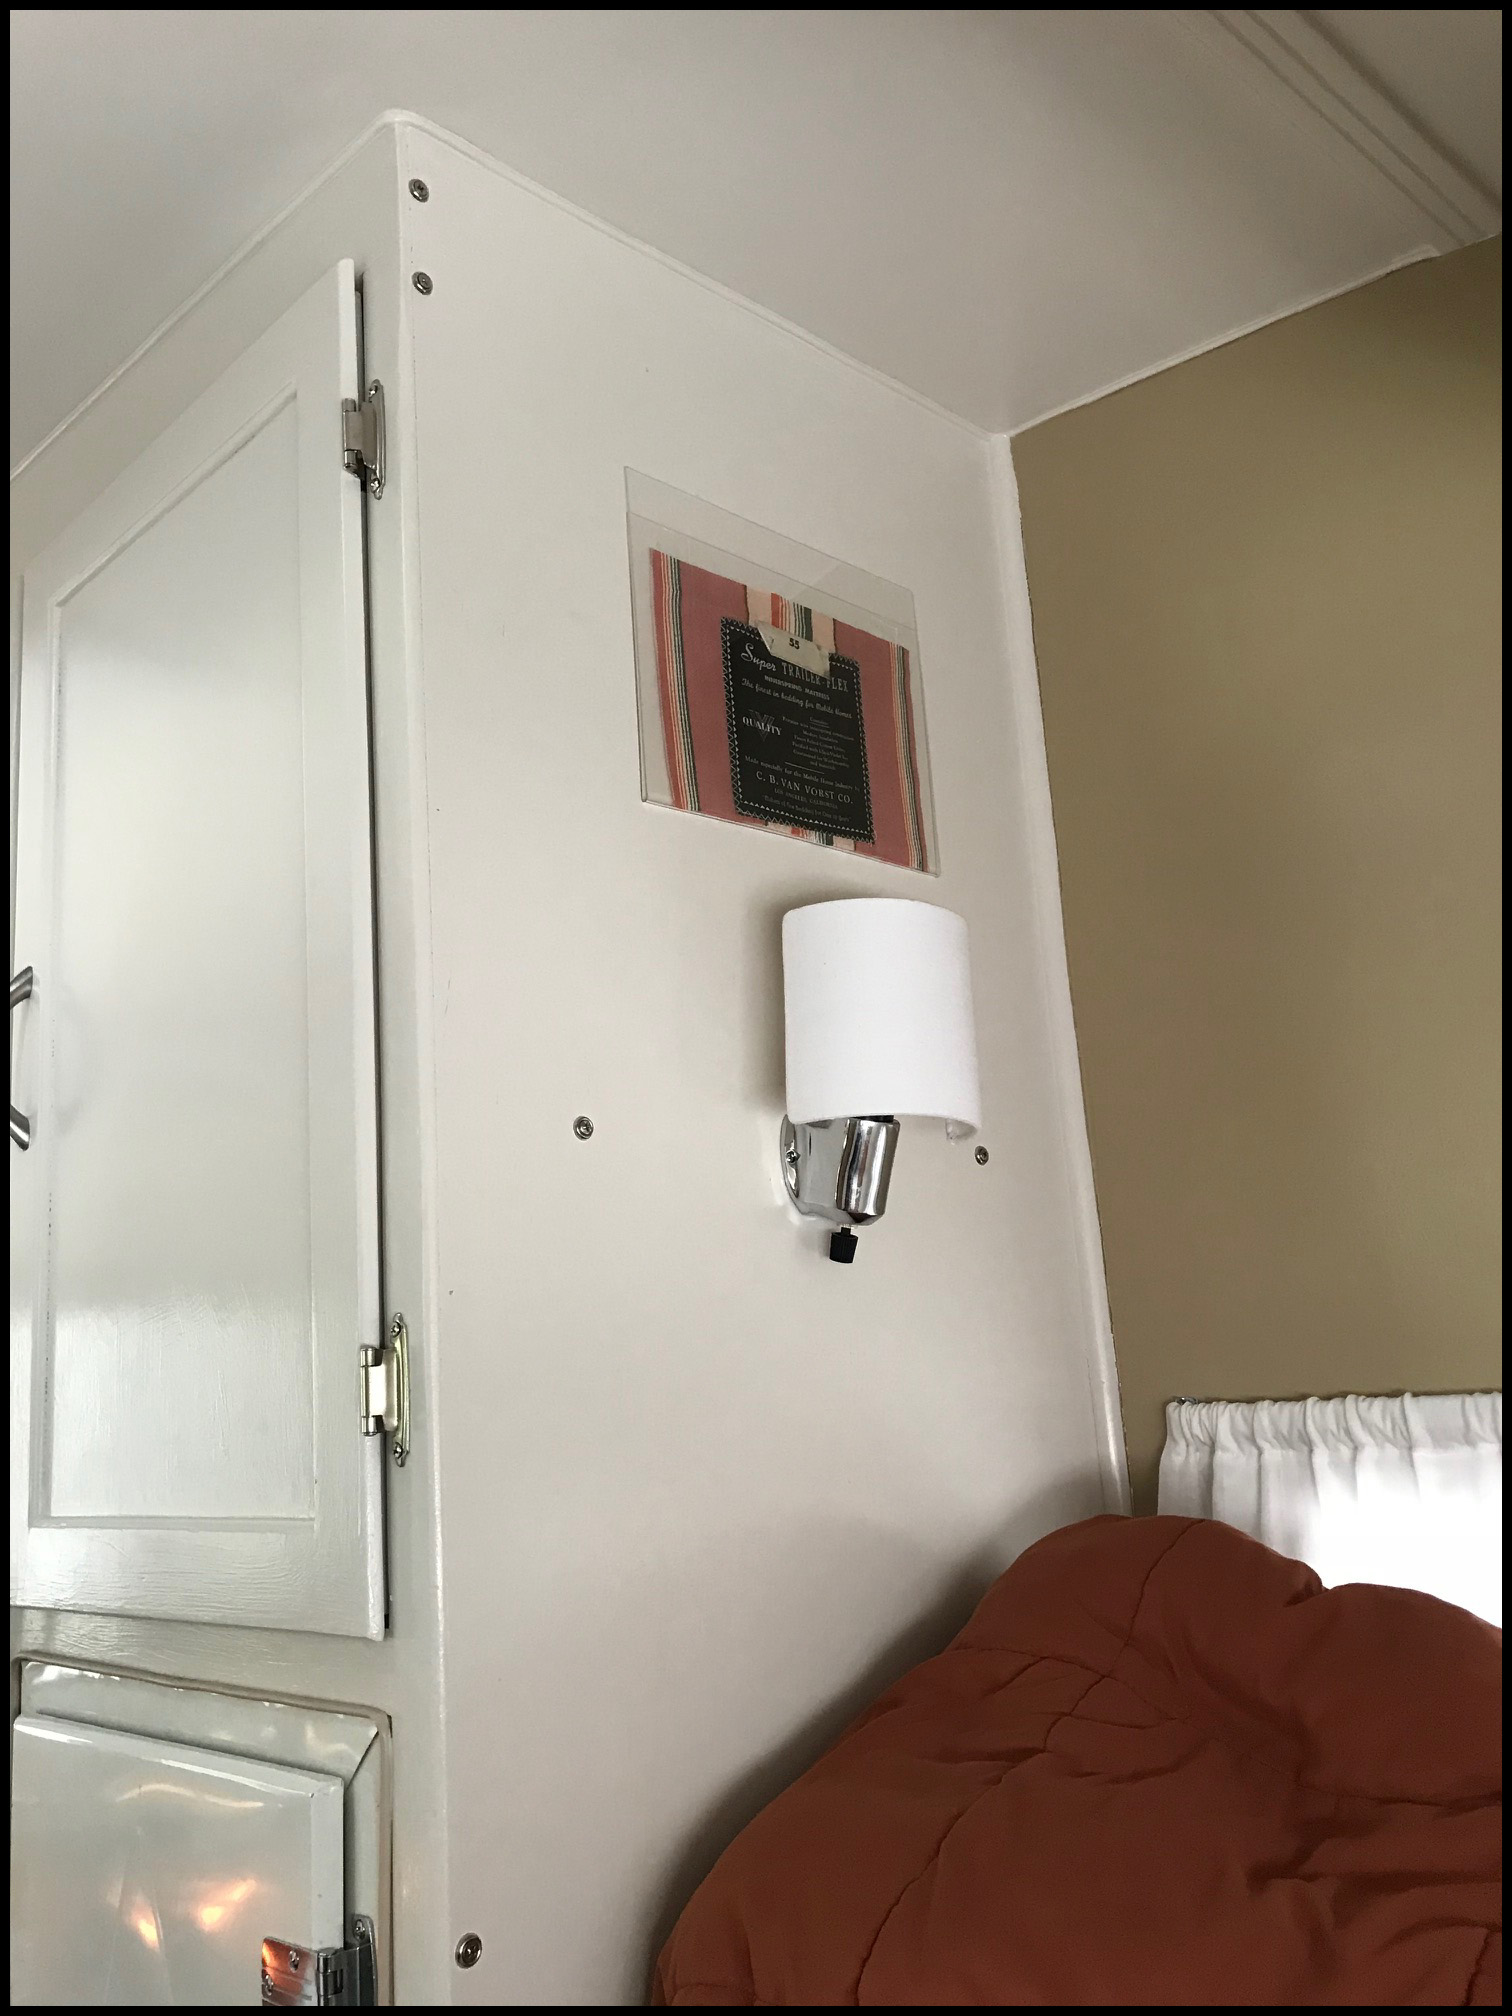
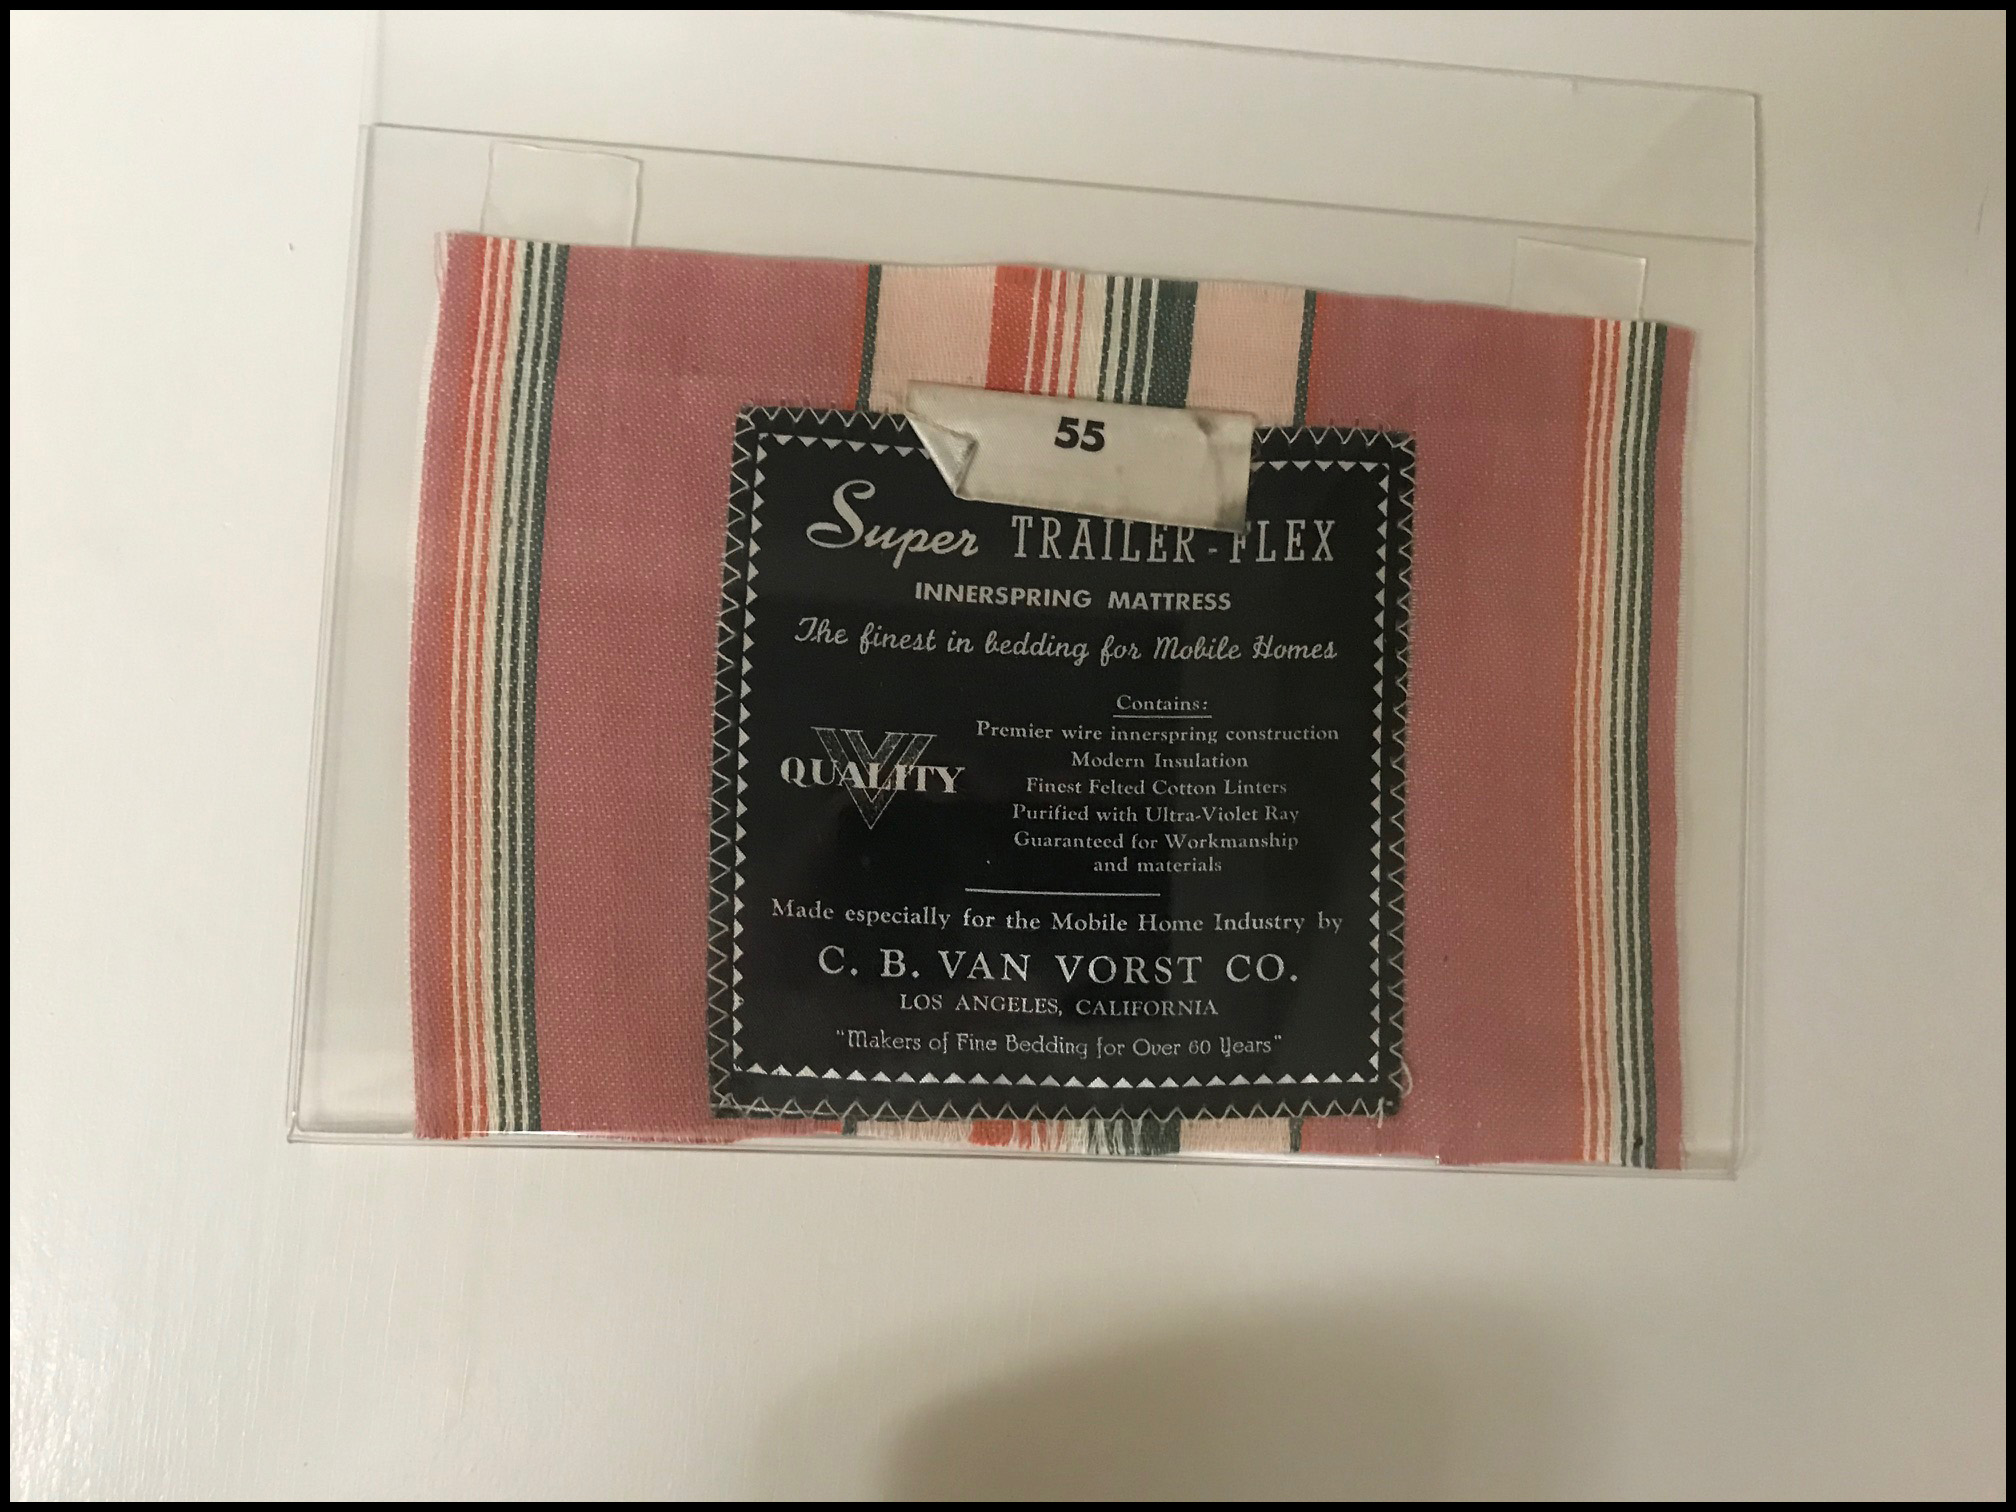
The one thing we could never agree upon was the backspash. We ordered tons of samples, scoured the internet and the local stores and always just weren’t satisfied. Then I was digging thru the left over parts and found the old back end piece of the trailer. The part where the license plate mounted, serial number and all, cut it to fit, and dang if it didn’t come out nice. Also coated with the same epoxy from the countertop. And the “V” and serial above the window fit like it was meant to be. Homage to the old look. And sitting in a pile of parts right there the whole time. Funny.
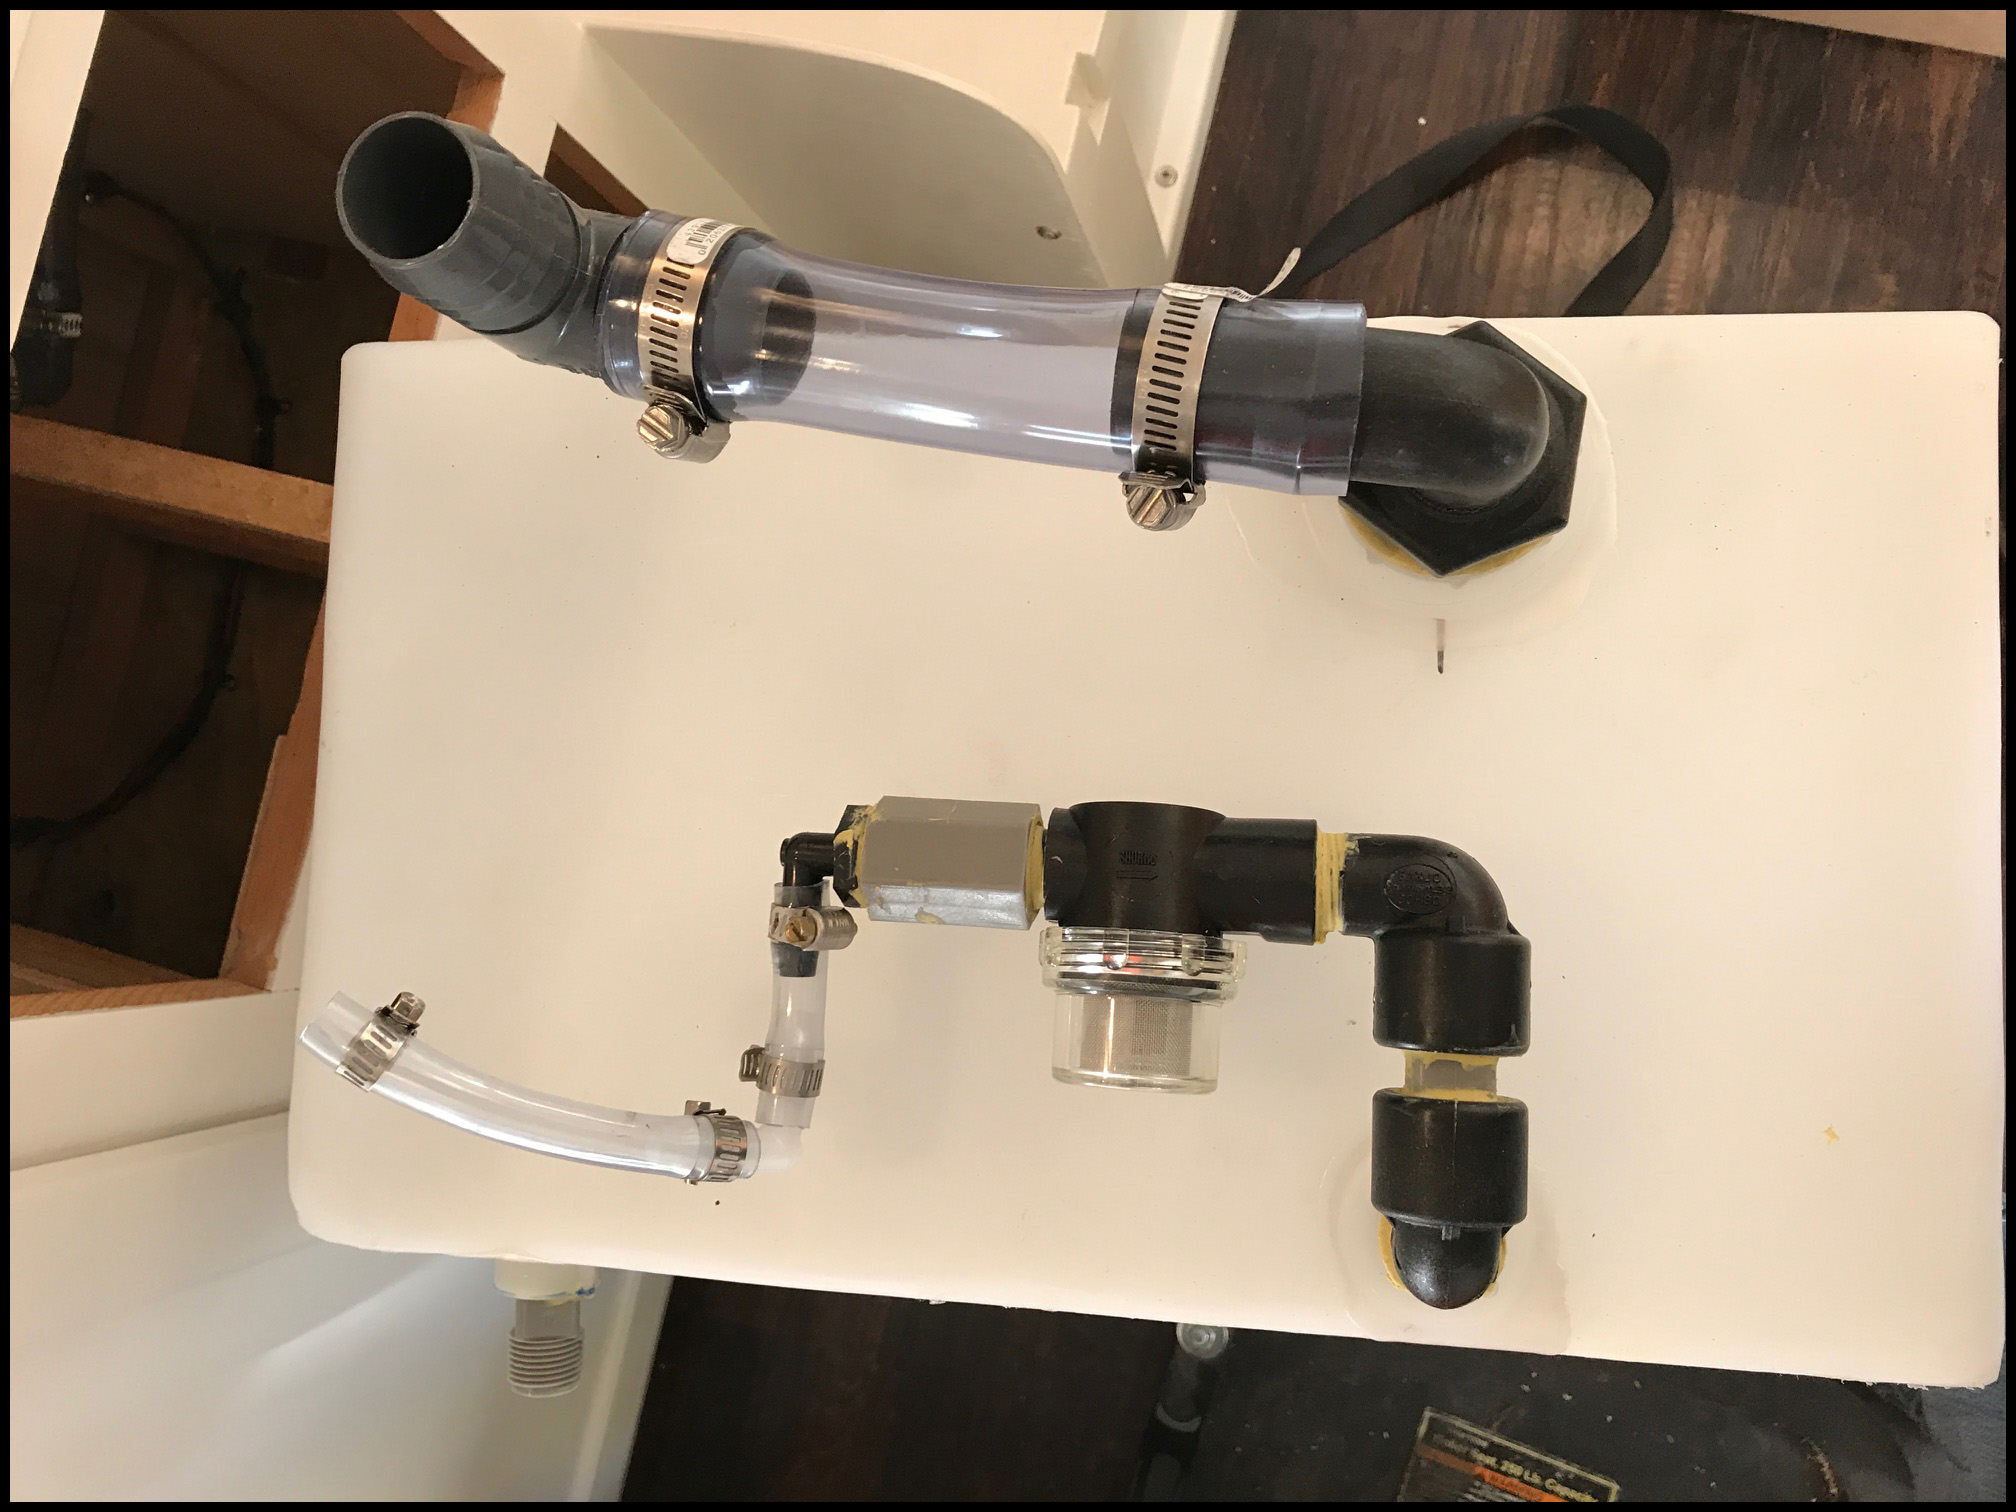
Got the plumbing finished up. Had some issues. As a note: The PEX fittings are only supposed to be mounted/unmounted like once or max twice. I found this out after some leaking and research. I did a dry run on the plumbing cut, then installed it. It leaked a bit and had to replace some fittings. Just an FYI so cut and mount once. Also, the pipe and fittings do not like any side to side pressure on them as well. Meaning try to have them all hang without a torque on the line, a bend, or pressure pushing it, this also will cause the joints to leak. And the inlet I got, see the pix, there are 2 versions of it, brass and plastic… get the brass, the plastic one broke in like 2 seconds. This one: Water Inlet.
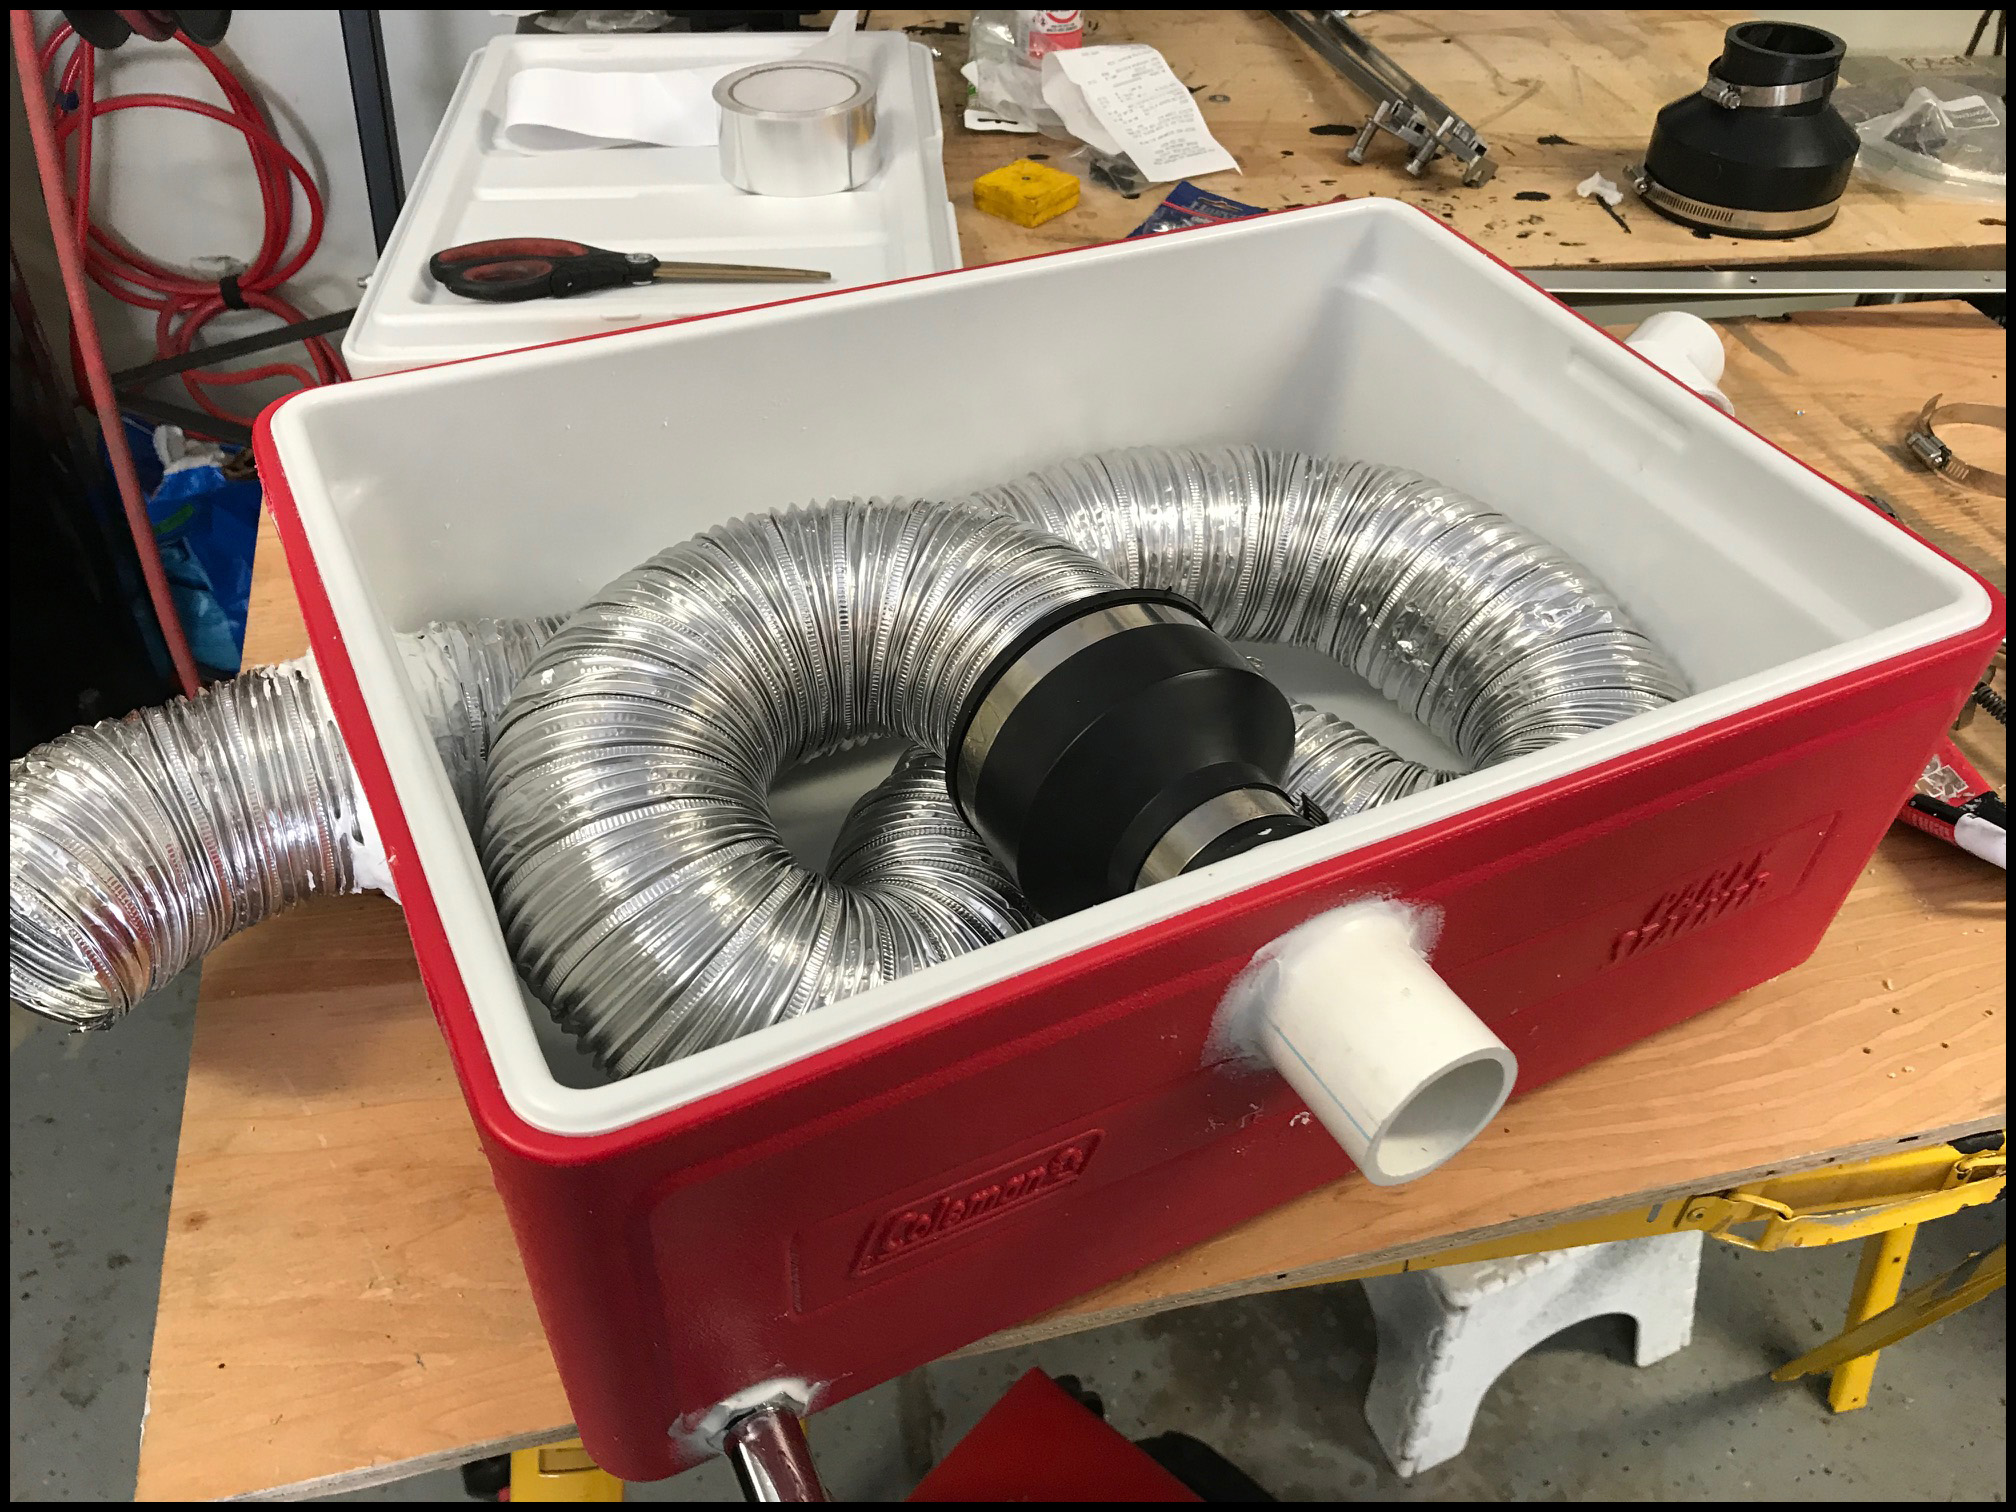
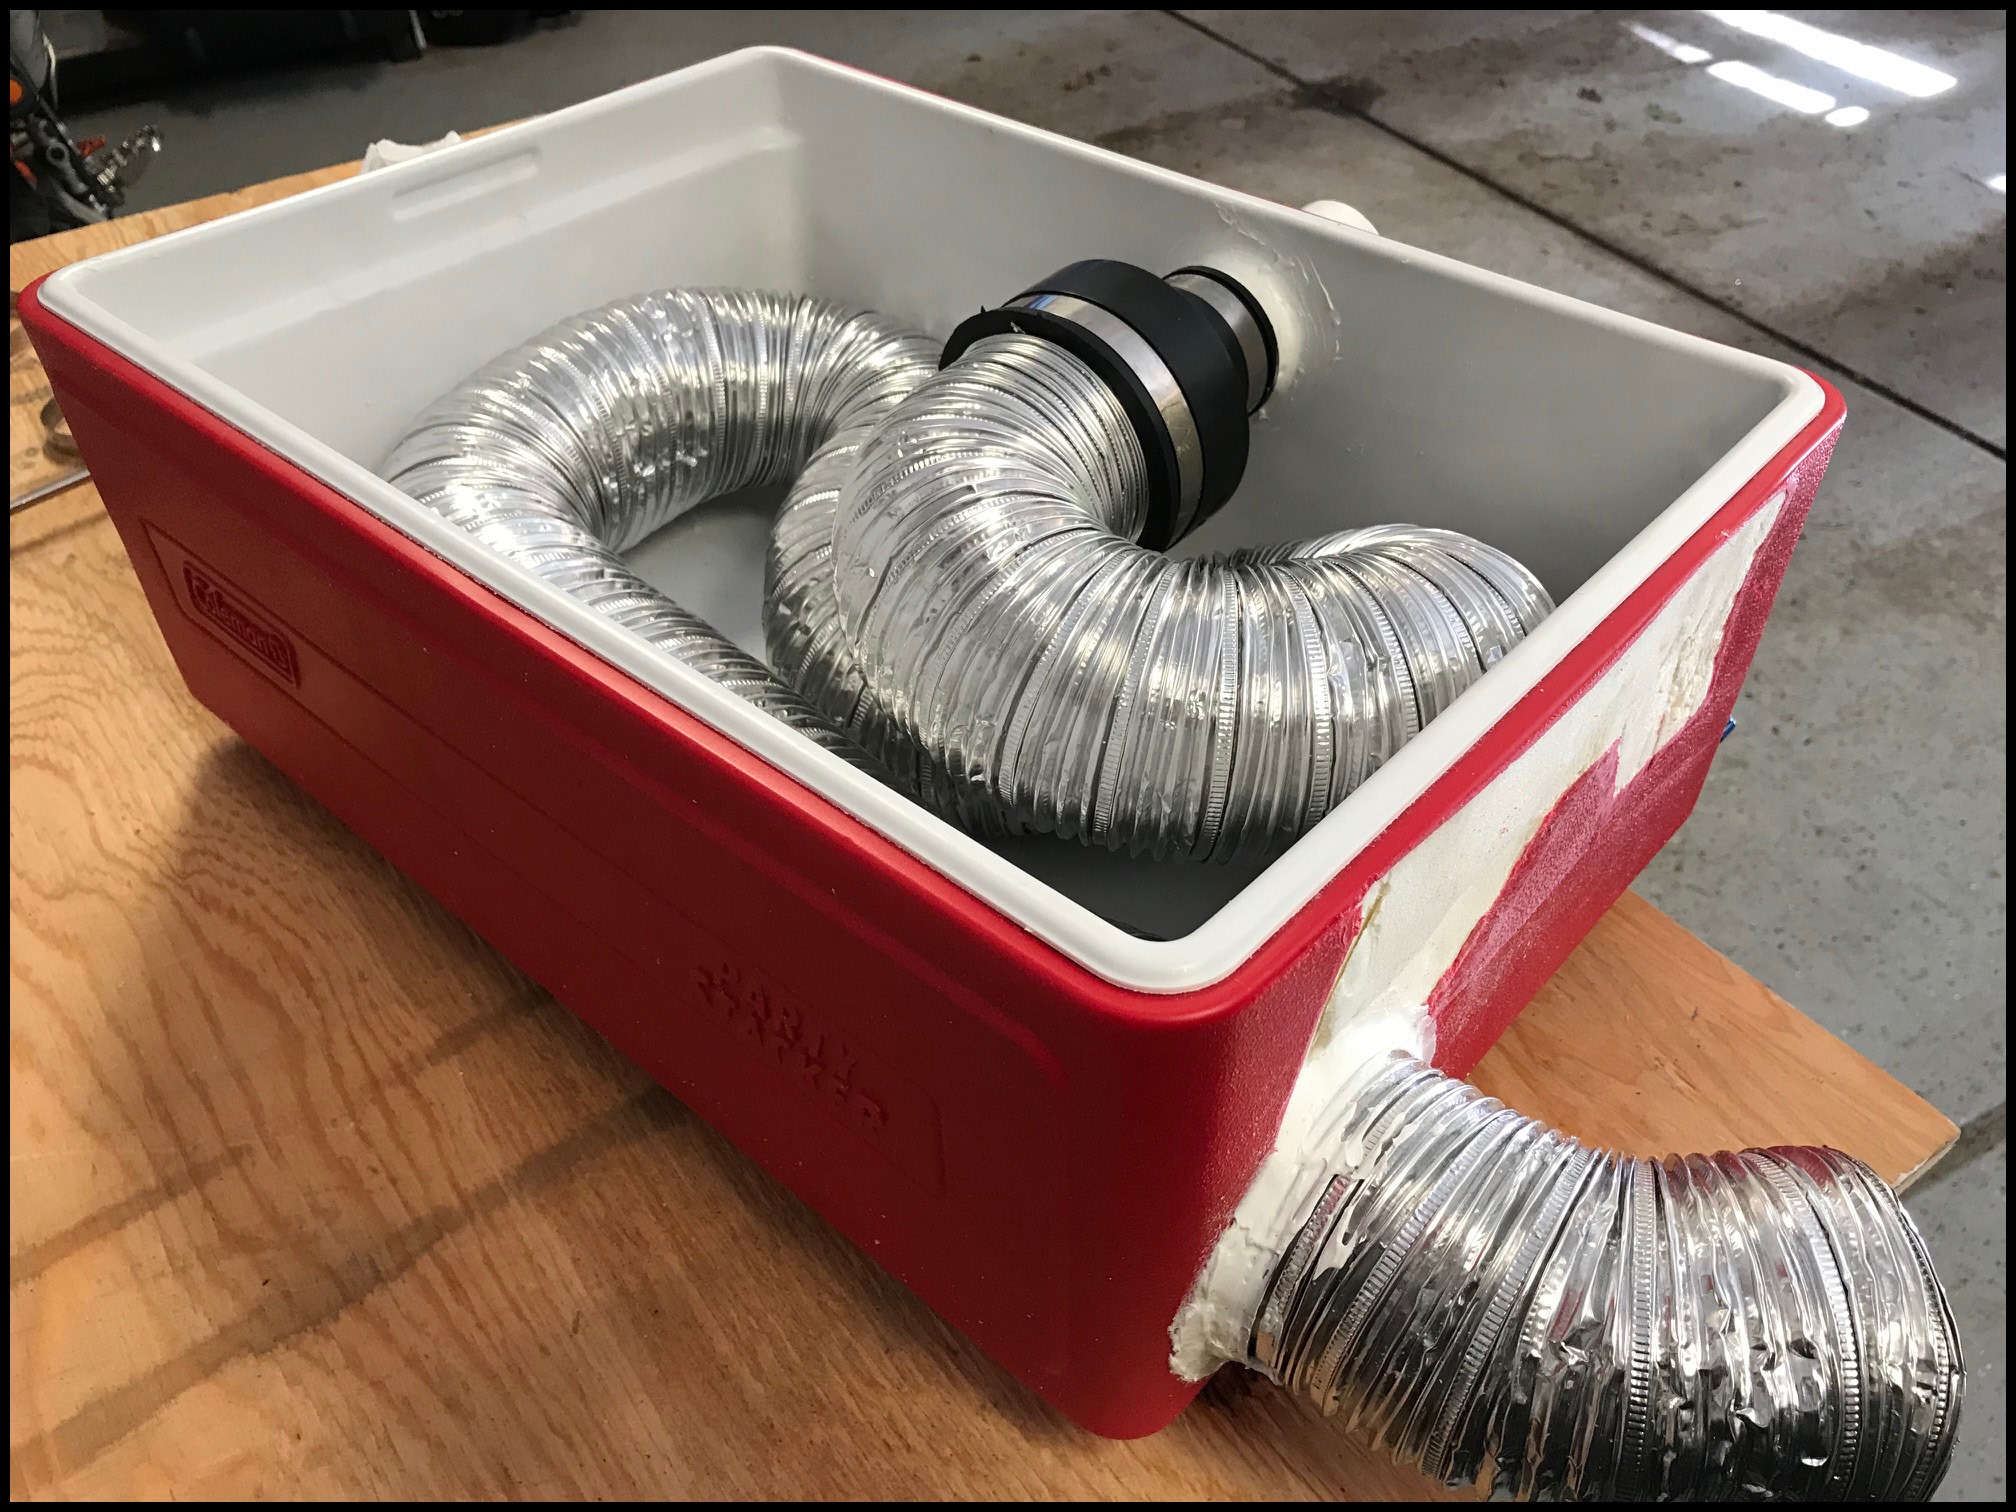
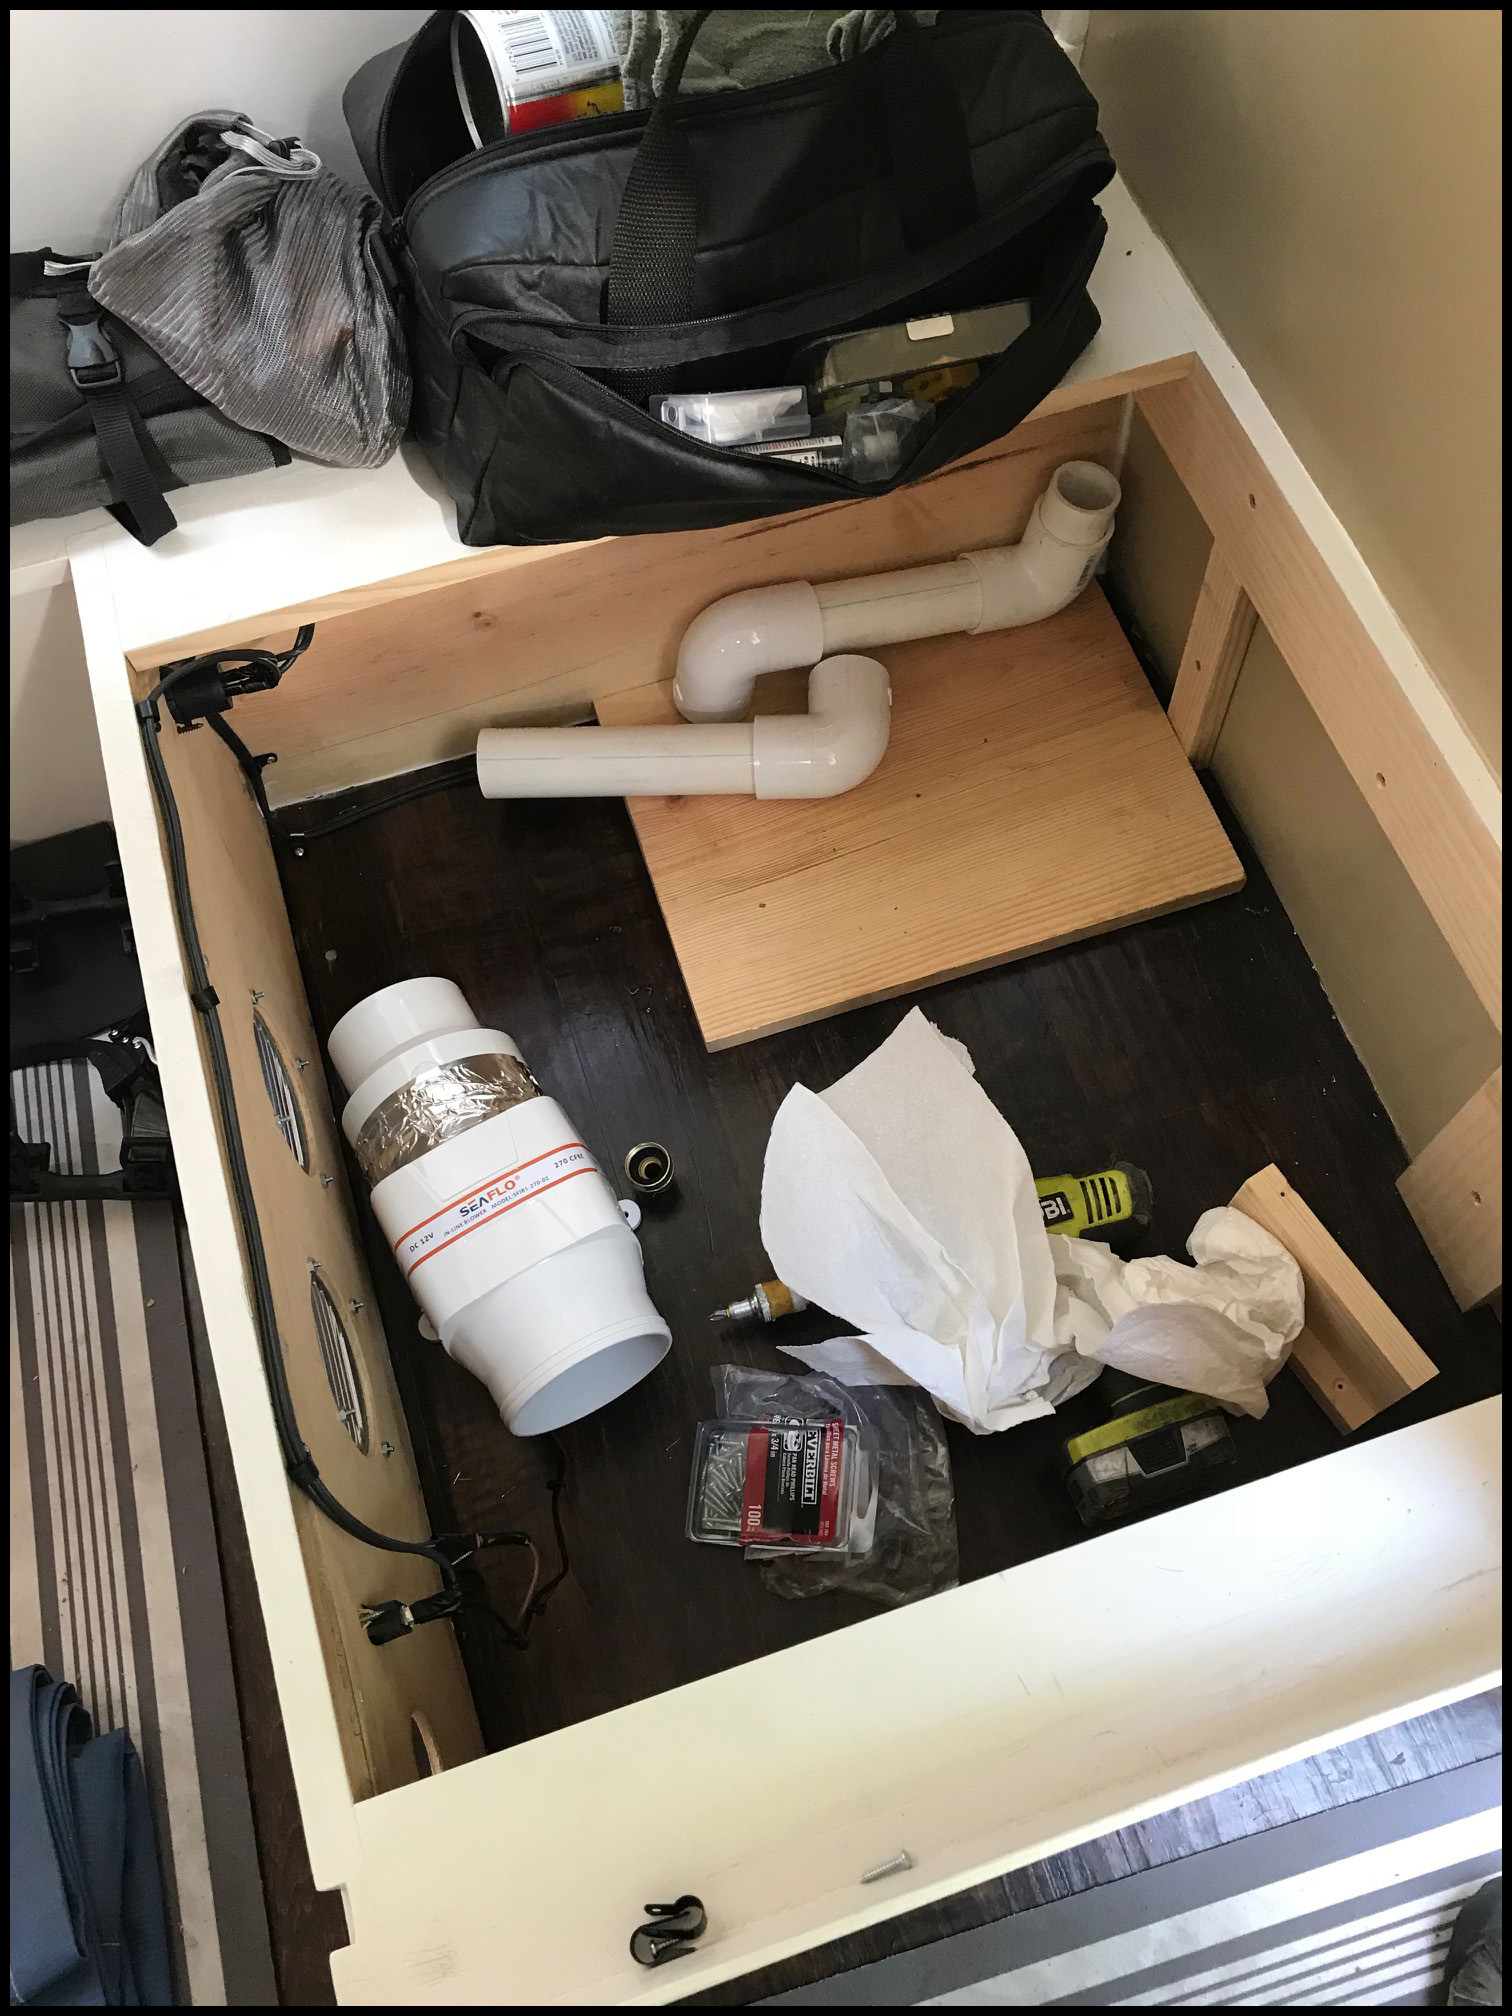
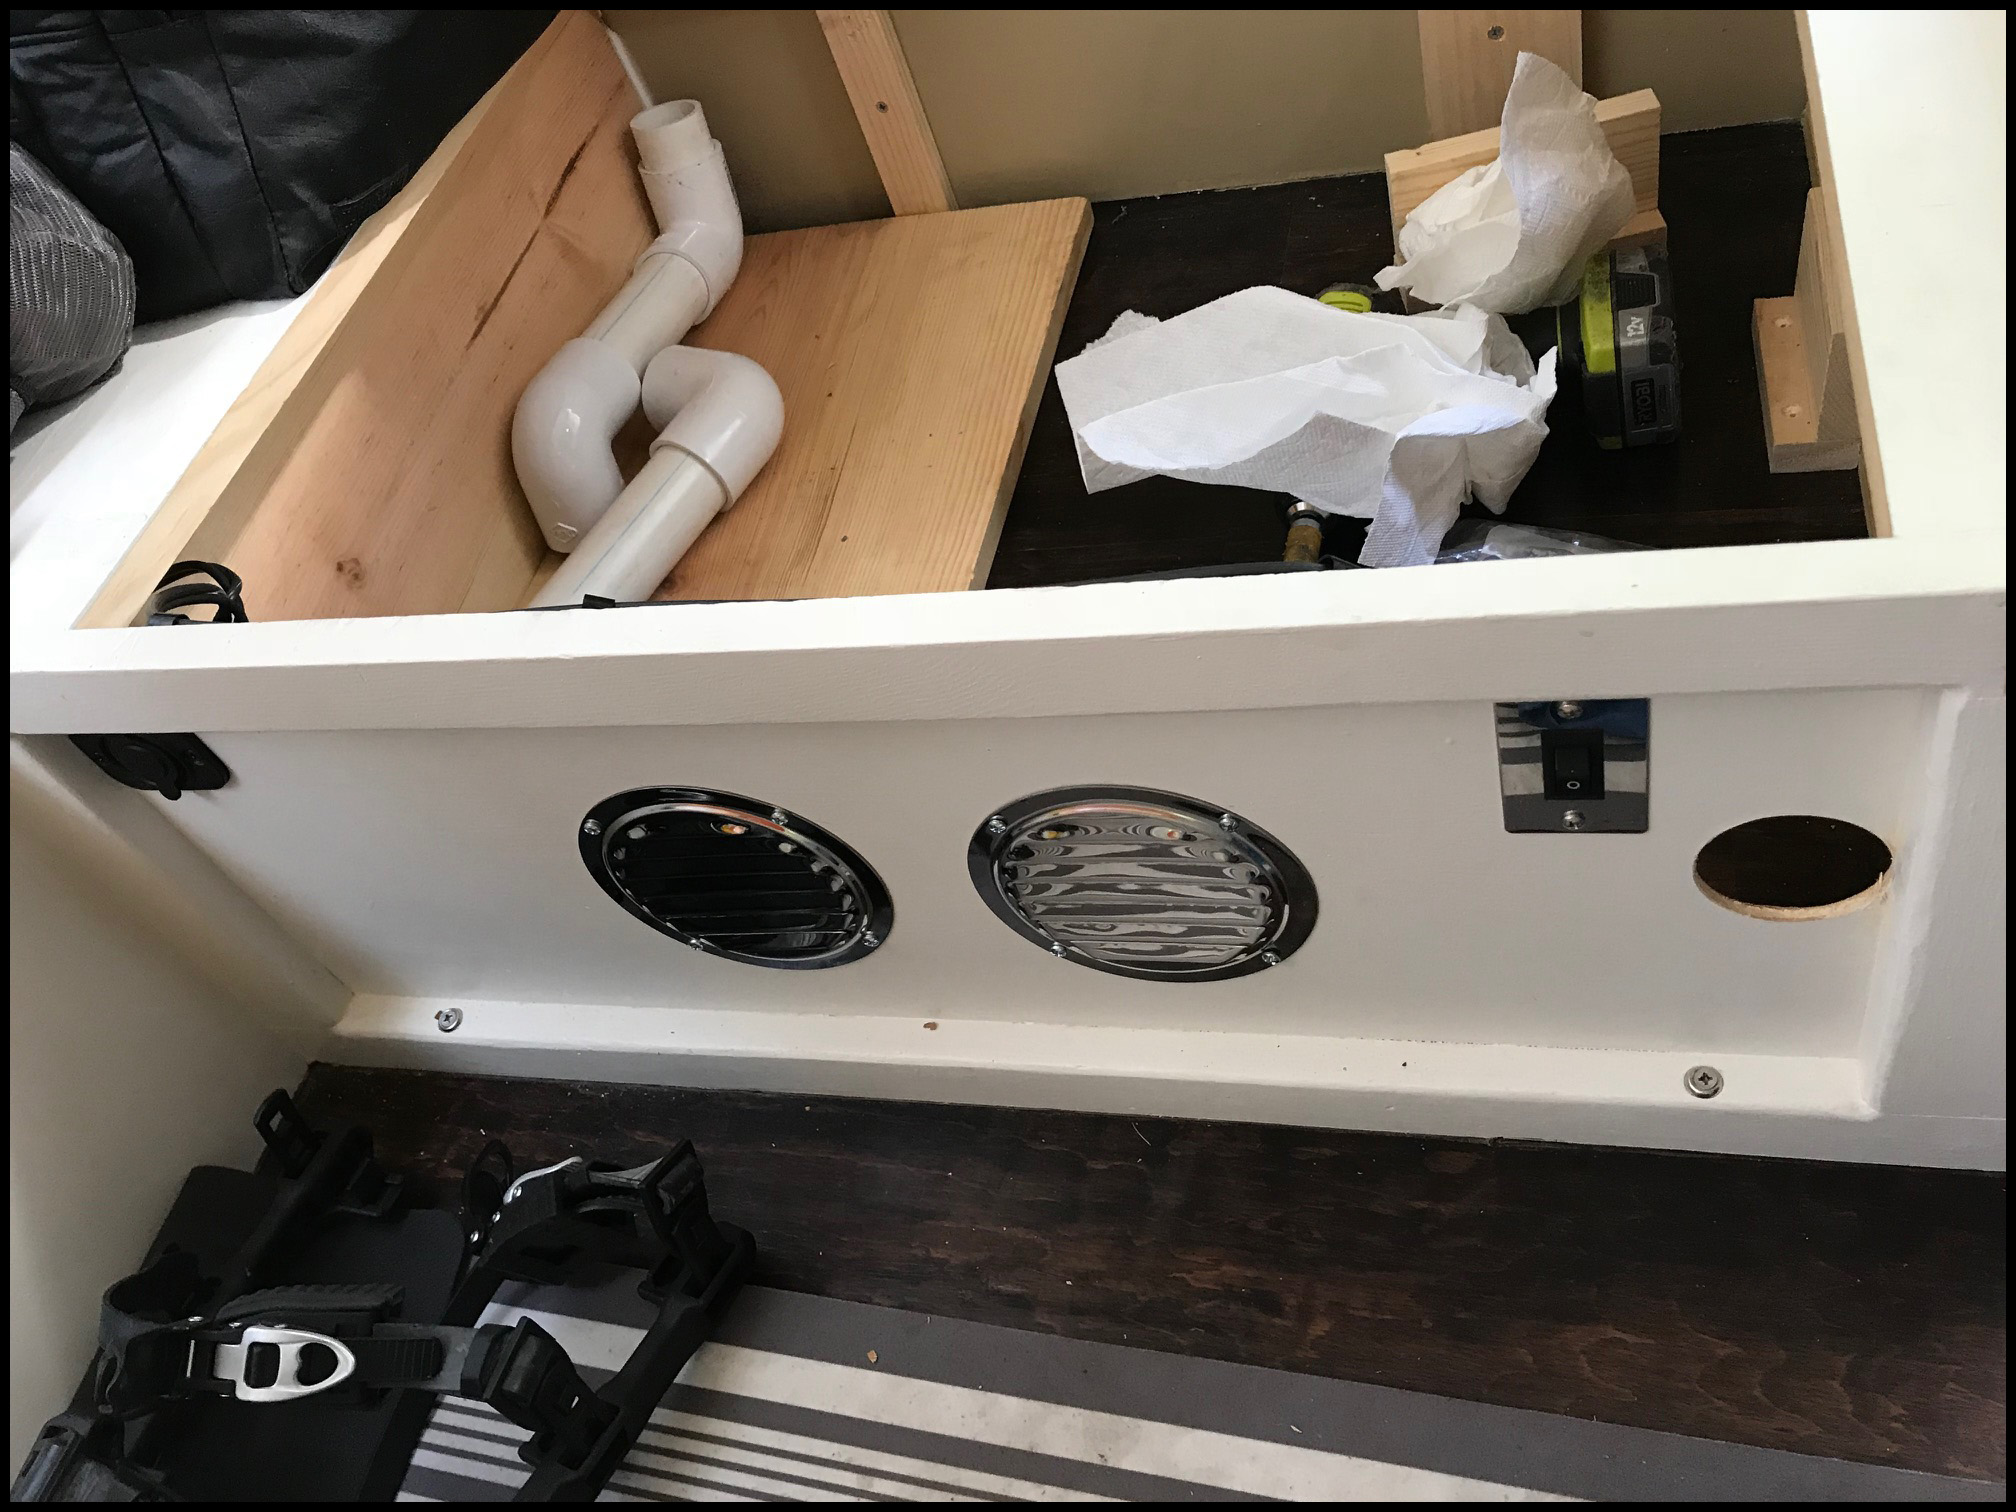
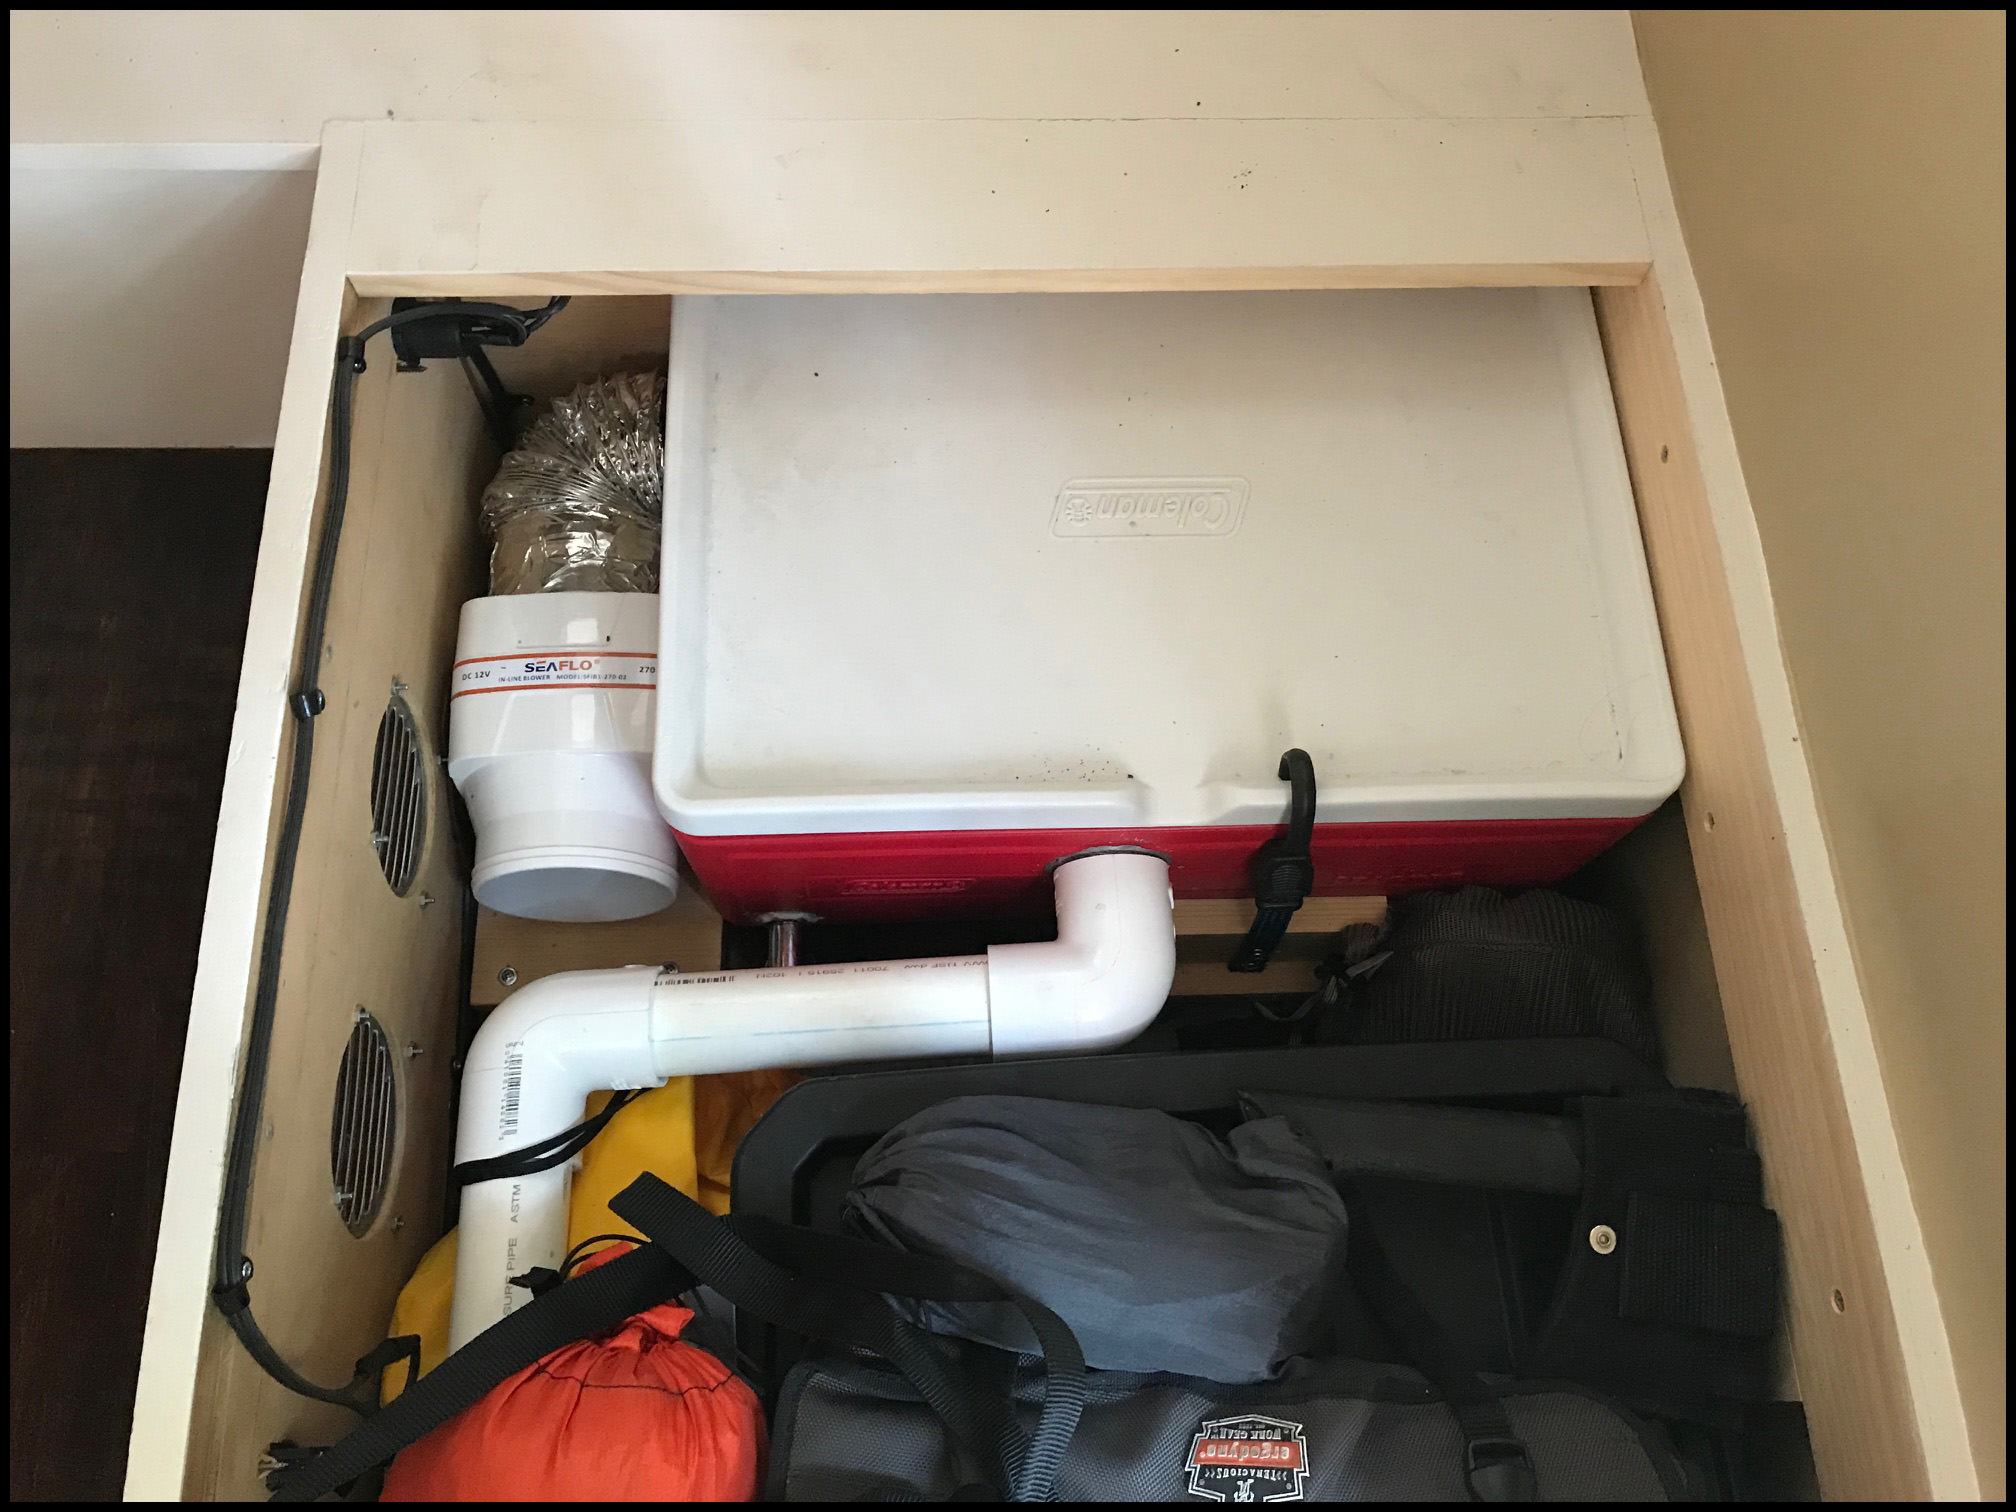
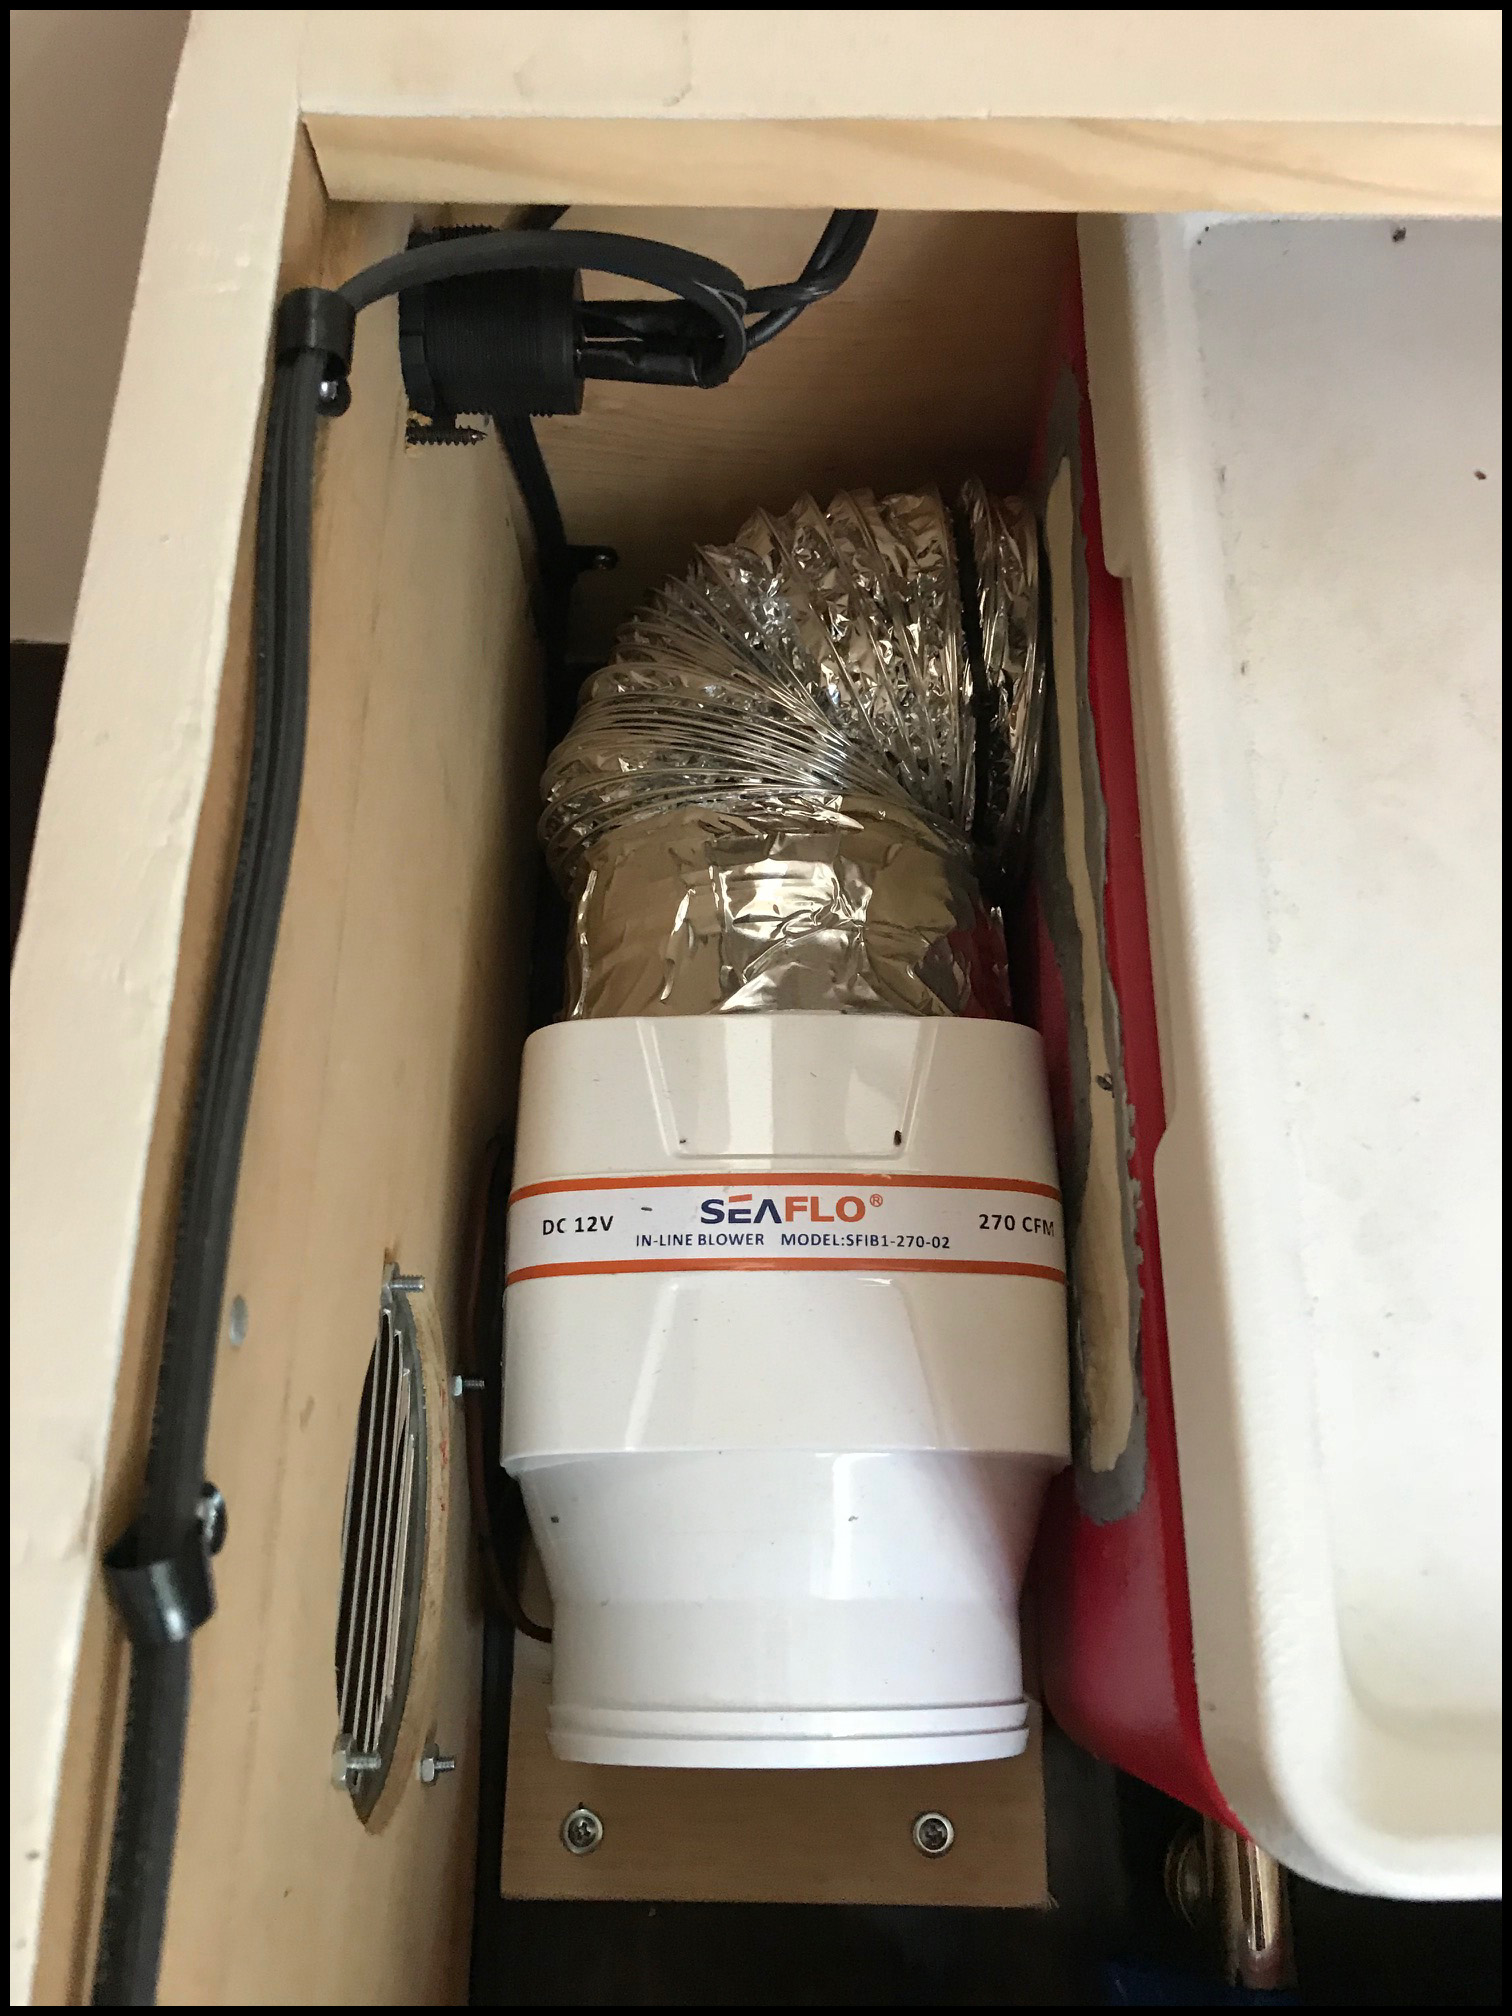
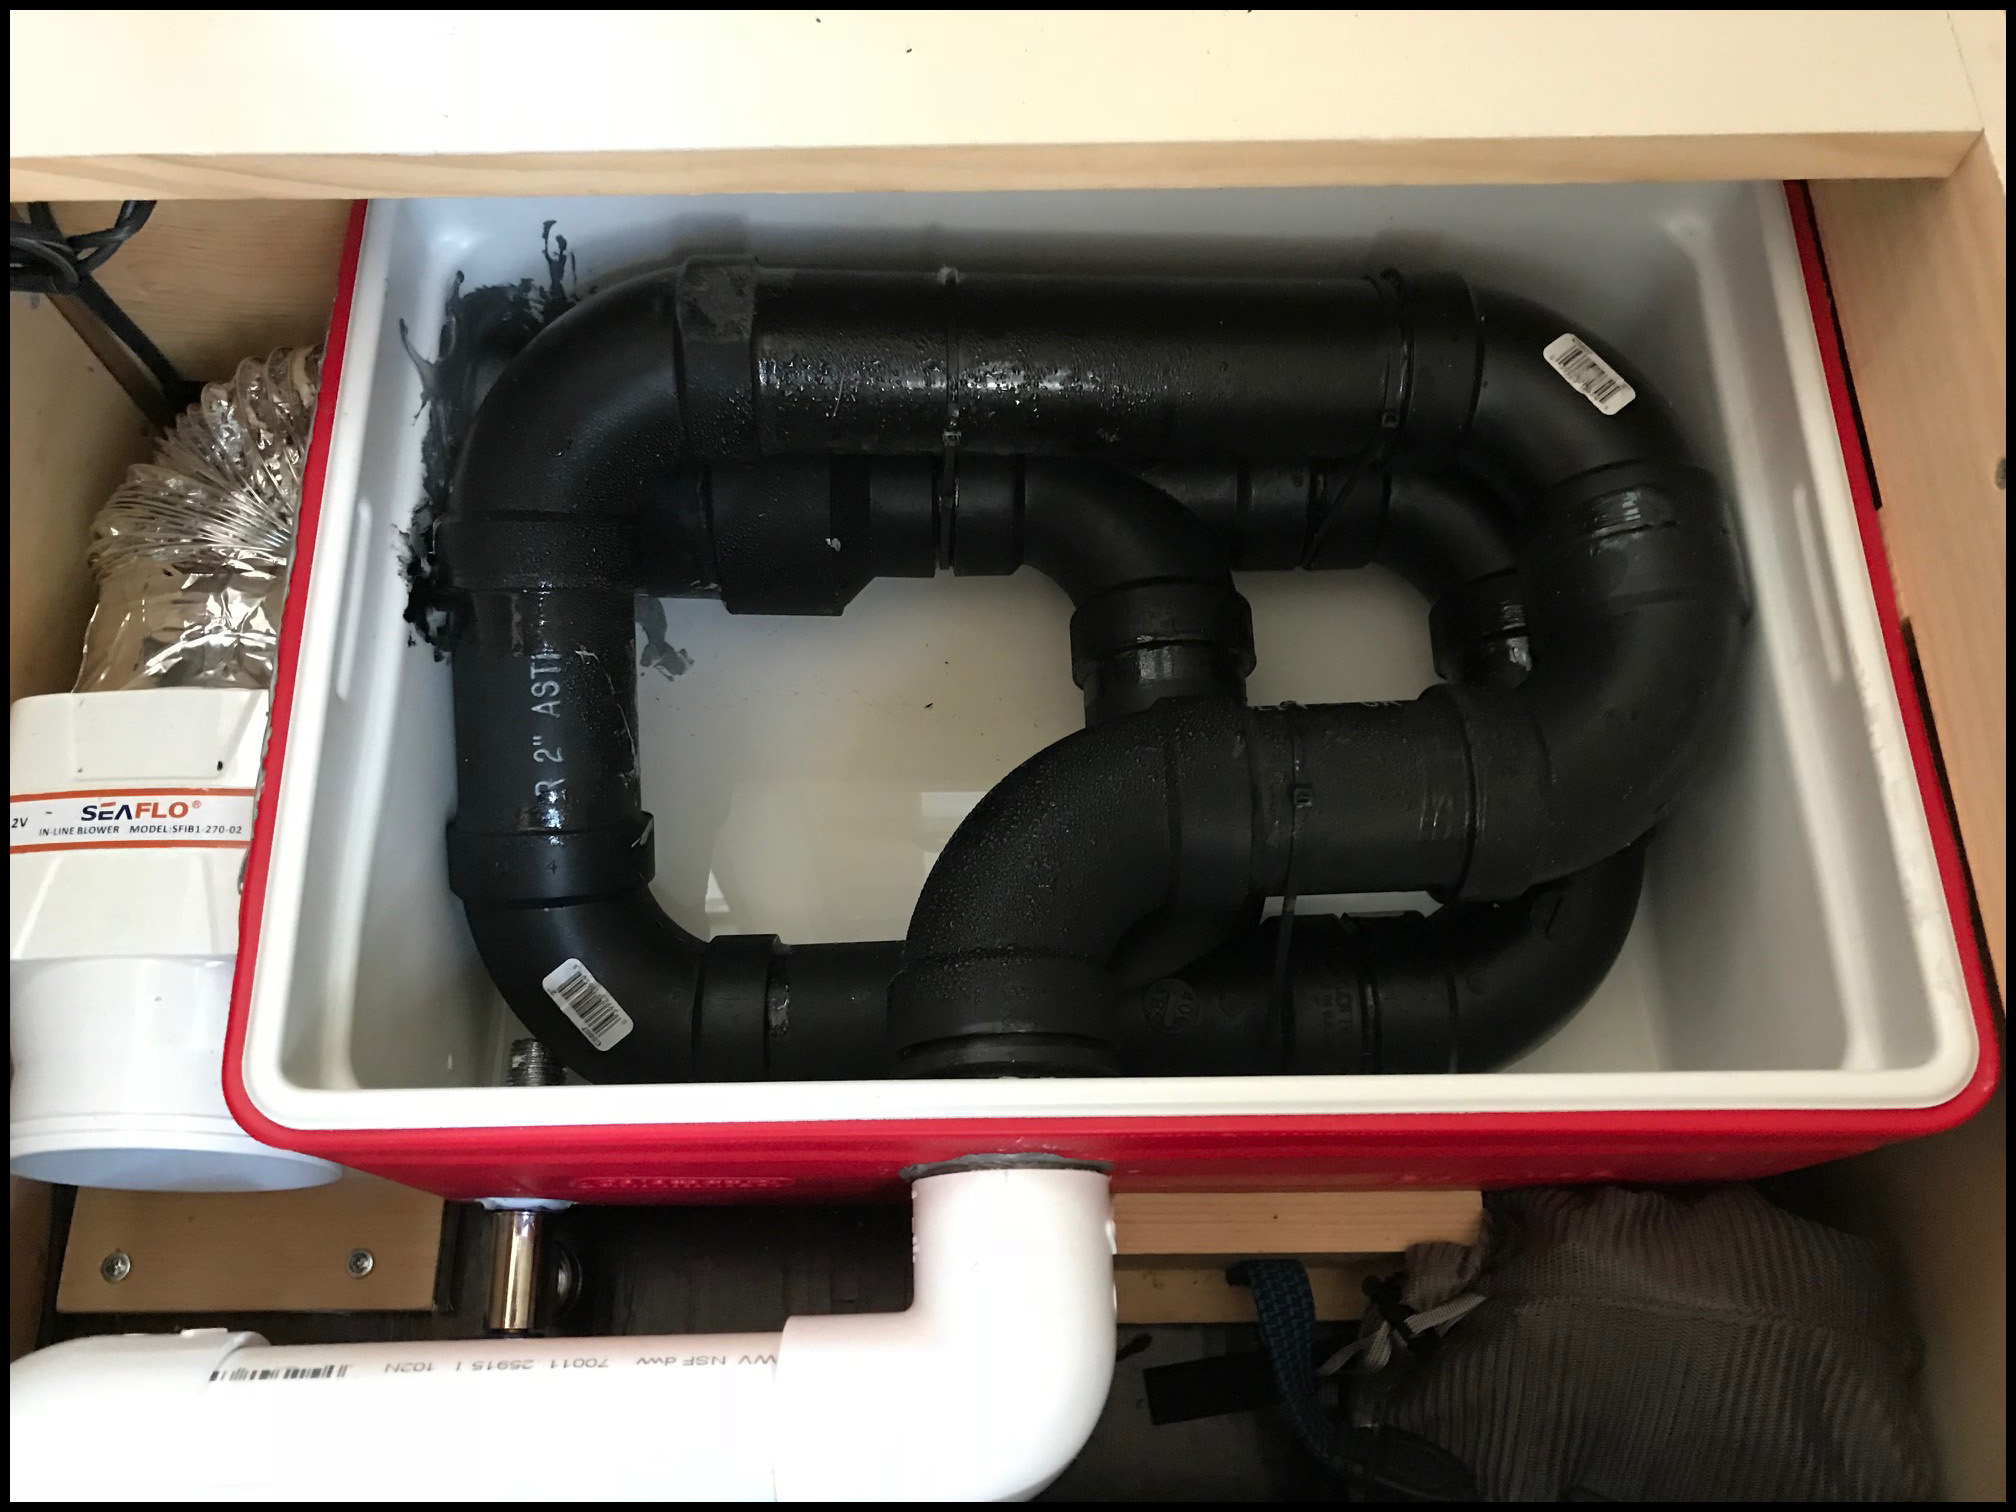
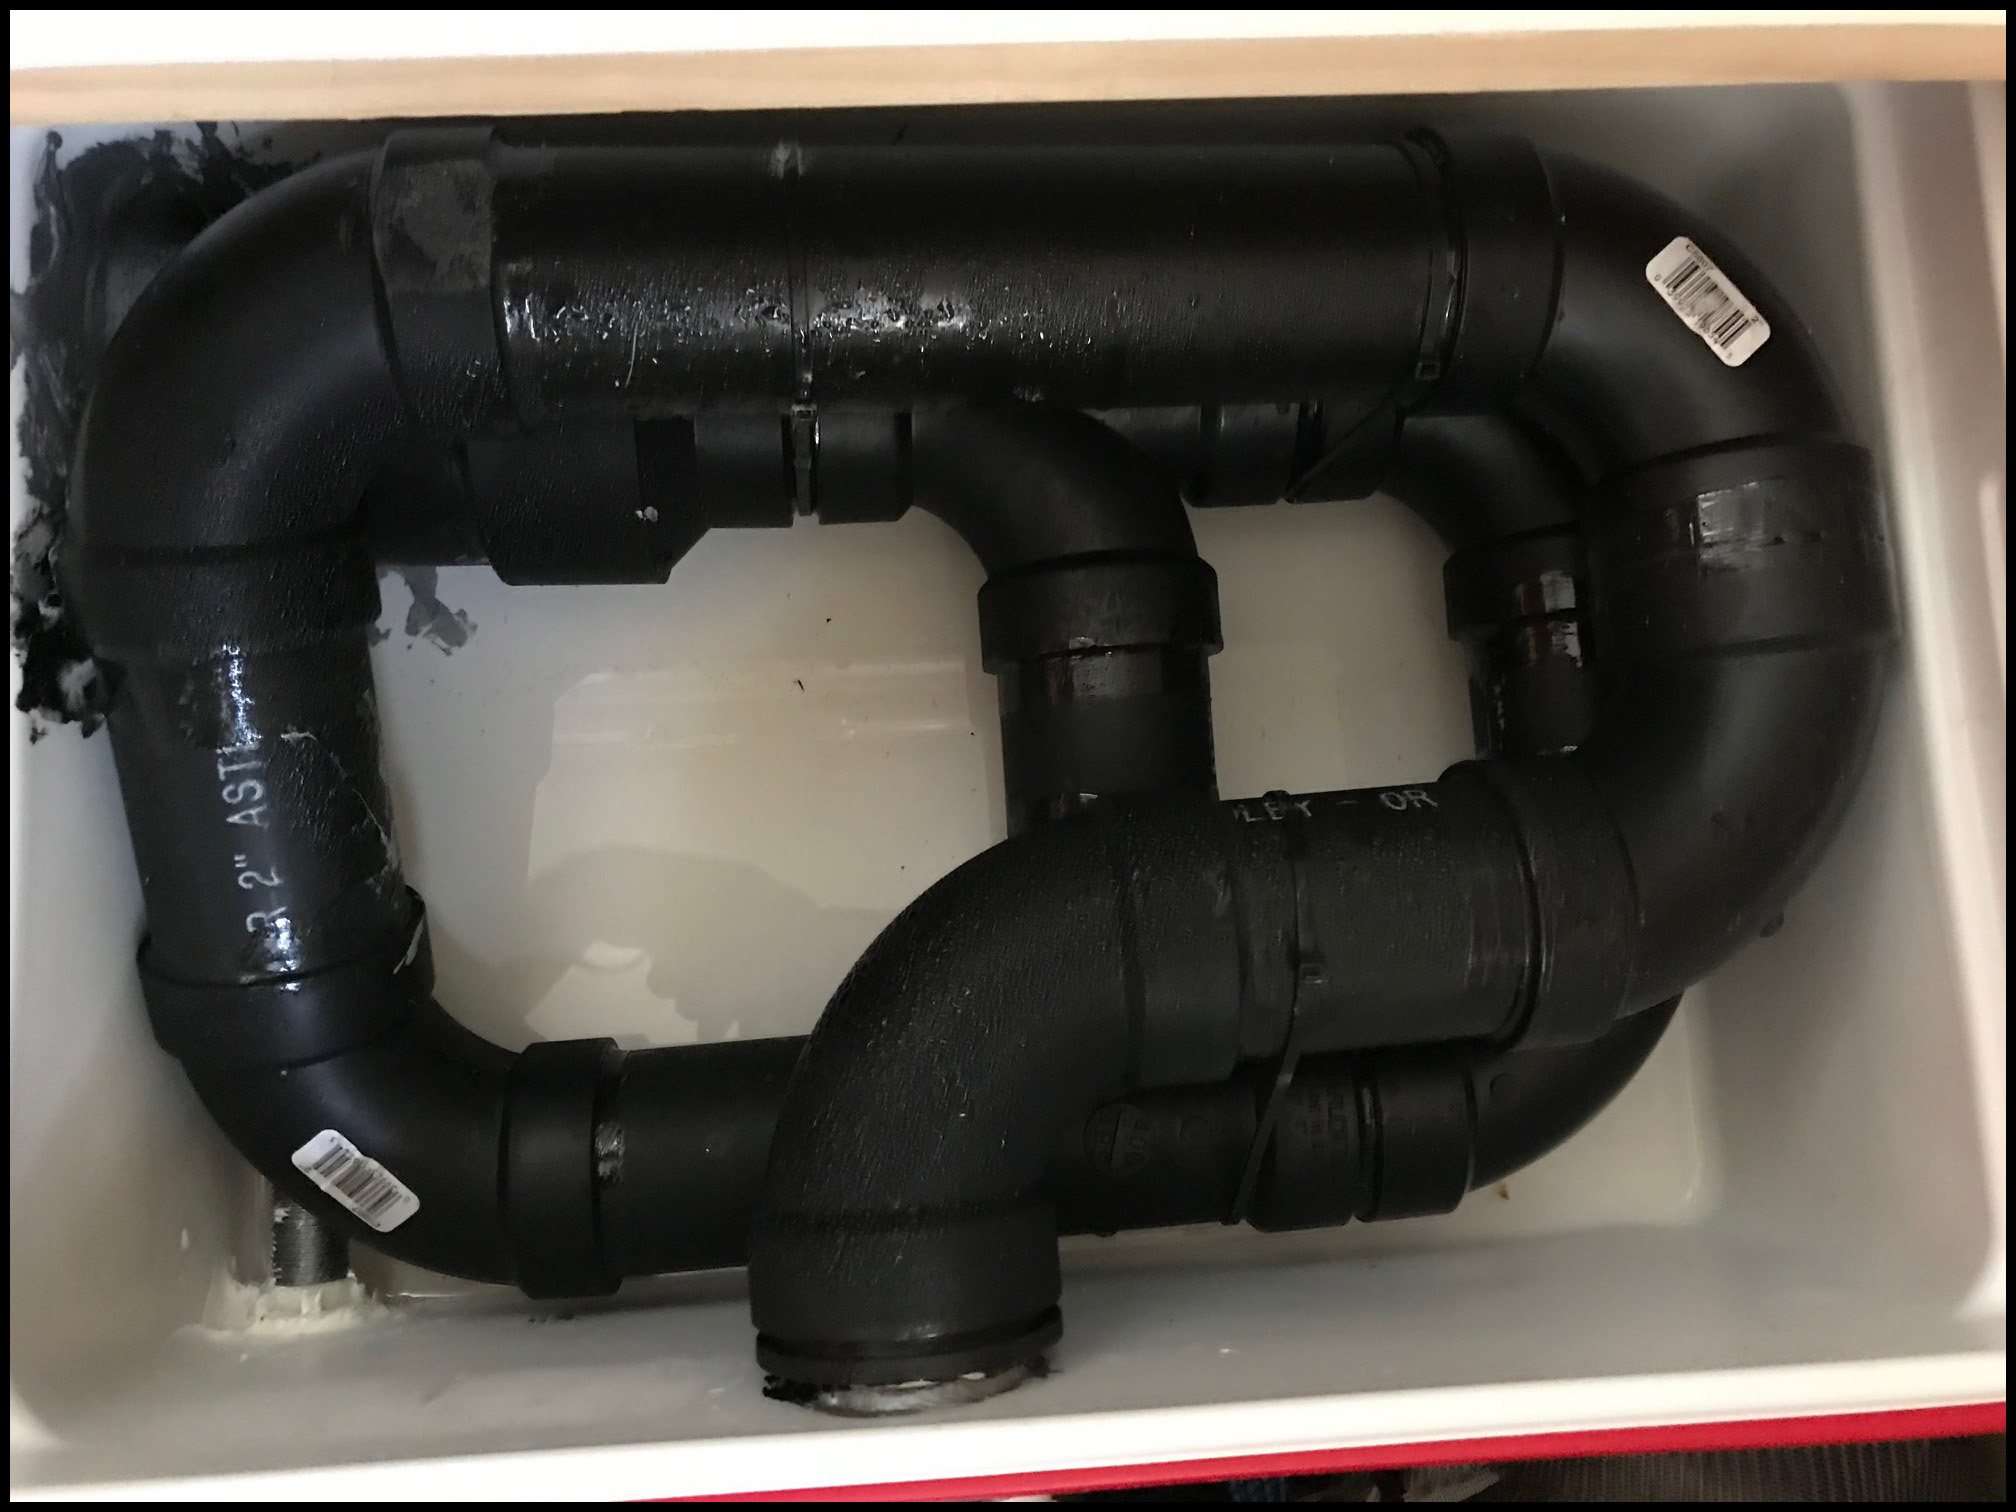
We struggled on the AC thing… Will it be too hot in August in Utah? Can we only camp in fair weather? We won’t always have shore power… and so on. Sooo I did the usual, researched the hell out of it, and after about 3 months of looking, decided that an ice cooler type swamp cooler would be the ticket. I looked at tons of designs and settled on this one; Cooler AC
But after building it, found tons of flaws… So I reengineered it a bit and got a reliable, non-leaking, small, cooler that works pretty darn good for the cost. I put it under the front passenger seat, vents in the front and outlet with a removable 45 degrees spout.
So here is what I changed in the design;
- 1. I used PVC pipe (plumbing type) instead of the aluminum tube in the video, I found that that pipe leaked over time filling the inner tube with water. And also it floated in the post ice water pushing the lid off the cooler.
- 2. I used the vintage trailer supply gutter seal instead of the sealant in the video, worked way better, no leaks.
- 3. Used all plastic, not rubber, for the attachments.
- 4. Went from 4” fan inlet to 1.5 inch outlet to take advantage of the compression cooling effect. Simple explanation here: Cooling Effect and a system here: Window Unit By forcing the air from 4” to 1.5” that alone cools the air, then the ice in the cooler over the pipes intensifies this effect. On mine, air in was 75 degrees out was 52.s
- 5. My system is also 12V, no shore power needed. Ice lasts about 3 days.
- 6. Parts I used:
- a. Coleman 24 Can Party Stacker Cooler
- b. Round Louvre Air Vent stainless steel Ventilation Ventilator Grille Cover
- c. SEAFLO 4" Electric In-Line Marine Bilge Air Blower 12V
- d. Aluminum Pigmented Gutterseal
- e. And tons of elbows and pipe from the local hardware store.
Propane was easier than expected. Make sure to check for leaks. Nuff said. Did find a pretty cool propane level gauge. Gauge here
Painter wanted too much to paint the wheels. So I took them off and had the local tire shop unmount the tires, used a wire wheel (worked best) then primed and painted them, took them back and had new tires put on. The local Sherwin Williams Auto Paint shop matched the trailer paint and put it in a spray paint can for me, with hardener, so it lasts longer. Worked out great.
After a quick clean and clear coat put the plaques back on. Lookin good.
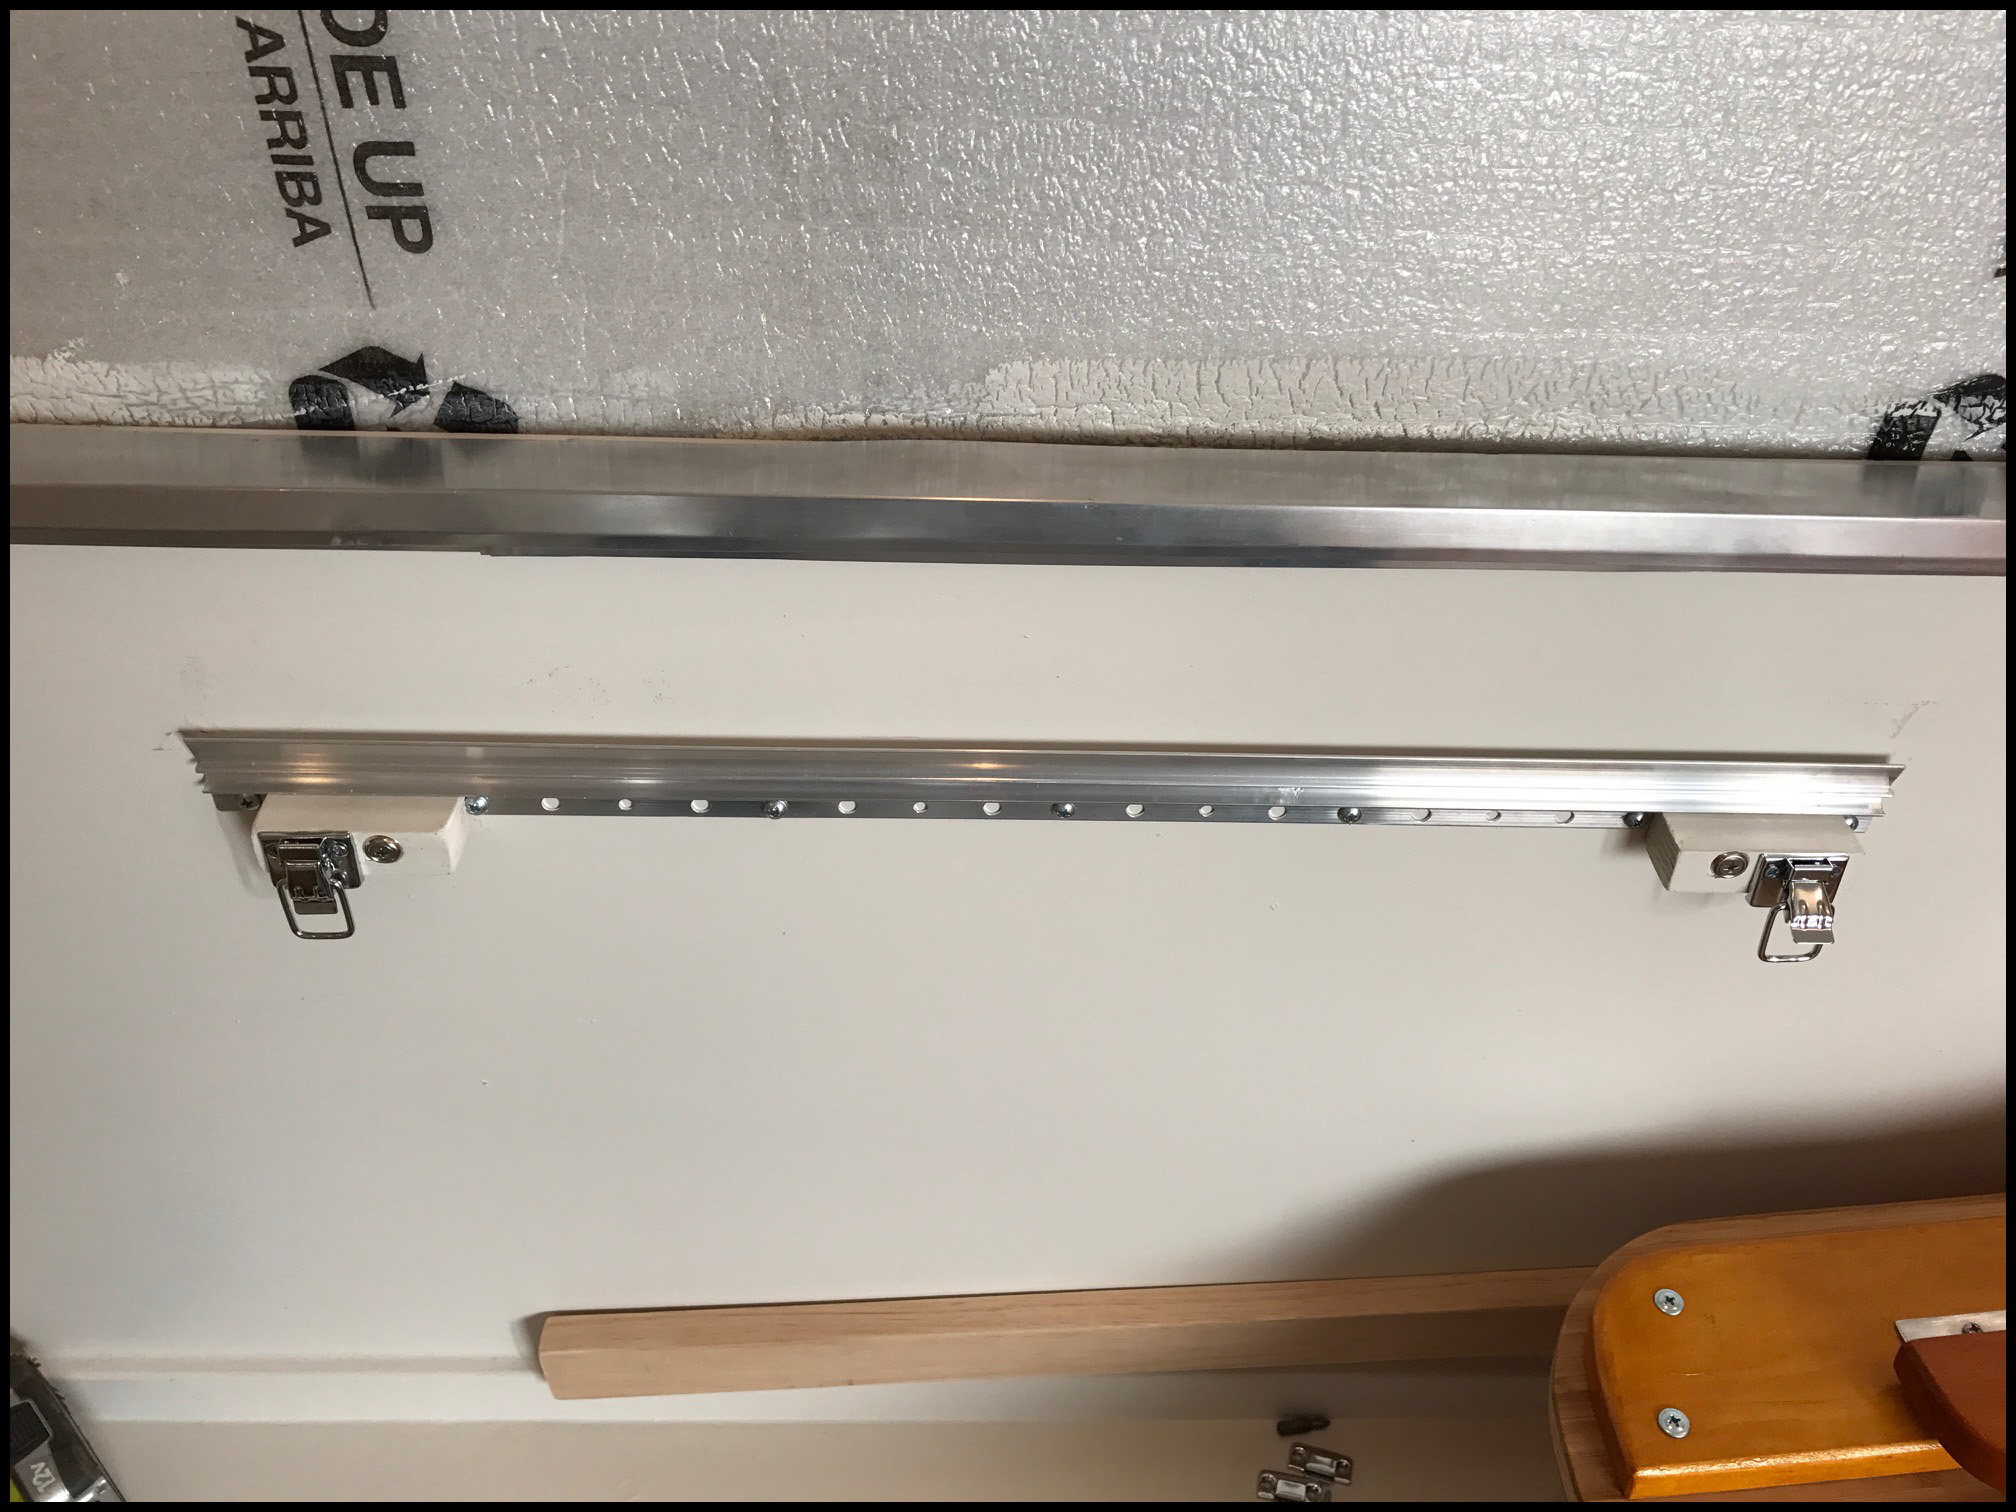
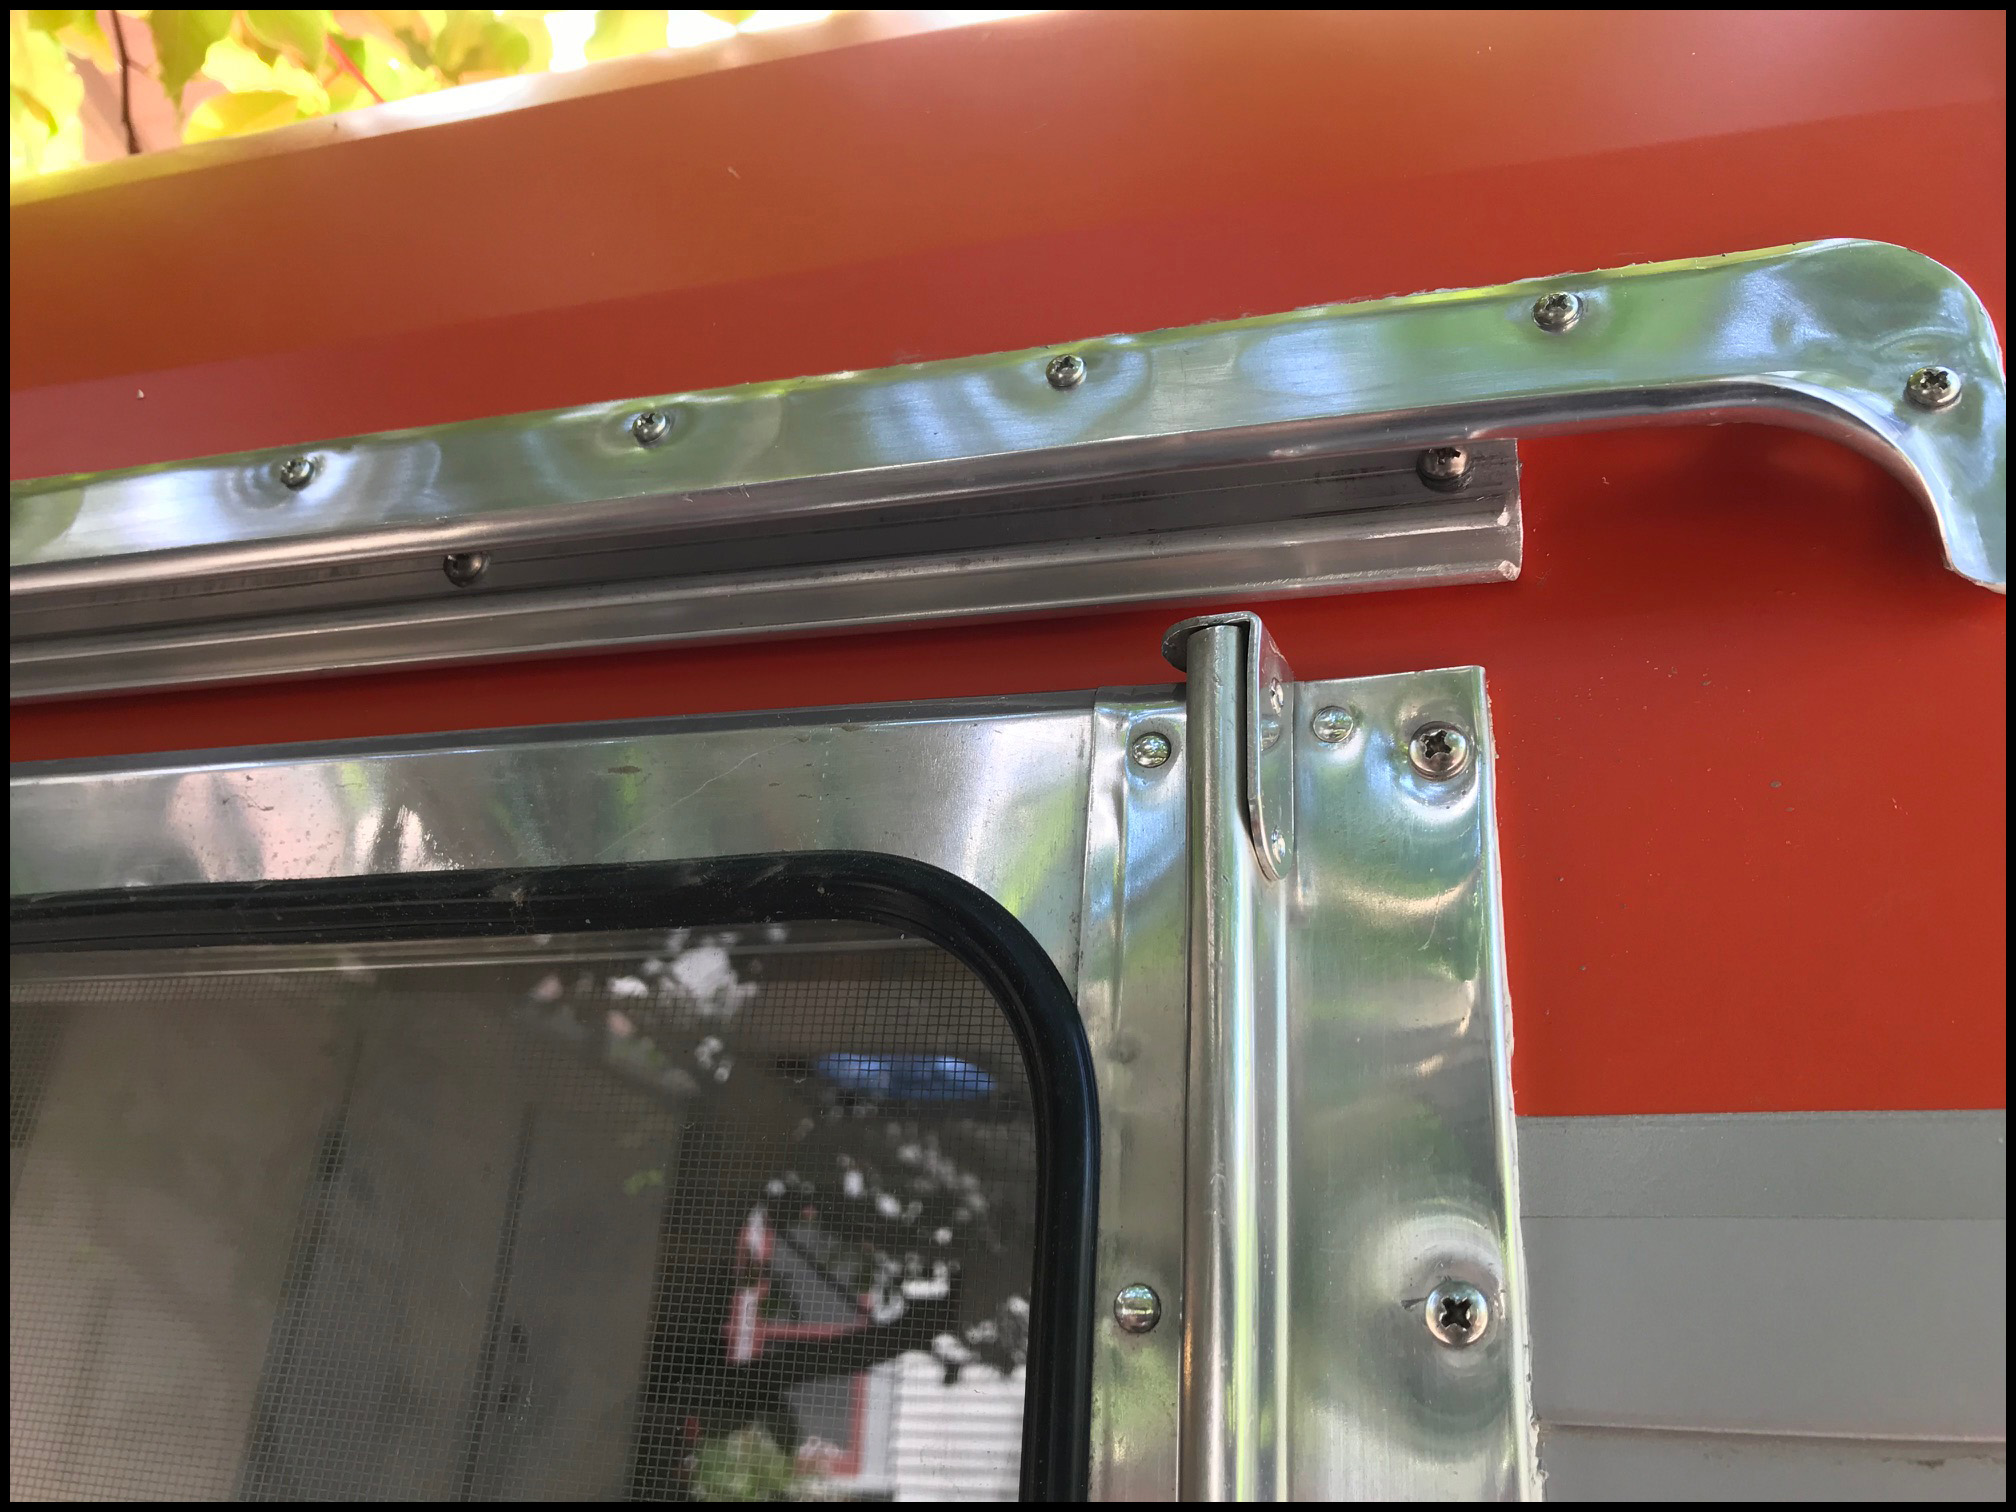
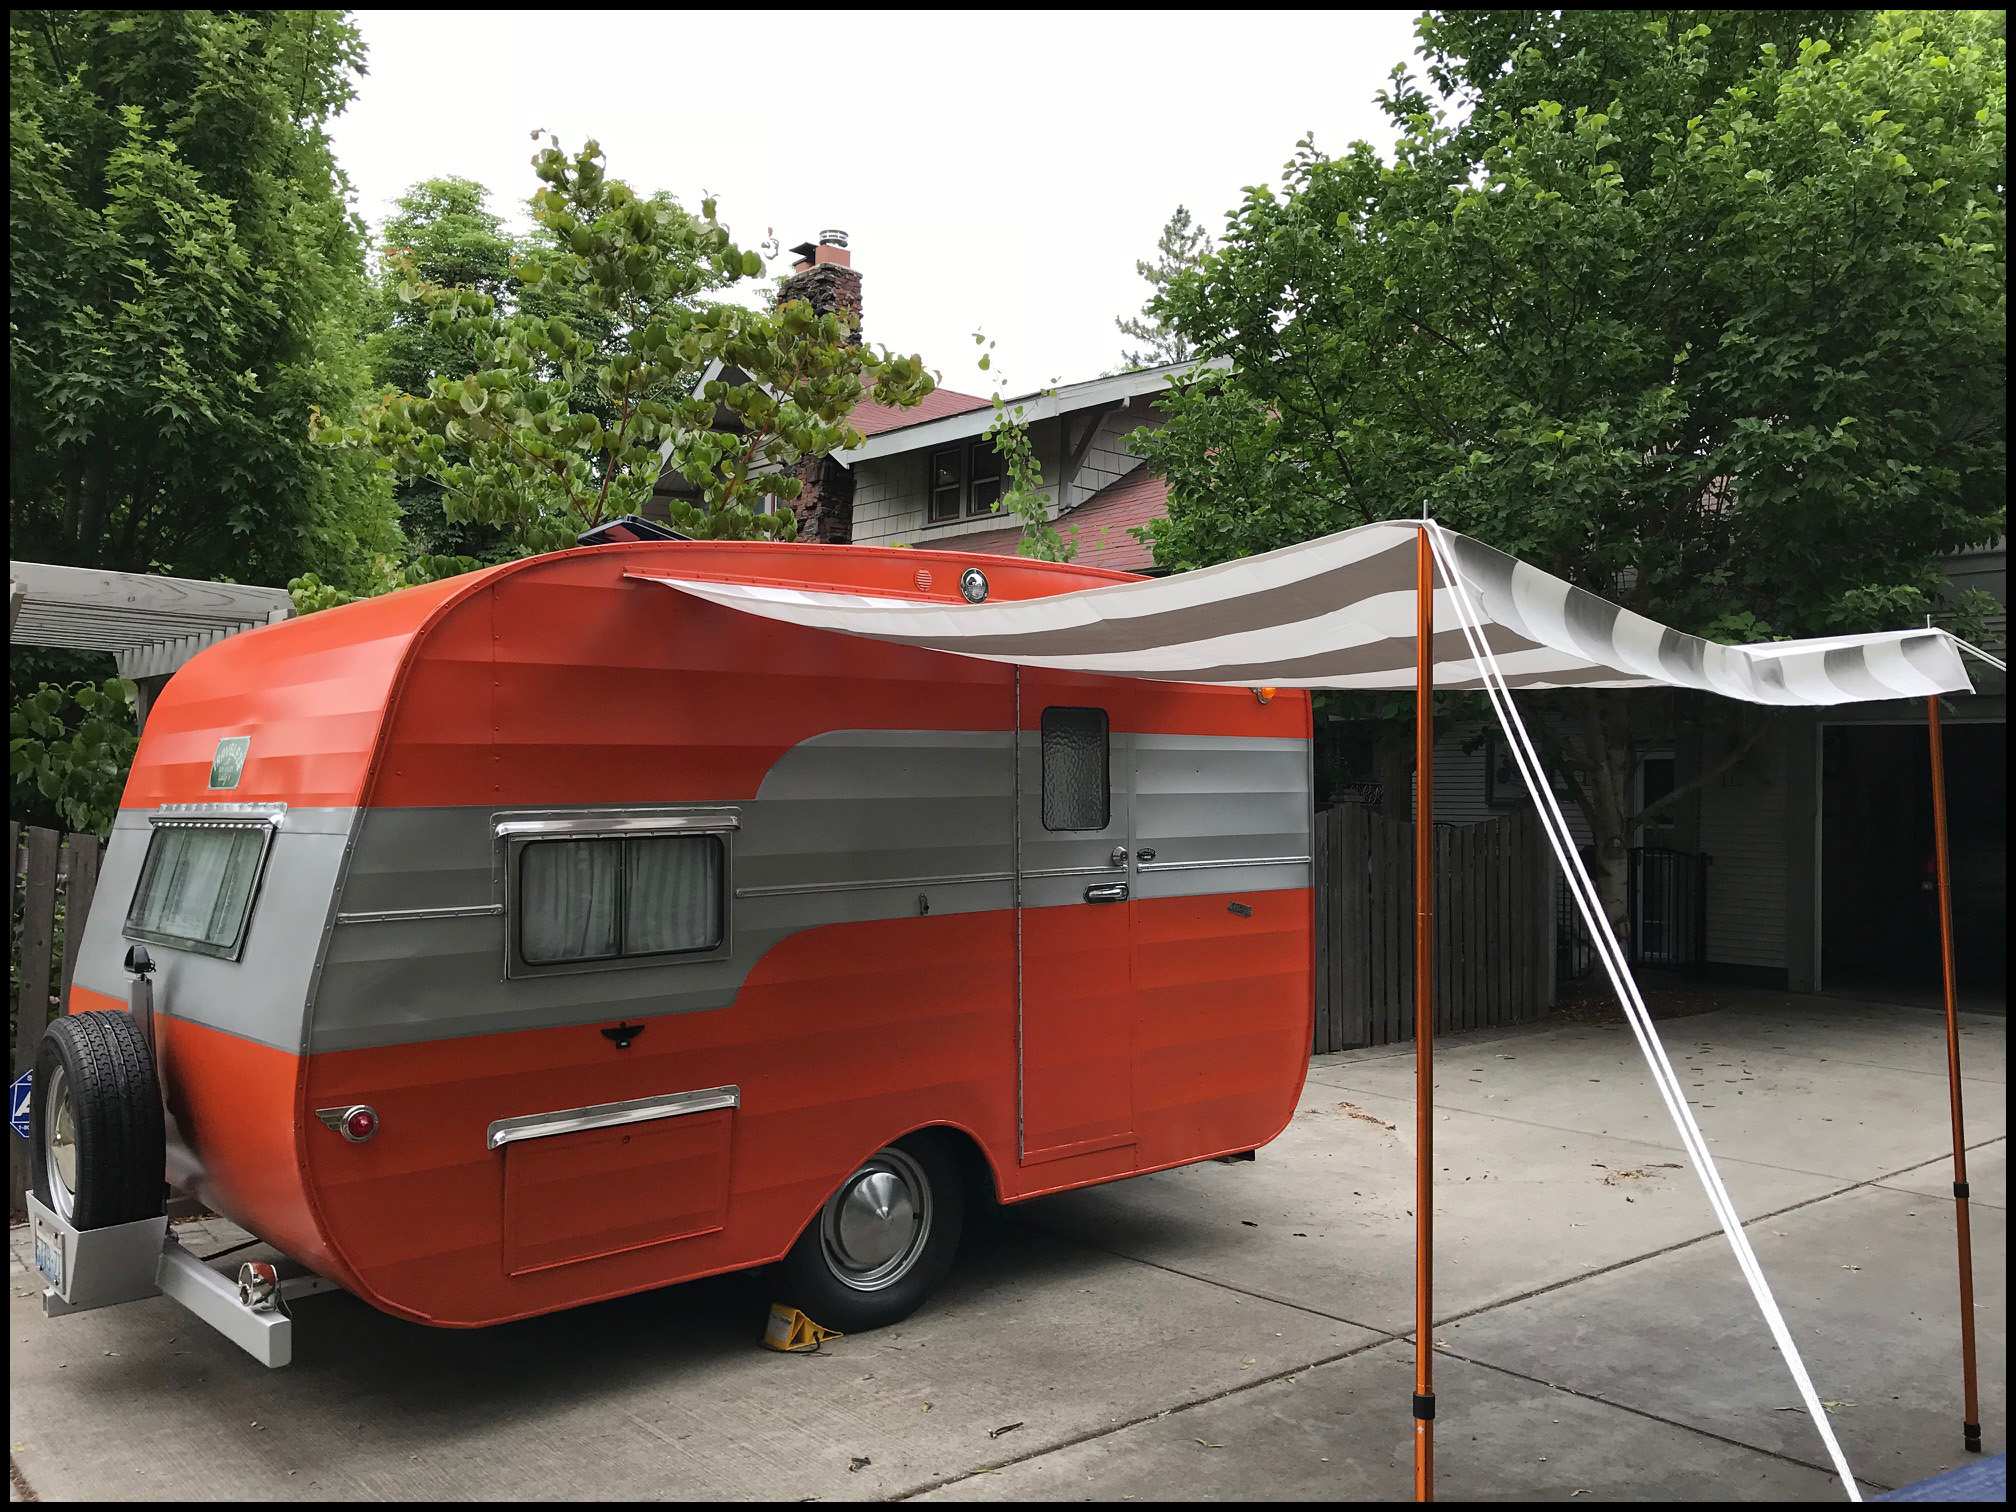
As for the Awning… Let me just say Marti rocks. She was so patient and helpful. And both the main awing and front awning/stone guard fit perfectly. And at what we thought to be an awesome price to boot. Do yourself a favor (do I say that too much… lol) and get your stuff there…. Marti’s Awnings. The awning even came in its own carry bag and all tied up with a bow… too cute. So on my front awning mount I did something I haven’t seen anyone do yet, most people used snaps to hold on the front one, I used an awning rail under the brow, see the pix. It is out of the way and makes it so the brow still does most the water diversion from the roof. And is kinda stealth too when the awning isn’t mounted. Turned out nice I thought.
Here are some things I found that are “need to haves” for us;
- 1. Andersen Camper Leveler 3604 – The spots are never level…
- 2. Renator M11-0660R Water Pressure Regulator Valve – Stop the overpressure from the parks from bursting your plumbing…
- 3. Progressive Industries 313.1163 SSP-30XL Surge Protector – Save the electrical please!..
- 4. Camco 42005 Awning Roller Ball with Screen Door Slide – The door, of course, rubs on the sweet new awning…
- 5. Camco TastePURE Inline Water Filter – No dirty water in my tank please…
- 6. RV T Level Bubble Level – So easy and blends right in, out of site…
Still left to do?
- — Mount all the front awning supports and tie downs.
- — We decided we wanted a bit more counter space, so were adding a fold down table to the left of the stove, on the bed side of the side splash.
- — Also, decided that some doors for over the bed cabinet would work better, need to build those.
- — And I am sure, a bunch of other odds and ends will show there head over time... ;)
It has been a long journey, one that I had no idea how involved it was to be when I began. When I first bought it and was pulling it home, I was thinking… a coat of paint nail here and there… Ha!
It has been an emotionally, educational, trying, yet satisfying ride rebuilding Nampa Jack. And if I had it to do again, I think I would.
So I have been thinking… is this the end? Or just the beginning. Another blog? Adventures with Jack? The things that go wrong on the road and how I overcame them?
|
 |
 |
 |
 |
 |
 |
 |
 |
 |
 |
 |
 |
 |
 |
 |
 |
 |
 |
 |
 |
 |
 |
 |
 |
 |
 |
 |
 |
 |
 |
 |
 |
 |
 |
 |
 |
 |
 |
 |
 |